
Do you have to design a poster, flyer, Roll Up? Learn some tricks to achieve greater precision between elements and align quickly. It is important that everything is centered and box with each other.
When we design a project in Illustrator we can use tools that will help us align the different elements that make up our piece. In addition, it will allow us save time. Next, we show you a short tutorial so that you learn to use them.
Align Tool
First of all, we will show you where to find this tool. You must go to the top menu, in the tab "window" and look for the option "to line up". It is advisable to have the shortcut of this tool in the workspace, since as soon as you learn to use it it will become essential.
Te a window will appear in which you can be guided by the icons of each button to understand what attribute each one of them has: align left, center, among others.
Select items
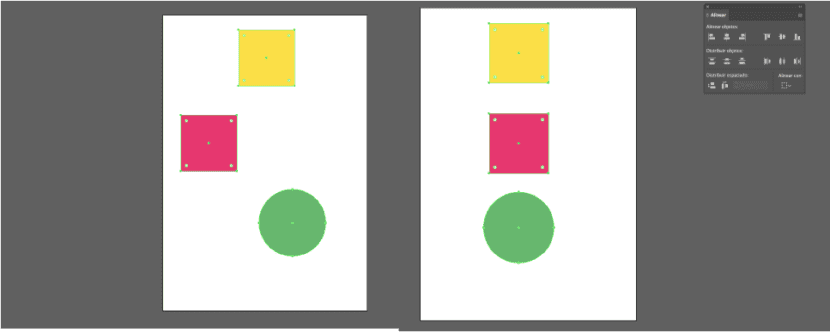
When we have the their at the work table we must select them. Only the ones we want to align with each other. To select more than one element, we will hold down the "shift" key and click on all the elements that we want to select. To understand the concept more easily, we attach an image below that shows what was explained above.

Align and distribute
In the tool window it allows us: align and distribute. The difference between the two is simple.
- To line up: Objects can be aligned to any of the four sides of an object's bounding box, or to its center both vertically and horizontally.
- Ddistribute: By using this attribute we make the selected objects remain at the same distance within the selected space or the artboard. That is, if we select the option "Distribute to the left", between the left side of an object and the next selected object there will be the same distance between them.
Align with ...
It is very important that we select the correct option according to our objective. We refer to the tab "Align with”Which will give us a choice between:
- Align with selection
- Align to key object
- Align with artboard
Having one or another variable selected will give us totally different results, therefore, make sure you have this section well marked.
Align spacing
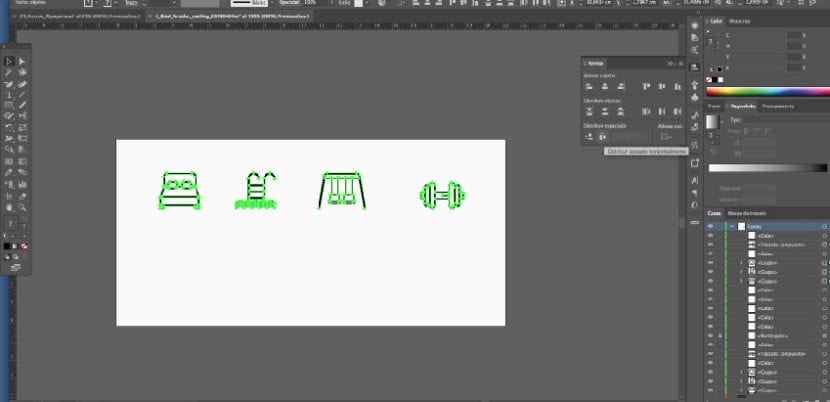
With the «Align» tool also we can distribute the distances within a group of objects and the spaces between them. For example, as we can see in the image below, we have three icons to distribute on the work table. If we want to ensure that the space between them is the same, and achieve a harmonious design, we must follow the following steps:
- Select all the desired objects.
- Go to the toolbar.
- Have selected the option: Align with selection.
- Click on the option: Distribute spacing horizontally.
Following these steps we will have the objects perfectly spaced between them, that is, with the same distance. If we want to be even more careful, we can to distribute the objects.
We encourage you to try and play with the different options. If you practice you will get enough agility to use this tool and save time in your work. Also, you will make sure get a clean design result and attention to detail.
Alien and distribute!