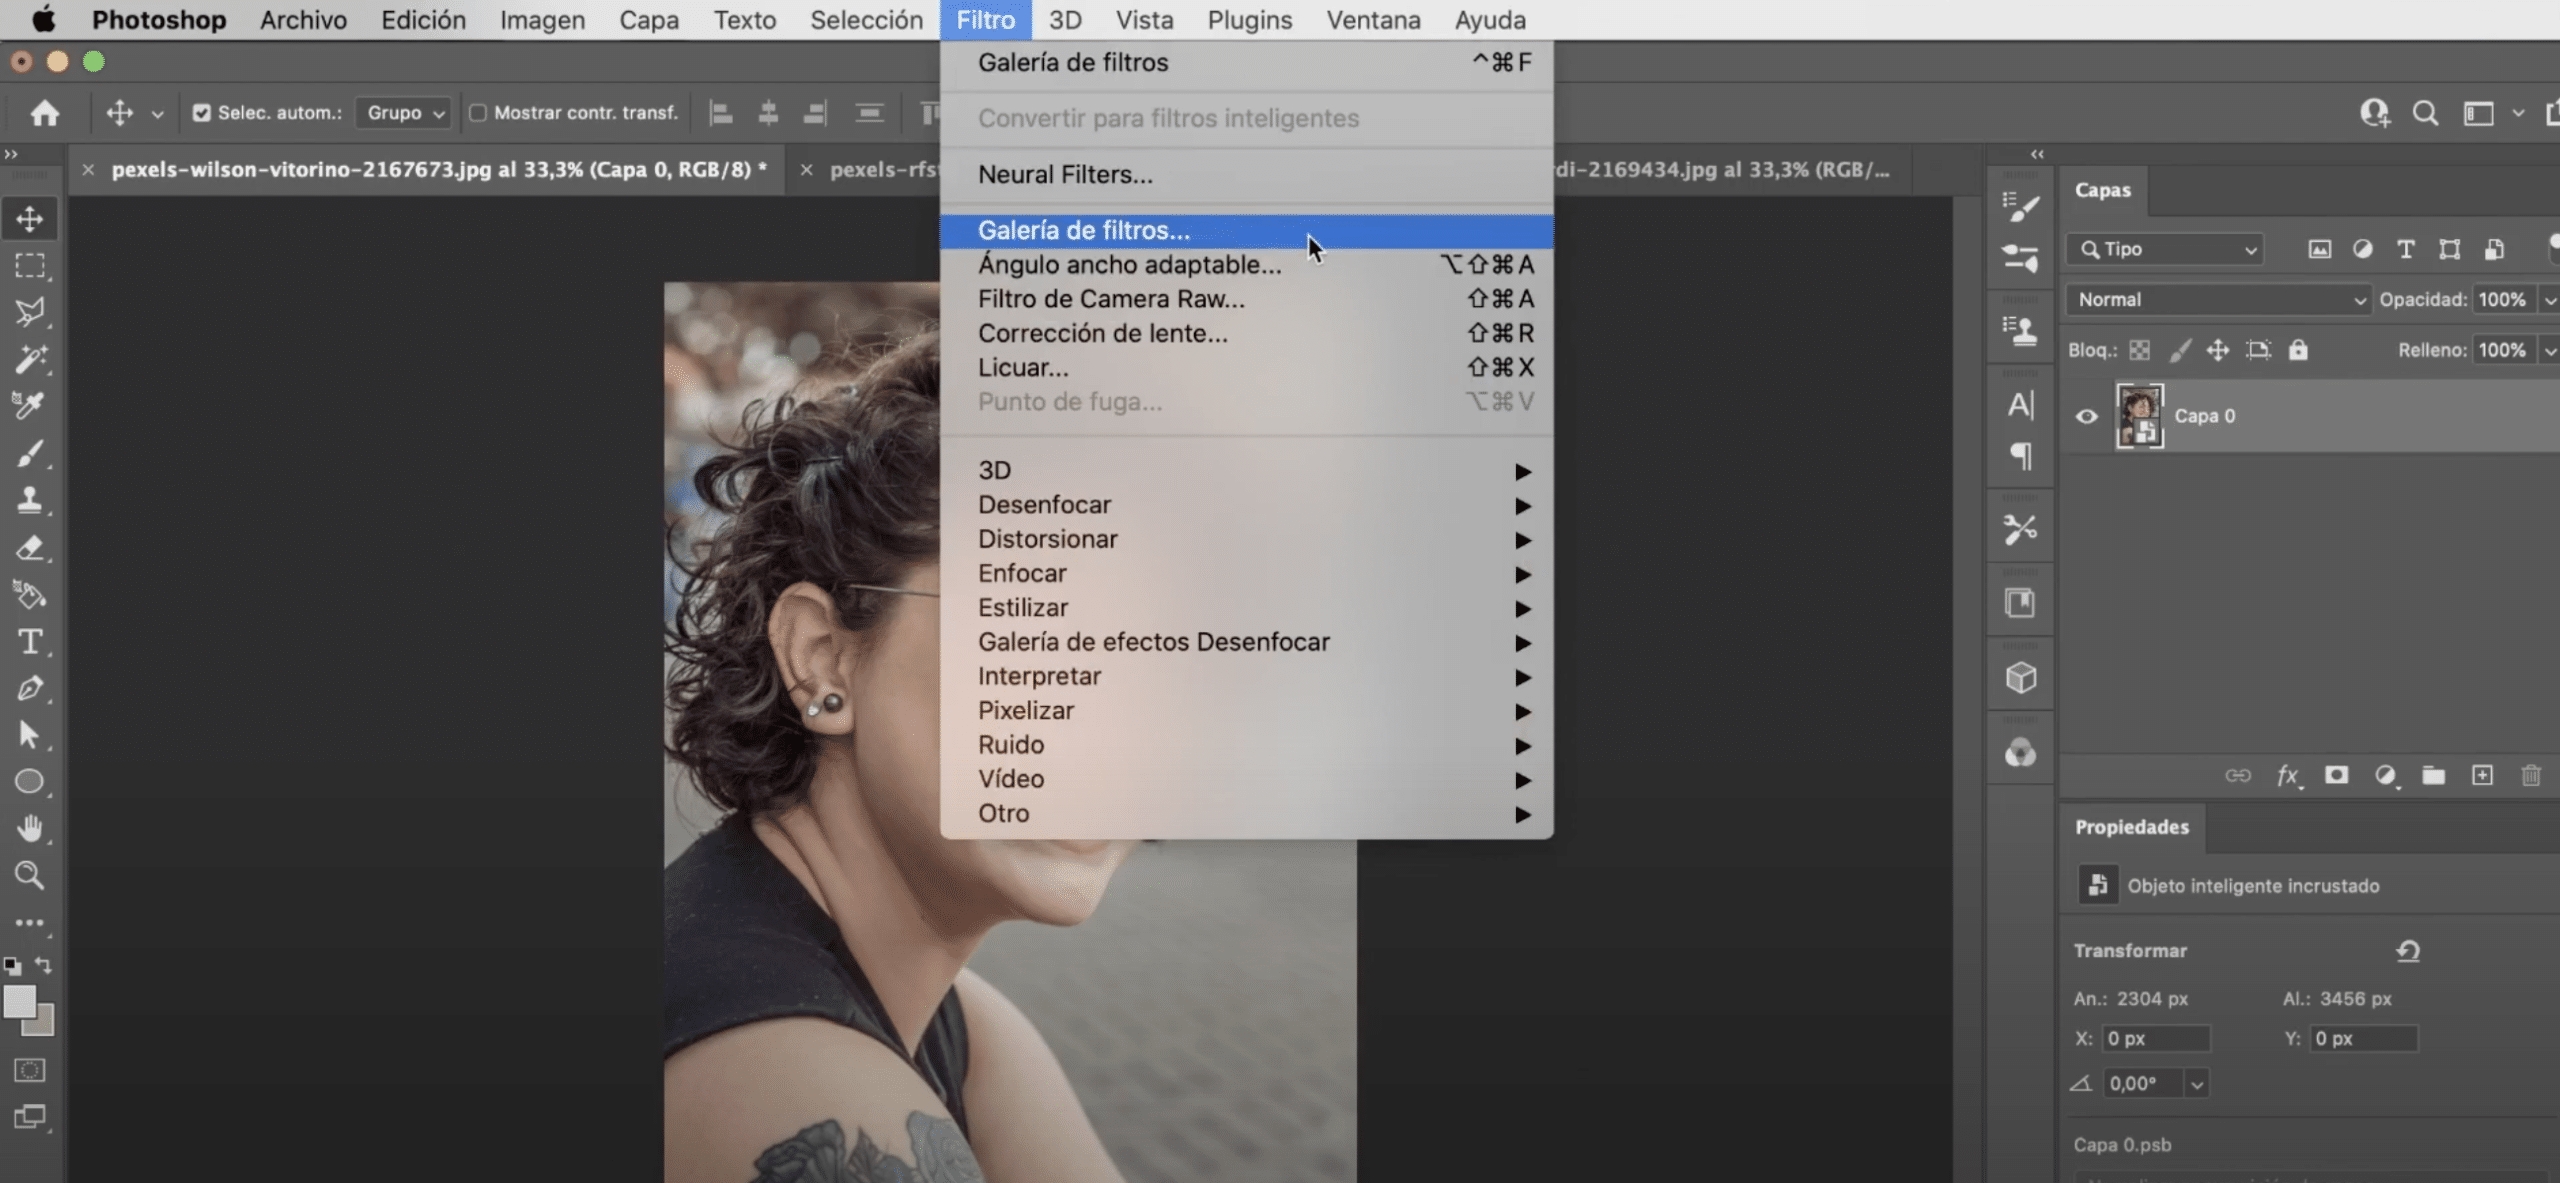
For apply filters in Adobe Photoshop, we have to go to the «filter» tab located in the top menu. A menu will be displayed in which all the filters offered by the program are available. Filters can be irreversibly applied to the image, but also we have the option to apply smart filters in Photoshop, which are added to the as a separate item, so they can be modified, deactivated and deleted.
How to apply smart filters in Photoshop

In order to rent smart filters, the first thing we need is convert the layer, the image, into a smart object. There are two ways to do it:
- We can click on the layer and go to the tab «layer», in the top menu, and in the drop-down menu we look for "Inteligent object" and click on Convert into smart object.
- The other option is to go to the filter tab and click on "Convert for smart filters".
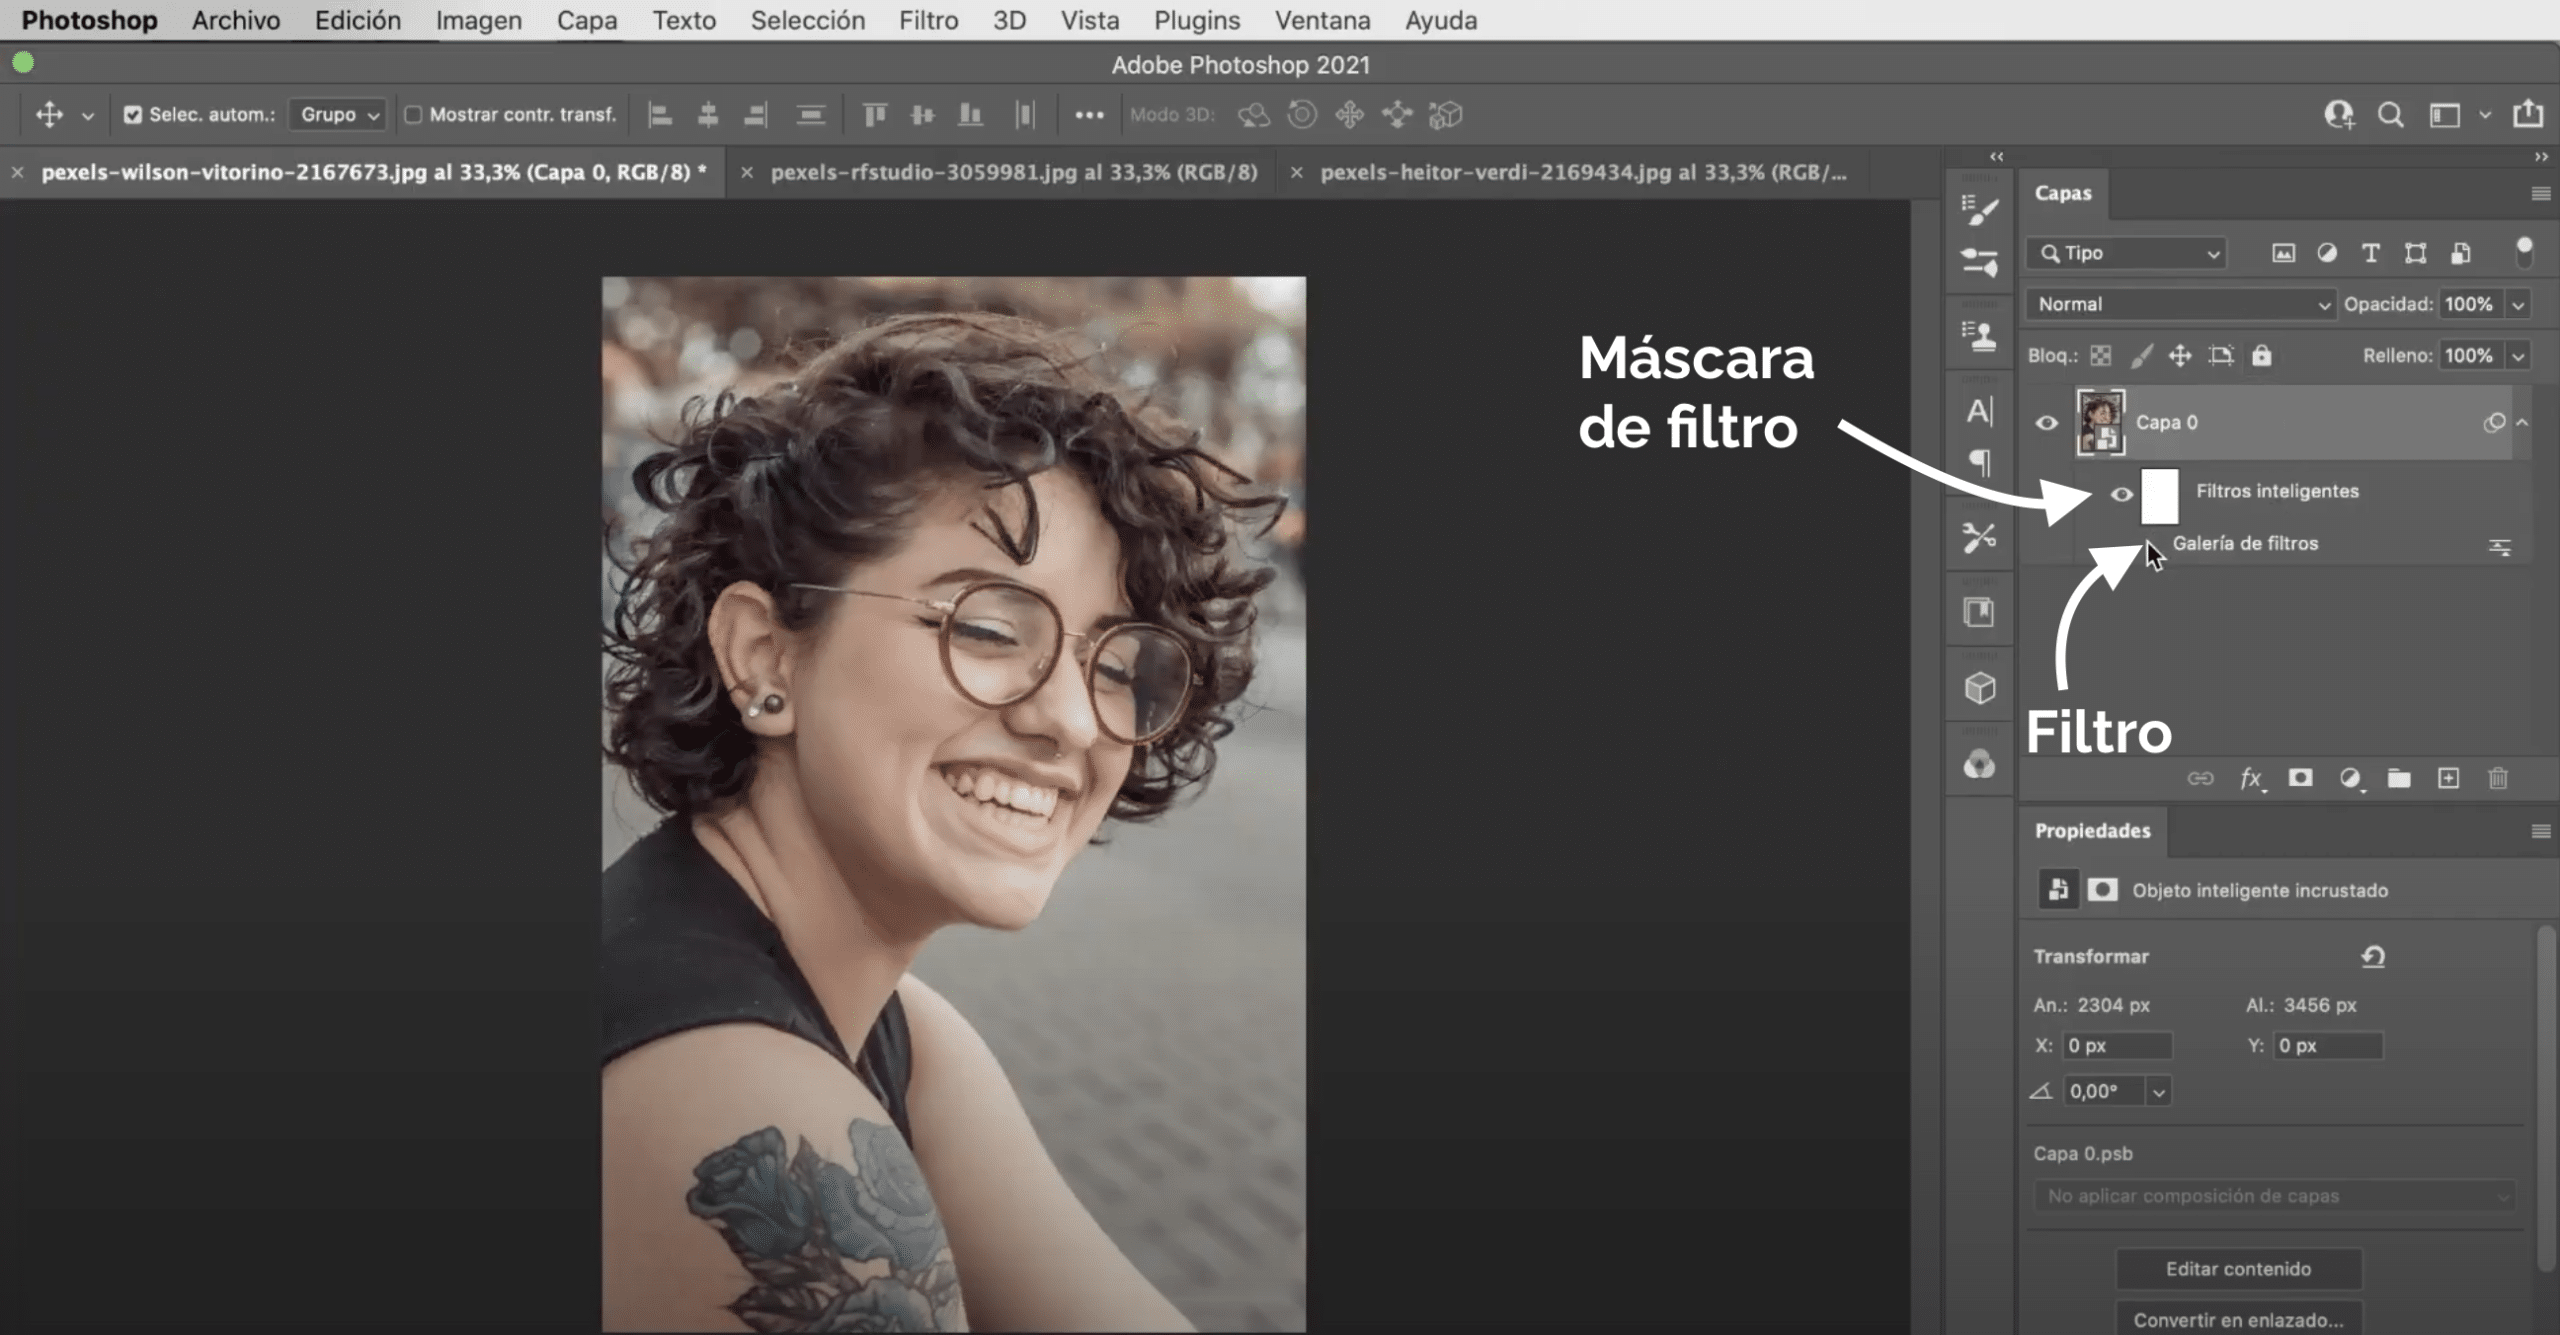
We can now add the filters. As you see in the image above applies as something apart, but also automatically creates a filter mask. With the brush and with the black and white colors, you can paint on this mask to decide on which part of the image is applied.
Examples with smart filters in Photoshop
Filter Gallery
En «Filter gallery» you have filters available that will give an artistic look to your images. When you go to the gallery a separate window, the image will appear enlarged, Can modify the zoom on the buttons (+ and -) in the lower left corner. In the Right panel you have the filters arranged in folders. A great advantage of the filters in this gallery is that several can be applied at the same time, you just have to do click on the plus sign, indicated in the image above, and choose the desired filter. If you regret it, you can always delete it in the trash.
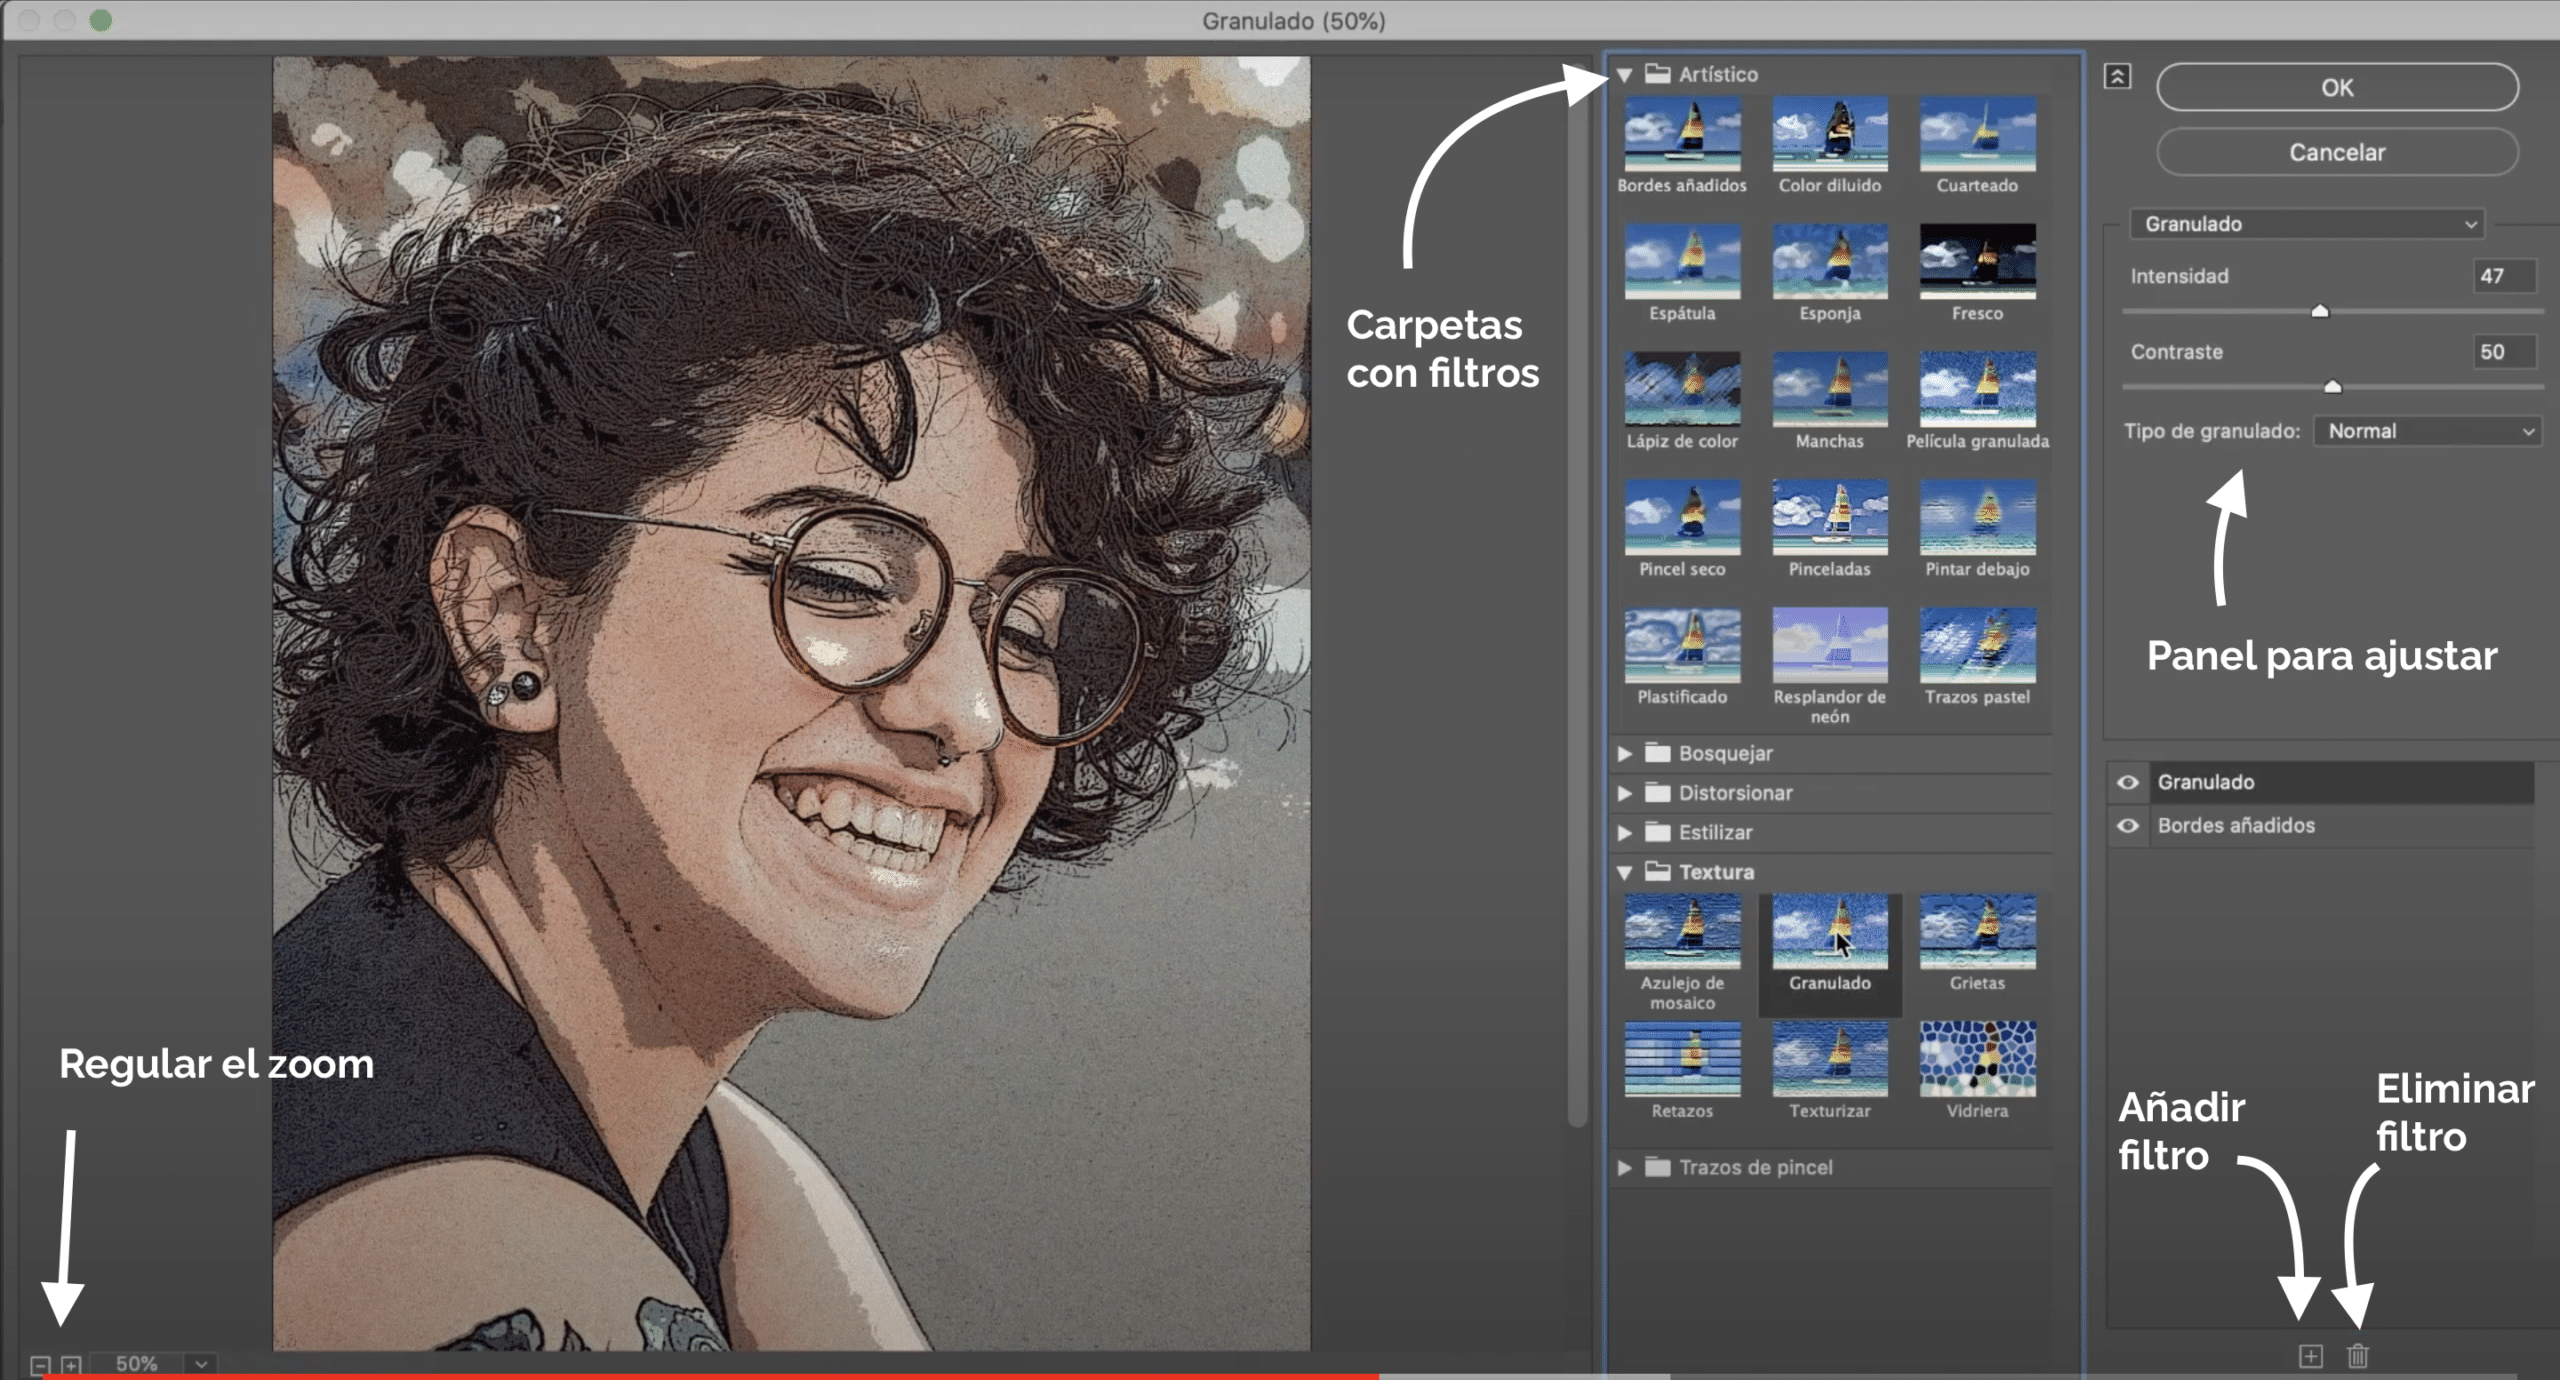
In the folder «artistic» you have available the filter «added edges», which gives the image the appearance of a comic-style drawing. In the panel on the right, you have the possibility to adjust the filter to suit your taste. In this case, I recommend lowering the “posterization” a bit and increasing the “intensity and edge thickness”. Inside this folder, I also find the filter «diluted color» There's one left paint appearance To photography, if you lower the level of brush detail a bit and raise the texture, this effect will become more evident.
In the folder «texture» you have available the filter «granulated», ideal to give personality to your images. It also serves to give them a vintage touch.
Blur filters
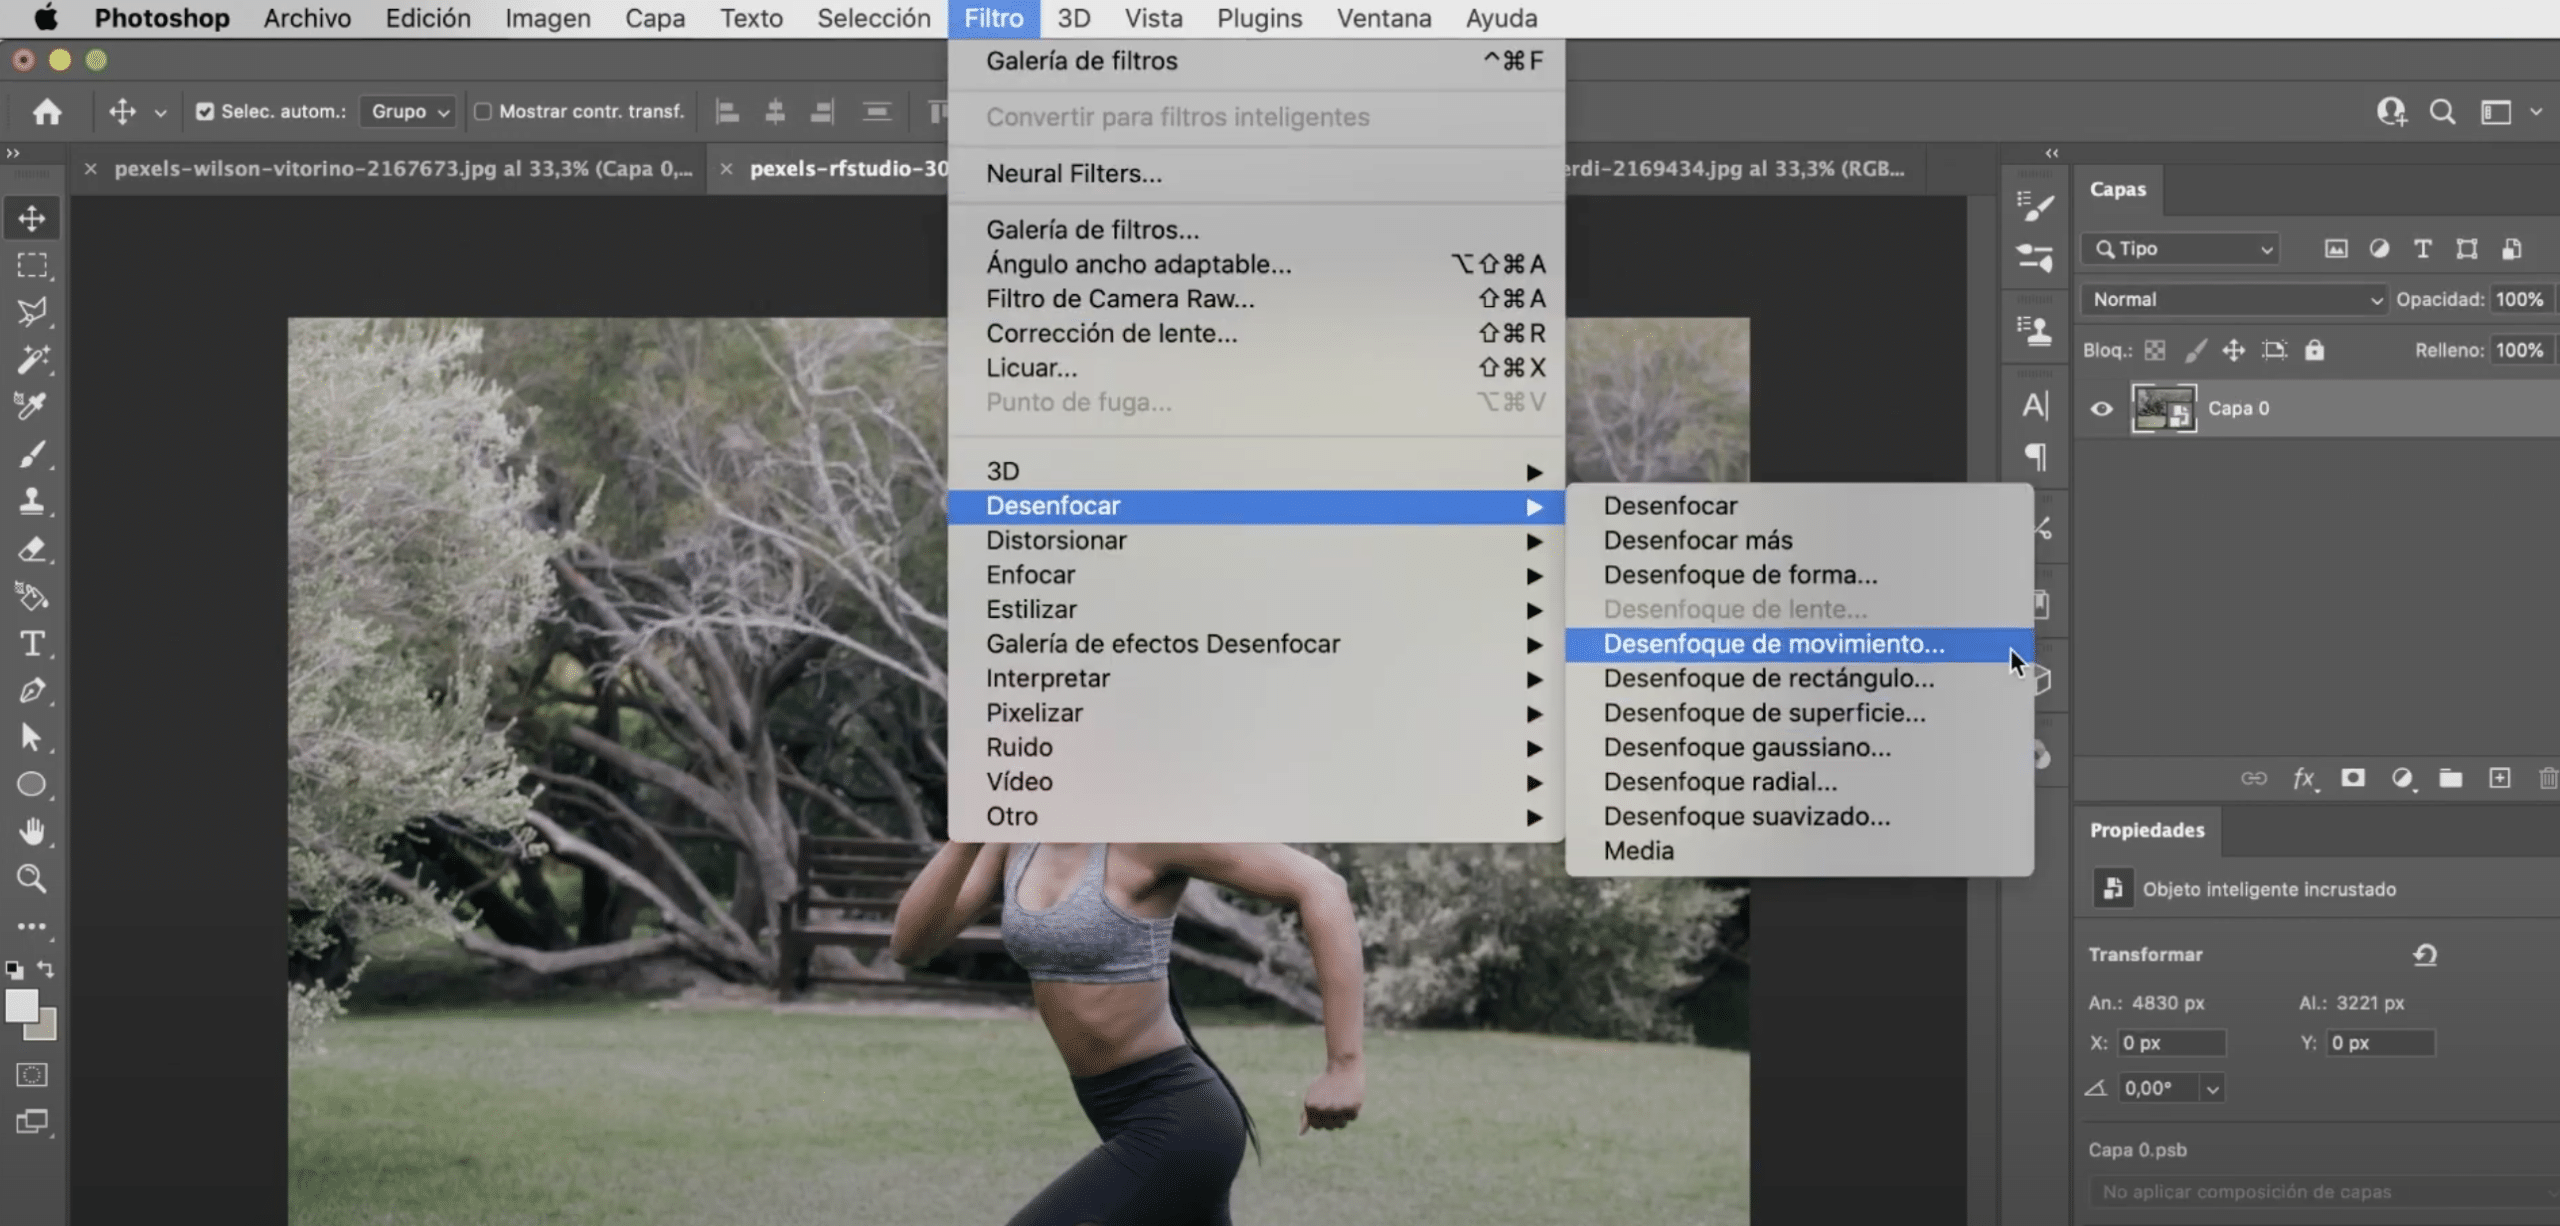
In the «filter» tab you have an option available that says "Blur". In this section you will find different filters related to blur. I will take the opportunity to teach you a cool trick with one of these filters.
We are going to search an image in which there is movement, for example I have chosen this one, a girl running. The subject must be in focus. Then, let's turn it into a smart object as we have done before. In the tab «Filter», «blur», we are going to apply «motion blur". A new window will open for you to set the blur parameters, you have to adjust it to your liking, but the image should be visible out of focus.
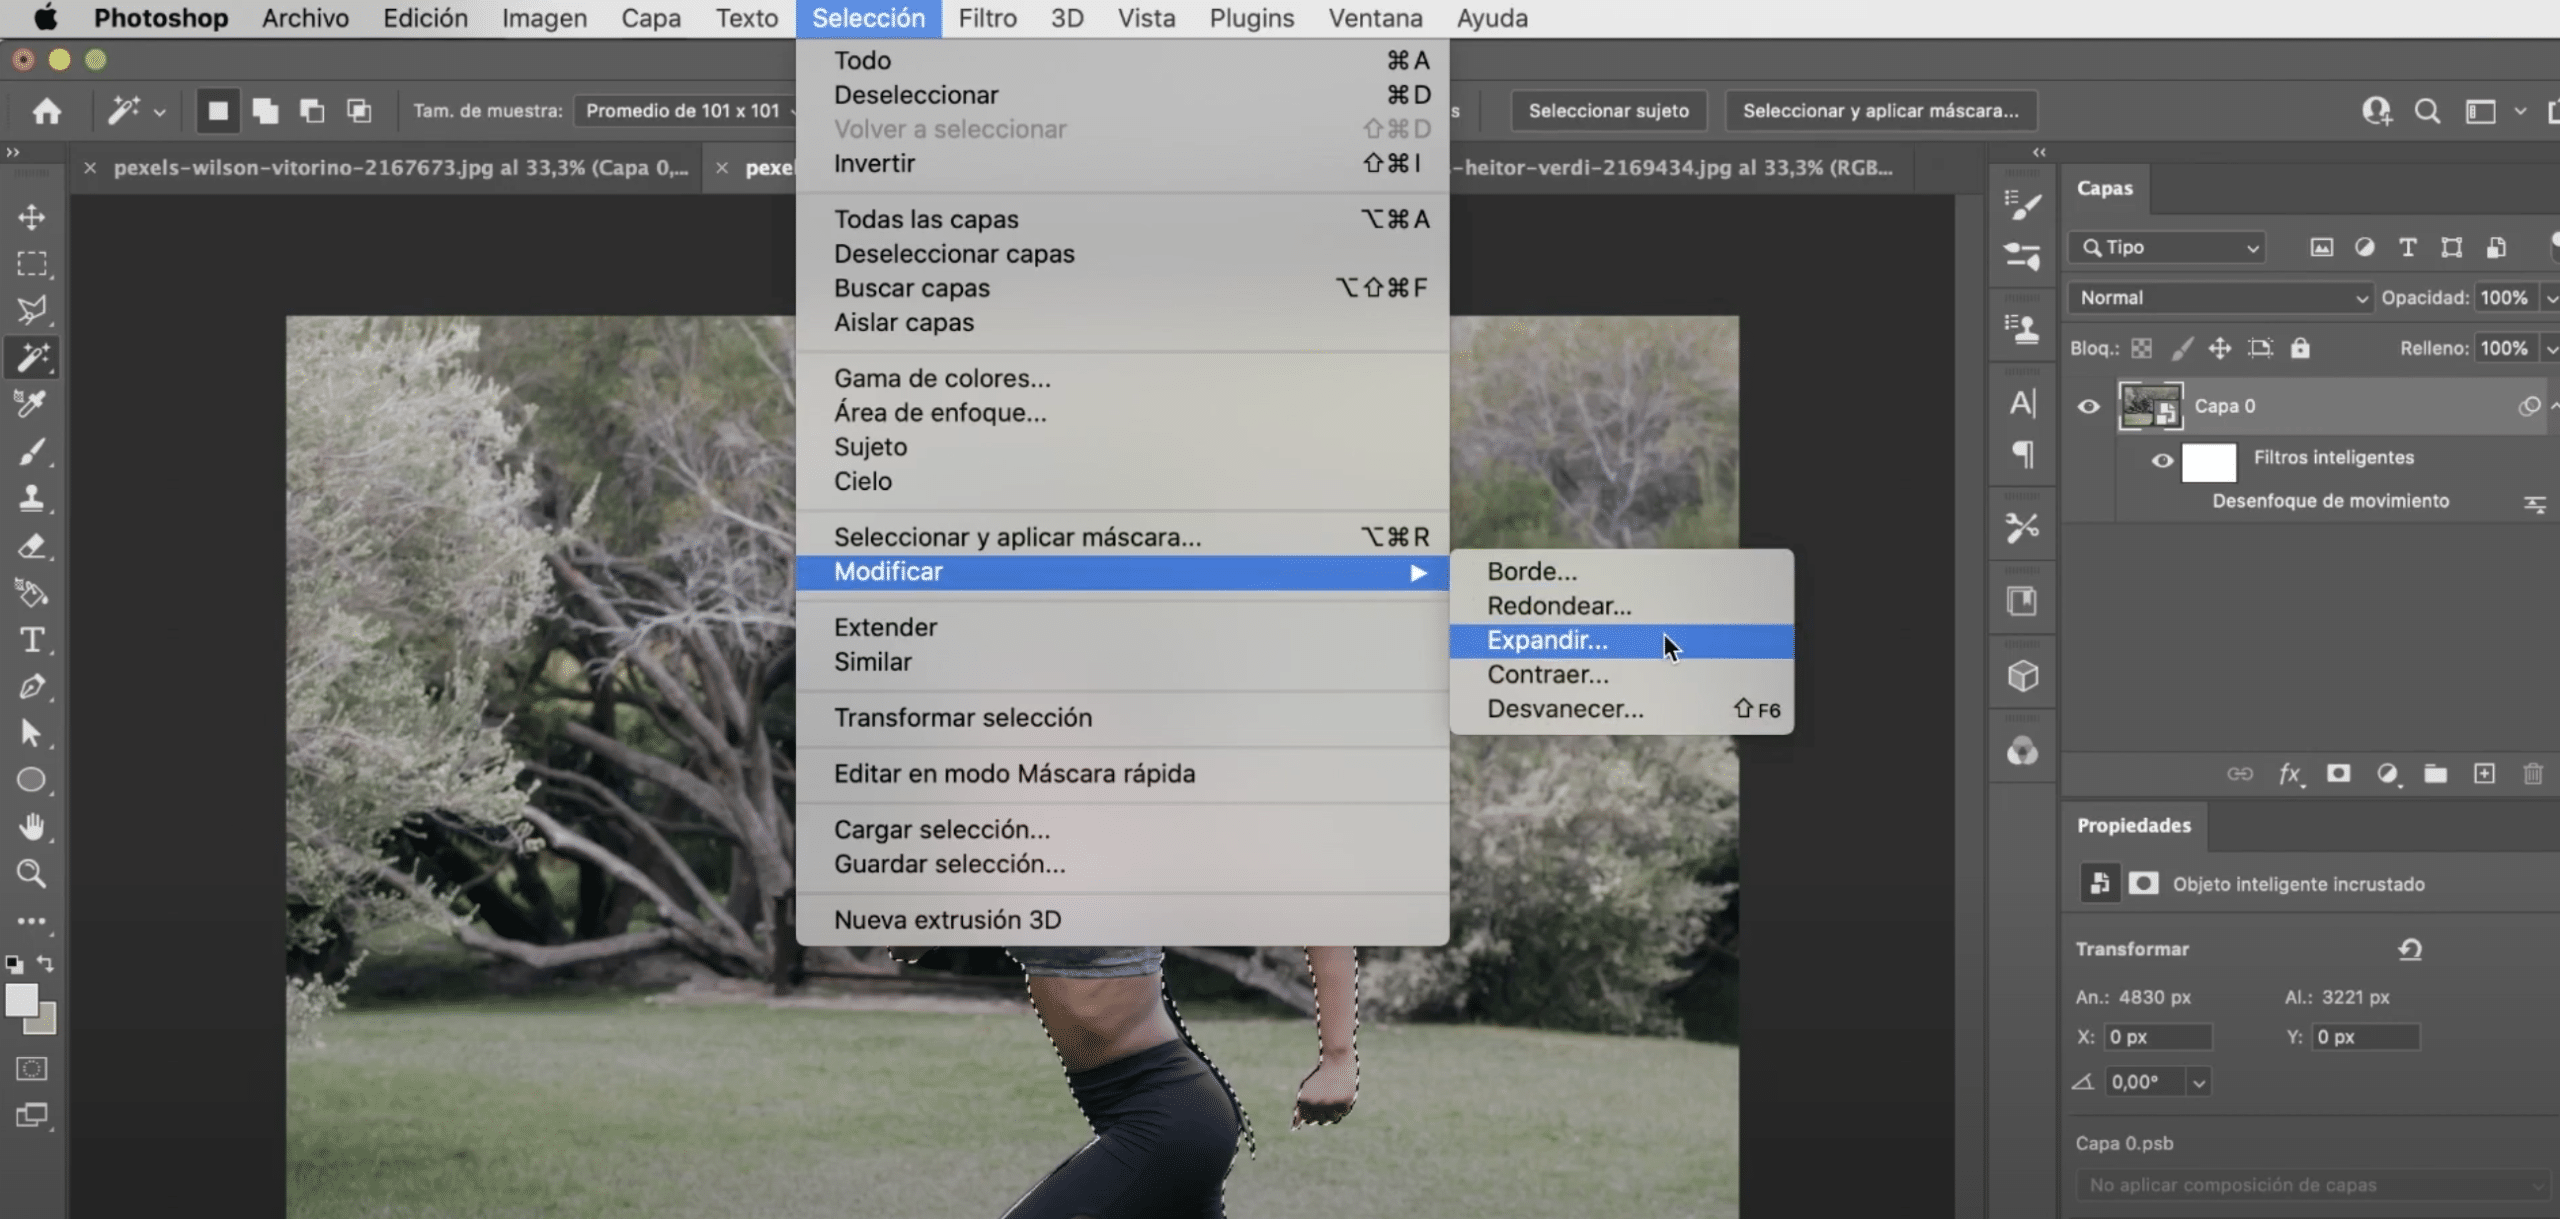
Now we will hide the filter, by clicking on the eye, we will go to "layer 0". With the "select subject" tool, available by clicking on any quick selection tool, we will select the girl. Let's go to the tab "Selection", and we will click "modify", "expand". Establish a offset of about 3 0 4 pixels, the ideal is that the selection surpasses a little to the girl.
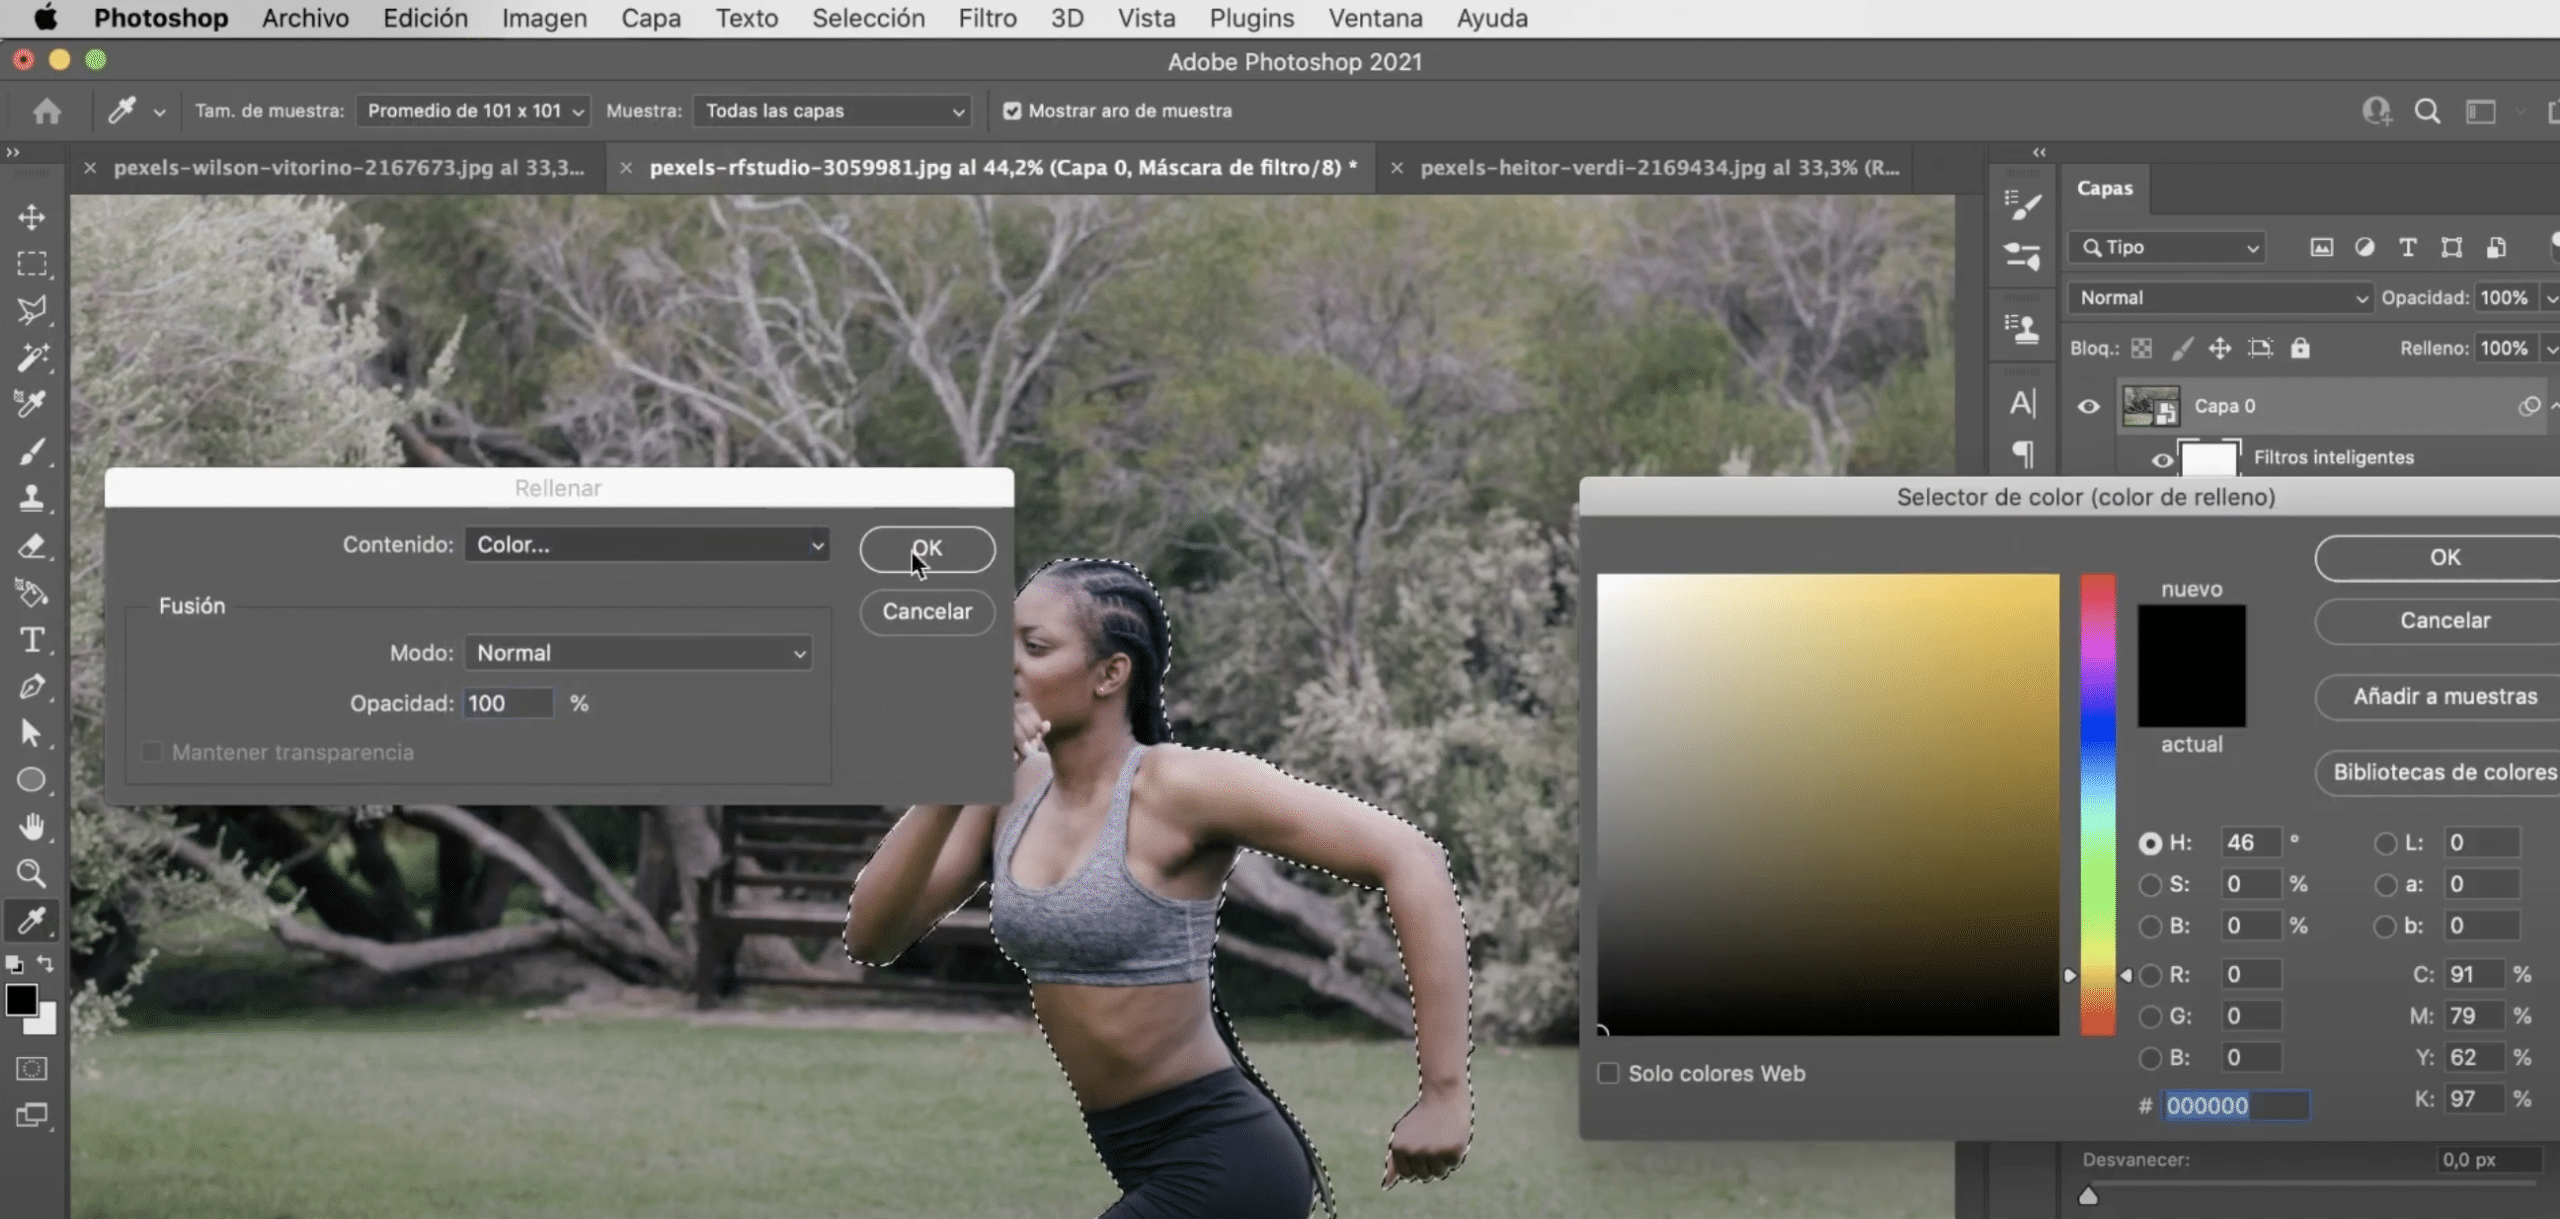
Then we will click on the filter mask and in the edit tab, we will click on fill and we will select the Color black. Activate the filter and you will see that now it only appears applied to the background. With the filter mask selected, we will press command + i (Mac) or control + i (Windows) to invert what we have. Now the filter will be applied to the girl and the feeling of speed and movement will be much greater.
Lighting effects filter
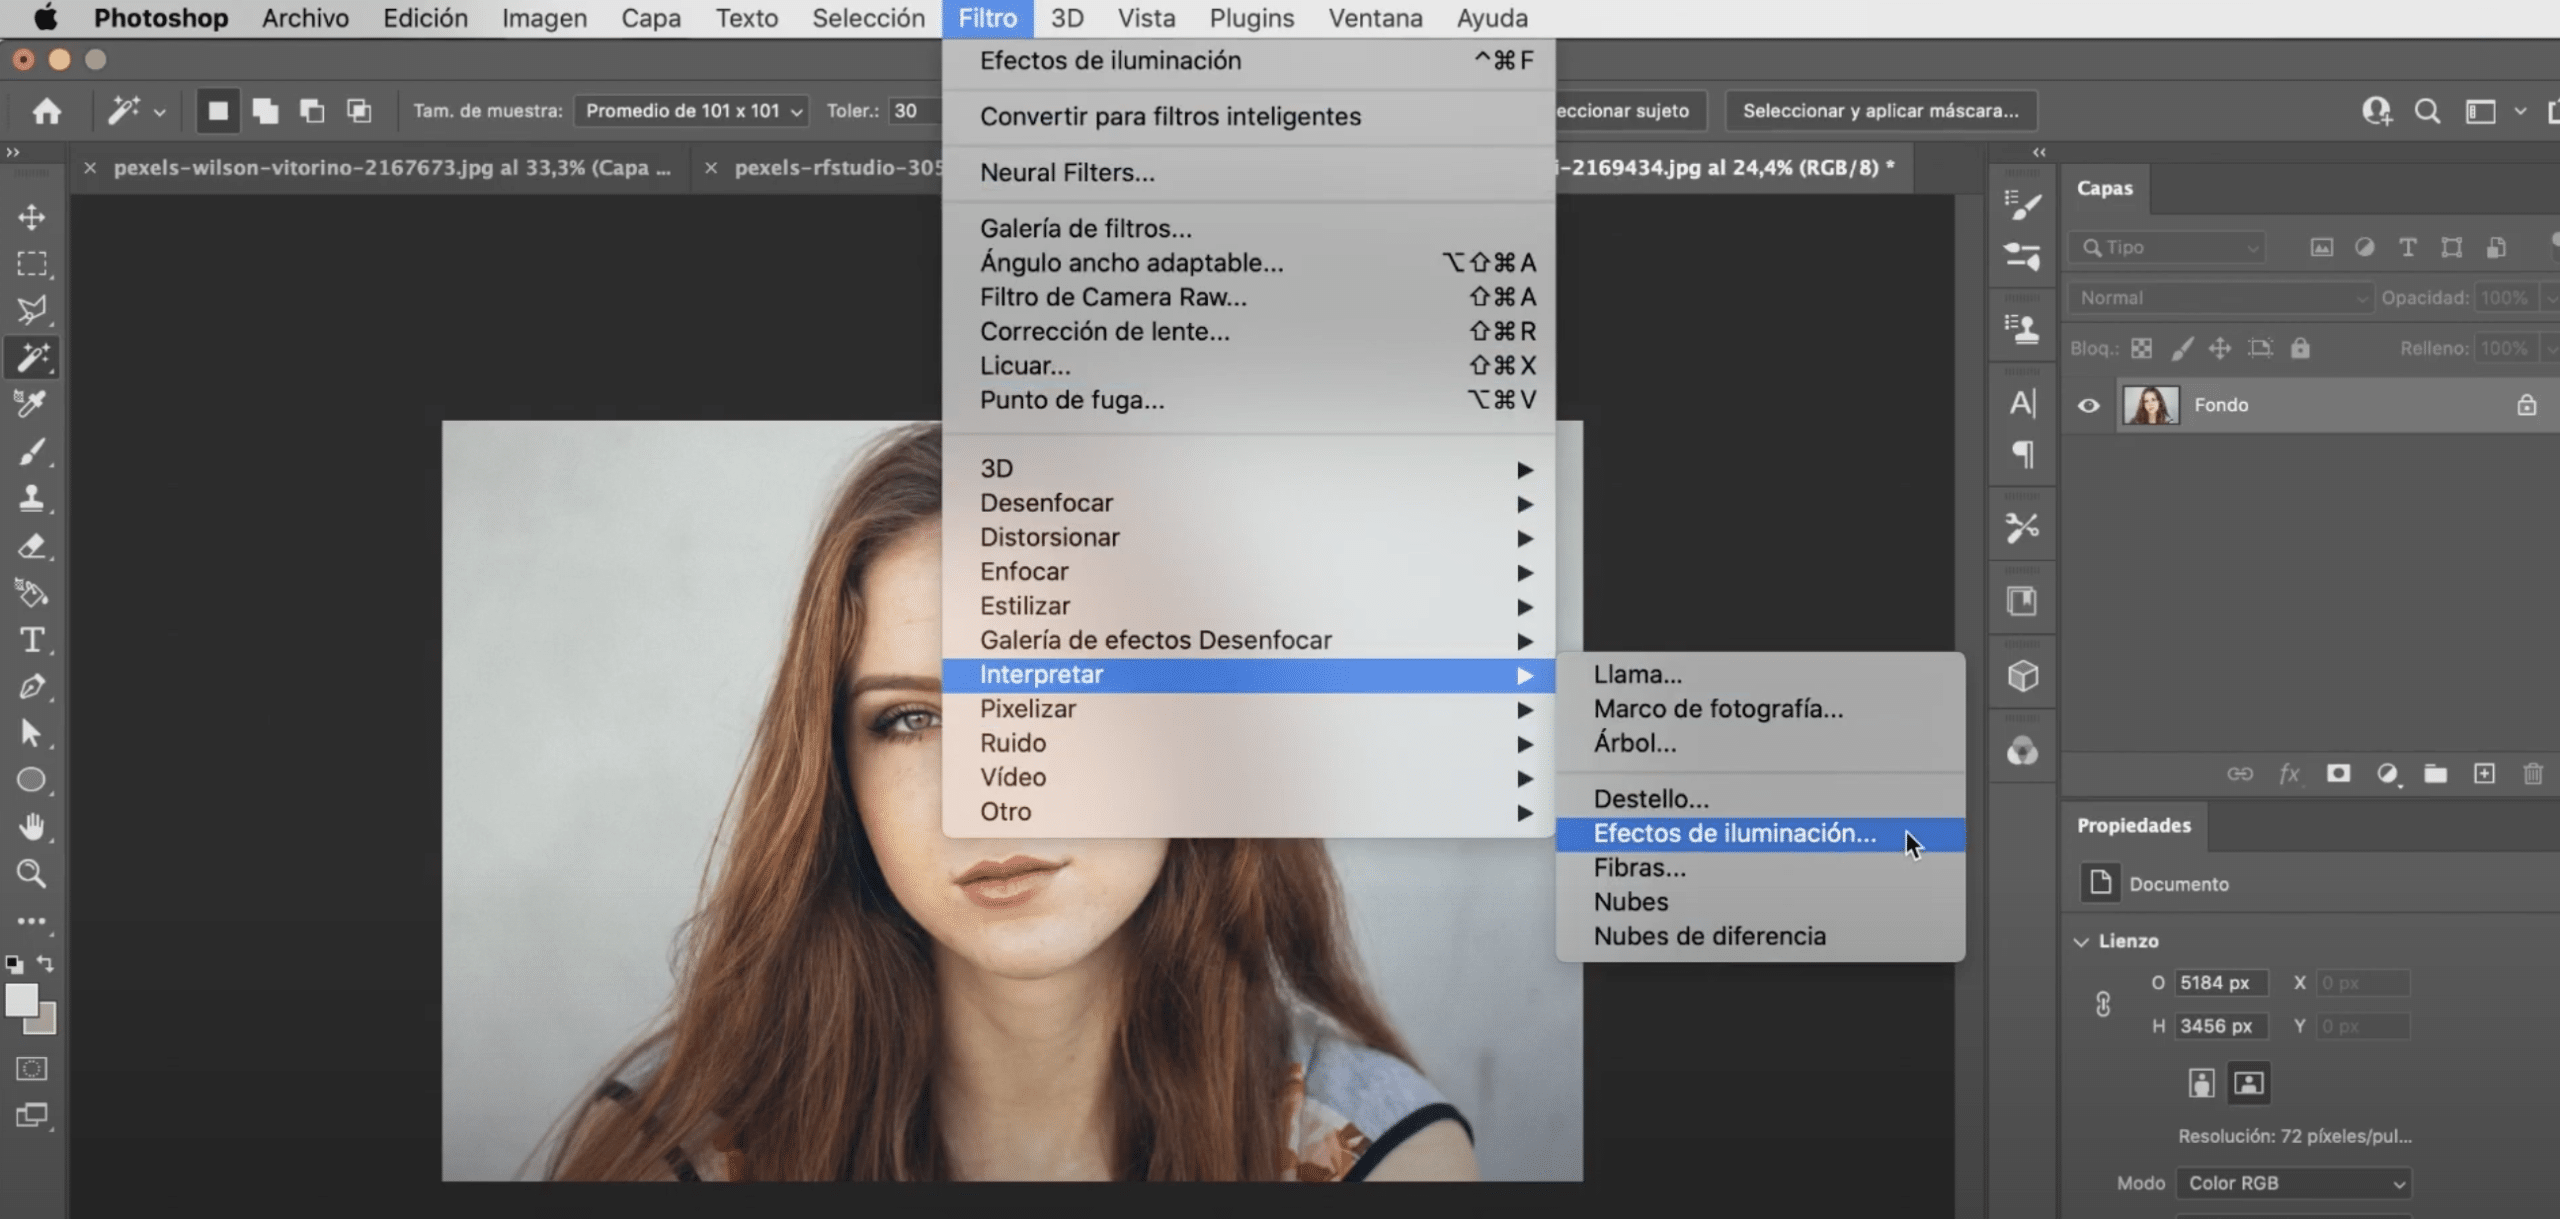
The filter "Lighting effects" you have it available in the filter tab, in the top menu, in the section «interpret». This filter is great for play with the shadows and highlights of the photograph. You can modify the light input, make the environment brighter, but also if you select focus on the right panel, a series of circles will appear on the image. Modify the lines of the circle to darken the edges to your liking, you just have to drag while holding the lines of the outer circle. Remember that you can always modify the filter simply by double clicking on it.
As you may have seen, Photoshop offers a large number of filters. However, the power of the filters is limited and that presets they can give you much more game. I leave you here a selection of actions and presets for Photoshop completely free, you also I explain how to install them Don't miss it and keep raising the level of your photos!