
The program, Adobe Photoshop is not only linked to the edition of images or photographs, but it is a program that goes further, with a wide range of tools with which to create images from scratch. You don't have to lock yourself into that idea, that it's just an editing program, Photoshop is many steps ahead.
Who has not ever happened to be preparing a presentation or editing some photographs and has to highlight an important element and does not know how? Some problems have an easy solution, and in this case we are going to do so, helping you to teach you how to make arrows in Adobe Photoshop.
An arrow, is one of the simplest elements and used when highlighting an element in any medium. Adobe Photoshop contains a tool that will make adding arrows as simple as possible.
How to draw a date in Photoshop step by step

The default shapes of Adobe Photoshop allow you to work in an easier way and with different shapes and graphic elements that will be useful for your designs. The tool of figures or forms, is one of the most important and most used of said program.
Photoshop has a small variety of shapes that come predetermined. But you have the possibility of expanding them, adding new ones made by other designers or by yourself.
La line tool, it is the one that will allow us to draw a line, excuse the redundancy, on our canvas, both arrows and straight lines.
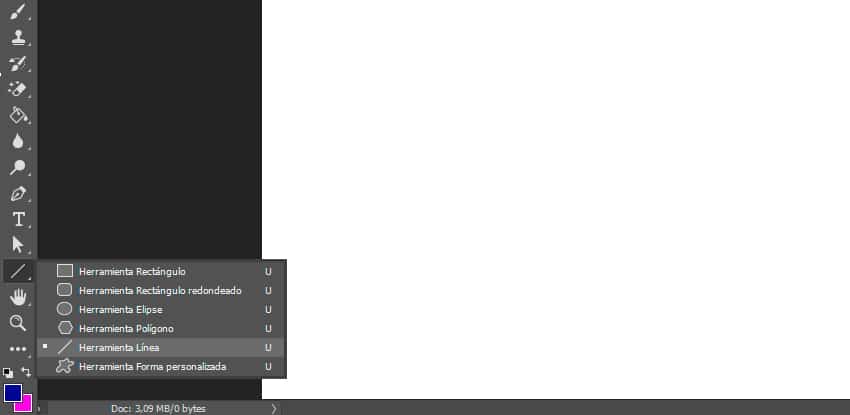
The first step we have to take is to select in our toolbar, located on the left side of the screen, the shapes option, with a square icon.
We will keep pressed for a few seconds and a drop-down will appear with the different geometric shapes that we can draw, and we will select the tool with a line shape.
Once we have the selected tool, we have to define the width of the line.
El line stroke thickness, we can modify it by going to the top tool bar, select the stroke option. We will have to define the width of the line in said options bar.
One piece of advice we give you is to make sure set the align setting of the plot option, in filled or outer path. That is, if the thickness of the line is set to fill, it will not be visible.
Another of the ways that exist to define the thickness of the width of the line, is through the options bar, in which it presents with or without drawing.
As you can see in this image, in the red square we are defining the width of the line, and in the orange square we use the thickness to set the width.
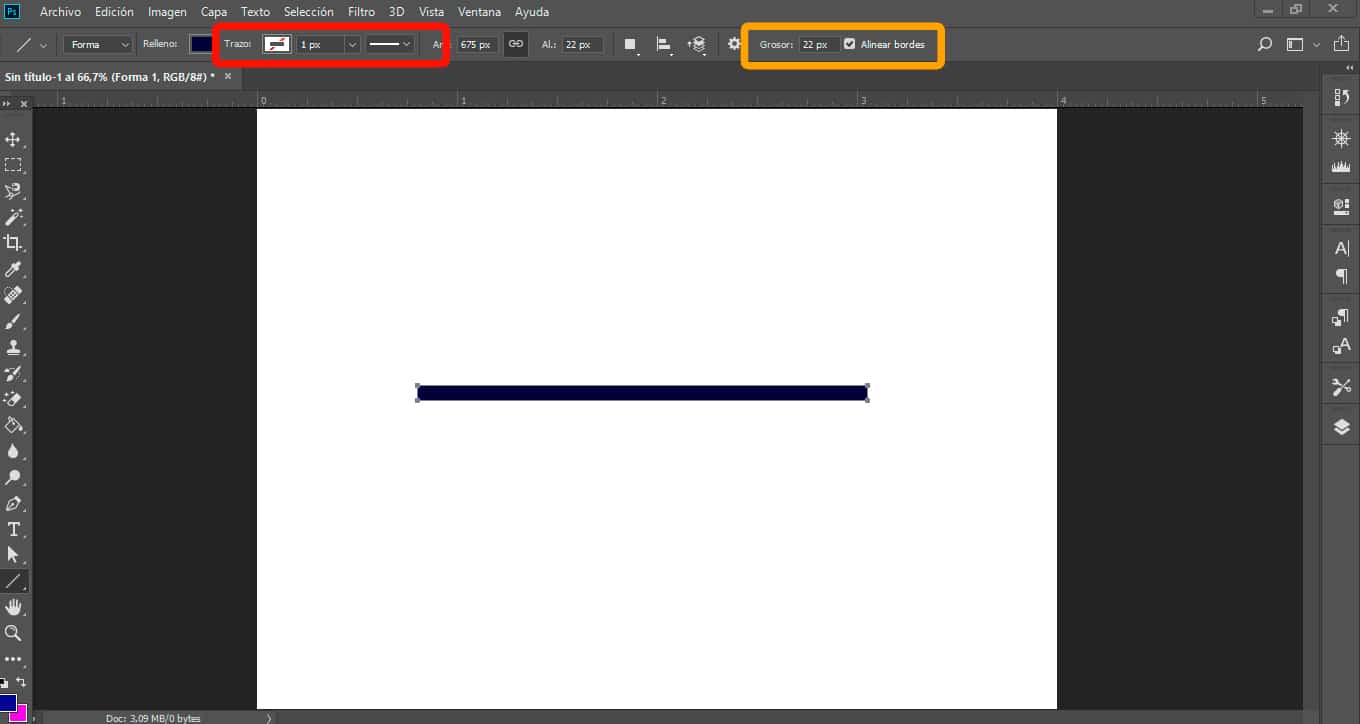
The next step we are going to take is assign a color to the line. To do this, we will click on the line, and we will go to the upper options bar and in the fill section, a sample window will open where we will choose the color that best suits us.
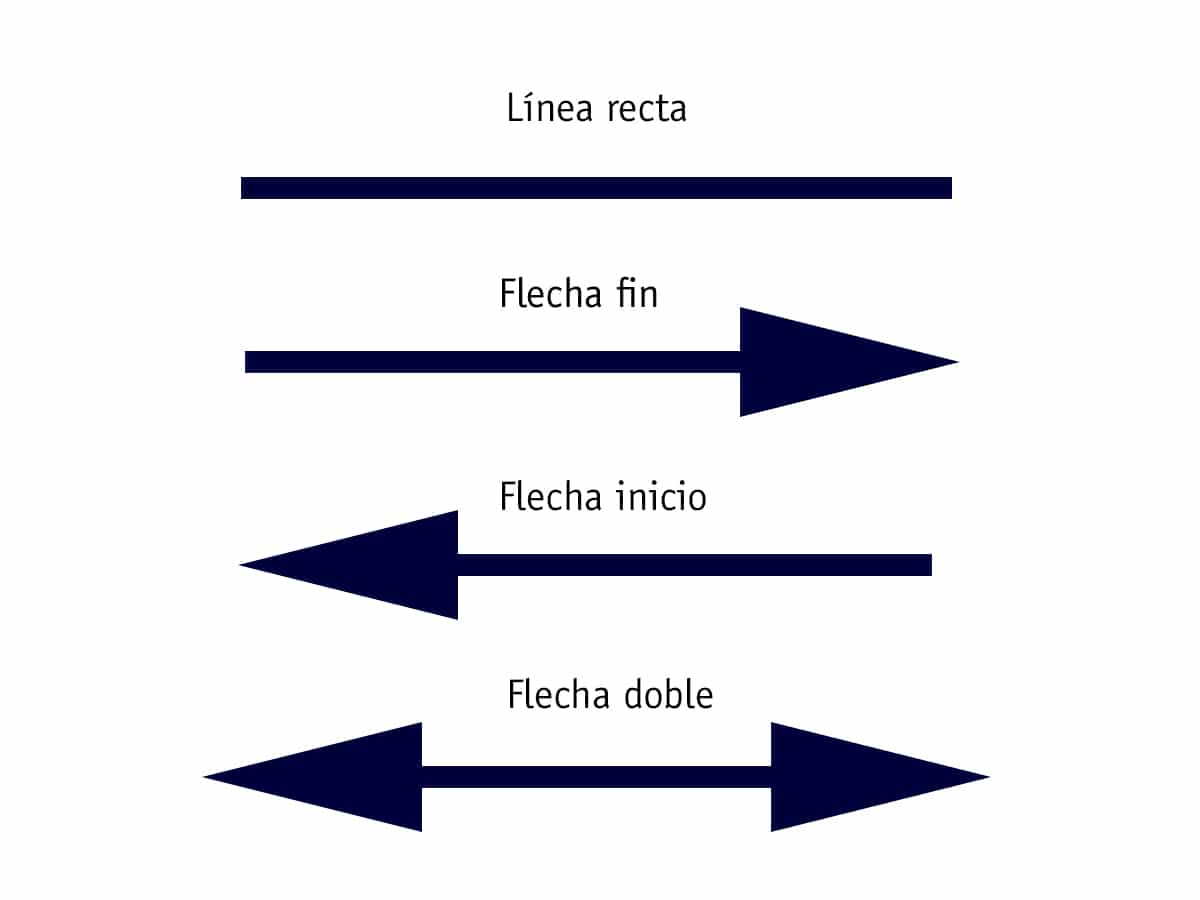
We already have the line created, now we have to finish by forming our arrow.
In the upper options bar, where we have configured the layout and color, we will see on the right a nut icon. If we click on that icon, a drop-down menu appears in which you can see the option to include arrowheads, at the beginning or at the end.
We choose the one that best suits us to select the element that we want from our work. In our case, we will indicate the start option of the line.
With the other three options in this menu, you can change the tip of the arrow, making it longer, smaller or curved. In the next section we show them to you.
Types of arrows in Adobe Photoshop

As we have seen with the date tips option, we can create different variables.
If what we want is simply a straight line, we will only have to select the shapes tool, select line and all set.
On the other hand, what we are looking for is a arrow with a point only at the end, we will have to make our straight line and in the arrowhead options that are shown, select the end section.
Instead yes we want the tip at the beginning, the option that we will accept is that of, beginning. Or even add tips to both sides, selecting both options.
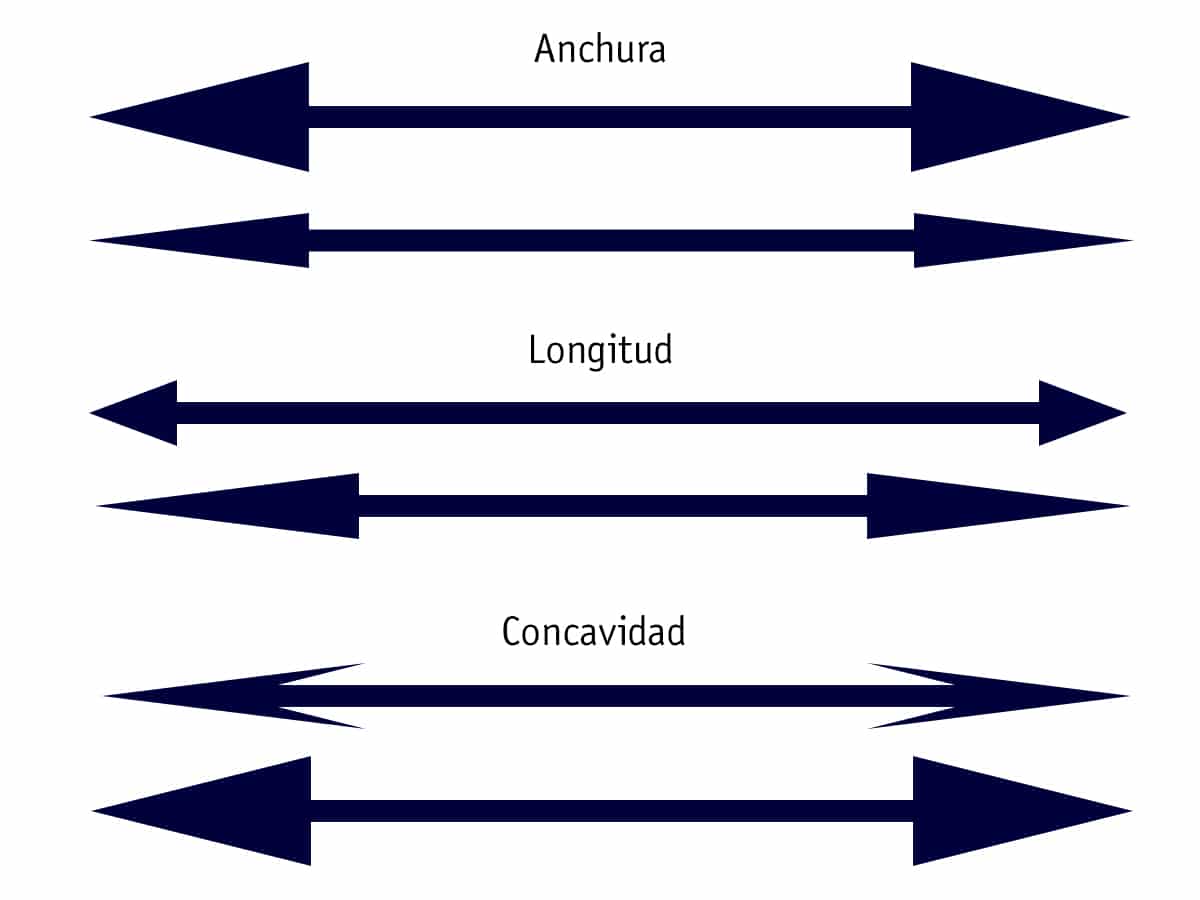
Also, we can achieve different styles of arrows if we play with the options of width, length and concavity. With them, we can create arrows with thicker tips, arrows with longer tips or with a greater curvature.
How to make a curved arrow in photoshop
As in the case explained above, we will create our arrow from the shapes tool, and selecting the line option.
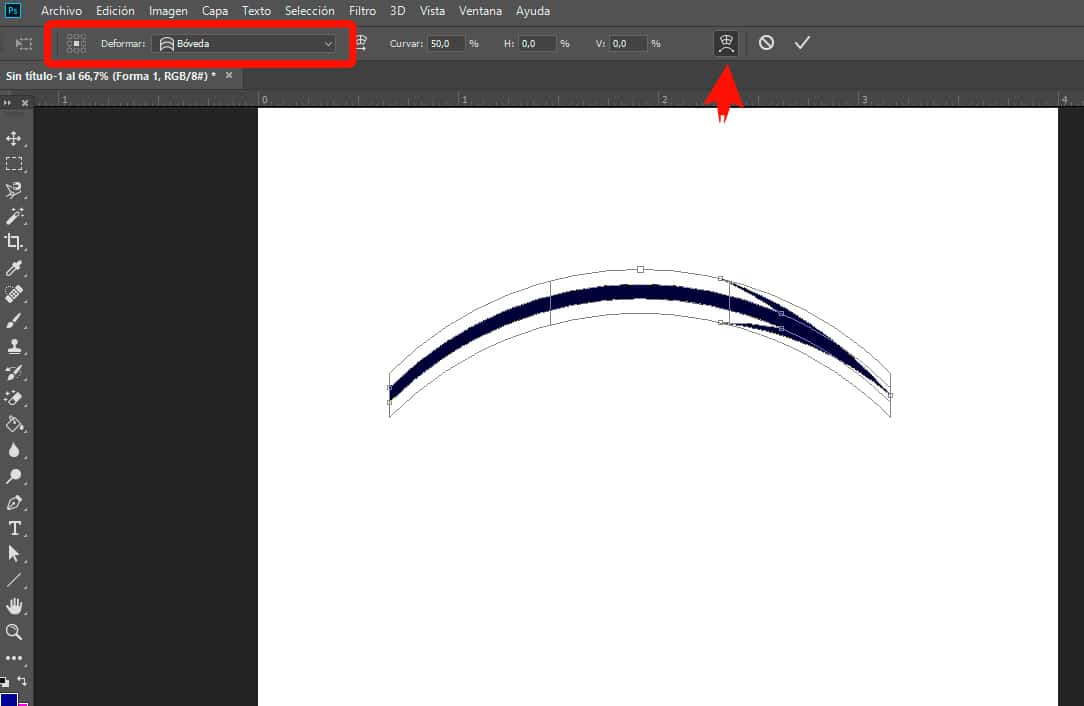
Once we have our arrow designed, with the line tool still selected, we will press the ctrl keys and the letter t, transform command. And in the options bar, we will select the one of free transformation and deformation.
The next step is to click on the warp option on the left side of the options bar. A list of shapes that your arrow will take will appear. In our case we have indicated the vault option.
With this free transform and warp option, you can give your design elements a different look, giving them curved shapes, wave shapes, narrowing it, etc.
As you have seen, making arrows in Adobe Photoshop is a very simple task. Only with the help of the line tool and the options presented to us, we can create different models of arrows, according to what you need.
Adobe Photoshop is a program where you can manipulate and edit a photograph in a thousand different ways. But, while some remain anchored in that idea. Others take advantage of the opportunities that this program offers them to create very ambitious designs, standing out above the rest.