
La movie Sin City stands out for its style so picturesque where the black and white y color thus achieving a highly contrasted image with a personal touch. In this post we will learn to make images with that style and at the same time we will master some of the tools basic of Photoshop to create more attractive and different photographs. If you are passionate about cinema, photography or are a fan of this film, you no longer have an excuse to create your own images in the purest style No City.
Lo First of all you must have is one raw photography to work on it later in Photoshop.
As you can see in the upper image, the photography stands out for the use of White and blackor with a touch of color this being a fundamental point in this style. We can see great contrast between the lights and shadows to reach a result like this we can follow a series of recommendations.
You can get inspired by watching the trailer of the movie.
All the recommendationss to get a good image are the following:
- Light up some areas harder than others to achieve a greater contrast between lights and shadows (This can be done with any gooseneck you have at home).
- Decides What areas are you going to highlight with color and what areas will you leave in black and white (it is recommended that before the photo shoot you already know what you want to do)
- Get an image with great quality (take care of the lights, the shadows ... etc)
The followed to follow in Photoshop are the following:
- We open the image in Photoshop
- We make a selection of the area that we want to keep the color (you can use any selection tool).
- Let selection-invert, create an adjustment layer and we select the option of black and white
- We retouch black and white to our liking.
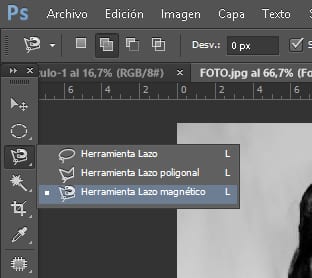
The first thing we are going to do is open our image in Photoshop and decide which areas we are going to convert to black and white and which to color. We continue selecting the tool magnetic loop and creating a selection on the area that will have color in the image.
-

- magnetic loop
-
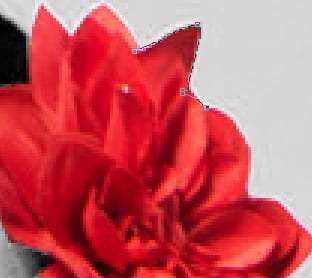
- selection detail by magnetic loop
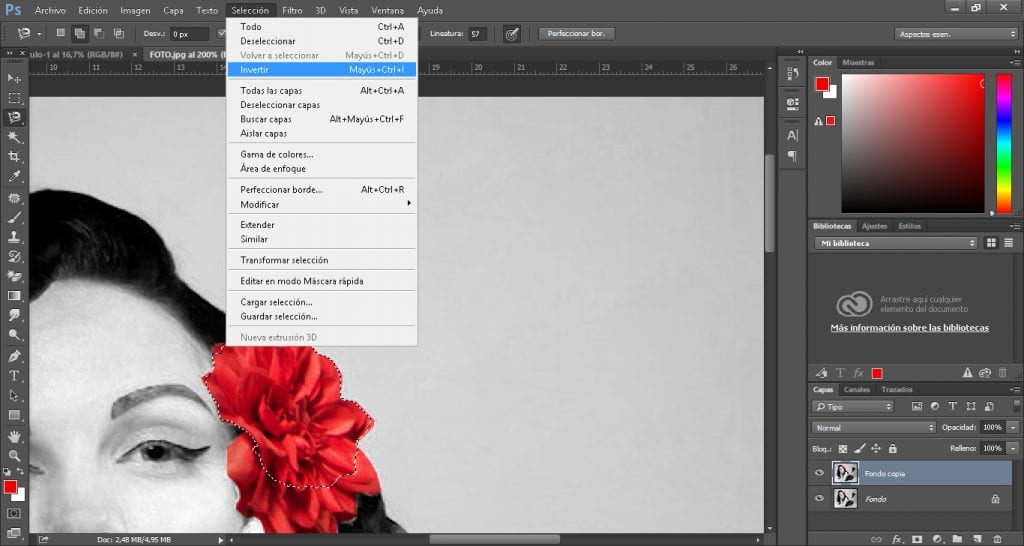
After making the selection we go to superior menu yy within the option selection we search to invest.
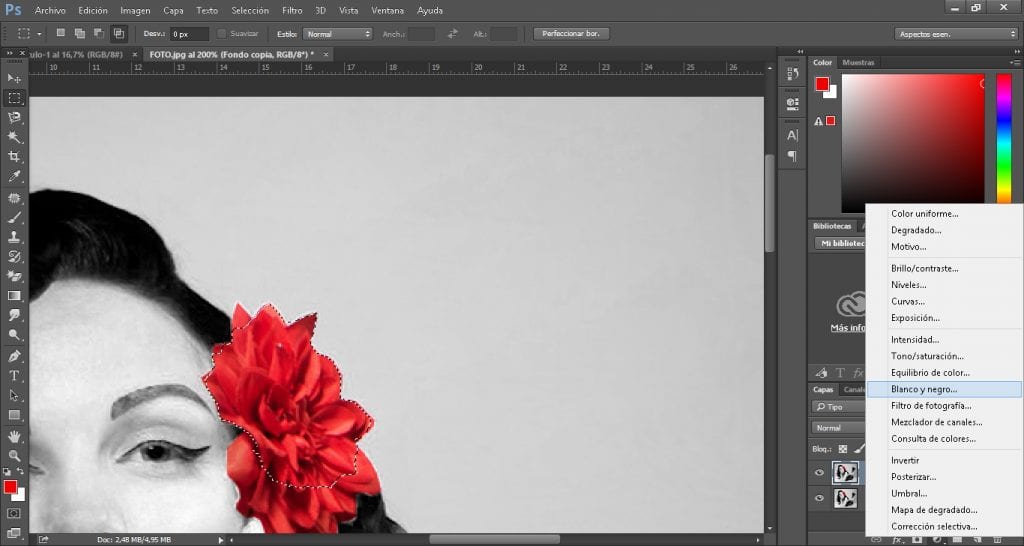
The last step is to create a adjustment layer, for this we go to the bottom of the layer zone and select the adjustment layer icon, inside this section we press the option of black and white
You already have everything you need now you just have to get to work and start create your own images. In the part of arriba you can see the videotutorial of how to work the last part in Photoshop.
The image of that woman in red looks so special, and the first thing that comes to mind is the Quentin Tarantino movie "Sin City." The game of the red color gamut and the entire step-by-step procedure itself is very well done.