
Design is a present resource in almost all agencies today. We could even say that this area of knowledge has become an essential element for the commercialization of products produced by companies.
And yes, the visual elements are very important Nowadays when it comes to marketing and sales, therefore, the vast majority of companies try to have all the visual elements in their favor, making graphic design a career with an extensive field of work.
Thus, the design work has managed to cover many fields, becoming one of the works of the moment.
To this we can also add the artistic background that we can find in design, which is why it is possible to find a large number of artists working in graphic design, making design both business and artistic work. It is one of the most enjoyable disciplines that exist, however, there is no reason to underestimate it, since as in any career, in design we can find all kinds of challenges and complications abundant in their complexity.
Today we bring one of the most sought after techniques in the area of design, the change of faces and we will briefly expose the steps to follow to be able to carry out the facial transformation from one image to another.
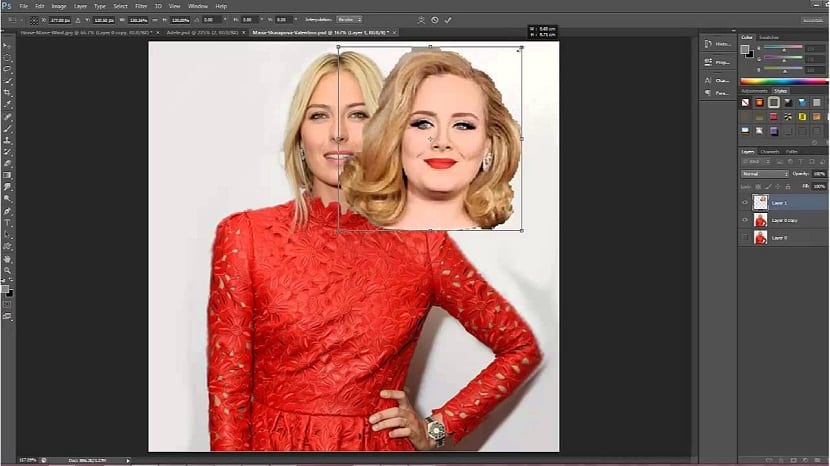
Tutorial to change a person's face
- We open the two images with which we will work.
- We change the color photos to black and white. If you do not know how to do this, we go to Menu - Edition - Mode and we change the RGB mode by grayscale
- We select the lasso tool and select the face.
- We drag the selection (which is supposed to be the face we want to place) to the other image.
- make a selection of the face that we are going to cover and paste it on another layer. Right Click - Layer via copy.
- We match the color of the two faces
- We select layer 1: Image Menu - Adjustments - match color.
- In the color match panel select the photo at source and in the layer layer 2 and press OK.
- We already have two even faces, so next, we can remove layer 2 or hide it.
- We place layer 1 on top of the background face, being necessary to lower the opacity and move it until the face position is correct.
- Create a mask on layer 1, selecting the soft brush and painting the mask until we integrate the entire face.
And voila, we will have a totally new face in our image. The steps can be a bit tedious, therefore the process needs patience on our partHowever, it is nothing to write home about, so users can through practice review and learn more and more the procedure of changing faces.