
Control the timing of a video with Adobe Premiere to create creative videoss in the purest professional style where combining different video speeds you get highly attractive results. Play with the timing of your videos to create a totally alternative dynamic and achieve fantastic results.
In a very easy way you will get learn how to time your videos with premiere, at the same time you will touch on some very basic concepts about video editing with this professional program. Master time, master video editing thanks to creativosonline.
Track time with Adobe Premiere is essential if we want to achieve different and creative video edits being able to play with the linear rhythm of the video, thus achieving a more attractive result for our audiovisual projects. On many occasions we will have to perform this type of effects because it is something very used in the world of audiovisuals, slow down time, speed it up and all kinds of changes related to the timeline of the video.
The first thing we have to do to create this interesting effect is to open a project in Premiere with the videos with which we are going to work.
Once the video is opened in premiere, what we have to do is create selections of clips from those videos.
The ideal way to make cuts from a video is before we go through the timeline because we get clean the video before. To do this pre-cleaning what we do is section the video with double click from the lower area, once this is done, in the upper part that video piece will be displayed, this is where we will do the courteous pressing options entry (start) and exit (end) Playing with these two options we are selecting the parts that interest us in our video, when we finish we drag it to the timeline by pressing on the video display. In the case of having a video in the timeline, what we do is leave this step and go to the next one.
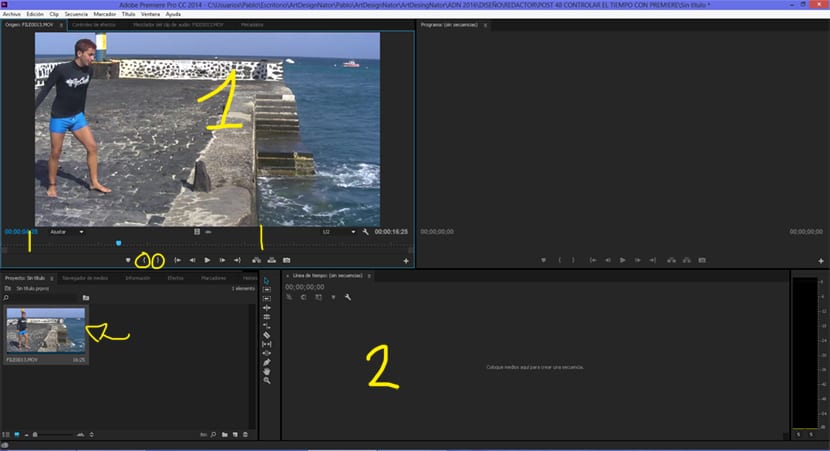
We drag our video to the timeline and we begin with the most selective process to get to play with the video time. We can visualize the video better if we move the bar at the bottom of the timeline.
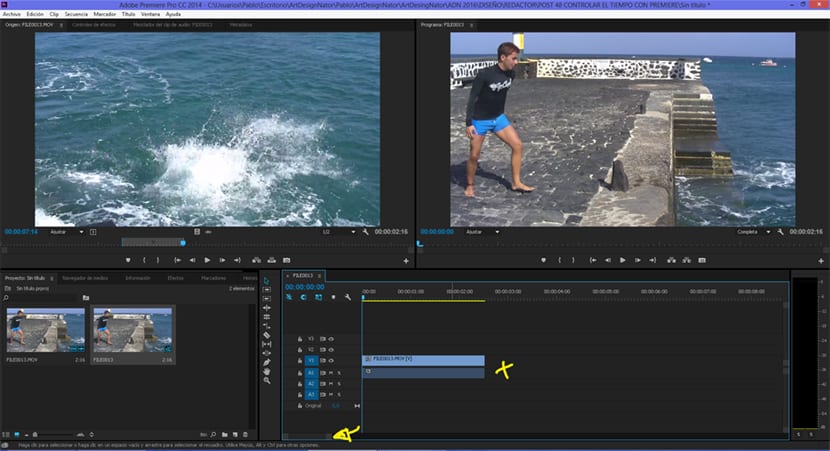
Once we have our videos in the timeline, the next thing we are going to do is start cutting them, for this we have to use the blade tool. We start making cuts into video pieces wherever we want change the speed of the video.

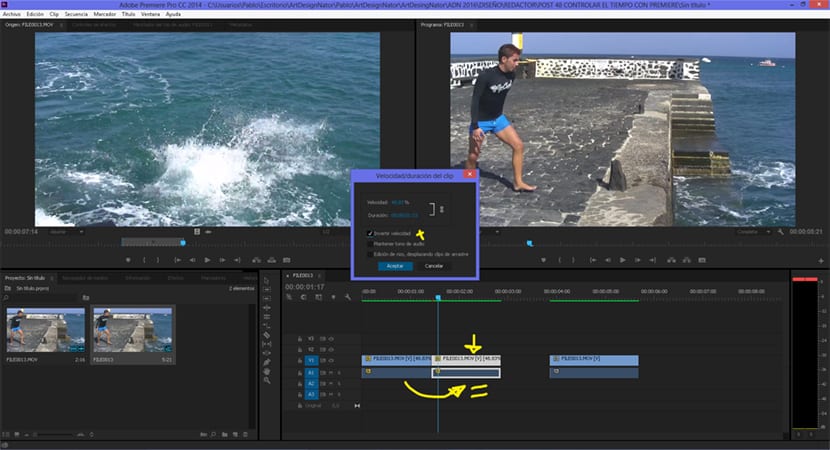
After making the cuts we have to press on the videos with the right mouse button and select the opción speed / duration. Depending on what we are looking for we will modify the speed of the video in one way or another, if we want that fragment to have a lower speed we have to extend duration time of the video and if we want it to be faster we have to shorten its duration.
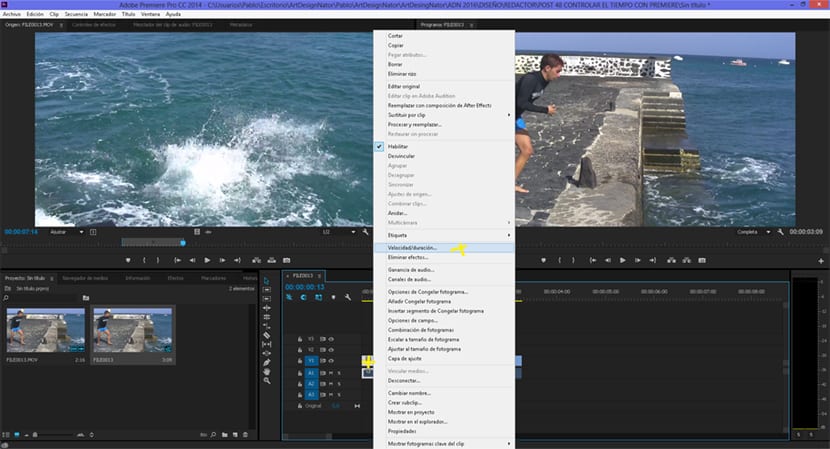
We can apply a rewind effect very quickly following the same steps as before but instead of changing only the speed of the video, we select the option to reverse speed. After this, the next thing we have to do is continue applying all the cuts and effects that we want in our video.
Control the timing of a video is something that is used a lot in all kinds of audiovisual projects, from cinema to video clips, this type of editing has been a attractive visuall. Now thanks to Premiere and its comfortable interface we can perform this type of professional effects very quickly.