
Create a blur in a video with Adobe Premiere It is something very easy to do and that can help us in all our audiovisual projects. Today, a blur can be created with any reflex camera but on many occasions we will find videos where we want apply a blur after you've recorded a video.
Apply blurs to your videos quickly and very professionally achieving that result that you are looking for so much thanks to the program premiere, a very intuitive professional program. Take a little more control of video editing.
Un blur it is often used as connecting element between two planes by way of transition but it can also be used as effect for something concreteFor example, if we want to represent that a person is suffering from dizziness in our video, we could use this blur effect. It could also be used for a intro in a video or for highlight some element on a plane. Whatever the purpose, the technique is always the same.
The first thing we need to create our blur effect is to open our video file in Premiere. Once the file is open we will move it to the timeline and look in the menu on the left for the video effects catalog, within this catalog we will find a Blurs section. For this example we will use the Gaussian blur.
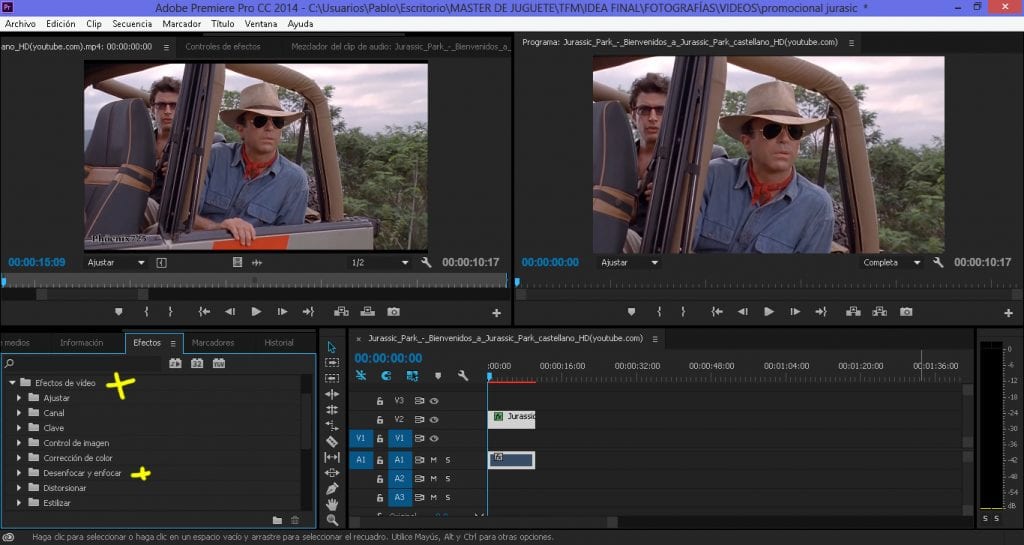
For apply blur We just have to drag it to our video, automatically our video will already have that effect applied. The next thing we have to do is give double click in the video where we have applied the effect and select in the top bar the effect controls option.

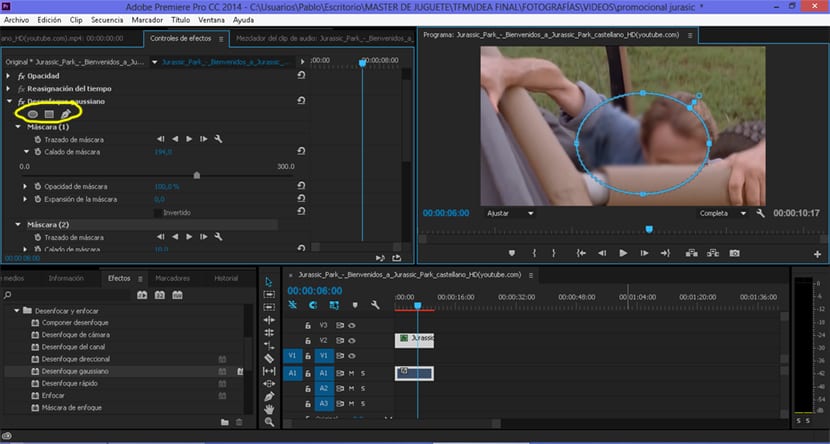
Once inside the blur effect parameters we have to start create keyframes to apply blurs only in those specific areas. In the case of not looking for more than one blur but a general one (at the beginning of the video mono) we do not create keyframes but we will directly apply the blur, if we want we can create several to achieve a gradient effect.
If we look closely in the menu we can see a clock, We will use this clock to start our point blur effect. The system is to create keyframes while moving the timeline azul that we see at the top.

We press the clock to start the effect, after this swe choose the small circle that we see on the right. We are moving the time bar of our video and we create keyframes in the areas that interest us. The last thing we do is move the bar at the bottom of the clock to apply our blur effect to a greater or lesser extent, too we can move the points up to achieve the same effect. If we want we can apply a blur using a default shape de Premiere (ellipse and square) if what we are looking for is a more exact blur we can make a selection with the pen.
Create a blur in a video with Adobe Premiere it is something that can save our lives in many audiovisual projects, for that reason it is necessary know these types of techniques if we are specializing in video editing with this or any other program.