
In this tutorial we will learn to appropriately crop an image from one file and then paste it into another, and so on get a nice composition. We can then create a motivating image, with inspiring phrases, or a simple collage that feels beautiful to the eye.
Today is the day to start produce our own motivations, take a look at this flash tutorial.
To begin, in Photoshop we must have open the two images (or more) with which we want to work.
The next step consists of click the selection tool that we feel more comfortable, in our case we opted for the tool Magic wand since our image has a uniform and easy to remove background. Depending on the image you choose, it will be easier or more difficult, but with patience you can always get it.

If you have a fund like ours, then we tell you that the more tolerance you give the selection, the better it will come to you. Likewise, if we remove the selection from the box that says "adjacent"At the same time we select the color we want, it will automatically do so on the surfaces of the same color that are separated from it.
In case we need to select a space, we can use the key Shift as a shortcut for add another selection. Otherwise, if we want remove something that we should not select, then we will use the key Alt at the moment of clicking.
Since here we select the background, and what we want to use are the letters, then we use the command Ctrl + Shit + I to invert the selection, or failing that, in the Selection-Invert tab.
Finally we copy it (Ctrl + c) and paste it in the other image (Ctrl + v)
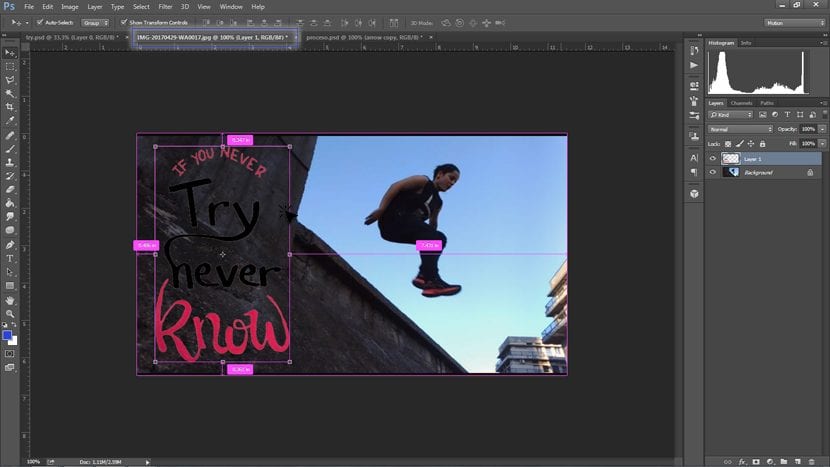
Once an image is pasted over another, we can position it where we like the most with a click and drag.
As you can see, sometimes when an image is on a background of a similar color, it is lost. To solve this little problem we have another quick trick in case we want to give you an extra detail, and which be more visible.
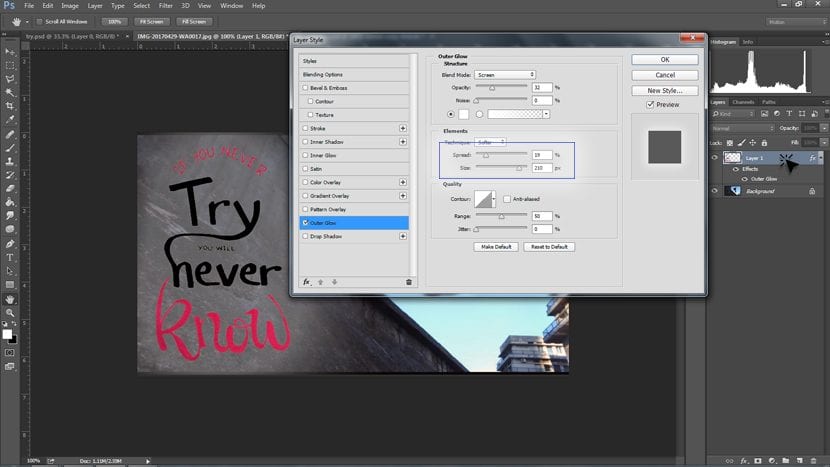
Doing double click on the image layer we want to edit, a pop-up will appear with many options to add. In this case we will use the option Outer Glow. We will leave the glow color blank, and expand it, as seen in the screenshot. So we can better read the text on the image, and in turn we will have a first visual focus on it.
Now it's up to you to create your own motivating image!