Design involves multiple curiosities, that is, many of the people who decide to enter this activity are usually attracted to a particular effect, which, in most cases, usually results in a large number of design professionals.
However, this does not exclude those cases in which graphic design would have been studied on the basis of the most academic guidelines possible, and in large part, many of the graphic designers They would have entered this discipline by following tutorials and manuals on the Internet.

Among so many proposals that we can find, design is usually associated with groups tied to certain trends in terms of their fashion and style refers, being an example of this urban art, highlighting the elaboration of letters and urban designs.
We can also talk about digital paintersThose who use design tools to make their models and works, a job that ultimately deserves patience and dedication. But in short, design is a discipline that enjoys all kinds of practices, highlighting all kinds of cultures and trends, making it one of the most comprehensive careers as far as its guild is concerned.
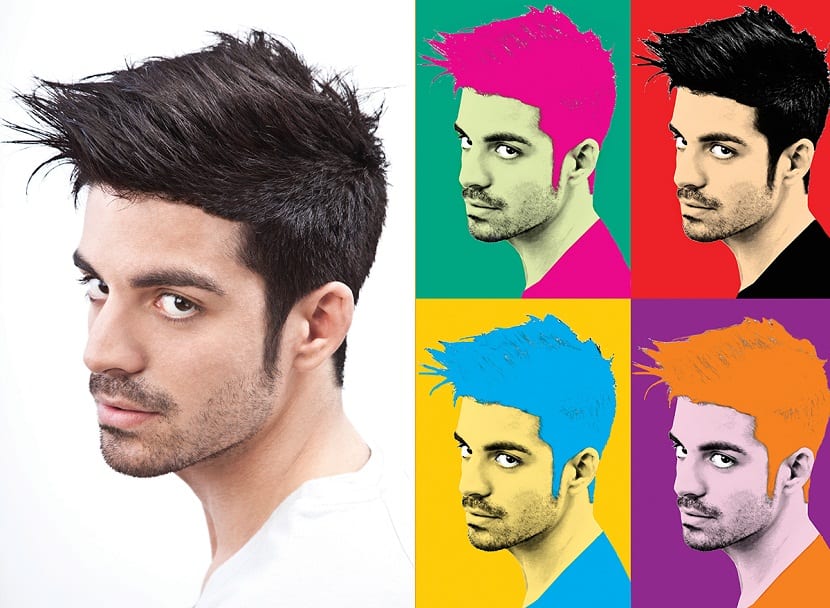
Today we present a tutorial that will allow you to create the "Andy Warhol" effect, here are the steps to create it:
- At first, we select the image we want to manipulate about our effect.
- Then we use the pen tool and cut out the background.
- Now that we have the image without a background, we go to Image - Threshold and move the mouse until we find the result that we like. It is worth letting you know that the 127 value it can be a good point of reference.
- We duplicate the layer with the threshold effect and in the thumbnail that shows the image, where in the layers panel we will press CTRL.
- With the tool paint bucket, we can paint the entire selection so that it is white.
- Then, we apply a filter, for which, we proceed to Menu - Filter - Artistic.
- We change the layer to Darken.
- Now we have to color our work and for this, click on the layer thumbnail while we hold down the Ctrl key, which is done in order to recover the selection that we would have made before.
- We create a new layer Menu - Layer - New - Layer. We place it below the original, for later select the color we like. With the paint pot tool we will fill the new layer.
- If we want to create a Warhol style, it will be enough to repeat this process with other colors, thus generating the desired effect.
It can be a bit difficult to achieve, however, the procedure will be easier and easier as we stay in practice, since the warhol effect It's not as hard as it looks.