
La custom shapes tool it is very useful for create our compositions quickly in Photoshop through the combination of forms and their manipulation.
To create high-quality work with this tool, it will be necessary to have a number of shapes that allow us to create from them. The best option to provision ourselves in the ways we need is to create them, either with our own drawings or with photographs. In this post we explain how to create your own shapes using the two methods.
Create custom shapes using our own drawings
We create our drawing with the shape we want, either with the selection tool or with the brush or with both. Then we fill it with the black paint pot or, we leave only the lines, as in the example. Keep in mind that Only what we have in black will be converted into a shape and the empty spaces of the shape will be white.
Once we have our design ready, we must select it. To do this we go to the layer where it is located and holding down the control key we click on the layer and the complete layer is selected.
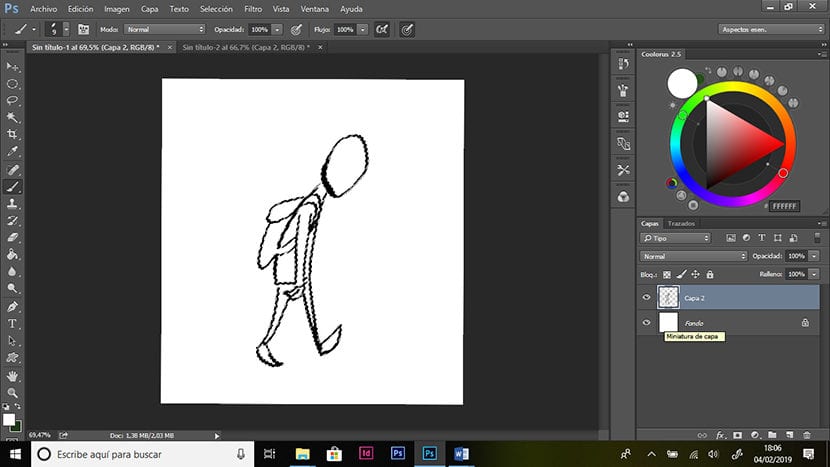
We hold down Control and click on the layer to select our drawing.
The next step is to convert the drawing into a vector. To do this, with the drawing selected, we go to the paths tab, which is normally located next to the layers window (if we do not have it open, click on Window> paths). We open the drop-down menu by clicking on the icon in the upper right corner and click on> make work path.
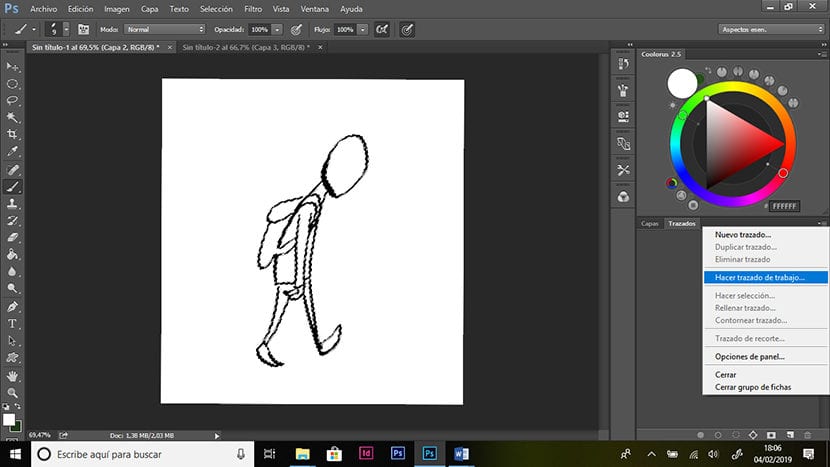
Now we see how our image has just become vector, you can see that anchor points have been created around the shapes of our drawing. Converting it to a vector allows the image to be scaled without losing resolution.
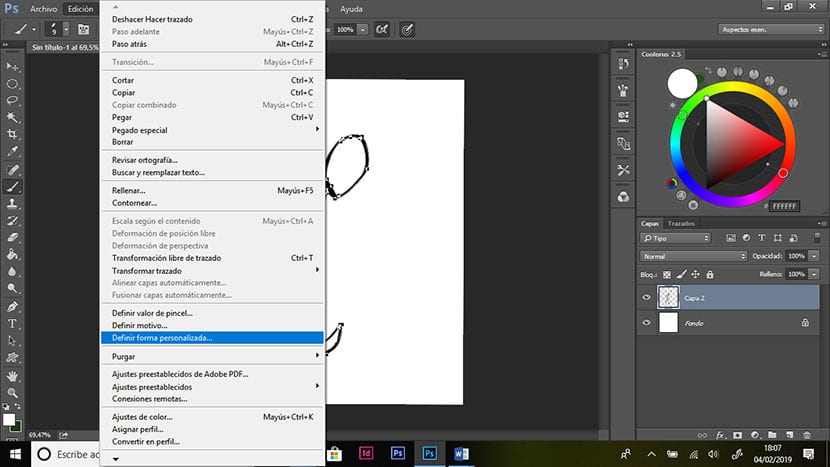
Finally, we have convert it to custom shape. We go to the Edit> Define custom shape tab, rename it as we want and click OK.
We already have the shape included in the gallery of the custom shapes tool. As we can see in the image, manipulating one shape a little, we create a new one and this allows us to work easily and quickly.
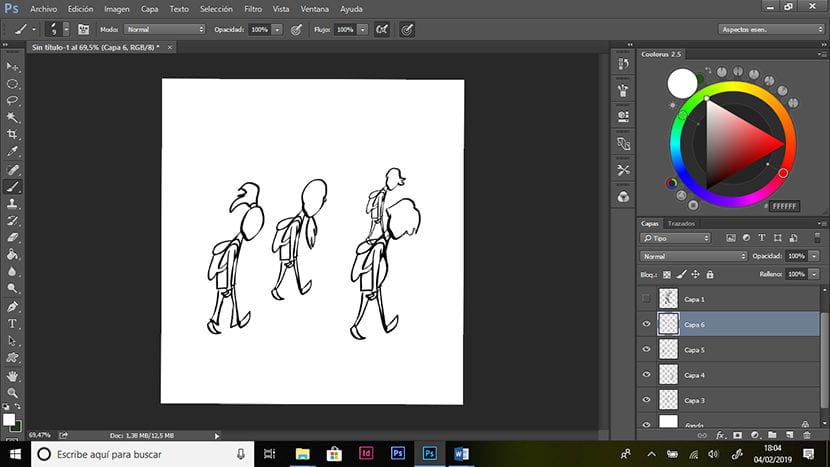
Here we can see how by making small changes we create a new design.
Create custom shapes using photos
We select one of our photographs that contains elements that are interesting for our designs, for example objects, trees, buildings, ruins, etc.
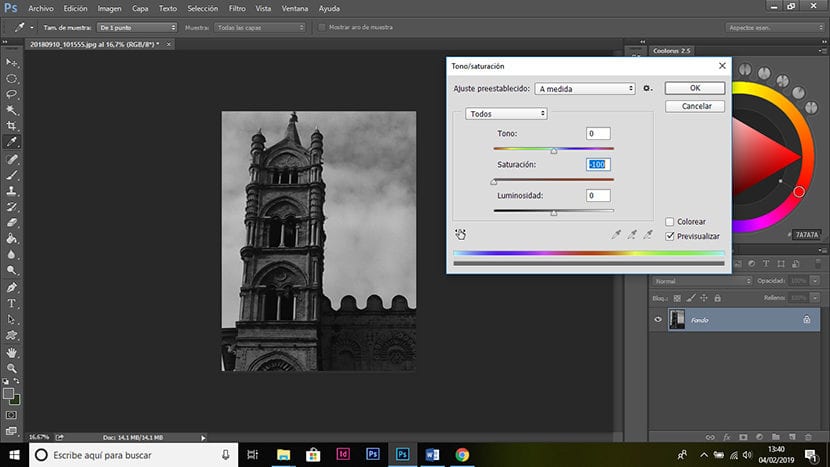
Now we must convert the image to black and white.
First we desaturate the image. We go to Image> Adjustments> Hue / saturation and we move the saturation bar to the left, so that we have the image in gray scale.
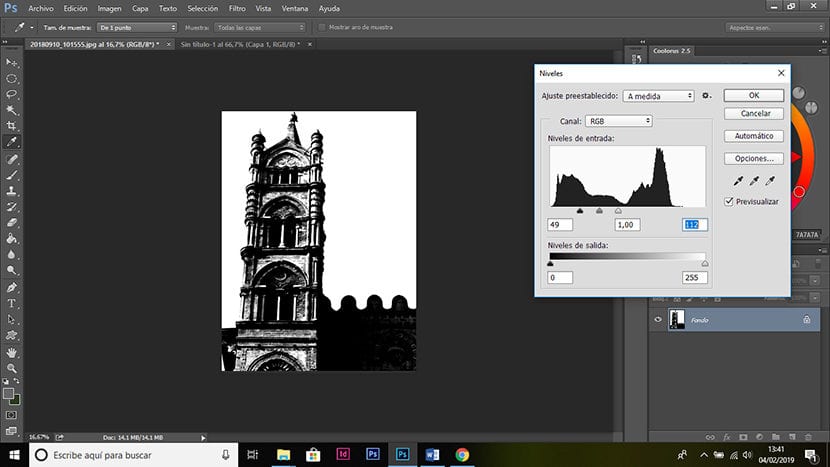
Then to convert it to black and white, we go to the Image tab> Adjustments> Levels and move the white arrow to the center and the gray and black arrow as well, until we have a clean gray image, but without losing the shapes that we like.
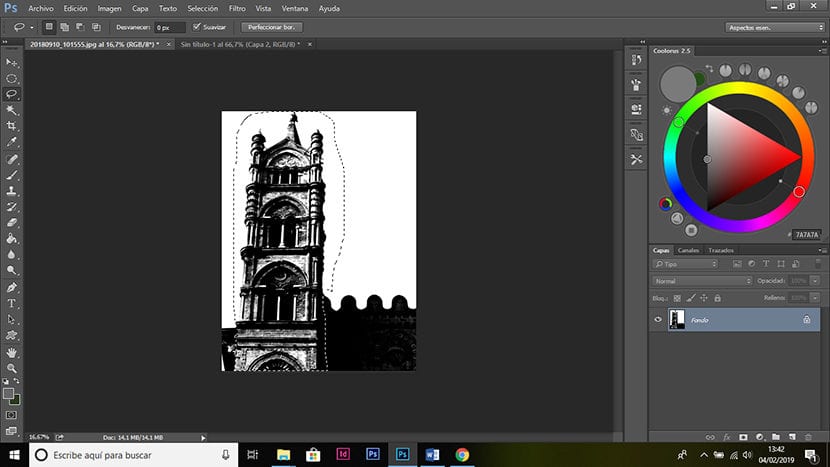
Now select (with the lasso or another of the selection tools) the area of the image that interests us to create the shape. We copy the selection and paste it into a new file.
If the image has a lot of noise we can eliminate it through filters, for this we go to filters> filter gallery and we try the one we like the most.
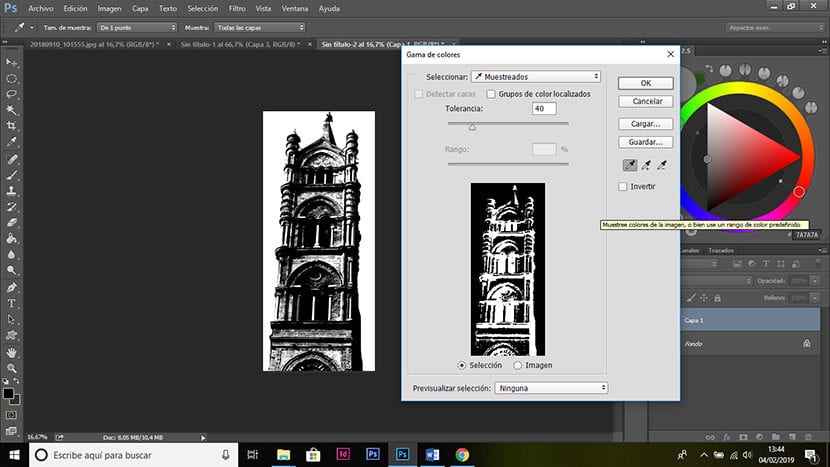
To clean the image of any grays that may remain, we go to Selection> range of colors and select with the eyedropper a black or a white area. We give OK and it makes a selection of black or white, depending on which we have selected, ignoring the gray. We press the Control + J keys so that a layer is created with the selection and we erase the noise that may remain in the image or that which does not interest us.
Finally, we follow the same steps we did to create shapes from our drawings, that is, we select the layer, vectorize in the paths window and create the shape from the edition tab.
The ideal is to have a large bank of shapes that allows us to have resources to create our compositions. We can complement our own forms with many others that we can find on the net, that other artists share or even that we can buy.
If you want to see some examples of compositions made with personalized shapes, you can search for example, thumbnails by Nacho Yague, and you can see how far you can go using this tool.