
Un realistic photomontage with Photoshop It is something that has been done for a long time with this great program that allows us to work with images as if it were magic. Either for hobby or work, Photoshop ofrece very realistic results for all types of photo retouching. Learn to master some basic notions to create your own realistic montages.
Create your own photomontages creative combining images of all kinds using a professional graphic tool used by designers, photographers and graphic artists. The most of the advertising Today it is done with these techniques and the results are incredible. It does not matter if you are a professional or if you do it for pleasure, you can learn to create photo montages and become an artist.
For create a photomontage the first thing we need is to have a idea in mind to later develop it graphic form. There are countless references on the Internet where we can find artists of all kinds to inspire us, one very good at photomontages in Joel robinson, this artist has a work based on photomontages where he combines the fotography with digital retouching (highly recommended for inspiration). You can also see some in this page.
Once we have the idea, the next thing we are going to do is develop it graphically.
If the assembly is going to be done with own photographs we have to know some fundamental aspects so that the assembly has a quite realistic result. If they are images from the Internet, what we do is look for some that comply with these bases.
- Take care of the perspective
- Photographs with good quality
- Take care of the lighting
These four points are essential to create a good photomontage, we will explain each of them in greater detail.
- Take care of perspective It is essential for our photomontage to have realismLogically, all the images of the montage must have the same perspective, although this depends on the project we are doing. For example, if we want to make a montage to put armor on a person who is looking straight ahead, the correct thing is that our images have that same frontal perspective.
- All the pictures must have the same quality so that the fusion is as realistic as possible. Depending on the project, whether or not we are interested in having more quality in the images, for example a blurred background could be useful if it is what we are looking for.
- La lighting is essential to achieve that realistic touch in our graphic project. When we are doing the photo shoot we have look at the points of light avoiding direct sun if we are outdoors. If our Internet images for the montage have overhead lighting (from above) we have to make sure that in our session the lighting also has that overhead style.
Therefore the first thing we have to do to create a good photomontage is plan all the details well.
We started our photomontage in Photoshop opening all images.
The first thing we have to do is start crop images, for this we can use any Photoshop selection tool:
- loop (magnetic, polygonal, free)
- Quick Mask
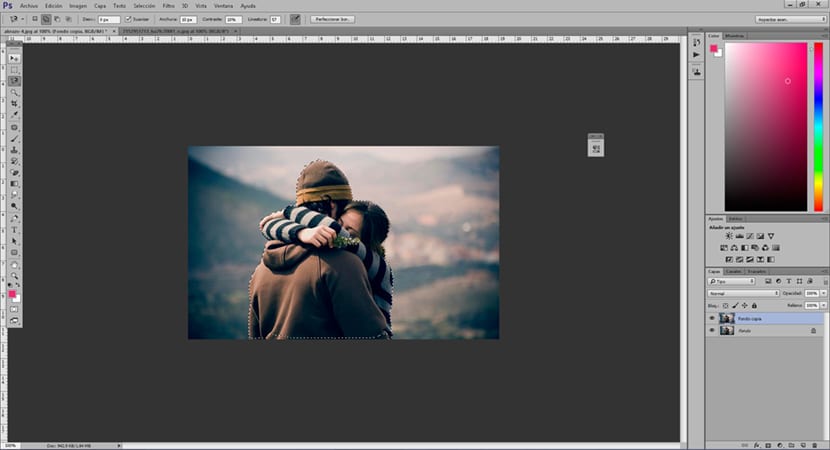
Once we have the images cut out, the next thing we are going to do is pass them to our photomontage area where we are going to combine all images.
The next step is adjust physical characteristics of images: positioning of each image, scale ... etc. We place each image where it goes without focusing on the visual part, we only adjust the physical part creating the base composition. The shortcut control + T used to adjust the size of images.
Once we have the images adjusted, the next thing we have to do is match color, for this we will use the tool color balance. We have to know that each image has a color cast specific and that is why we must match both colors to reach that realism that we seek so much.
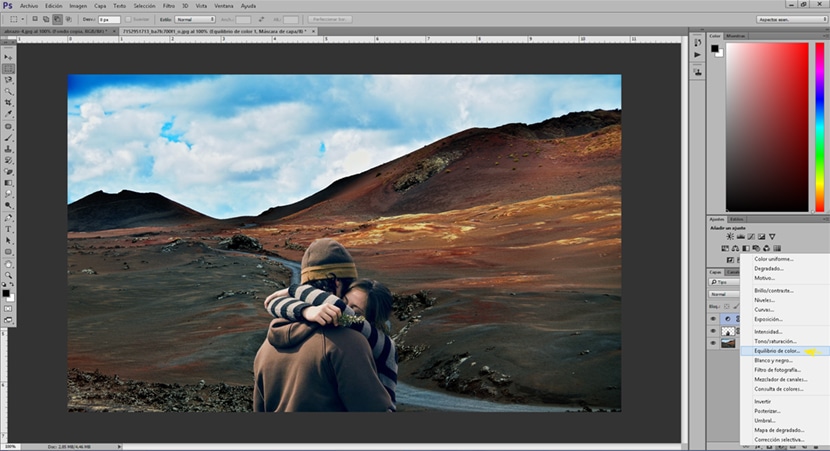
We have to know which is the dominant color of our image base to be able to match the color in all the images, this can be done by looking at the image in a general way. In the case of this example photo, the dominant color is red.
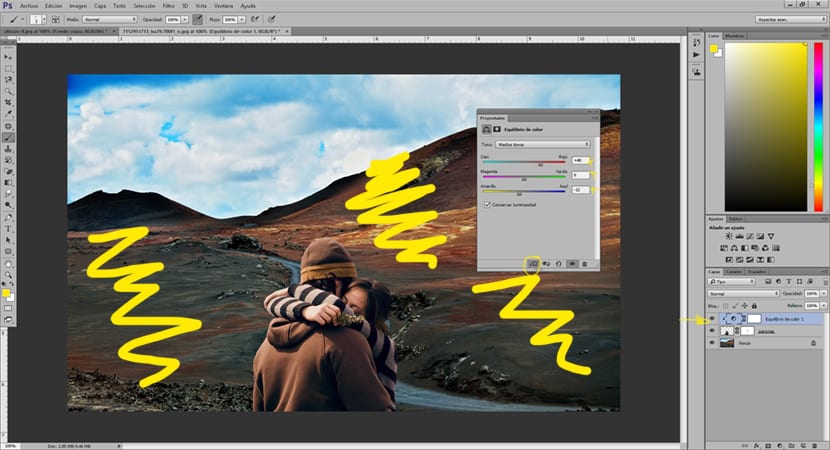
Once we have corrected the color, the following is correct lighting and contrast. To do this we create another brightness and contrast adjustment layer that will help us to match lighting between the images of our montage.
We can use other adjustment layers to obtain more realistic results: levels adjustment layer, selective correction adjustment layer, intensity adjustment layer, etc.
The trick to reaching a quality photomontage is to plan the work well at all times and to work always looking at all the aspects mentioned above. Think of a project, organize it and carry it out. Our only limitation is our own imagination.