
Create a realistic shadow with Photoshop quickly to improve our photo montages and get an rIt is much more professional and attractive. Get to contribute realism to your photographic projects using the best photo retouching program.
Lights and shadows are fundamental elements that we must control if we want to achieve realistic and attractive graphic results. Controlling the lights and shadows will contribute to our work depth and relief managing to blend the images with the environment better. Learn to use a technique to create shadows with Photoshop with very realistic results.
Create realistic shadow with Photoshop It is something very easy that will bring to our photographic retouching that realistic results that we so much seek. When applying a shadow the first thing we have to know (whenever we look for realism) is know the points of lightDepending on the point of light, the shadow was projected to one side or the other. After knowing that point of light the ideal is see shadow references to appreciate the shape of the real shadows and have a reference for ours. Remember that if you are looking for greater realism details are very important.
Create shadow with Photoshop
Once we have in mind the idea of shadow that we need, the first thing we have to do is open our image in Photoshop. Once the image is open, what we will do is create a selection of the object to which we want to apply the shadow. (In the event that our object is fixed and we do not need to select it, what we will do is paint the shadow with a black brush, later we continue the tutorial).
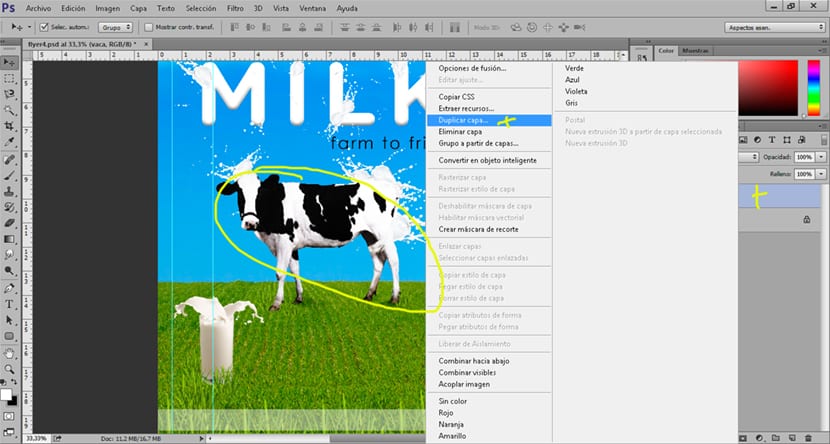
Once we have the selection ready, the next thing we will do is duplicate layer pressing with the right button of the mouse on the layer that we want to duplicate.
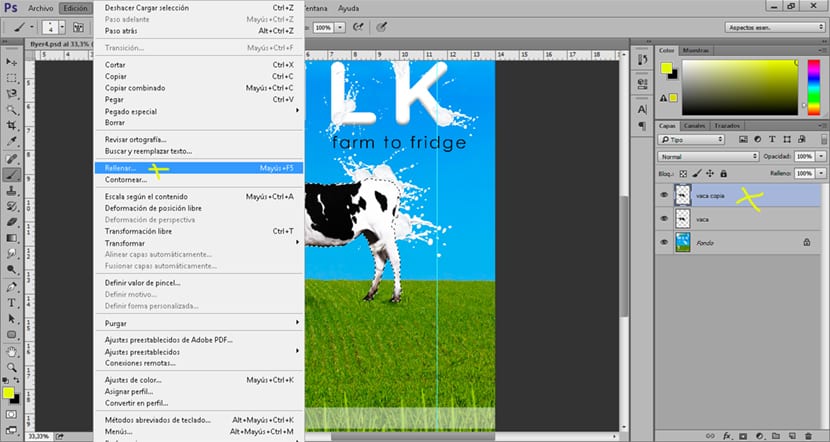
Fill layer
We fill the shadow layer with black color. To fill the layer we select in the upper menu edit / fill. It is possible to fill the layer with a color other than black, if we are looking for a not so strong shadow we can use a soft gray tone.
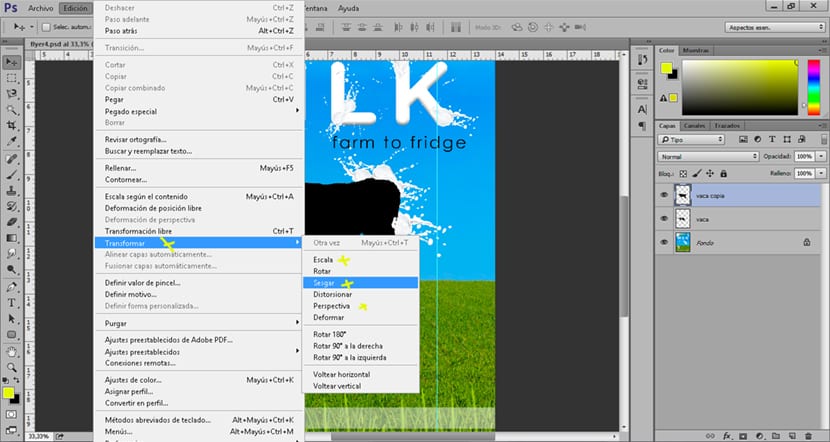
Adjust shadow
We begin to adjust the shadow to achieve a more realistic placement. To do this we select the shadow layer and press on the top edit layer transform. Ideally, use several options to achieve position the layer with more realistic results that will make our result more professional.
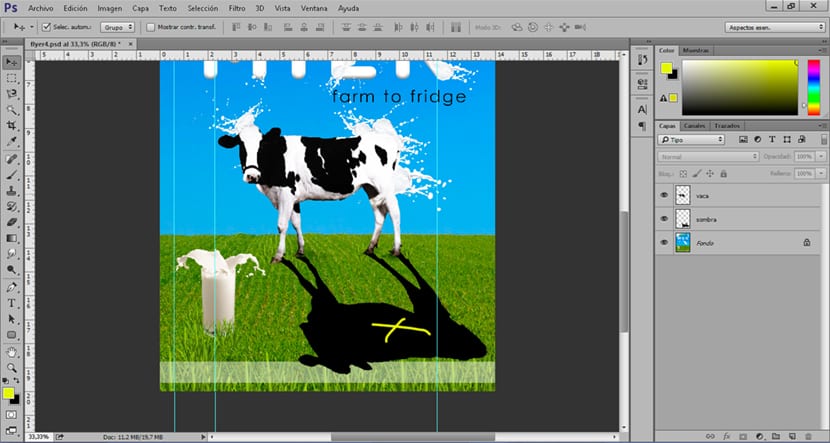
We continue adjusting the shade until we achieve a result that suits our needs. If we are looking for realism this part is essential.
Blur the shadow
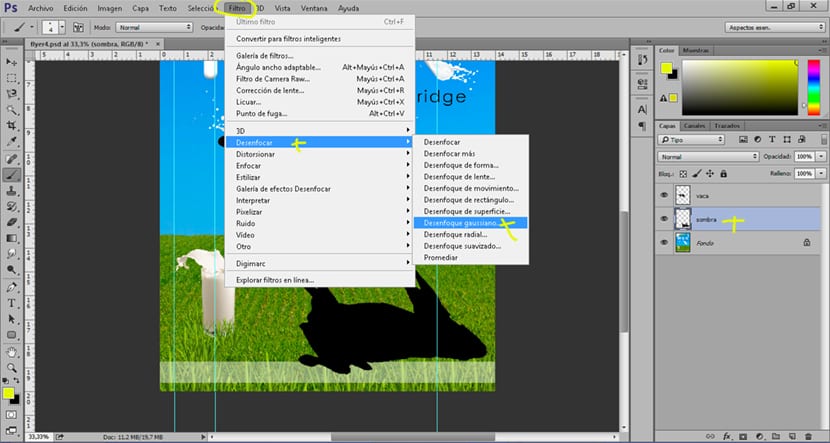
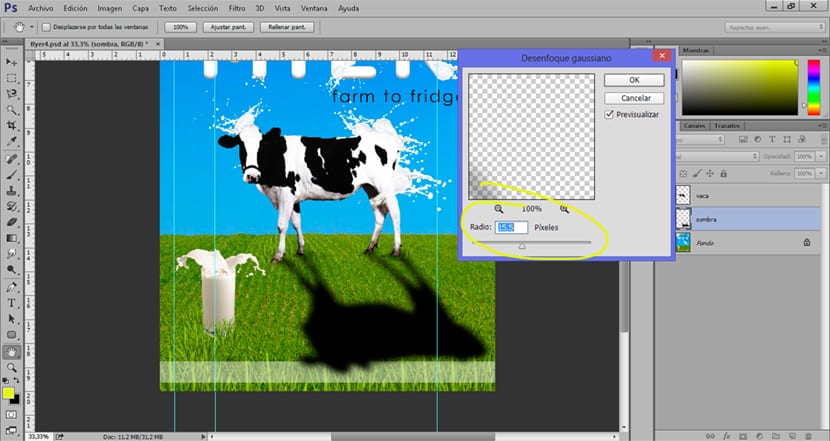
For make the shadow softer The next thing we have to do is apply a little blur to it. To apply the blur we go to the upper panel and press filter / blur / gaussian.
This part depends on the type of shade we are looking for, references will help us to know how shadows tend to be depending on the types of lights that generate them.
Soften shadow
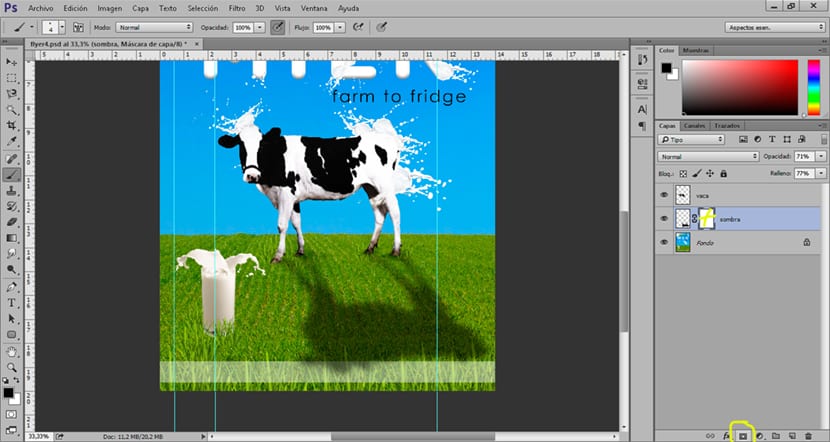
We can soften the shadow a little more to get a smoother result if we lower the opacity and fill of the shadow layer. If our shadow must be soft and with little force, it is ideal to apply this modification on the layer.

Retouch shadow
We can retouch the shadow by eliminating certain areas For greater realism, not all points in a shadow are the same. To do this we have to create a vector layer located in the bottom menu of the layers.
Once we have this layer created, the next thing we have to do is change brush values for a more subtle touch-up.
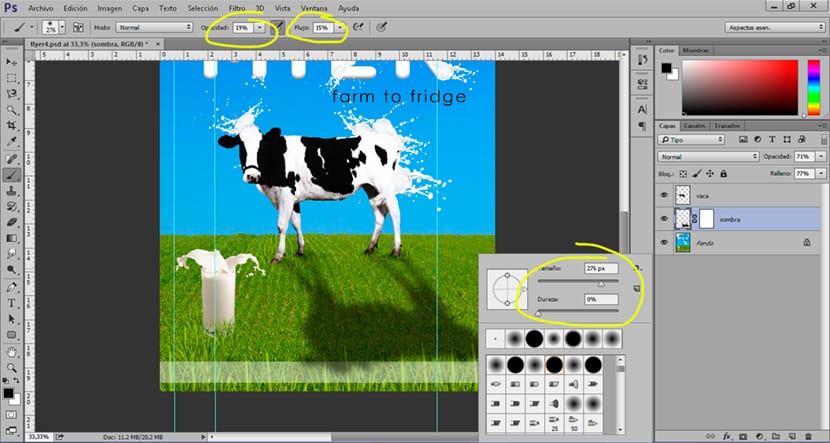
The values that we must change are: opacity, hardness, flow. These values nallow you to change the strength of the brush when retouching the shadow. Little by little we are eliminating with the brush (it acts as a kind of rubber) the parts of the shadow that do not interest us.
Improve shadow realism
We can improve the realism of our shadow if we darken certain areas of the image, for example the base of the object where the shadow is or near areas where the shadow is projected. To do this we will create a curves adjustment layer changing el layer mode from normal to multiply, we press the shortcut control + i to reverse layer. Little by little with the help of the brush we will darken the areas of the photograph.
Getting shaded an image is a job that requires time and a lot of eye if what we seek is to arrive at a considered realism. This type of technique can be used in an endless number of photographic retouching projects, for that reason it is very interesting to start using it in our graphic projects.