
Andy Warhol effect with Photoshop that will allow you to get some highly attractive photographs visually thanks to the great color contrast that this effect offers. The Warhol effect can be done in several ways, in this case we are going to do it in one way pretty fast offering a fairly high chance in image style control.
Saturated colors contrast each other in such a way that the image becomes whole a work of art, This style is very interesting to apply in those in photographs where we want to highlight the force of color. Learn a little more about Photoshop doing this interesting and creative effect.
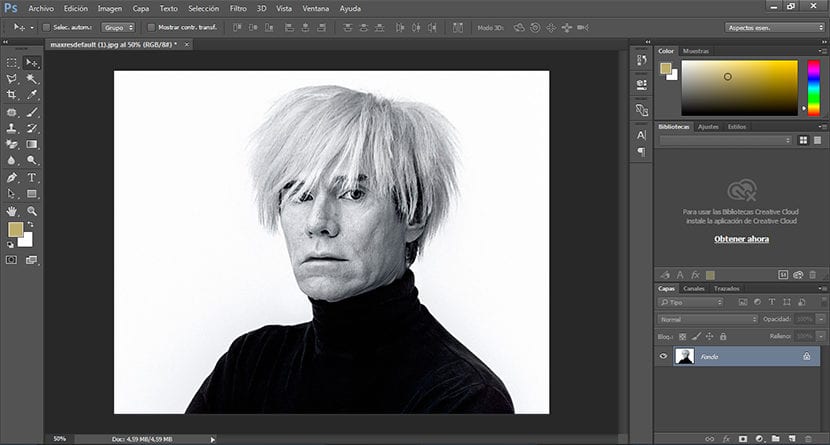
The first thing we have to do to achieve this effect is look for a photograph where we can apply the modifications with Photoshop. In this case we have used one from Warhol.
Find a photograph for our effect
Threshold effect
The first thing we have to do is duplicate our photograph original to ensure that we respect the original image, to do this we click on the square on the lower left located in the layer area.
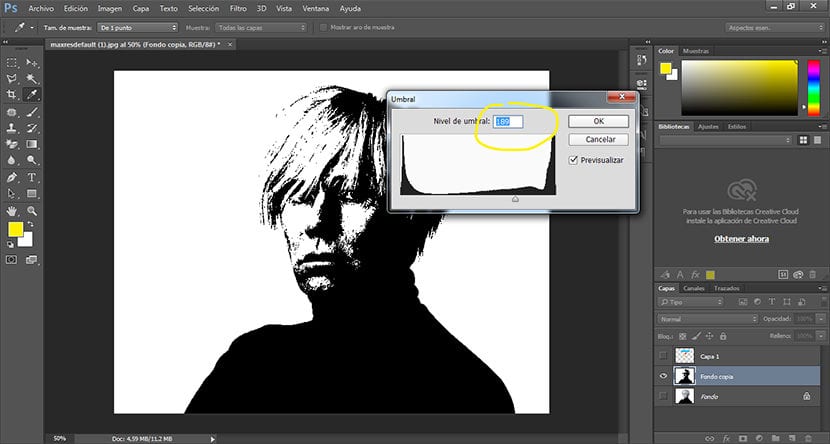
After duplicating our layer, the next thing we must do is create the threshold effect, to do this we click on image / settings / threshold.
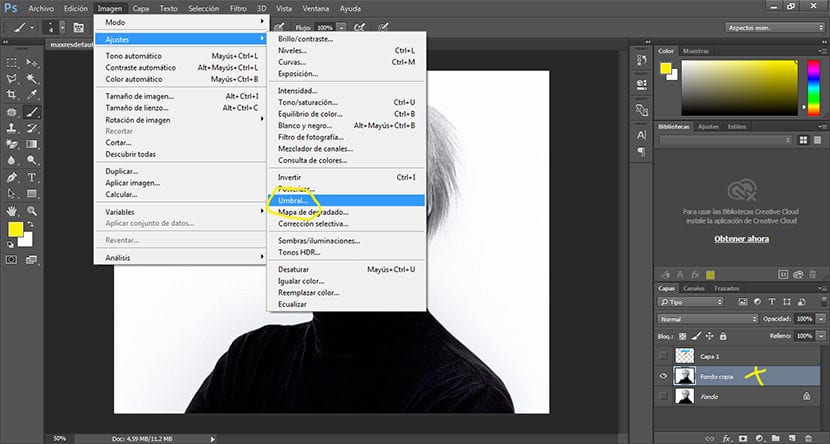
When we click on the threshold option, a pop-up window where we will have to adjust our image, this step is totally free since according to our needs we will apply a more or less noticeable effect.
Clear the background
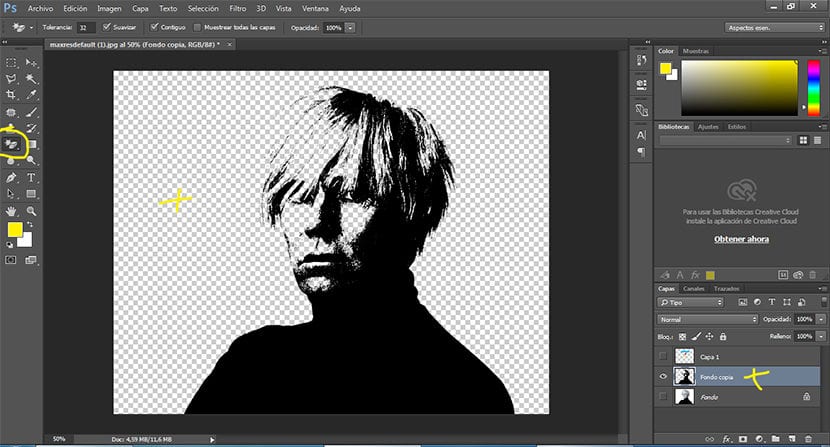
The next step is to erase the background to later apply another color that contrasts with the image above. To do this we just have to select the magic eraser tool located on the toolbar on the left side of Photoshop.
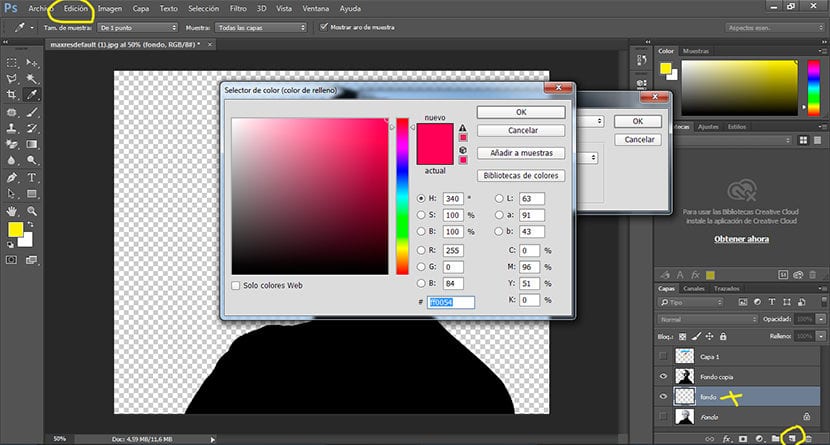
Fill the background with color
We fill our new fund with some saturated colorTo do this we must first create a new layer and place it below the original image layer, after this we select the option edit / fill, we select the color we want and we accept it.
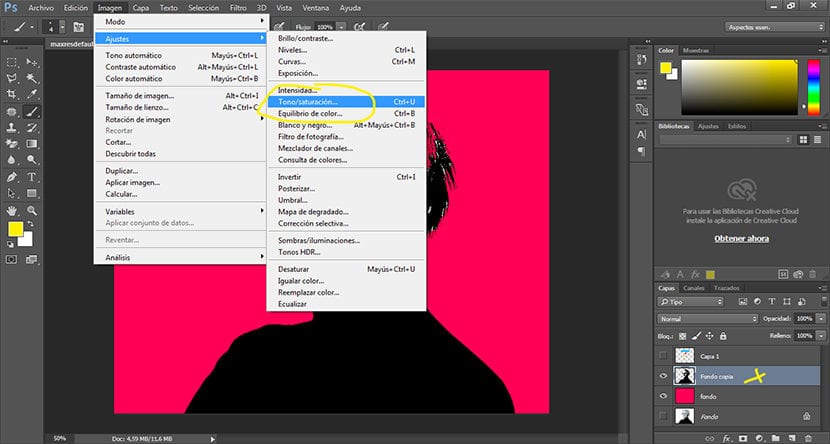
We change the color of our image
The next and last step is to change the color of our image to black, we can do this by filling that black color with a new color or creating a color adjustment on the layer, in this case we will create a color adjustment by clicking on the top menu image / adjustments / hue saturation. We click on the coloring option and choose the exact color that we are looking for, we can play with the parameters that this menu offers us until we reach the desired effect.
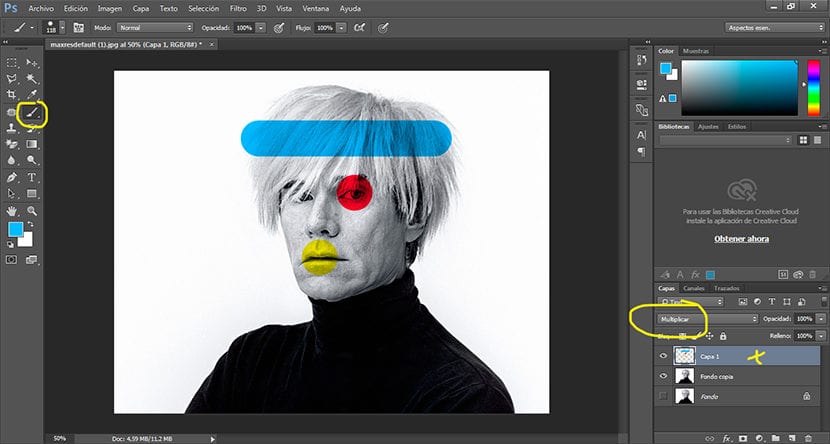
Alternative effect
We can create alternate effects with similar touches based on the use of color as the main strong point in the image. In the case of this example we apply colour stains by using an adjustment layer in multiply mode.
With a few simple steps we have managed to create a interesting Andy Warhol style quickly and easily while using some basic tools in this quintessential digital retouching program.