
Cget a perfect smile with Adobe Photoshopp is something we can do quickly and easily to see our very white teeth like we just got out of the dentist. It is a good way to correct our smile in photographs or improve the smiles of others in all those photographic sessions we do.
Whiten teeth with Photoshop it will also allow us to learn a basic photo retouching technique With this program, you can later correct other elements of the photographs such as the color of the skin, the whites of the eyes or the clothes. The technique is always the same We just have to apply it in different ways looking for where it can be useful to us.
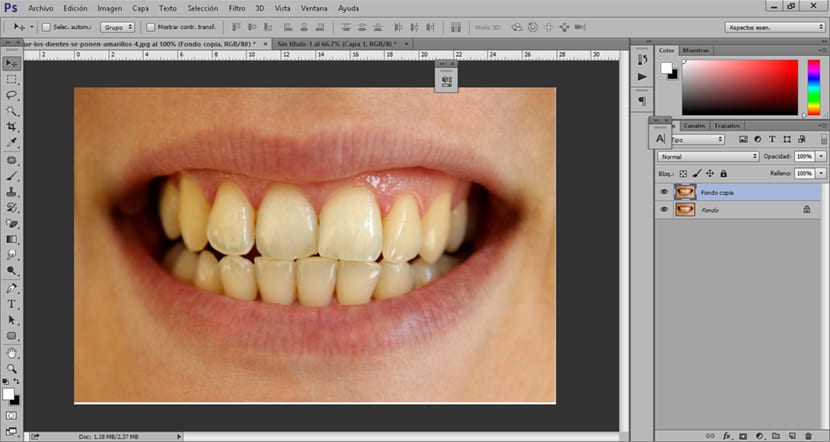
The first thing we need to do this retouch is to have a photograph of a smile where you can see the teeth, the ideal is do the effect on teeth with little shine To better see the effect but in the case of not having any image so we can use whatever we have on hand.
In this post we learn to use the following tools:
- Quick Mask
- adjustment layer
We open our image in Photoshop y we duplicate the main layer.
Once we have our image, the next thing we should do is make a tooth selection, for this we can use any selection tool, in this case we will use a quick mask.
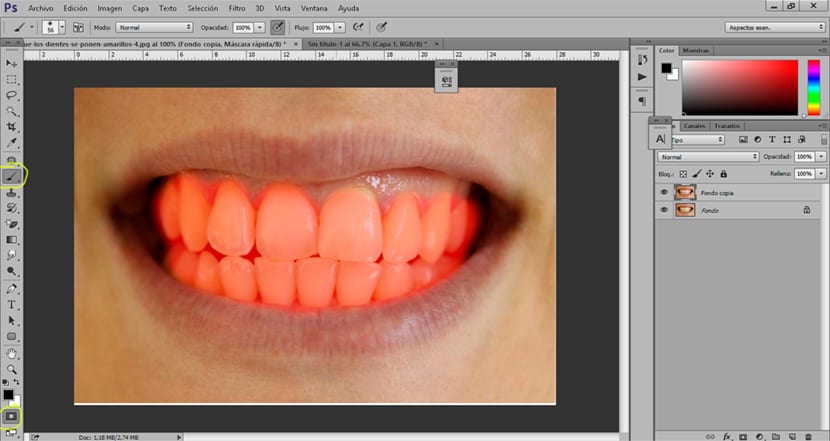
We click on the quick mask option and we create a selection of teeth as if it were a normal brush. This tool allows us paint areas and then create a selection, in this case we will make the selection with the brush with minimal hardness to avoid making the effect too noticeable at the edges of the selection.
Little by little we do the tooth selection with the quick mask making sure to select all of them without leaving us any part. After making the selection, the next thing we have to do is press the quick mask icon againBy doing this, we will create a selection of everything that is outside of our selection. To end we invert the selection in selection invest.

After making the selection we will create a adjustment layer levels In order to whiten our teeth, this adjustment layer allows us increase whites and blacks in such a way that a greater brightness is achieved in the smile, it is a retouch that can be applied in many elements of an image.
In just a few minutes we have achieved give life to our smile with the aid of Photoshop using tools that can help us in many photographic retouching.