
Usually, people are on vacation during the month of August, enjoying trips to the countryside, going to a swimming pool, seeing new places or perhaps just sunbathing on the beach. But if you are part of those people who, in the middle of the summer, spend their time in front of a computer, either for part-time jobs, obligations or simply to want to do it and regardless of the case, it often becomes very difficult to want to sunbathe to show off a beautiful tan for this month of the year.
Fortunately for many, graphic design tools They can help us solve this small problem if we do not have the opportunity to leave the computer screen and you only need the photo that you like the most and in this article we will show you how get dark thanks to GIMP or Photoshop And it is that despite being simply an effect applied to an image and not in real life, at least you will have the opportunity to share it with your acquaintances and friends on the social networks of your choice.
How to get a good tan with Photoshop?

If we want to get this beautiful brown skin tone with Photoshop, it is quite simple to do, although it can become somewhat tedious.
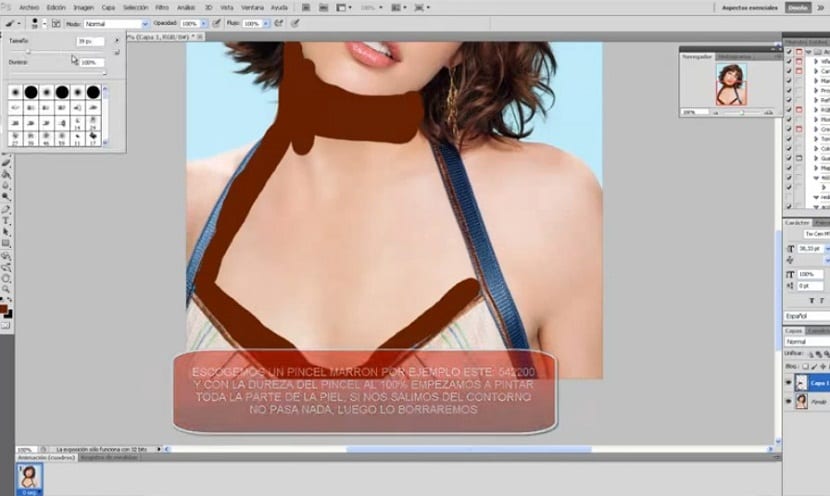
The first thing we need is a photo of ourselves, either on the beach or in the pool and we select all the sections that are part of the skin. To do this we can use several methods such as the magnetic lasso, the polygonal lasso or in its difference using the quick mask mode.
In order to make the selection, we press the Q key and paint over the entire area that represents the skin with the brush. Already done this, everything we have painted will be marked with the color red. After this we press the Q key again to be able to return to normal mode, we go to the selection option and click on invert.
Now that we have selected the skin, we simply have to dedicate ourselves to adjusting two parameters, the main one being the image levels and in the second we have brightness and contrast Of the same. First we go to the settings and click on levels or we can also press Ctrl + L. The level that we have to select will depend on the photo we have chosen, the original skin tone and the level of tan that we want to put on it.
To do this, we simply try the settings until we get the tan tone that we like the most.
Alright, we already have the tone we want but it looks a little off, like this now we have to continue with the second parameter which is the brightness and contrast, which we also do from the settings menu. In the same way we are applying the adjustment until we get the result we want.
Finally, we just have to deselect the skin section, from the selection menu or simply by pressing Ctrl + D.
How to tan with GIMP?
In order to get a splendid tan using the GIMP tool, the procedure we need to follow is exactly the same, with the difference that some menus may vary. Once we have selected the entire area that corresponds to the skin of the photo, we go to the window where the levels appear, from the color menu, we click on levels and adjust the values until we achieve the result that we like the most.
In the same way we did with Photoshop, now we have to adjust brightness and contrast, so that the skin does not look dull. This time we go to the colors menu. After doing this, the only thing left to do is deselect the skin area and we get the tan we want so much.