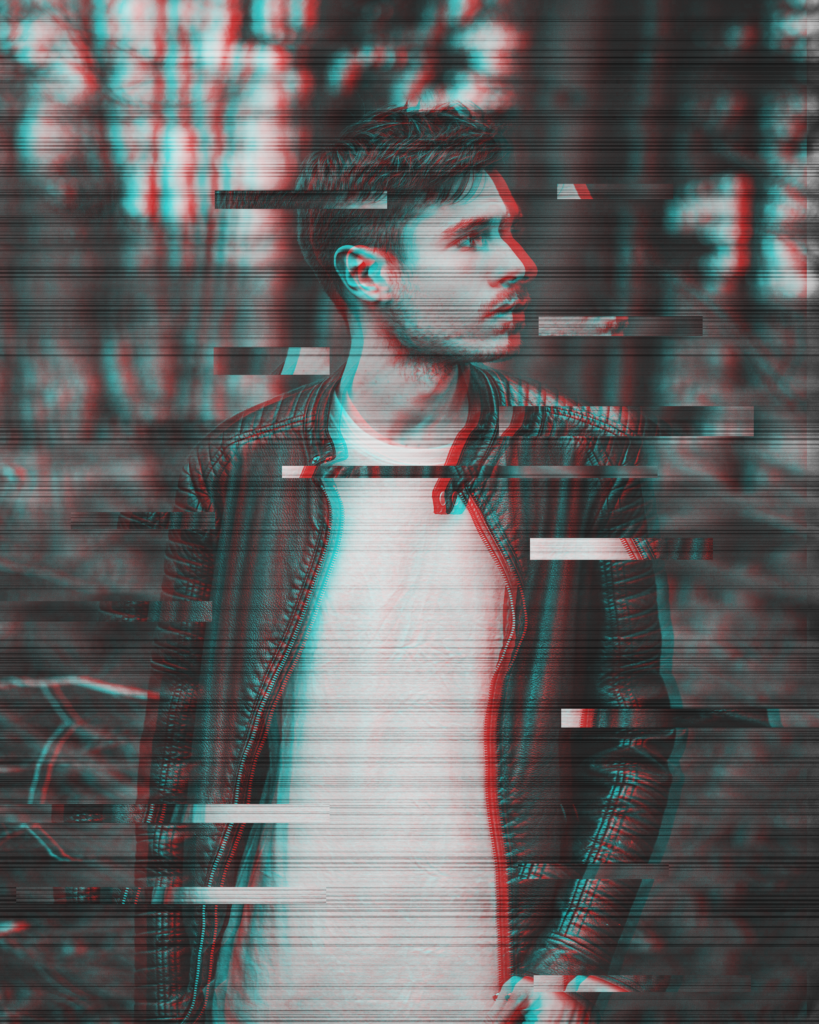
In computing, a glitch is an error, when there are badly encoded or damaged files, erroneous images are generated that cause this visual effect. The "glitch" aesthetic is currently used in the world of advertising and graphic design to give a retro and eye-catching touch to photos. In this tutorial I am going to teach you how to make the glitch effect in Photoshop in just a few steps Don't miss it!
Prepare the necessary resources to create the glitch effect in Photoshop

Before we start, let's see what you will need to follow this tutorial: first you will need the photograph to which you want to apply the effect and a pattern of black and white horizontal lines, you can download it from any image bank, the one I have used is from pixaby.
Open the photo and duplicate it to make it black and white
Let open the photo first and we will duplicate it. We will put this new layer in black and white, there are two ways to do it:
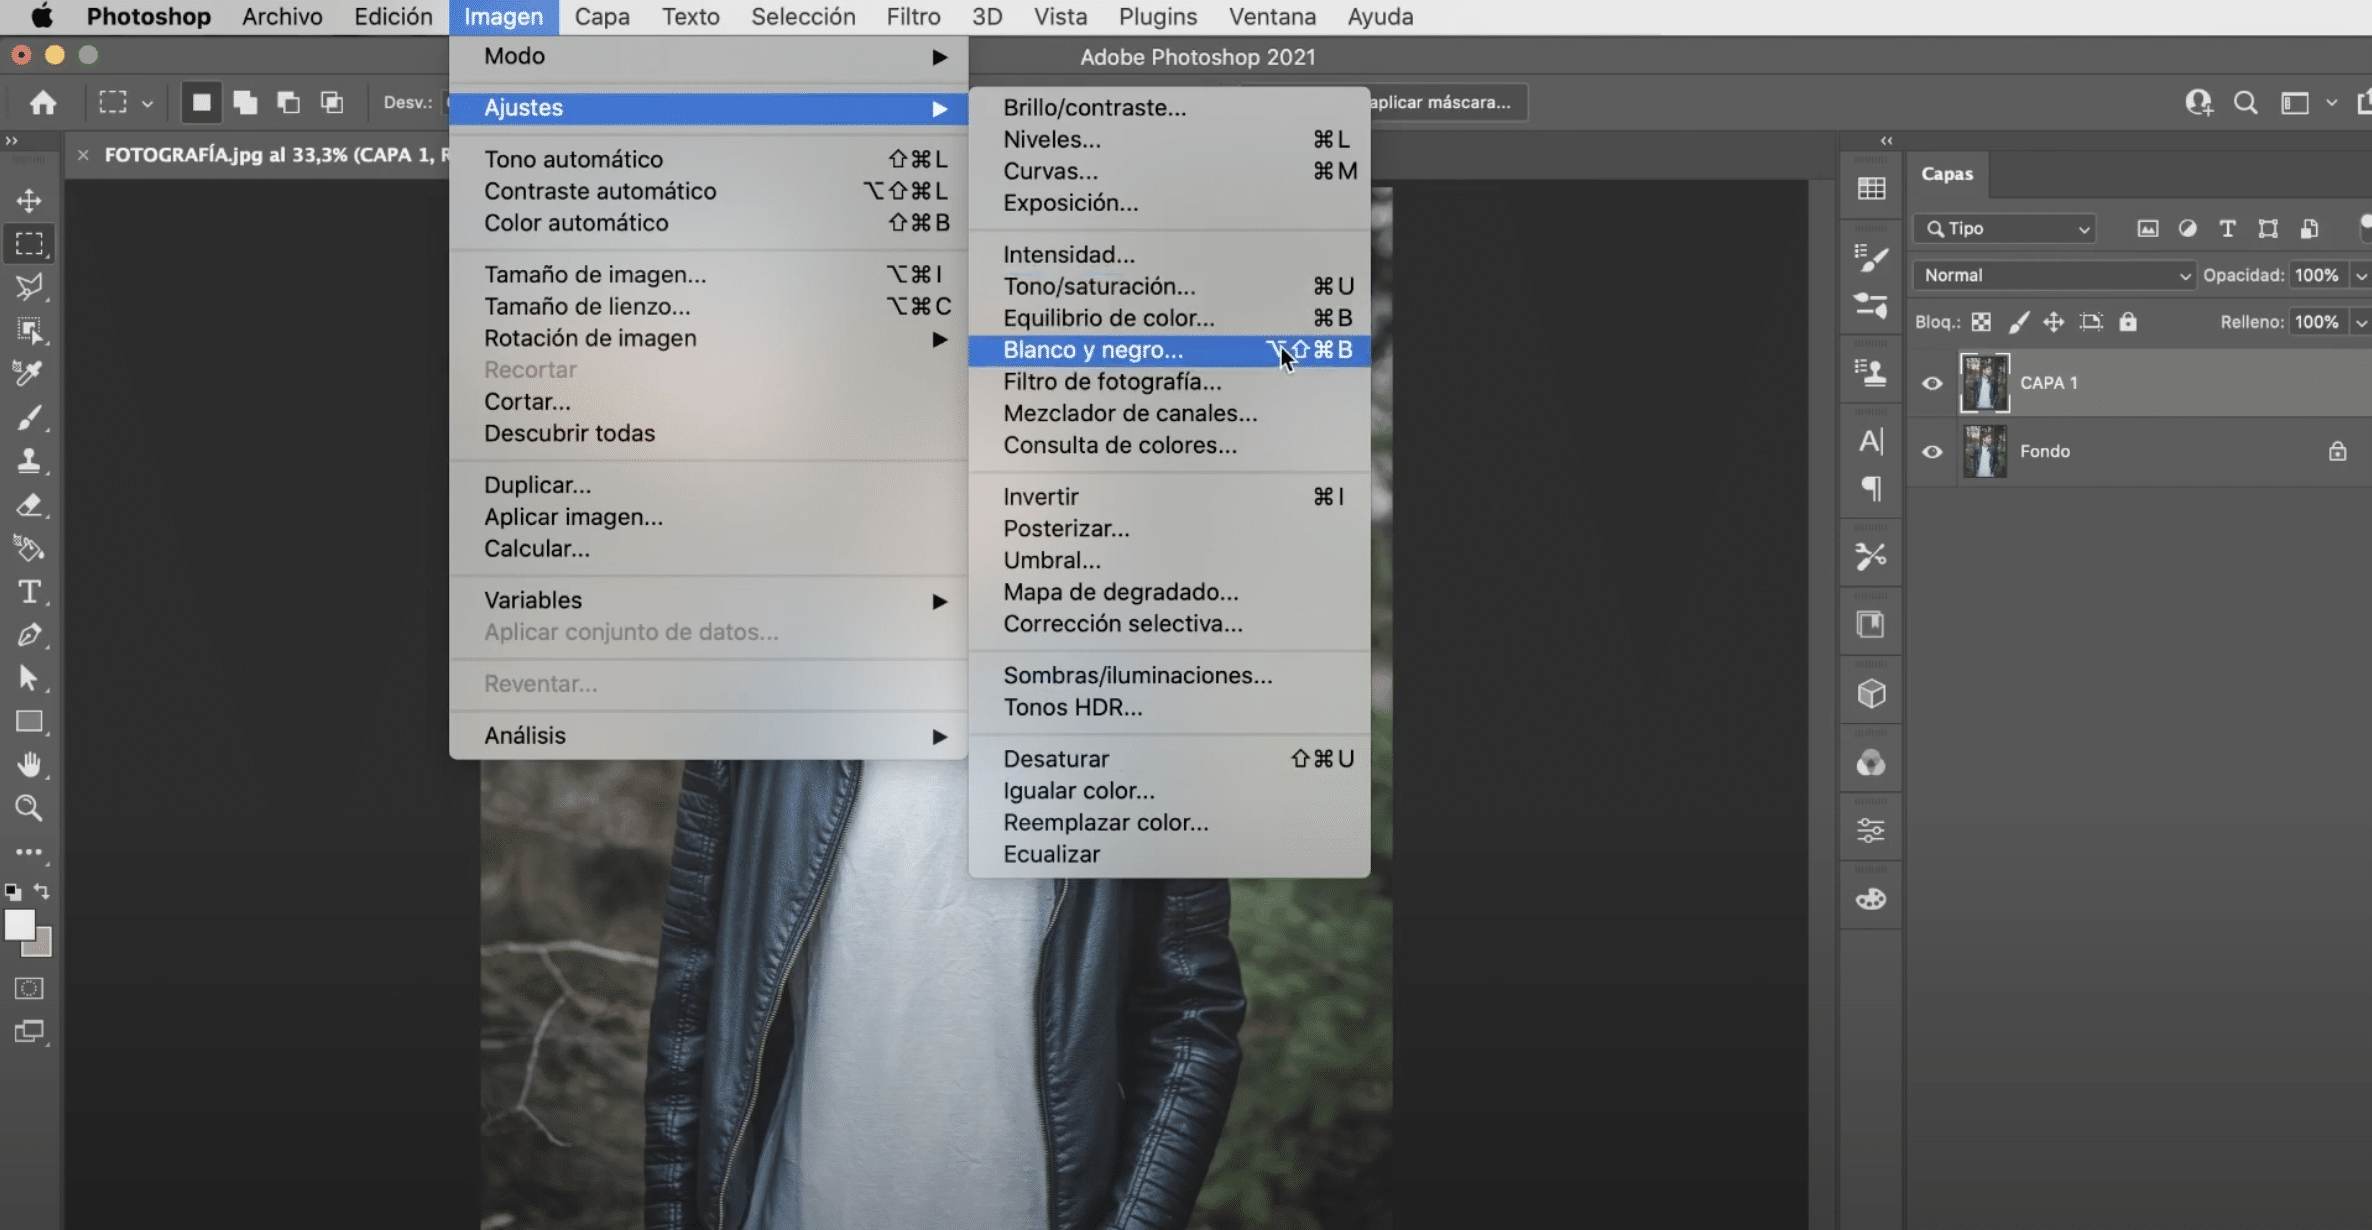
- One option is to go to the "image" tab, in the top menu, go to "settings" and click on "desaturate".
- The other is go to "image"> "settings" and click on "black and white".
In this case I recommend that you do it the second way, because it is the one that allows you to customize black and white. To apply the glitch effect, it is better if the photo has a dark background, so I have lowered the red, yellow and cyan levels a bit.
Duplicate layer 1 and disable R channel in advanced blending options

We will duplicate this new layer (layer 1) (creating layer 2). do right click on «layer 2» and in the menu that will appear click on fusion options. A window will open, locate the part where it says "Advanced fusion". There, turn off channel R. Now, with the move tool, move "layer 2" a little to the left.
Add the hatch and create a layer group in Photoshop
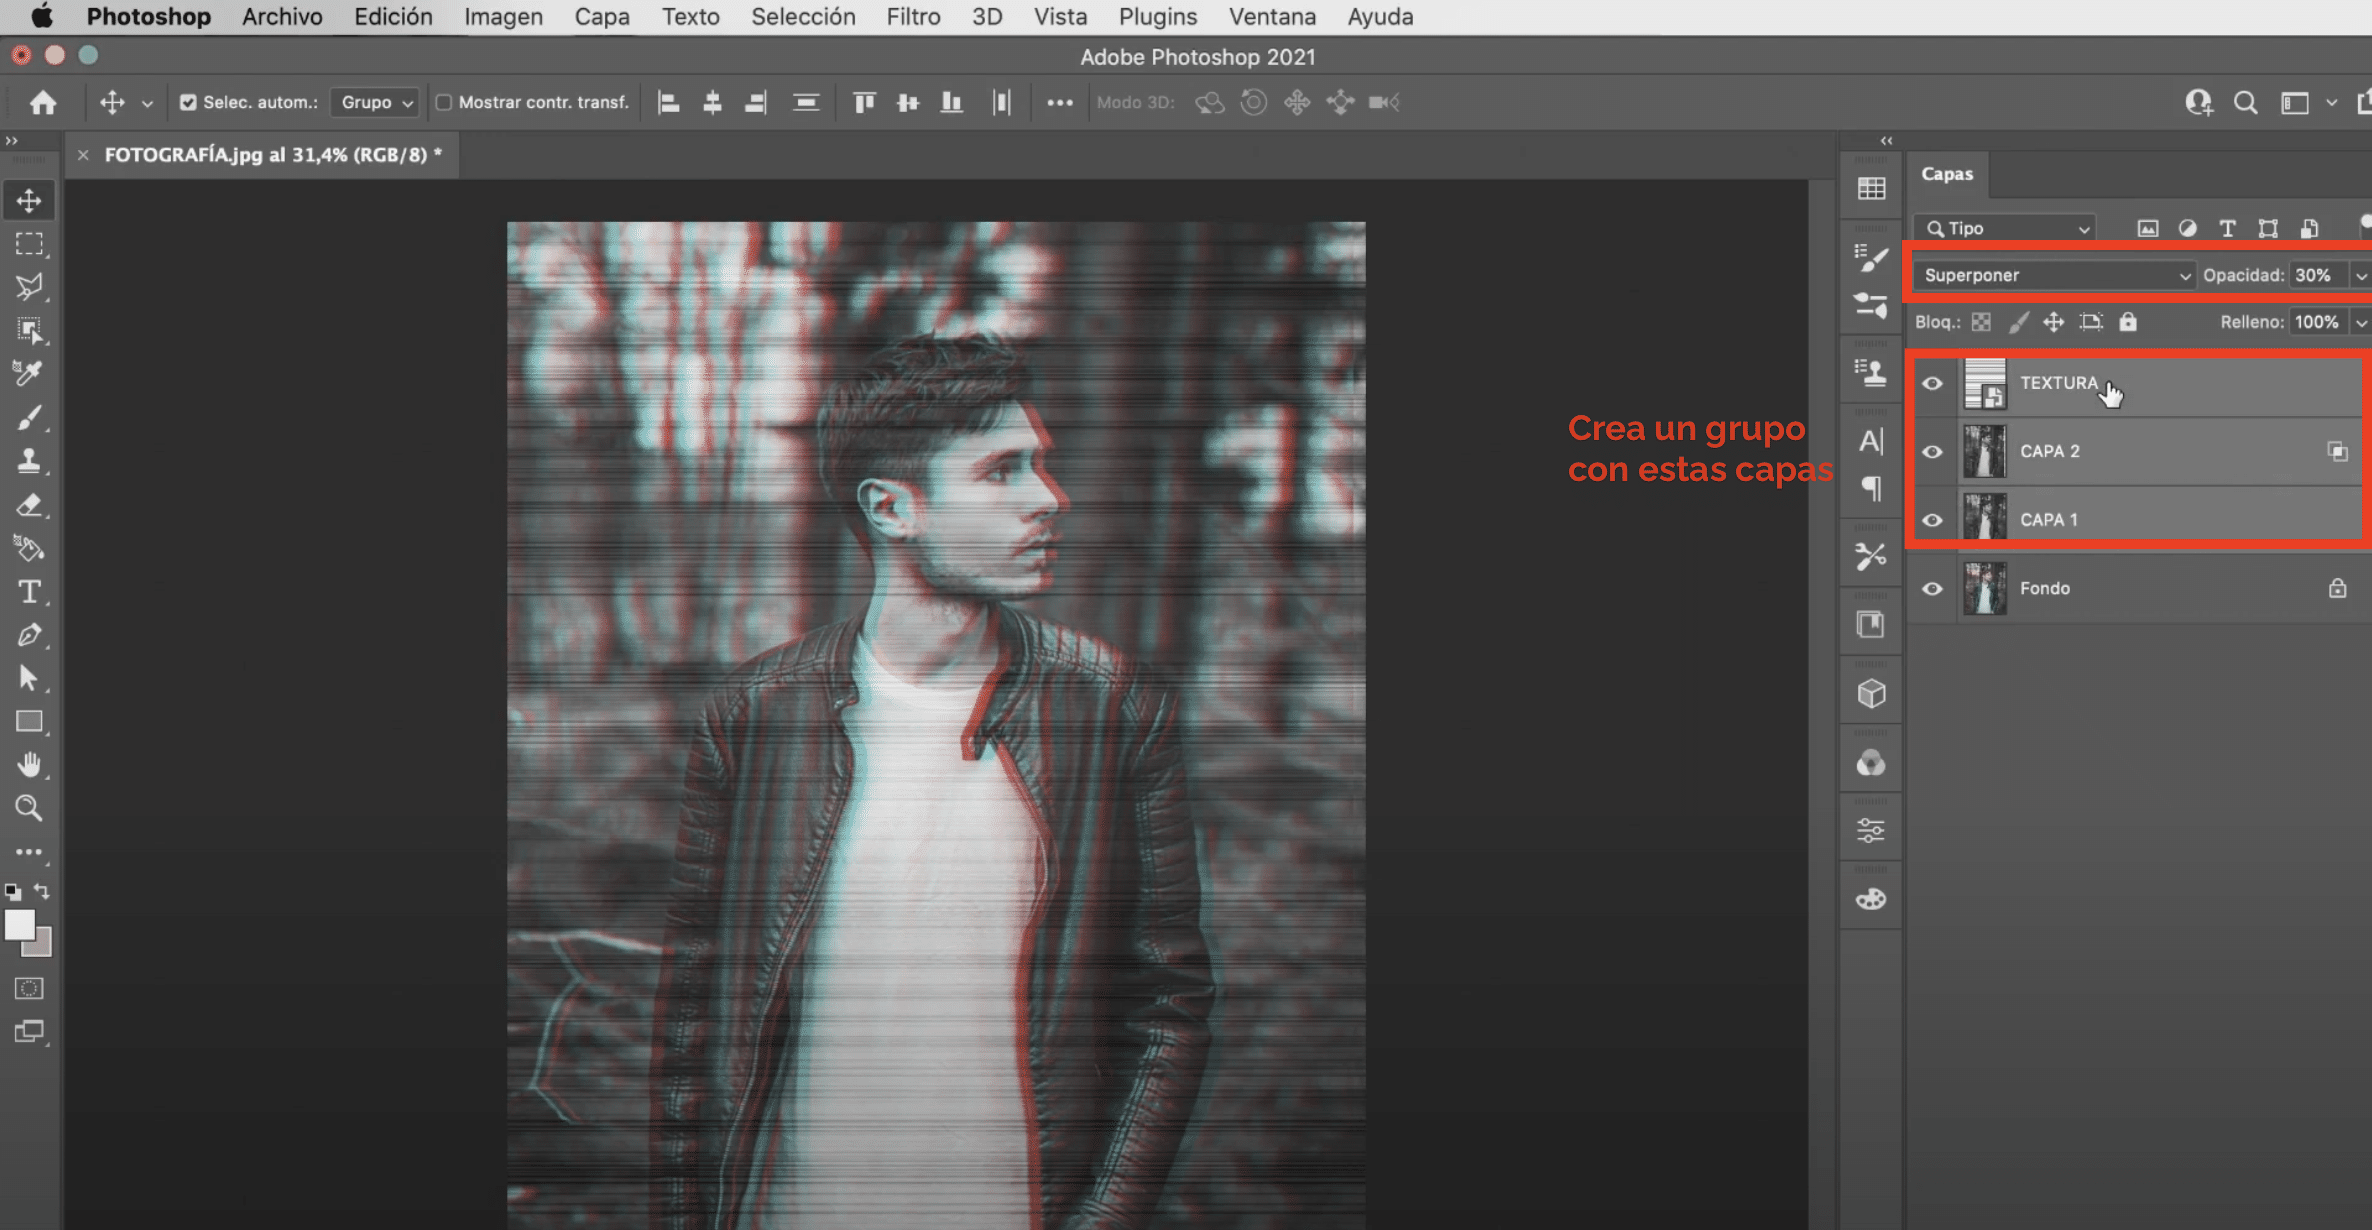
It's time include hatch. Drag it to the screen and resize the image to fit to photography. When you adjust it, change the blending mode to "overlay". The next step will be lower opacity of this layer. I'm going to leave it at 30%, but it is not an exact value, adjust it to your liking.
If you are not convinced where the lines fall, you can always move the "raster" layer with the move tool or with command + T (Mac) or control + T (Windows). With all layers that we have so far, except the background, we will create a group. To create a group of layers in Adobe Photoshop, hold down the shift key and click on all the layers you want to group to select them. Later, type command + G (Mac) or control + G (Windows).
Create the broken image effect
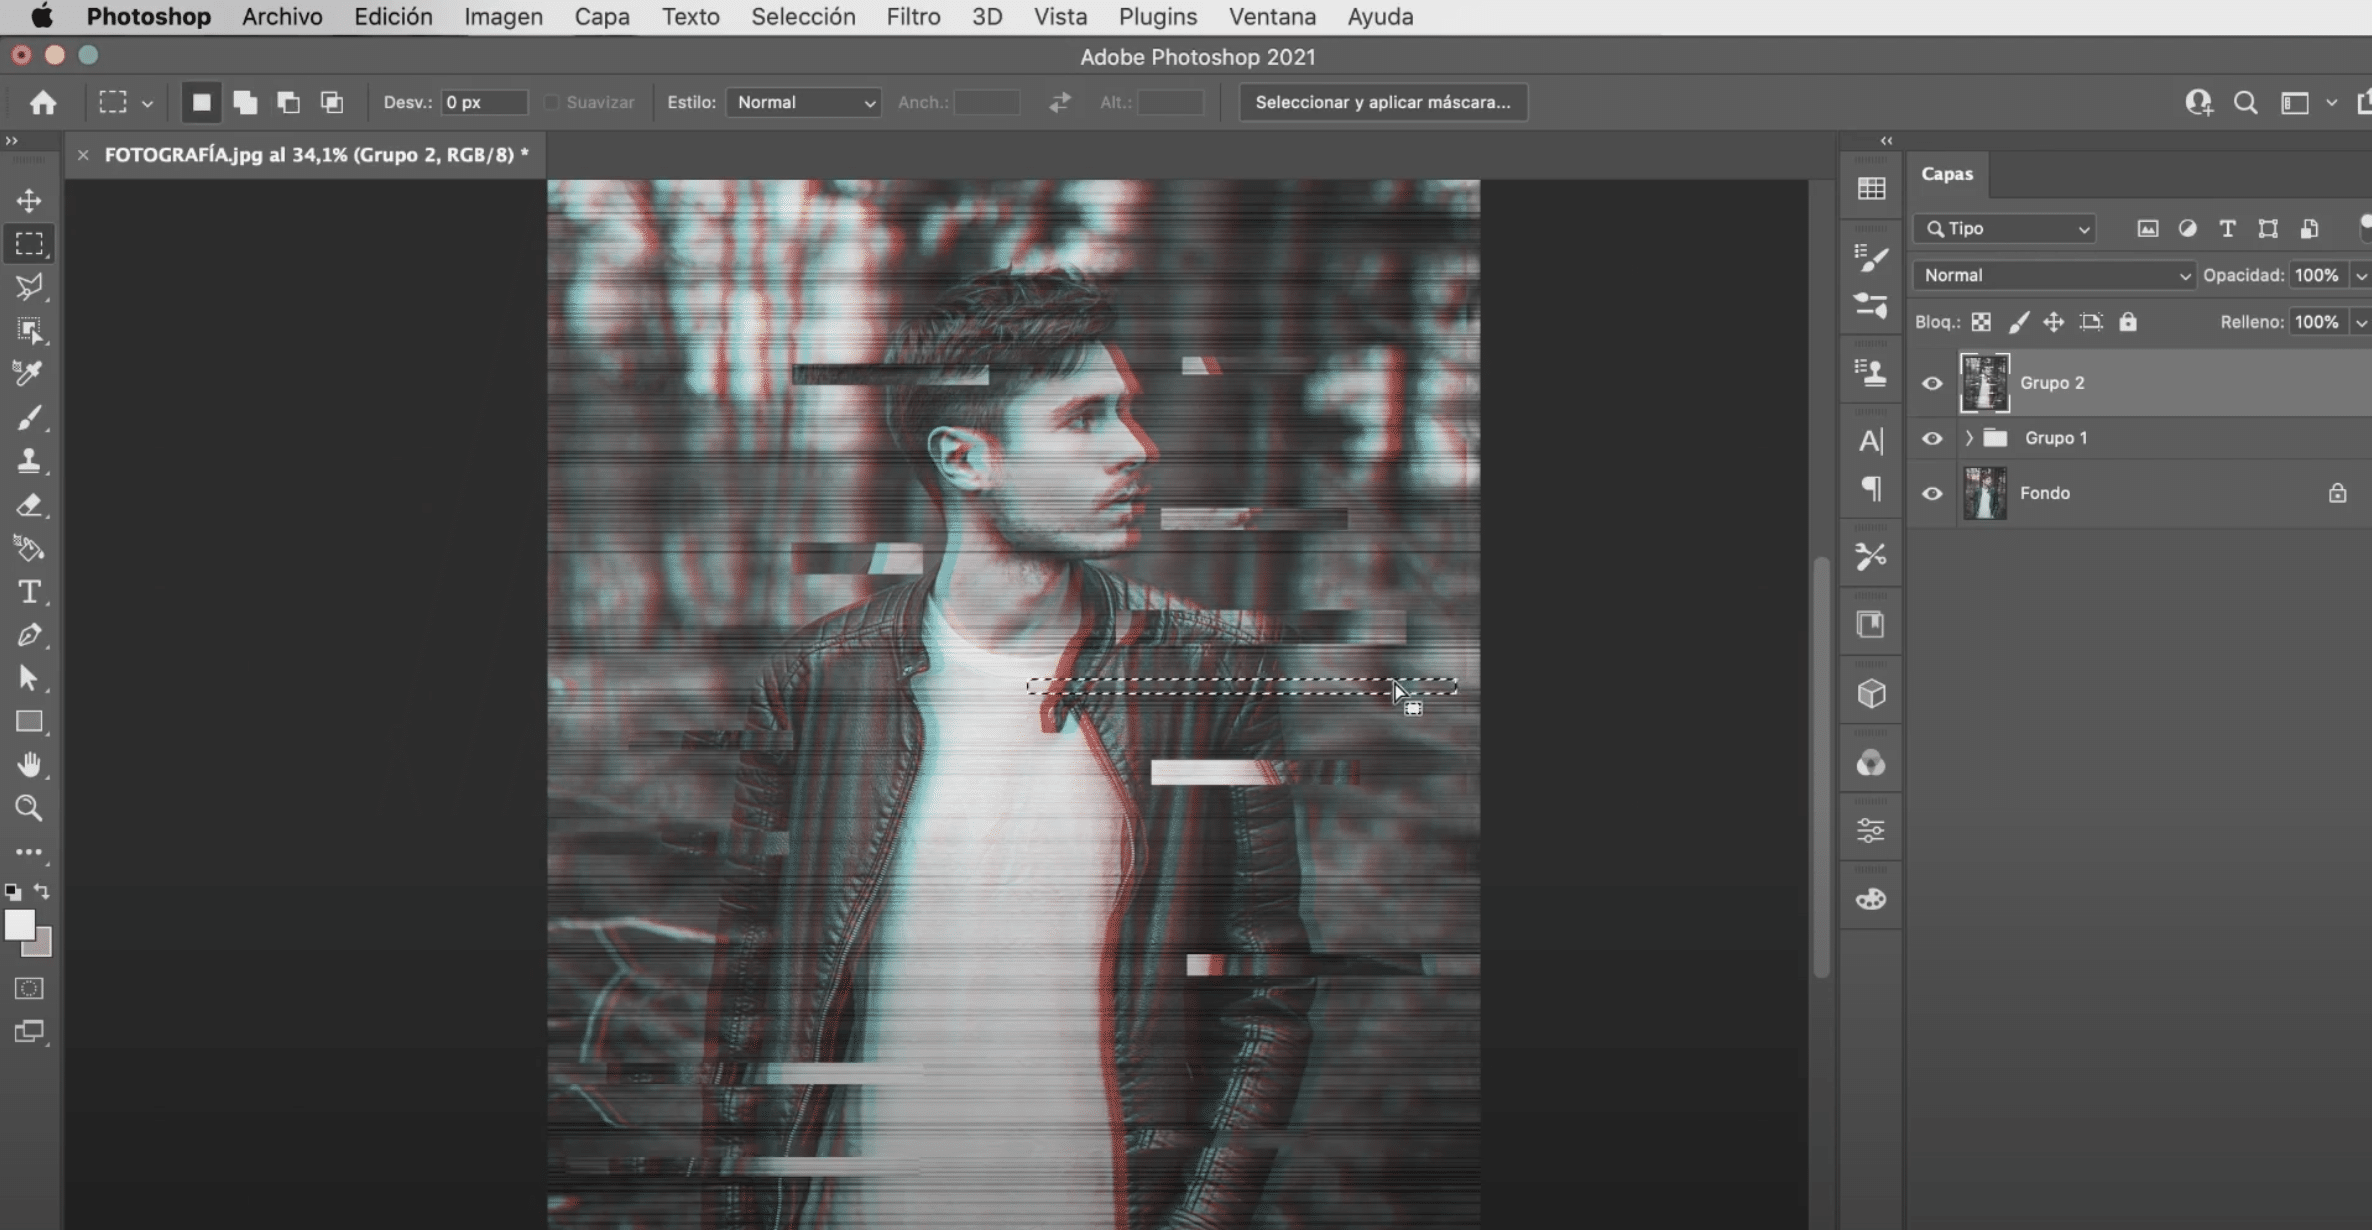
Let duplicate group. Will right click on the copy and in the menu we will select «combine group» to create a single layer. We only have one step left to take. With the tool rectangular frame we are going to do rectangles of different length and size on the layer we have created, and with the move tool (you can simply press command or control while dragging), we will move them to create the "broken image" effect. You can create as many as you want What do you think of the final result?