
adobe fuse an impressive program that allows in a fun way to create characters to add them to your designs in Photoshop.
Fuse is an application available to Adobe Creative Cloud members. It is an application that, although it was launched at the end of 2015, is still in beta. The software provides the means to easily create and import 3D characters in Photoshop. Characters can interact with other 3D elements in Photoshop and have pre-recorded poses or animations applied to them.
The folks at Mixamo are responsible for creating Fuse, and their other product line houses several other apps designed for more intensive work on 3D character development.
An agreement between Mixamo and Adobe is what caused the inclusion of Fuse in the list of applications from the Creative Cloud. Characters created with Fuse can be entered into Photoshop CC or uploaded to Mixamo's 3D Character Library.
Fuse is not a robust 3D content generator like Maya or 3D Studio Max, and therefore does not have the learning curve that these programs require. Although Fuse is somewhat limited in what can be created, but it is a fun and highly intuitive application, surprisingly powerful and very easy to use.
How does Adobe Fuse work?
The workflow of Fuse is very simple And, even with a wide range of options, the process is never confusing. The interface is well built and distributed so it is always obvious what you are doing in the current step and where you want to go in the next step.
Here is a small tutorial guide so you can see how easy it is to use Adobe Fuse.
Assembling the character
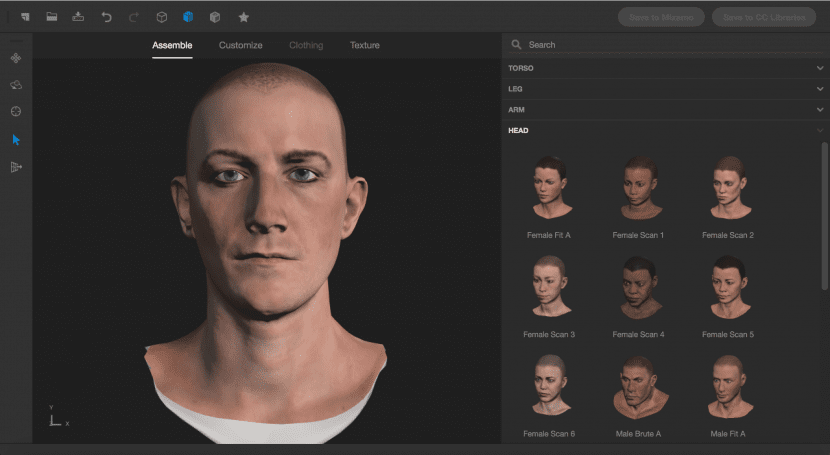
- Step 1: The first step when launching Adobe Fuse is select character head. There are a large number of types of skulls available to choose from. If you don't see one that perfectly matches your character, just choose the one that best suits the character you want to create (most of the head and facial features are adjustable later).
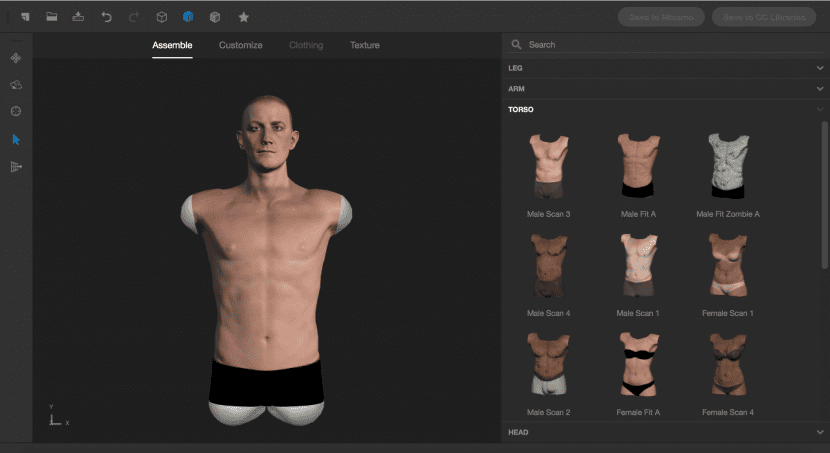
- Step 2: After you have chosen one of the heads, the program will automatically offer you a library of torsos to mount the head. Again, find a good starting point as the details are fully adjustable later on.
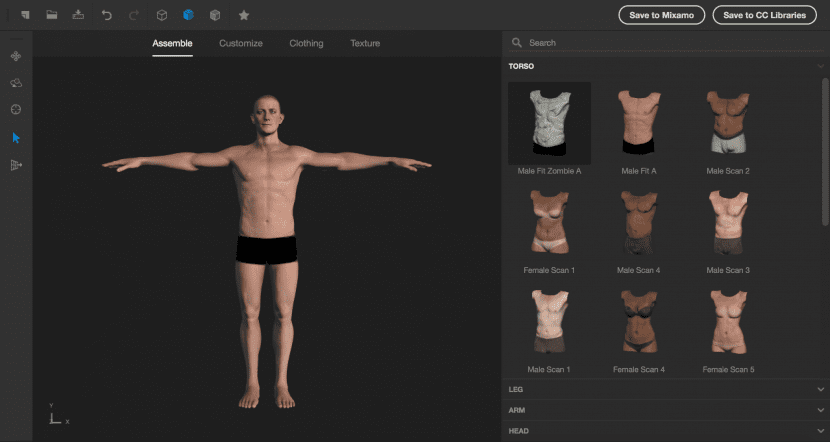
- Step 3: After the torso has been chosen, the arms and legs are added in the same way. Select one of the pairs of arms and legs from the library and the program automatically adds the limbs to the model and perfectly blends the skin and muscles. The model is fully 3D, and the panel on the left contains tools to move and rotate the model so that you can examine your character from any angle.
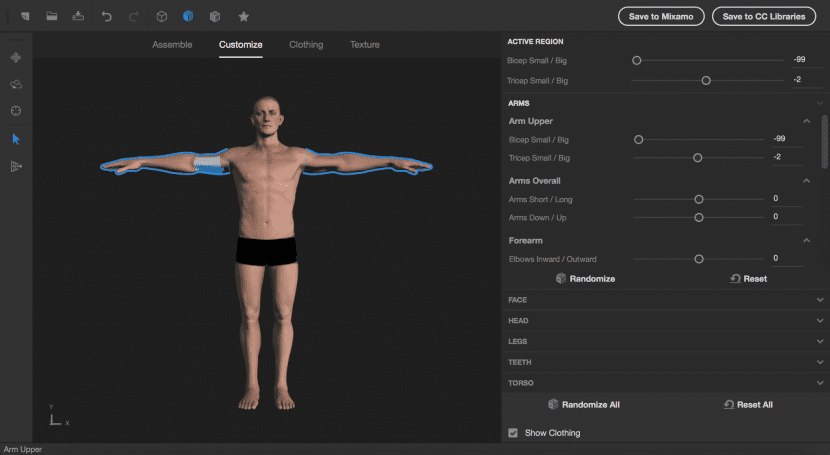
- Step 4: After the model is completely assembled, go to the customize tab. The properties panel reveals several folders, one for each area of the body and various settings for that specific part of the body. While folders are laid out in a very logical way, a faster way to select the exact part of the body to edit is to use the selection tool (the arrow in the tool panel on the left). Next, click on an area of the body and drag while holding the mouse button to adjust the size and / or relative location of that part. The settings are automatically updated as a result. (You also have the option to do it from the selectors in the menu on the right).
La ropa
Once the character's body is built and adjusted to our needs, andThe next important element to build our character is clothing. The options that adobe fuse offers you for the wardrobe are even more varied than the options it offers you for the parts of the body.
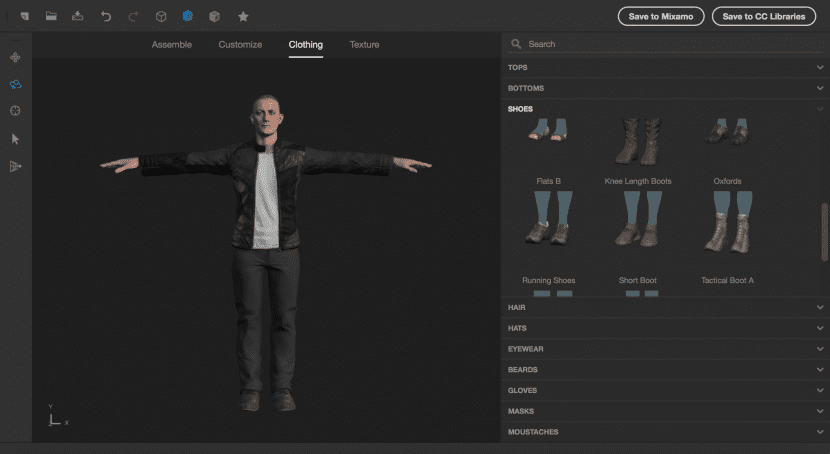
- Step 1: Most options for clothing tend to be built on a male or female frame. But there are also a handful of unisex clothing available. In any case, whichever piece of clothing you choose, it is automatically sized to fit your character's body.

- Step 2: If you've found putting on clothes in real life a challenge, wait until you try to pair a set of pants and shoes with your character's top clothes. Fortunately, trying on a pair of jeans at Adobe Fuse is just the click of a button. Likewise, all footwear comes in pairs, and you don't need to search for the missing shoe.
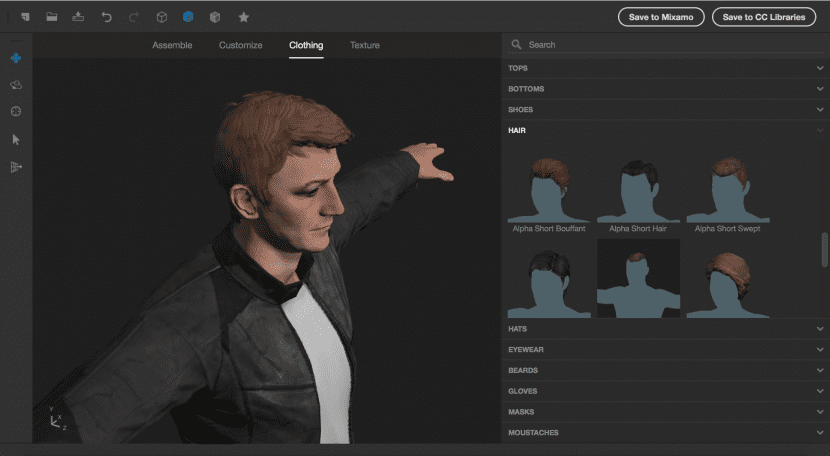
- Step 3: There is a good variety of hairstyles to choose from. (don't get distracted by hair color, because that can be changed later). Worry more about style and length as these are more complicated settings.
- Step 4: The headgear section is particularly impressive because there is collision detection built into the hairstyle. This ensures that there are no locks of hair pushing through the surface of the hat (which will make the combination of the hairstyle together with the hat that much more real). There is no obvious interface option to remove the hat once it has been added. To do this, simply select the hat in the preview window and press the Delete key.

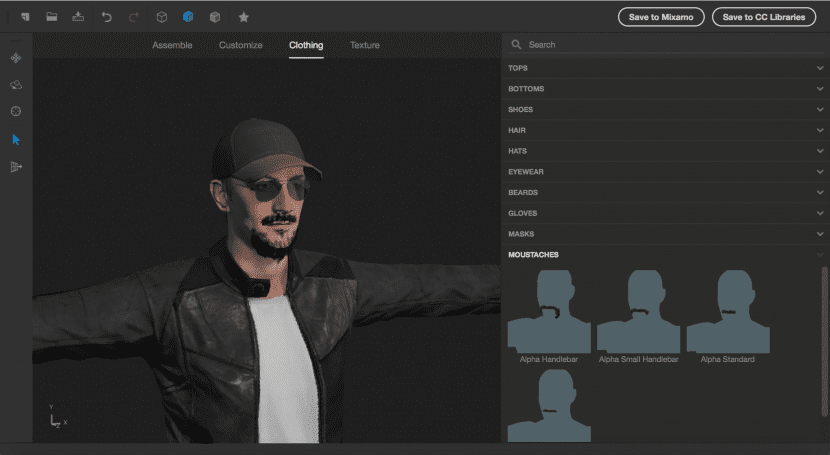
- Step 5: The accessories available range to goggles, beards, gloves, masks, and mustaches among others. Obviously it is not necessary to include all these in each character, but it is good to know that Adobe Fuse offers us these options.
How much customization is there?
At this point, Adobe Fuse seems like little more than a very sophisticated costume show. Some video games even offer this level of control to players to create characters for their game.
Is this all there is? The truth is, no, Fuse has much more to offer. Next, we will take a look at some of the more advanced customization options that the program offers us.
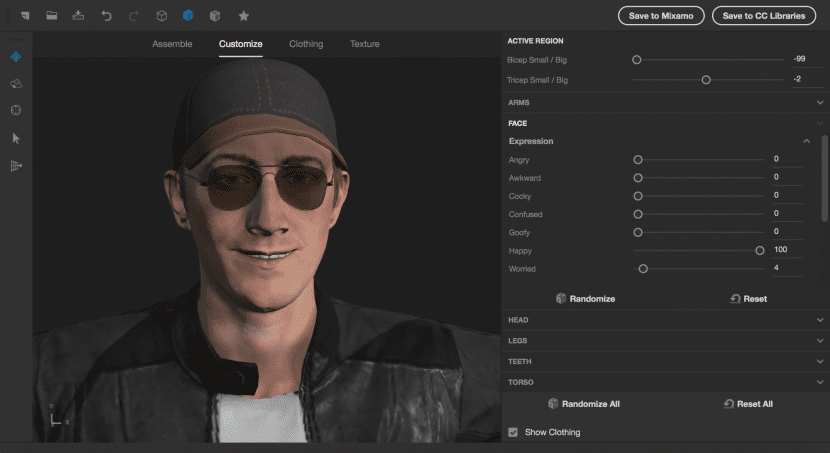
- Step 1: One of the most common criticisms of CG characters is their lack of facial expressions. The position of a character's eyes can be a bit creepy depending on how they're positioned. But once we add a bit of personality to the facial expression, it helps us make our character a little more personable.
When we return to the Customize tab, the «face» folder contains various sliders to adjust the character's mood (expression section). These adjustments alter certain facial regions to form expressions. They can even be mixed.
- Step 2: Expression sliders are great, but there may be times when you want more precise control over certain features, such as the position of your mouth. In this case, there is a section called "extra" in the "Face" folder that contains more settings for finer or more subtle control.
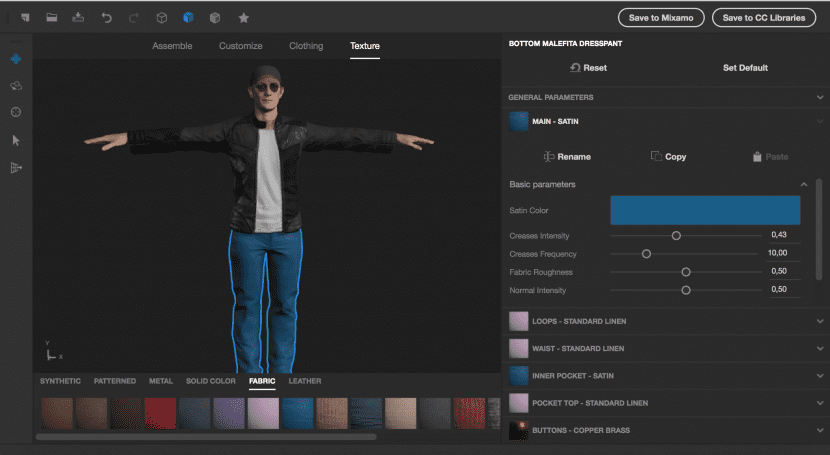
- Step 3: Go to the "Texture" tab and then select one of the clothing items to see the number of options to customize the textures. Not only is there a library of different materials and textures available at the bottom of the screen, but also each surface has its own set of properties that can be adjustedFor example, the color of the jersey can be set to white, but you also have control over the number and frequency of pleats, and even the predominant direction of the pleats.
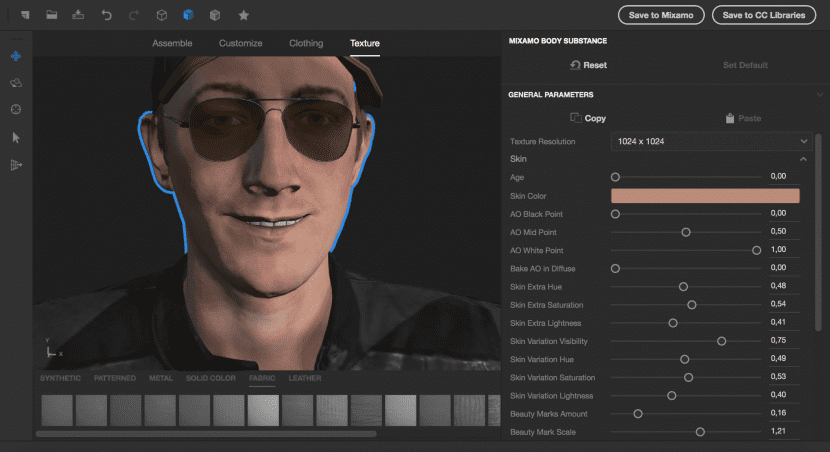
- Step 4: Select an area of your character where the skin is displayed to see the large number of attributes available to personalize the skin and face. Skin color is much more than just a color picker - there are controls for "Age, Hue Variation, Beauty Marks, and more." Dig deeper and you'll find specific controls for makeup, facial hair, and even lash length - but don't stop there. If you really want to go deeper, browse through the eye controls. If you want, the pupil can be defined as the pupil of a feline, or you can even adjust the size and color of the veins that are seen in the whites of the eyes.
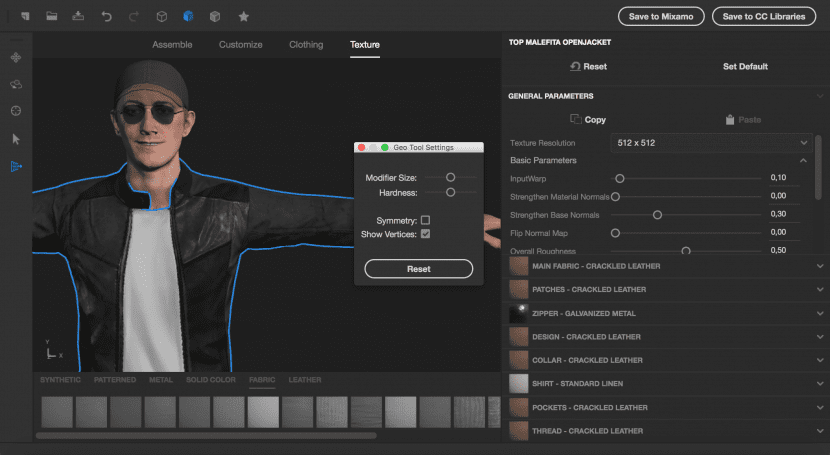
- Step 5: The customization options we've seen so far will probably cover 99% of the needs of the characters you want to create. But there is one more customization feature to take a look at. This feature should be used sparingly. Adobe Fuse includes a sculpting ability for the character's base shape. The tool at the bottom of the toolbar on the left is the one for "Modify geometry". This tool allows you to change the actual polygons of the model by pushing and pulling them with a brush along the surface. This option can be useful but it is difficult to master and can easily ruin a good model.
And now that?
At this point, you've probably spent a lot of time testing and studying the specific attributes of your character's face. Now you will have your character created.
And now that? How do we export our character to Photoshop? Well, the standard means of saving the file in Fuse and then importing or opening it in Photoshop won't work. You have to do something else instead.
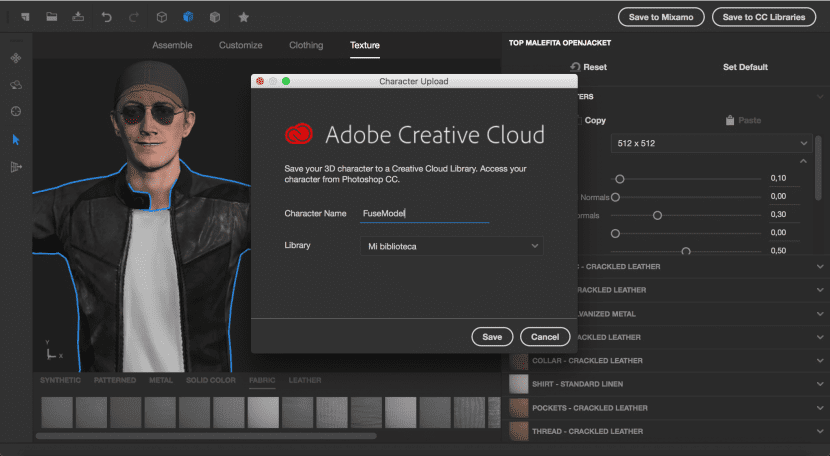
- Step 1: Press the button Save in «CC Libraries» at the top right of the interface. Adobe Fuse will ask you for a file name and to select a folder within your CC library.
- Step 2: Launch Photoshop and create a new document. Then, open the Libraries panel (window> Libraries) and locate the character that you created in Adobe Fuse. Right click on the character and choose "Use in document". Photoshop will add the character to the scene as a 3D element.
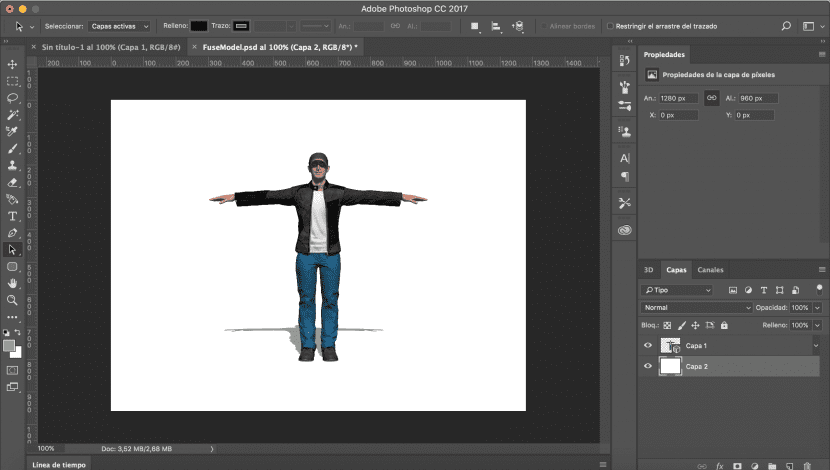
- Step 3: Change the workspace to 3D and use the 3D panel to manipulate the 3D properties of the scene. The character is a 3D element so you can adjust the camera view, lighting, shadows and even the properties of materials such as brightness, reflectance, etc ...
- Stage 4: In the 3D panel, select skeleton (there is a small bone icon next to it) and the properties panel updates with a long list (123 pages available) of available positions and animations that can be applied to the skeleton. Just click on one and Photoshop will apply it to your character.
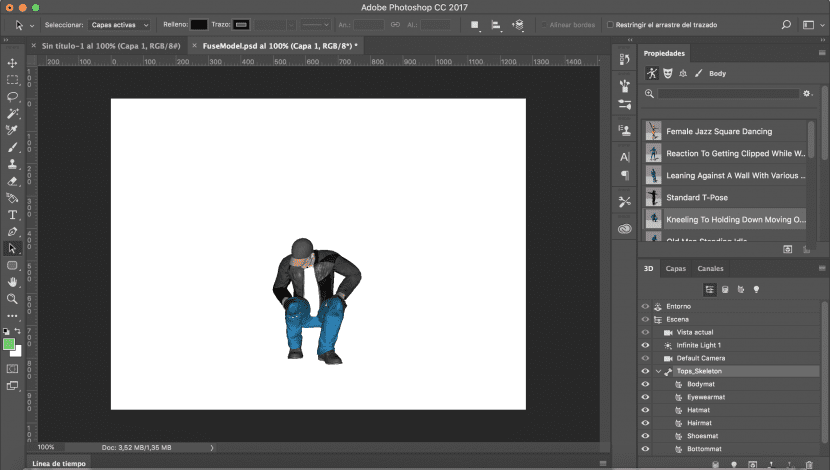
- Step 5: To see the animation, Open the timeline panel via Window> Timeline. Then press the play button to watch your character come to life.
What is the use of having a 3D character in Photoshop?
If your creativity is already spinning with ideas on how to incorporate custom characters into your new designs, the possibilities offered by Adobe Fuse in conjunction with Photoshop are really only limited by your imagination.
Simply having a 3D character available in Photoshop is a huge resource, since you can place it in the scene with the position that best suits your needs.
But even if you are not interested in using a character in a composition, another option is to use them as a visual reference to create digital characters in interesting positions.
What is missing from Adobe Fuse?
There are some features that I think this app is missing:
- Custom positions: This is the current biggest drawback. There is no way to create a custom position for your character. Options are limited to choosing from pre-set poses or searching through countless character animations in hopes of finding a move that hits just the position you need.
- Custom textures: While it is true that we have a great variation of textures that are excellent. Nevertheless, there is no way to apply a custom texture file to a character. The applications of this would be things like for example adding a graphic to a shirt, or a tattoo to the character's skin. With knowledge of the Photoshop 3d environment, these can be applied with the 3D tools, but I think these are options that should be available during the character creation stage, so that they would make our lives much easier.
- Quality renderings: It is very difficult to draw a character who does not have the appearance of a video game. Characters created with Adobe Fuse are far from looking real.
- Compatibility with Mixamo characters: The other option to save a character is to save in Mixamo. This transfers the character to the online database of 3D characters available on the Mixamo site. The downside of this workflow is that the characters on the Mixamo site cannot be downloaded for customization in Adobe Fuse. The workflow is only one-way.
I hope this guide has helped you understand how Adobe Fuse works and its integration with Photoshop.
Diego Philip
Hello I have a question, when I open the characters in PSD, from the library, the shadows appear pixelated and most of the effects come from fuse, why does this happen?
regards