
Continuing with tutorials for you to learn to draw, in this case we are going to go one step further. How about drawing a hand? Or maybe both?
Next we give you the steps you must take to make drawings of hands. Do you want to know how to make them? We tell you.
How to draw an easy hand and for children
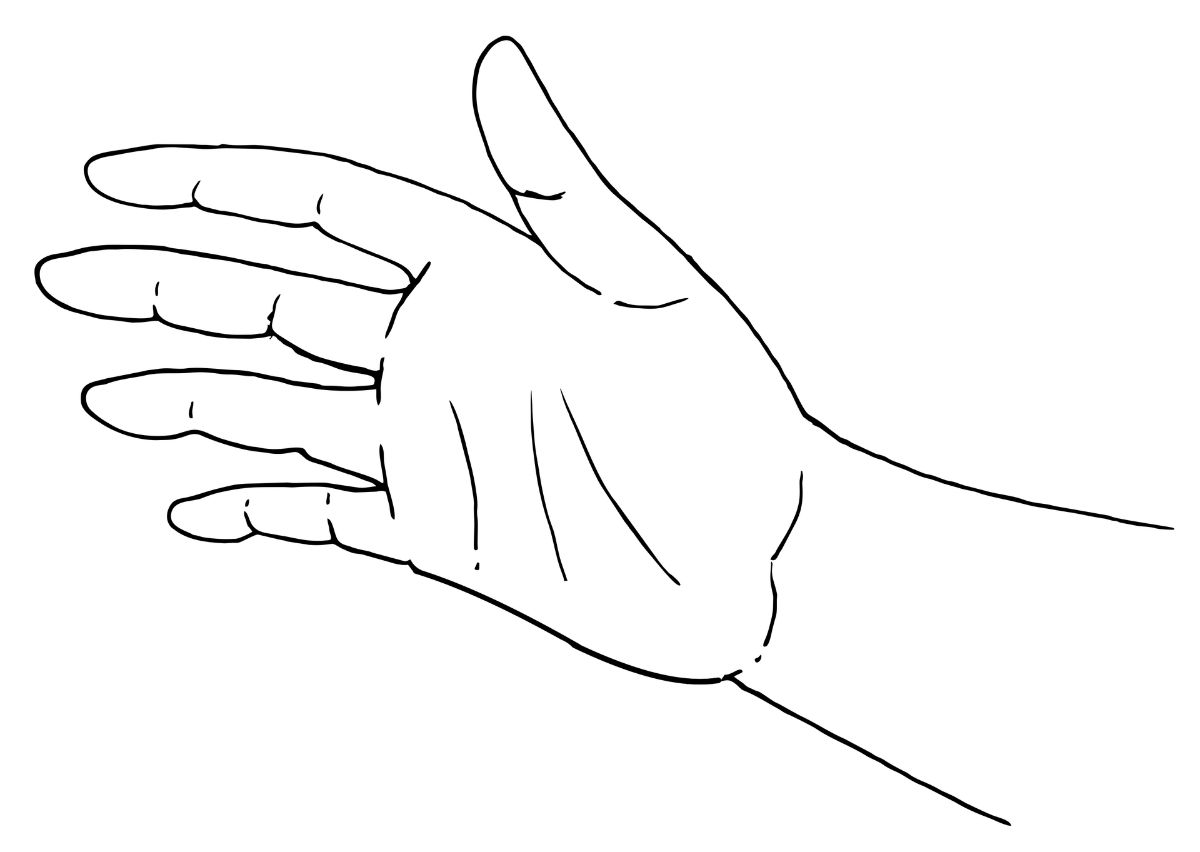
We are going to start drawing a hand that is easy and that even children can do it. It is important that you have a pencil and an eraser handy. In this case, the steps are as follows:
- Start by drawing a circle. This is going to be the palm of your hand. At first, it will help you to create the shape but later it will be given more hand style.
- In the upper part of the circle you can draw a curved line, since we are going to make the different fingers through it. Of course, go making them to different sizes, since each finger usually has a different size (the middle finger is the longest and then the index, ring and little finger would go).
- Finally, at the end of the circle you will have to draw another line that makes the thumb, which is the smallest of all.
In conclusion, add some extra details like the lines that separate the fingers or the nails.
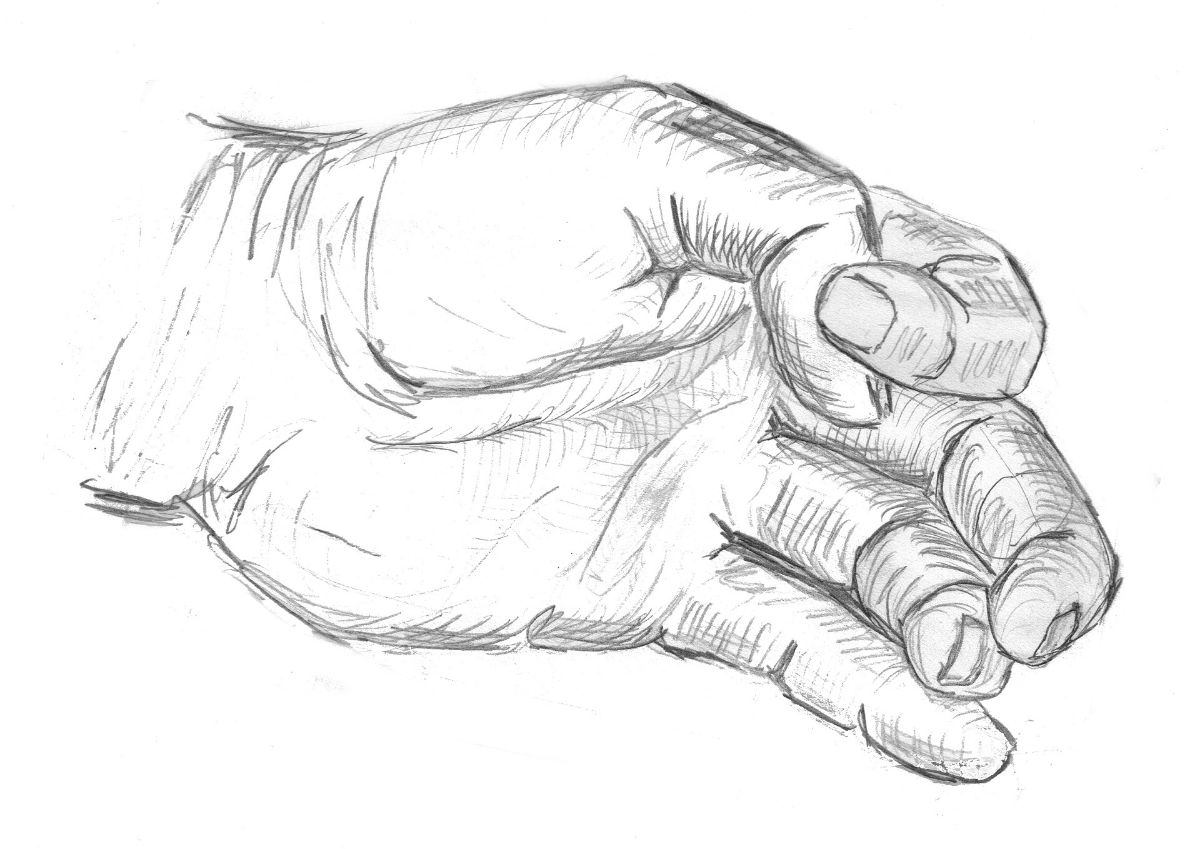
How to draw a hand clenched into a fist
This time we are going to take it a step further and instead of doing an open hand, the following will be closed in a fist.
To do this, you must start by drawing a vertical oval that will be the base of the palm of the hand. You actually start the same as before, only instead of a circle, you need to make an oval because the hand is going to be closed. Add a somewhat irregular shape to make it look like the knuckles. And from them you will have to remove the fingers, which must be cylindrical if you want them to represent the longest, or rounded in the case of the smallest.
Of course, do not forget to separate the fingers. Since they are closed in a fist, what you can do is create some shadows with the pencil that make them come together but give them volume so that each one of them can be seen to have body.
In the case of the nails, you would only have to draw the one on the thumb, since when it is closed in a fist it is normal for the other nails to be covered. Finally, you will have to give depth and volume to the hand. To do this, identify where the light falls and add shadow to the areas that are on the bottom of the fingers and palm.
How to draw a hand holding something
Another of the common postures in drawing to learn is the drawing of a hand grabbing an object. And the truth is that it is not as difficult as it may seem a priori. But you do have to have the steps well defined so as not to get confused.
To do this, you must start as always, drawing the palm of the hand. If you already have experience you can skip making an oval and mark the lines with the pencil. If you have a model, it will be easier for you because that way you will see how the rest of the fingers are arranged, which is the next thing you will have to draw.
To do this, take a good look at how each of the fingers is placed and imitate it in your drawing. For example, it is normal for the thumb and forefinger to “clip” when holding the object, but also the heart and ring fingers hold that object, even the little finger (unless it is stretched upwards). Do them with a thick line, without paying too much attention to the details and yes to their position. When you are satisfied, you can go drawing and outlining each of the fingers, with their nails, division lines, etc.
Finally, you can put the object that the hand is holding (if it is holding something) to give more realism to the image you have made.
Finally, you will only have to erase any guide lines that you have previously drawn.
Steps to draw hands together
Before we have drawn a single hand. But what if we raised the bar and now you draw two? It's not difficult, you'll see. Do you remember the oval for the palm of the hands? Well, in this case you must make two, one on each side because you will have to create two hands. Prior to this, we recommend that you practice making one hand to the right and another to the left, because it will help you to know how to place each finger and line.
The next thing is to make the fingers appear interlocked. This is the most complicated thing you are going to have to do, because you must keep in mind at all times which fingers are from one hand and which are from another. In general, and depending on the view you have, you will see the palm of one hand and the fingers of another on the bottom. Those are the ones with nails, while the others you will only draw lines delimiting the fingers.
Finally, outline the drawing and add details. Keep in mind that the two hands need to be symmetrical to look good. If you put one larger than the other, the drawing will not look good.
Drawing of a pointing hand
To finish, we are going to give you the steps to draw a pointing hand:
- Begin by drawing the basic shape of the palm of the hand.. You can do this just as we have told you before.
- Add the shape of the pointing finger. You can draw it with a cylindrical shape that comes out of the upper part of the palm. As if it were the index pointing. That's why it has to be long, but don't go too far because if you put a small palm and a very long finger it will seem strange.
- Add the details of the hand, such as nails and the lines that separate the fingers and creates a more normal shape of the finger (the line is not straight if you look at your finger).
- To finish, you can add shadow to make it look better.
As you see, drawing a hand is not complicated to do. You just need practice since this part is more realistic and you can try to do more than just draw it. In fact, it would be good practice to start with realistic drawings.