
High key effect on Photoshop quickly to get a distinctive touch to our photographs getting diminish blemishes on the skin thanks to the large amount of lighting that the images have. In just a few minutes with some simple but widely used tools in Photoshop we will create this interesting photo effect.
Learn a interesting trick widely used in the fashion industry in photographic retouching, achieving a purity aesthetics and perfection in the skin to the purest fashion magazine style. This technique can be used for all kinds of photographic sessions and can be adapted to our needs.
Achieve perfect skin It is something very easy when a large light source hits our skin, eliminating all those faults, spots and wrinkles. The high key is an interesting effect that achieves highlight the lights in photography, thus achieving a very attractive aesthetic on a visual level.
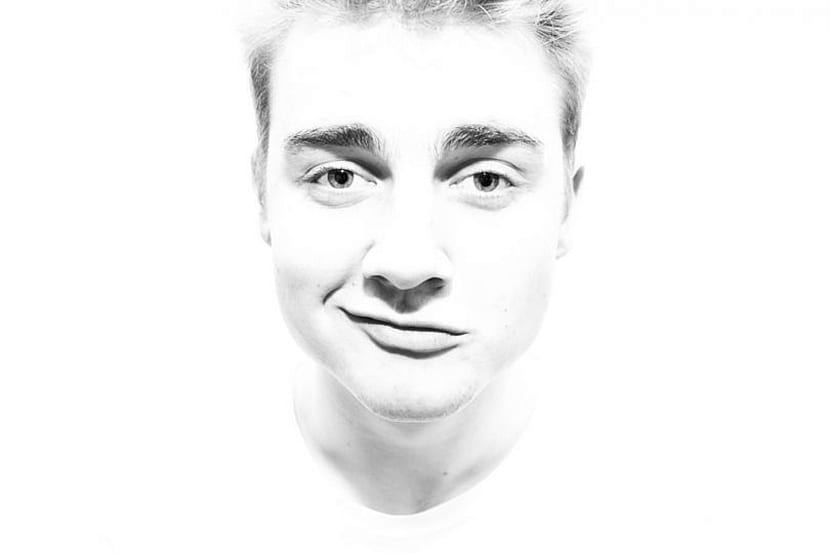
We can see an example of this effect in the image above, if we look closely the lighting stands out a lot. This effect can be done entirely with Photoshop or a Photo studio through the use of spotlights.
Create high key in Photoshop
The first thing we are going to do is look for a photograph To apply the effect, once we have it at hand we will open the Photoshop and we will start working with it.
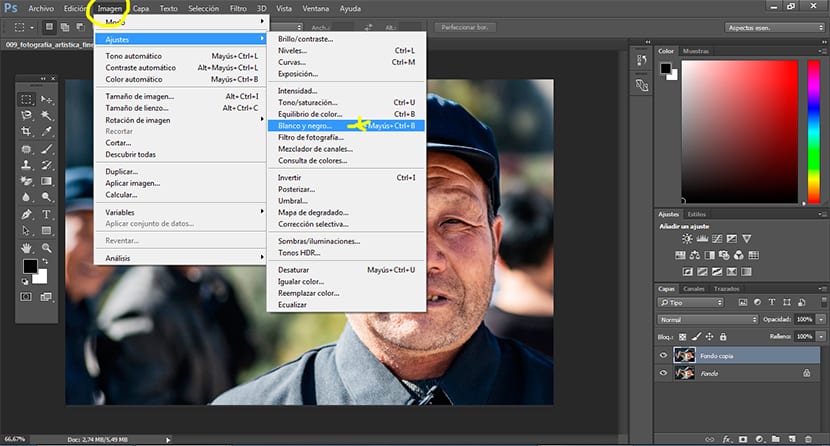
Convert image to black and white
The first step to get our high key is convert our image color into a black and white image, to do this we will create a black and white trim layer pressing the bottom button in the layers section.
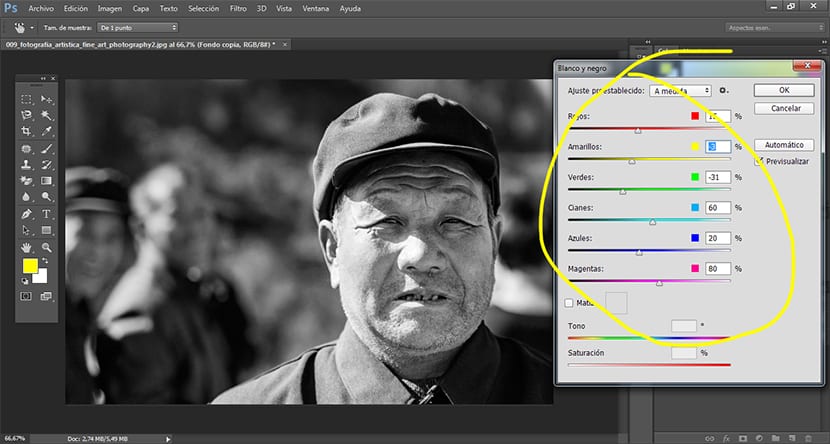
Parameters for the black and white effect we can adjust them according to our needs.
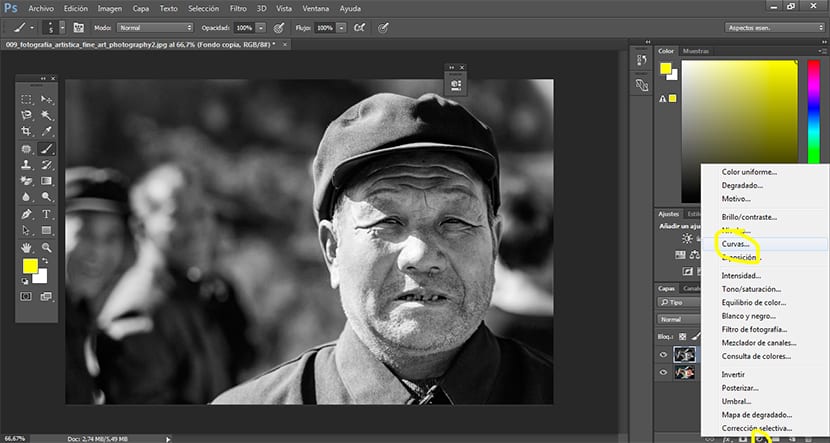
Curves adjustment layer
The next and final step is to create a curves adjustment layer In order to highlight the lighting in the image, to do this we press again the button of the curve adjustment layer housed in the layer area.
Once we have the curves adjustment layer, the next thing we must do iss modify the curve to make the lighting brighter in the image. This part will depend on the effect we are looking for, many times it is applied smooth shape and others, instead, of form more extreme eliminating part of the body silhouette.
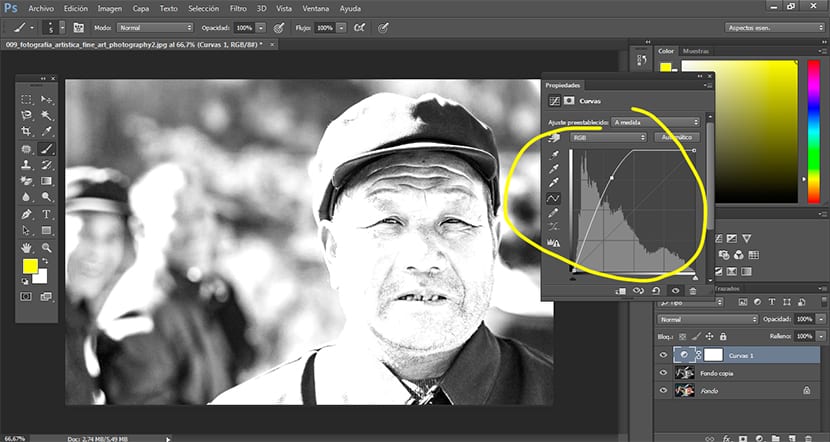
We adjust the curve to our liking and we would have finished this interesting photo effect very attractive on a visual level and with many possible uses for all kinds of photo shoots.
Very nice blog. Many thanks to the author.
I have emphasized several details and hope to use it in my work.
Good luck