
Un point focus with Photoshop to make something stand out in a photo is a technique widely used by photographers and designerss when they want to highlight a part of an image and remove the prominence of another part that is not so important. On many occasions we will find good photographs but that lack depth or important elements were lost in the composition when the photograph was taken.
Blur a background to highlight the main part of the image, create a subtle blur to minimize visual importance to some detail or simply to want to get a photography with more visual play. It is a technique with very good results and it does not require a great knowledge of Photoshop.
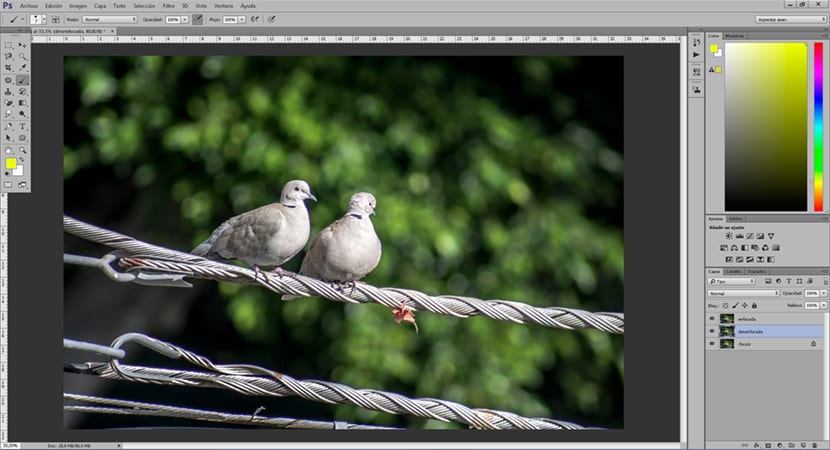
The first thing we have to do to create the point focus effectl is to have a photograph where the effect can be applied, once we have the photograph we will open it in Photoshop and we will start working.
We duplicate the layer main twice until you have three layers in total.
We select the layer in the center, it is in this layer where we are going to apply the blur. It is advisable name the layers To work in a more orderly way, in this case we can name the center field as "out of focus" and the upper layer "in focus". Working in this way is very important so as not to get lost when we are working with many layers.
We create a gaussian blur in the center layer, the amount of blur is something that varies depending on the needs of each person. If we want a very strong contrast between one element and another, such as blurring a background, we apply a greater blur.
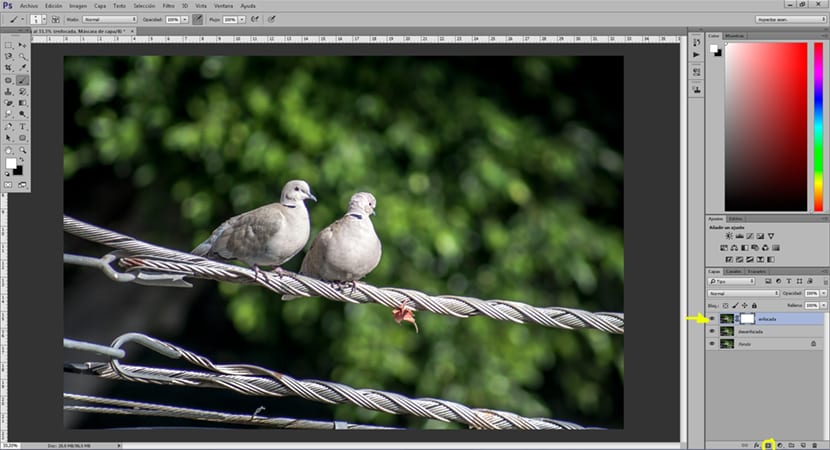
After creating the blur the next thing we have to do is create a mask layer on the top layer (above the blurred layer) what this mask does is allow the top layer to become transparent by passing a brush over it. Is a widely used technique in many jobs with Photoshop.
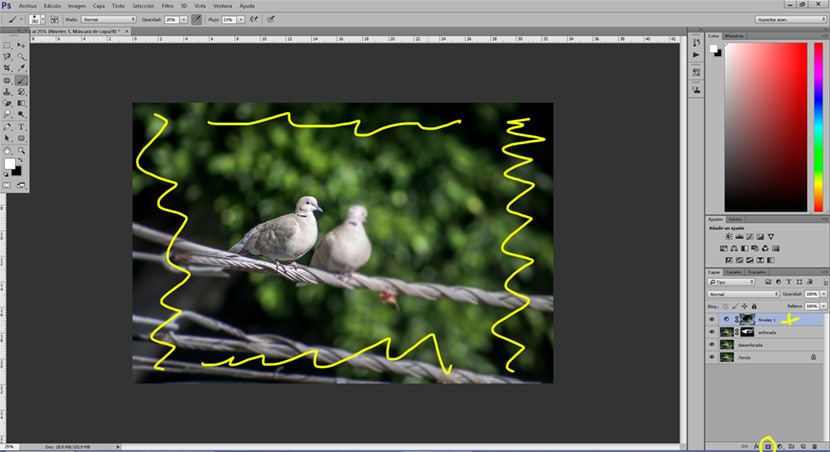
With the help of the brush we go selecting those areas that we want to blur, we play the parameters of the brush: hardness, opacity, flow. This effect is achieved because when painting in an area with the brush we are telling the program that we want that area to become transparent, leaving the lower layer visible, we can appreciate the blur effect.
We can also apply a levels adjustment layer with the objective of highlight an area with light. The human eye is always attracted to areas with greater illumination, for that reason darkening those areas that are not important can help us create a better image reading.
With the help of Photoshop we have learned to create a effect widely used in photography and with unlimited uses for all kinds of graphic projects. Working with layer masks and adjustment layers is basic, necessary and with professional results useful for all graphic artists. Improve your photos and dominate a little more Photoshop thanks to the help of this tutorial.
Too much work, right?
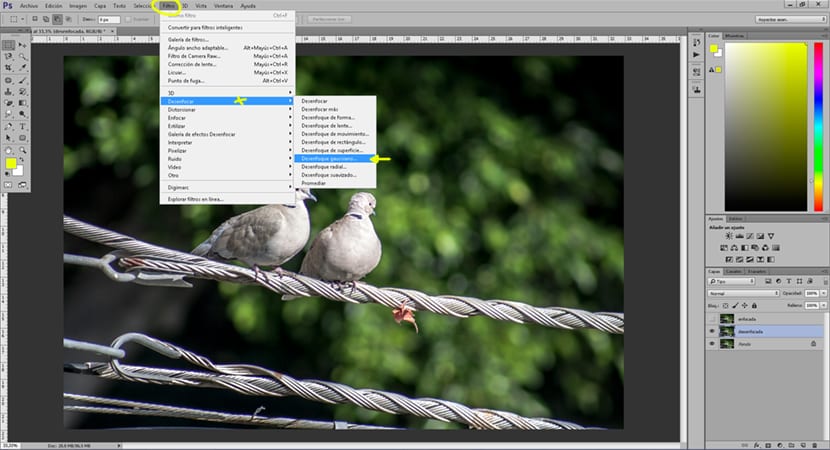
In the filters menu you have a gallery of blur effects that gives that fine finish with a series of very complete adjustments.
This way is used for precise touch-ups in a more precise way for those jobs that require greater detail. It is like when a color correction is worked in a general way or it is done through more precise corrections using selective correction. You have to know what we need for each project.