
One of the most notable consequences of the many updates that the Photoshop Over the years, it is the diversity of variations and forms by which a certain action can be carried out, sometimes to achieve the same result, sometimes to print different styles to our creation.
Surely, the case of the control of lights and shadows be one of those that most clearly illustrates this phenomenon. Today, there are countless ways to control, within an image, the amount and intensity of shadows and highlights. We can do it using curves and levels in Camera Raw or Photoshop, by controlling blacks and whites in multiple ways, manipulating contrast, lightness….
In these types of cases, I always advise all those ways of working that allow us a custom control of each of the steps, or, put another way, the via manual. I do it for several reasons: We are offered the opportunity to print our personal style to our creations, we get used to understanding and interpreting images better and the possible results that we can achieve multiply.
Therefore, today I would like to talk to you about the control of lights and shadows using the tools of "Overexpose" y "Underexpose" that, apart from all the reasons already exposed, help to achieve a very particular drama to the portrait-images, endowing them with a special force and a certain unreal tone.
A photograph is basically made up of lights and shadows. Learning how to properly modify them is the best way to achieve expressiveness to our our design / creation. Therefore, this is an unavoidable step in any image manipulation process, whether done in this way or any of the others mentioned above.
You will learn it very easily through the following tutorial, in five easy steps:
Tutorial to Dodge and Burn Lights and Shadows in photoshop
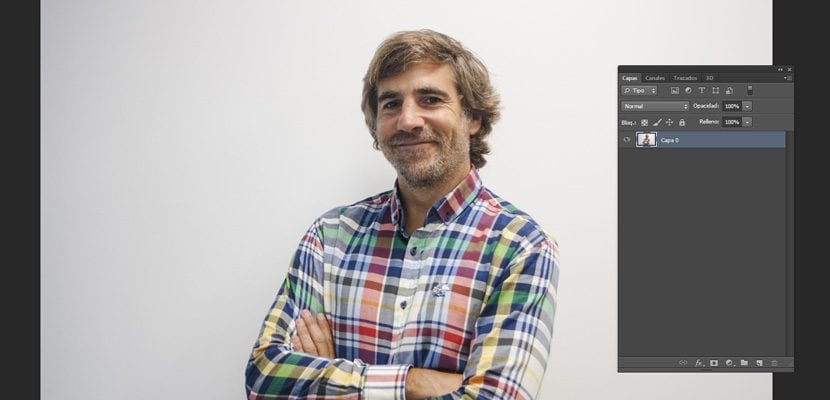
Open your image:
We open our image. Keep in mind, that as far as higher resolution has an image, the better will be the result of any manipulation that you want to carry out. This is because the piece of the photograph you are working with (an eye shadow, a fold of clothing ...) will be defined by a greater number of pixels. In this case, I will use a photo imported from my camera, so I can count on 300 dpi and a considerable size. We will use it to work on the face of the portrait, although remember that this is a very valuable effect also to work on folds of clothing, and shadows of the whole body.
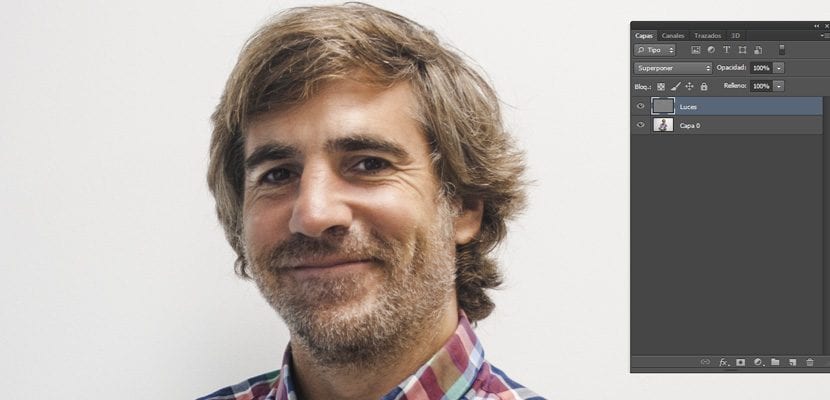
Create a new layer:
We create a new layer, which we will name "Lights", we will apply a layer mode "Overlap", and we will fill it with a 50% gray, as shown in the picture.

Highlights lights:
With the tool “Overexpose" selected, and varying the size and opacity of the brush we started to paint the illuminations of the image, always on the new layer created in the Step 2:. It is advisable to hide this layer and show it every bit to see how the result of our work is turning out.
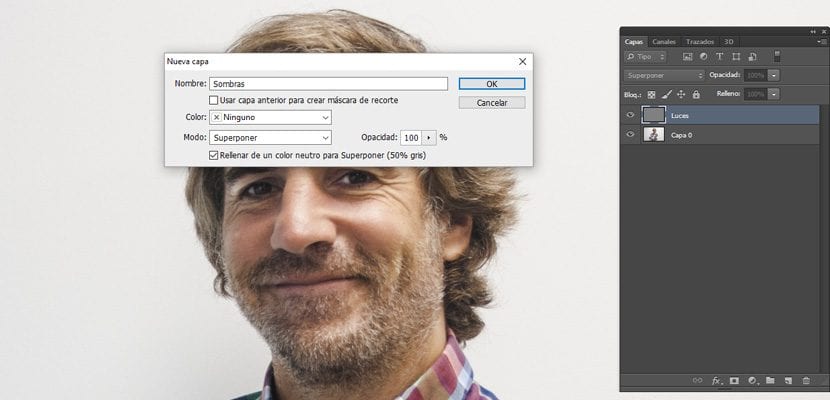
Another new layer:
Similar to how we did in the Step 2:, we create a new layer that we will call "Shades".
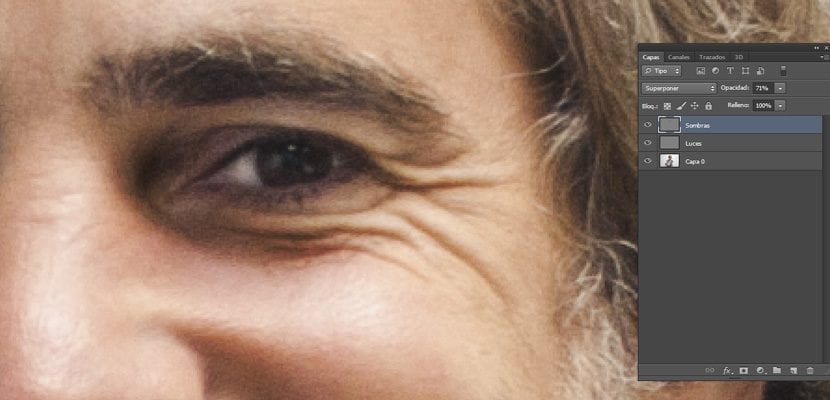
Create the shadows:
As in the Step 3:, but this time with the tool "Underexpose", we will begin to work on the Shadows that we want to highlight from the image. One thing you have to keep in mind is that an image is full of lights and shadows, often there are many more than the eye can see at first glance. Each fold, bulge or hole, usually creates a shadow and a light. That is why I usually recommend getting used to using the zoom meeting, to more easily locate the areas we want to highlight.
Result and final note:
Compare the result with the original image, remember that we will always have the advantage of modifying the layer opacity or blending modes to malterate the results to our liking. Once we are done, we will couple the image, especially if our work is intended for any type of print mediumSince very often, printing machines tend to modify all kinds of gradients in adjustment layers.
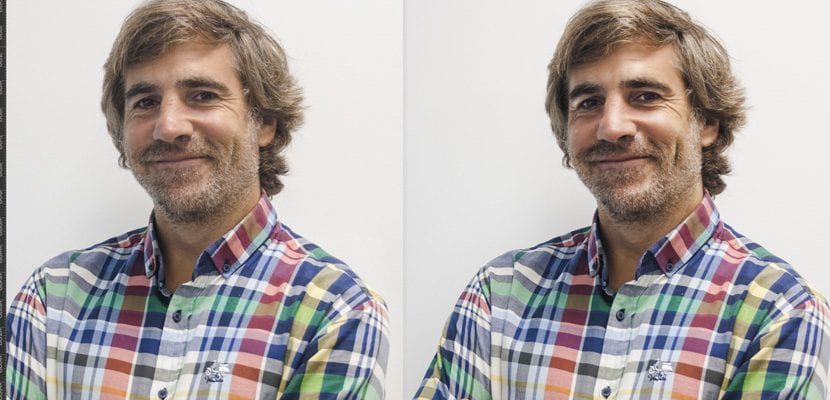
And that's it, as you can see, the image is endowed with greater expressiveness on its own, which is usually very useful for all kinds of advertising media in which it is intended to capture the attention of the public through an image. This is part of the large number of means, which make a photograph practically subliminal to generate interest.
If the result is not to your liking, try again ... Try again! Nothing like being persistent to learn!