
With Photoshop it is possible to retouch a normal photograph and give it a finish similar to that of an old photo.
How to age a photo with Adobe Photoshop in an easy way to get a different touch to your photos. Everyone talks about restoring an old photograph, but what if we want to do the opposite? age a photograph which is perfectly sharp. It can be done and you will learn to do it in this mail.
An aged photo is nothing more than the result of the passage of time on the different chemicals that are fixed on the photographic paper, the trick is to see what an old photo looks like and apply those changes to photos that are not old.
What if we want to age a photograph instead of restoring it? we can not do it? well yes, we can do it and we will do it in two different ways showing tools with which they will be able to make their own personalized image aging.
In this post we will use the following tools de Photoshop:
- Adjustment layer: brightness and contrast, hue, saturation, levels, black and white.
- Layer styles
We will learn the following:
- Change color of an image
- Apply texture to an image
- Retouch basic parameters an image with advanced tools
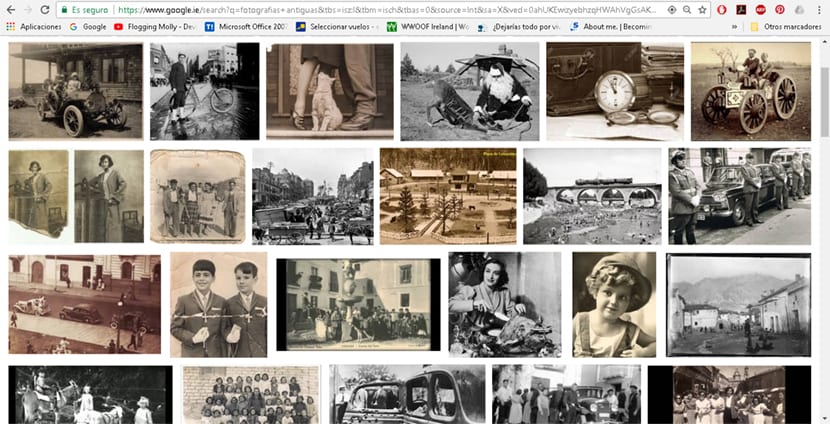
View visual references of old photographs
The first thing we have to do when aging a photograph is to know how is an old photograph, for this we need visual references what can we see in Google.
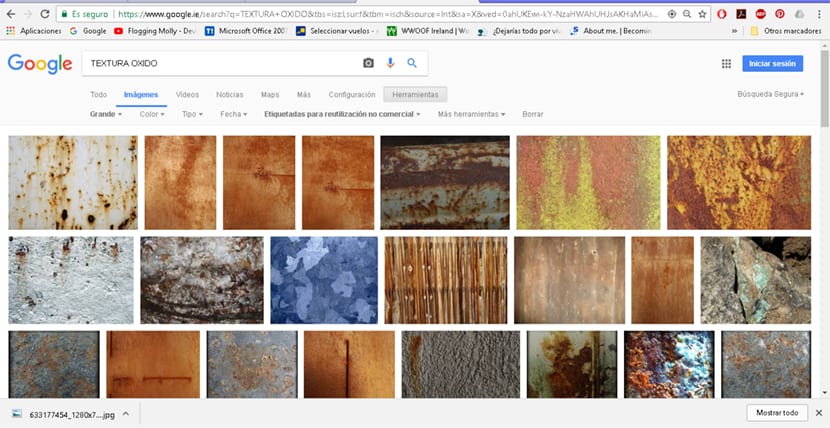
The next thing we have to do is download some texture to apply it on the photograph and make it look older, for this we can use any type of image Bank or directly look for one in Googland making sure to use the option free use photography.
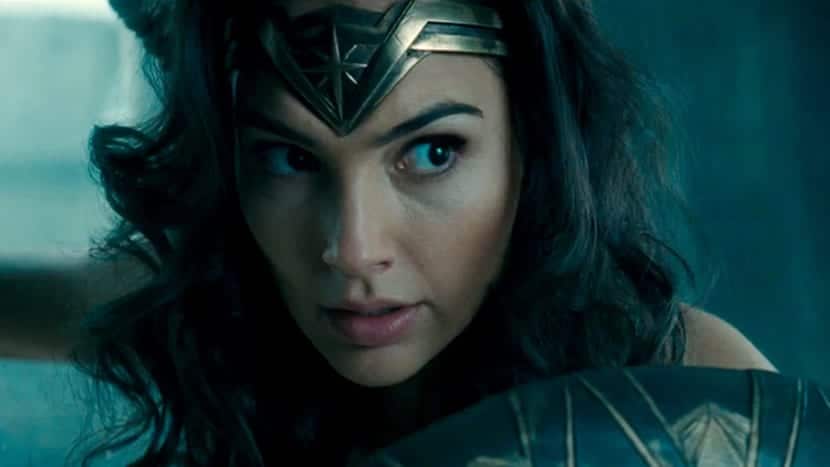
When we already have one or more textures, the next thing we do is open our image in Photoshop and start working. We can use any type of image from the Internet to practice before using our own, in this case we have used an image from the movie Wonderwoman.
First style to age image
In this post we will see two ways to age an image, in this first style what we will do is apply a texture on our image respecting the color (in this case a sepia tone) in the next version we will create a black and white version.
The first thing we have to do is open our Photoshop image.
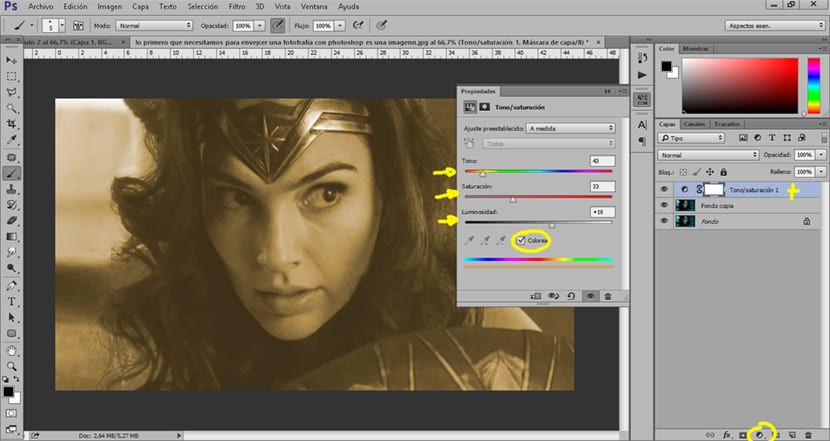
Saturation hue adjustment layer
We create a saturation tone layer to change the colors of our image, in this case we will give our image a sepia orange tone. To do this we just have to click on the adjustment layer option in the layers area and look for the saturation hue adjustment layer. Within this layer we press the color box and change the colors of our photograph as you can see in the image.
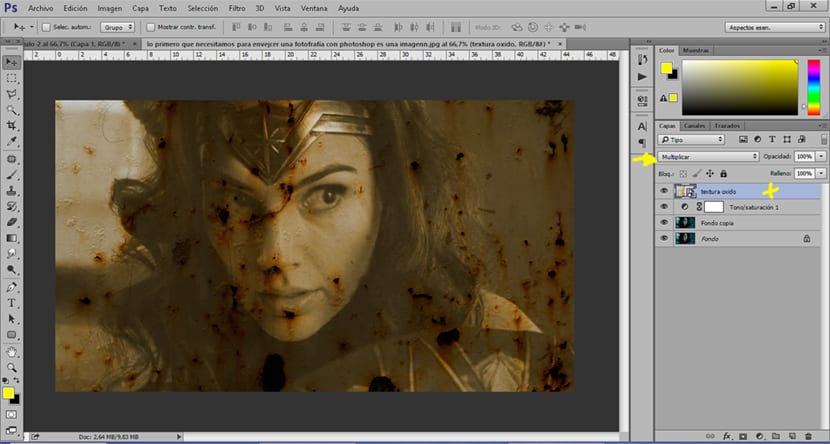
Once we have the layer created, the next thing we must do is apply texture on our image to get that old-fashioned effect.
Apply texture to image
To apply the texture to the image, all we have to do is drag our texture and put it above our image. Once we have the texture above our photo what we will do is change the layer mode from normal to multiply.
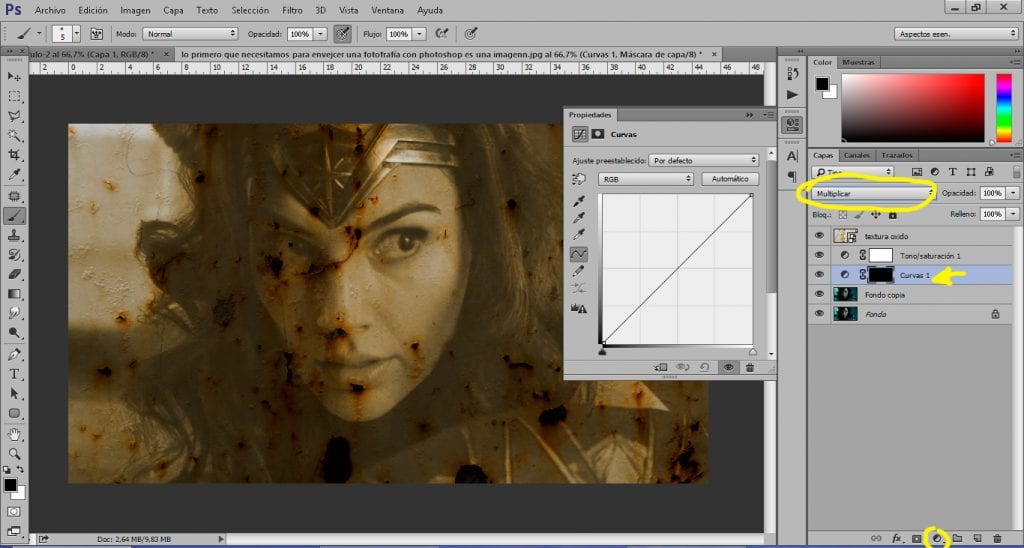
Darken areas of the photo
When we have the texture applied, the next thing we will do is apply shadows to darken certain areas of our image, the normal thing when we see an old image is that it has areas darker than others.
To achieve darken certain areas from the image we will use a curves adjustment layer in multiply layer mode, when we have this layer we will press the control + i shortcut to invert the layer. The operation of this layer is quite easy because works just like a brush, we changed the brush hardness mode and thickness to fit our image. The ideal is use low opacity to make the change little by little.
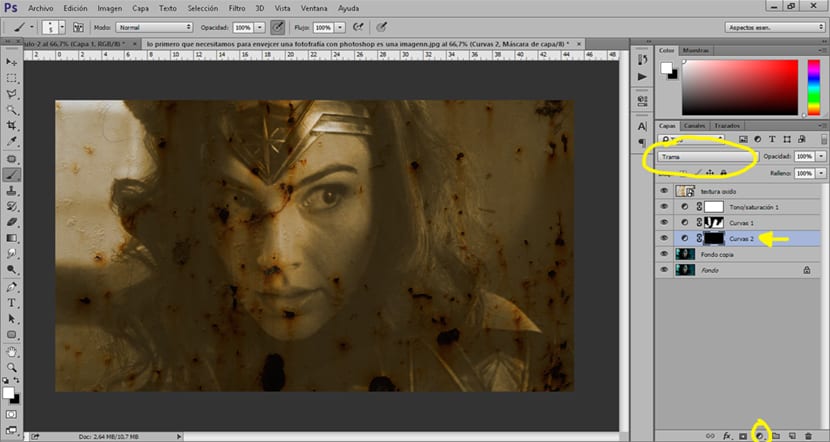
After darkening areas of our image, the next thing we have to do is the opposite, clarify areas of our image.
Lighten areas of the photo
To clarify areas of the photograph what we have to do is create a curve adjustment layer and change the mode layer from normal to weft, once we have the layer we press el shortcut control + i to reverse it. With the help of the brush we are painting those areas that we want to clarify in our image.
After these steps We have managed to age our image a few years, right? surely some decades.
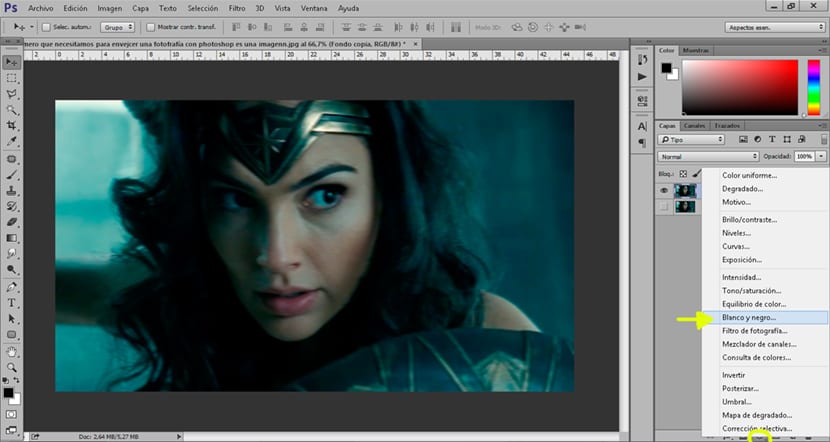
Second style to age image
In this second style we will convert our black and white picture to apply other types of effects obtaining a different photograph.
Convert image to black and white
To convert our image to black and white what we have to do is create a black and white adjustment layer in the original photograph.
When we have the black and white image we can start applying the following adjustment layers to continue aging the image.
Change image lighting
In this part we will change the Brightness and Contrast of our image in order to make the image much brighter as if it were something burned by excess light.

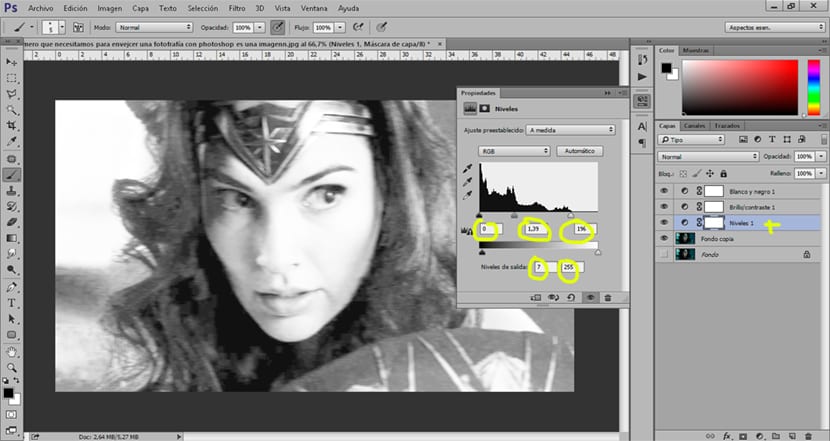
The next thing we do is change image levels to get the lights and shadows to be more contracted. We create a adjustment layer levels and we tweak the parameters as you can see in the capture.
The next thing we can do is darken and lighten areas creating adjustment layers multiply mode curve and plot. We will use the curved adjustment layer multiply mode to darkenr areas of our image, the one of plot what it achieves is to clarify.
The possibilities for aging images are very varied because it depends a lot on what we are looking for, with these small steps you will get create all kinds of old photos if you start messing with the parameters of all the tools we've seen.