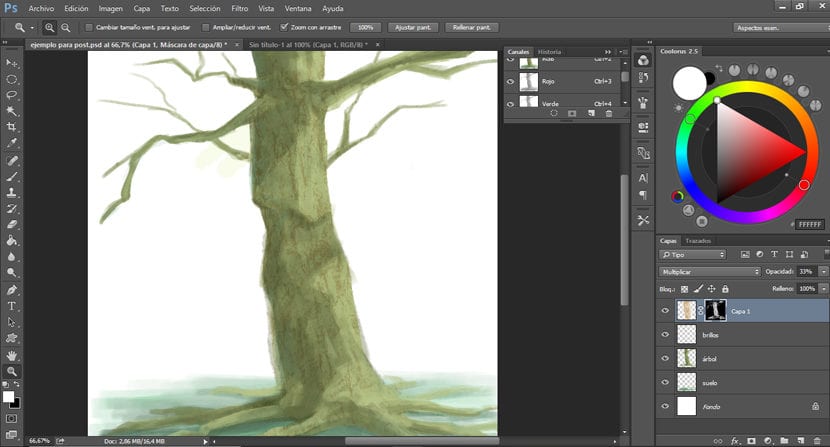
In our illustrations we can choose introduce textures that will bring greater expressive variety to our workswill make them more visually interesting, creating new sensations and enriching the work.
To apply textures in Photoshop we have different options depending on the effect we want to achieve.
Here are two ways to apply textures to our designs.
Option 1
We select the texture we want to use and insert it into the file where we have our illustration.
We select the color that we want to apply to the texture and now we go to Image> Adjustments> Gradient map. A window will open that shows us a bar that appears to us of the color that we have selected and the white background color (the gradient map tool always applies the colors that we have on the front and background). Now we double click on the gradient and move the gradient bars creating greater contrast if we want, for this we move them towards the center.
Once we have the texture to our liking we can change the layer mode, opacity or erase the areas that do not interest us, depending on how we want to give our illustration.
If we want to apply the layer only on one area, we select the area that interests us, we place ourselves on the layer where the texture is and now we apply a layer mask to it by clicking on the third icon at the bottom starting from the left in the layers window, as seen in the example.
Option 2
We select the texture we want to place and we change it to grayscaleTo do this we go to the layer where we have the texture and go to Image> Adjustments> Channel mixer> Monochrome.
We must insert the texture in the same file where we have our design and place it where we want to apply it.
We make sure that the foreground and background colors are black and white. Now we go back to Image> Adjustments and select> Gradient map. We double click on the gradient to edit it. Another window will open where we must move the bars towards the center to increase the contrast a little.
Once this is done, we hide all the layers that our illustration has, except for the texture. Now we are going to make a selection of our texture, we go to the Window> Channels tab. We click on the icon that we find in the lower left that is shaped like a circle with broken lines and it will make the selection. We can now hide the texture layer and activate the rest of the layers of our illustration.
So that the selection does not bother us when painting, the ideal is hide it by pressing Control + H keys.
We create a new layer and start painting the color of our choice where we want the texture to be applied. The good thing about this way of applying textures is that it allows us to control color and transparency.