
How create a blur in a video with Adobe Premiere in such a way that we gets control blur just as we do with a professional digital camera. Not everyone can afford a video reflex camera so create point blurs it can be a very difficult thing to do.
Suppose we have our video ready and we realize that we have forgotten to add a series of blurs in some parts of the video, it would be very difficult to be recording the entire video again, for that reason it is very important to know control these tools Adobe Premiere to be able to control blurs. It is a very easy-to-use tool that provides us with many advantages when editing a video.
A blur get blur our image in such a way that visibility is lost, thus achieving hide content in a video, this can get give more importance to other elements of the image As for example a text being able to create a credit title where the background is out of focus and the letters are fully focused. We can also use a blur to hide the image of someone, this is a resource quite used in the cinema. Whatever we do we have to see the blur beyond a simple effect.
We will learn two types of blur with Premiere
- General blur
- Spot blur controlled
General blur
The first blur that we are going to learn to do with Premiere consists of a general blur where we apply the effect on an entire video track, we apply the same effect equally throughout the video. This type of effects will come in handy when our objective is to blur a piece of video equally without the need to create a controlled blur.
Cut the video
If we want to apply a blur in a part of a video in a general way without the need to complicate our lives a lot, what we have to do first is cut the video part in which we want to apply the blur. To make this cut we will use the blade tool de premiere.

To use the blade tool we just have to select it and click on the video, we will automatically cut our video.
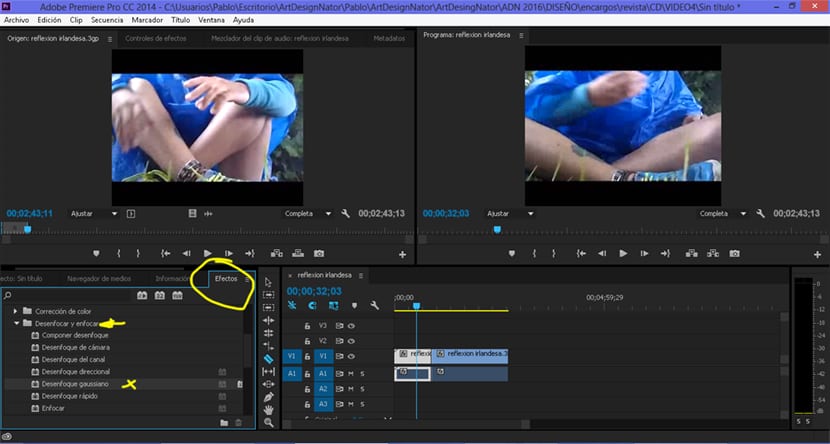
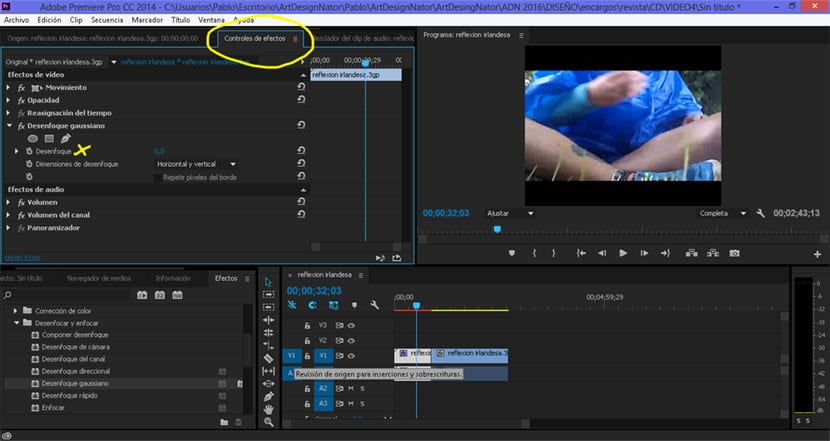
Once we have our video ready, the next thing we have to do is look for the blur tool inside video effects menu. To apply the blur effect, all we have to do is drag the gaussian blur to our video piece. After dragging the effect, the next thing we will do is press twice on our video piece and click on the effects controls menu located at the top of the screen on the left.
To apply the blur we just have to move the cursor of the blur option.
Controlled spot blur
If we seek to create a more accurate blur and controlled we can do it with the same Gaussian blur option but marking key points the areas where we want to apply the blur. We can achieve a gradient effect if we use this technique in a controlled way.
This time what we are going to do is use the time selection bar to mark where we want to apply our blur effect.
- We select the part of the video where we want to apply the effect
- We click on the clock to mark that keyframe
- We select the parameters of blur
We select the part of the video where we want to apply the blur effect, after this we click on the clock to create a keyframe, By doing this we are telling the program that the effect begins at that specific point in the video.
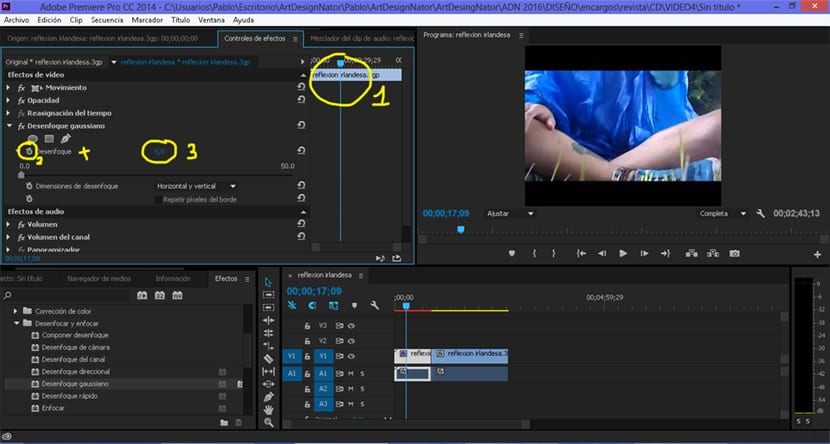
If we click on the option add frame what we achieve is to create another point in the video to get apply the effect in that exact area in the video. The normal is move time cursor and go apply the effect in a controlled way depending on the needs of each one.
Control keyframes is something fundamental and very useful in video editing, for that reason it is very interesting to start working with this type of tool little by little to gain a higher level.