
Photoshop is a great tool for altering reality in your photos. The program offers great tools to modify the color of any of the elements that make up an image. In this post I am going to teach you how to change color in Adobe Photoshop fast and easy. This trick is a good resource and, despite being simple, it usually gives Very good results.
Change color in Photoshop using gradient map
Open your photo and make the selection
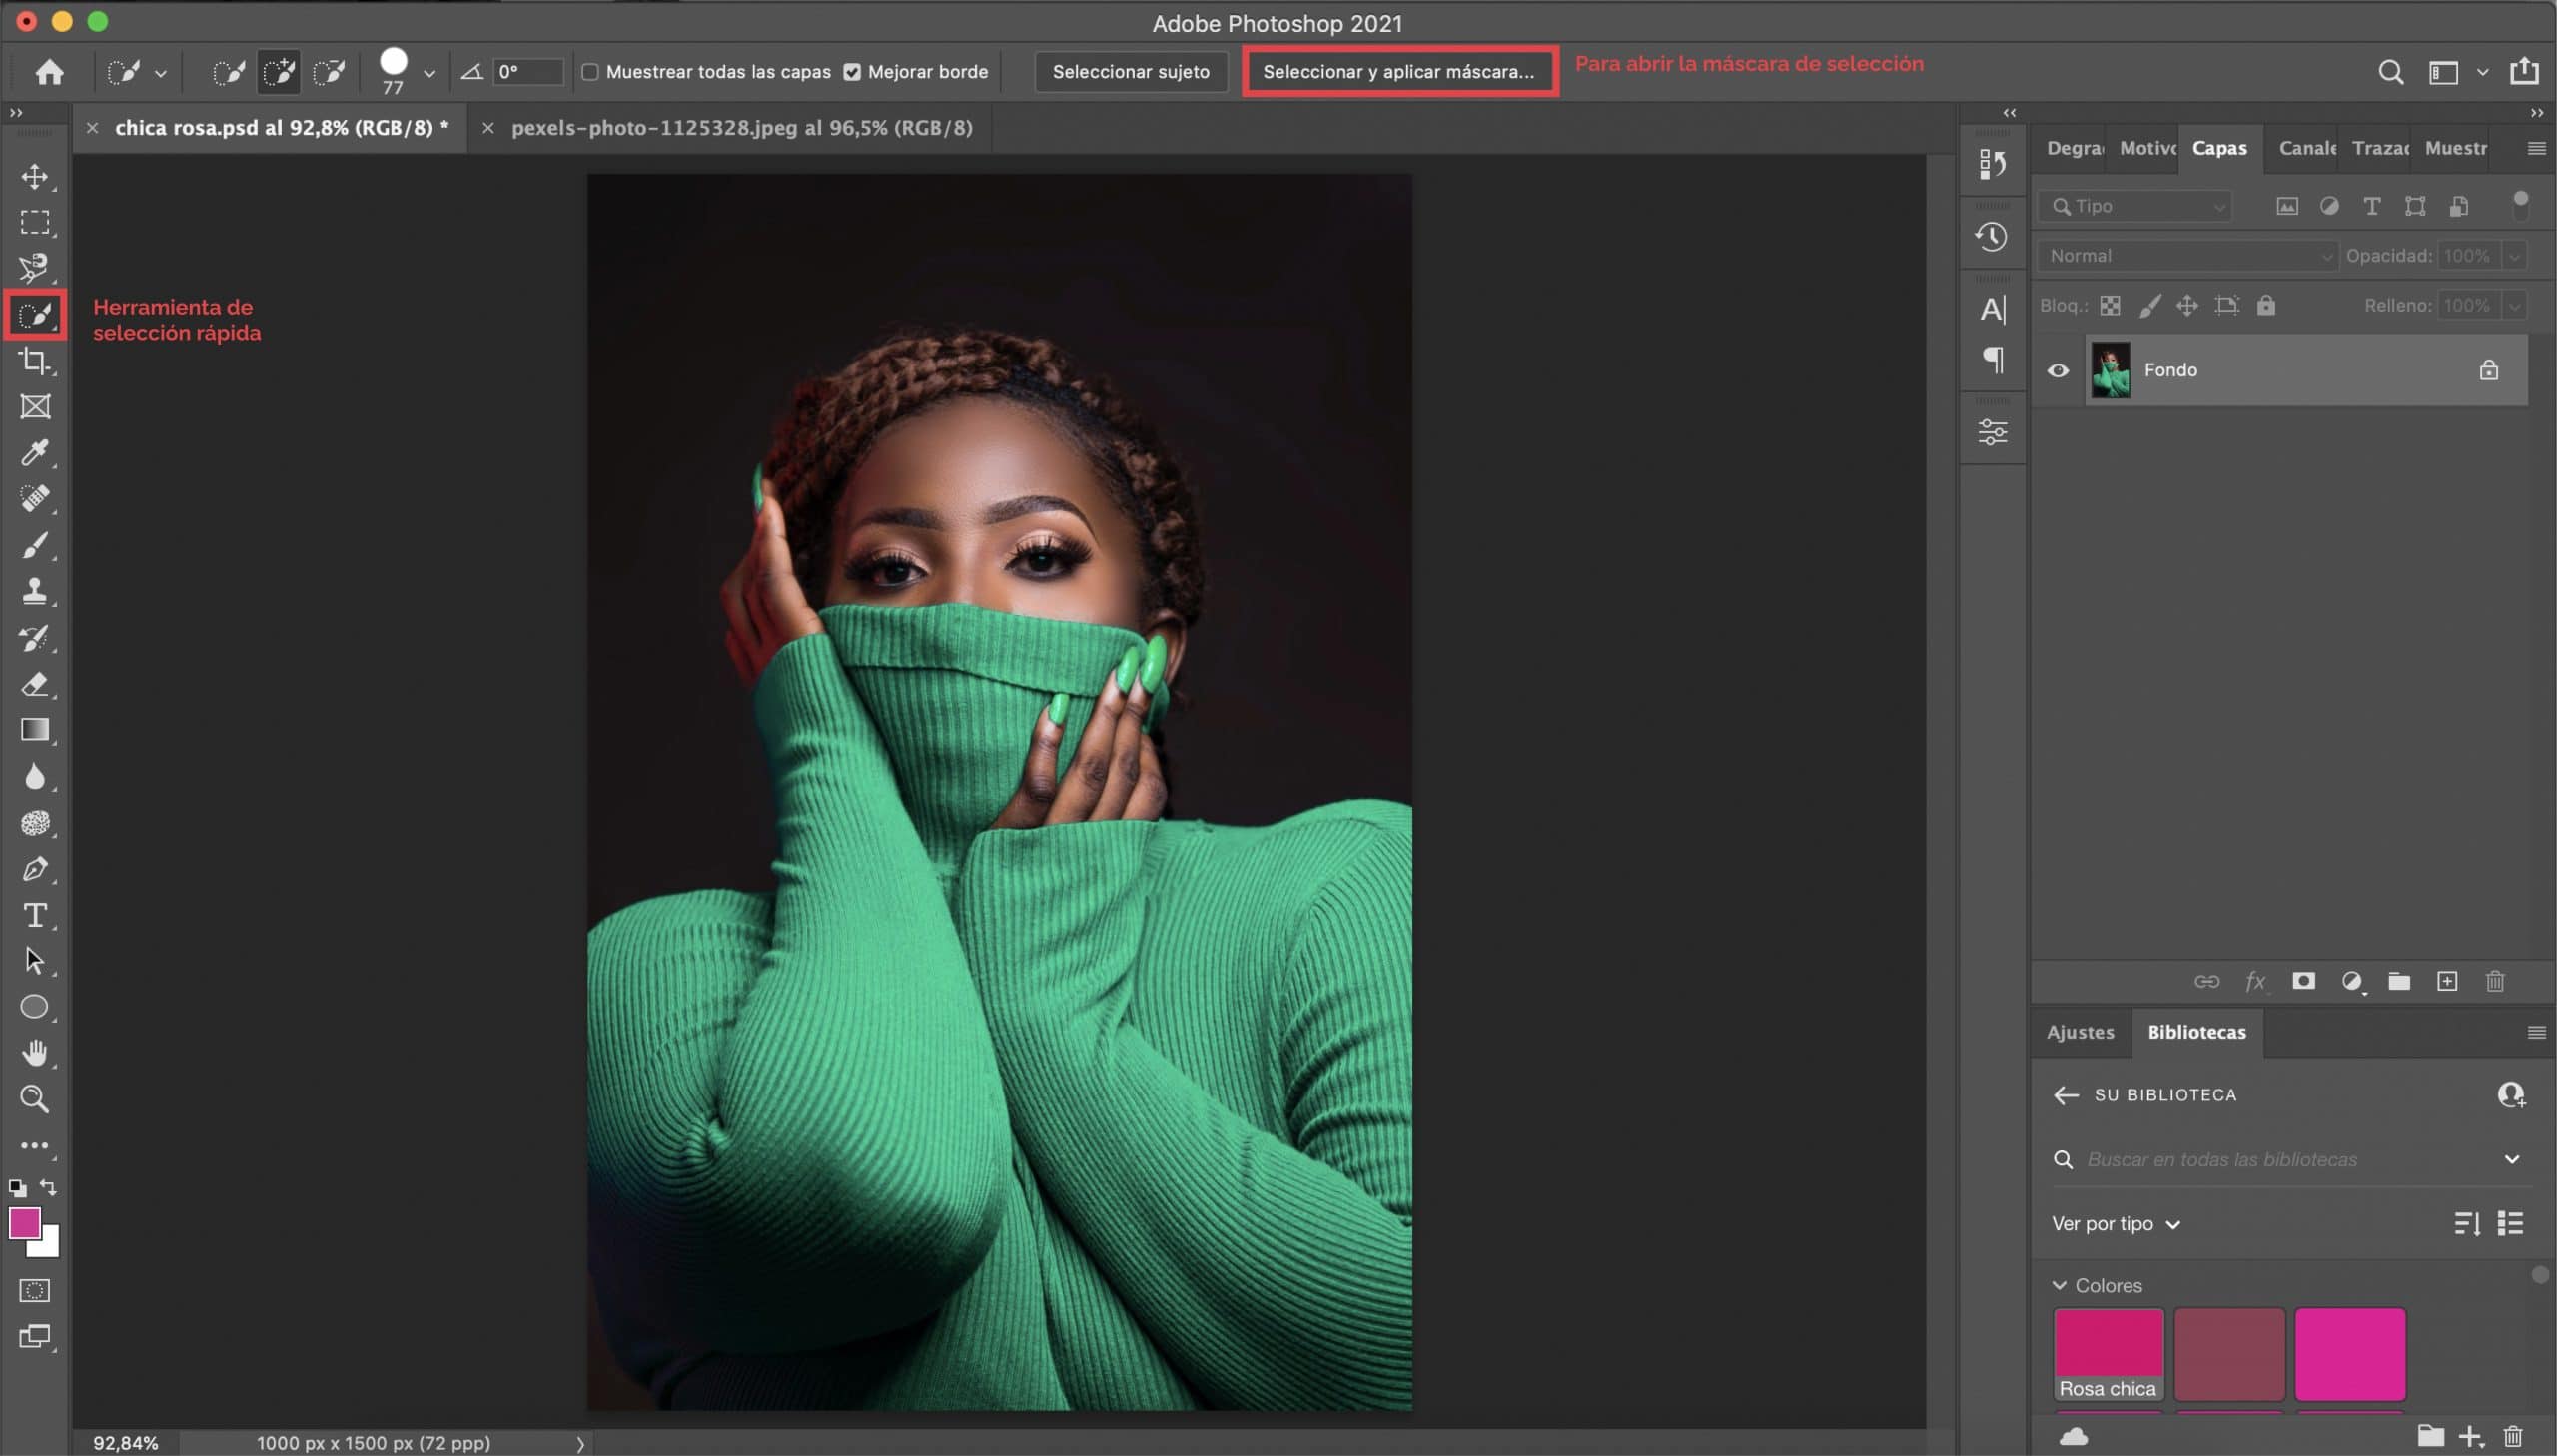
The first thing we will do is open the photo in Photoshop we want to edit. In my case, what I don't like about this picture is the color of the girl's sweater, so I'm going to select them to change it. For this I have used the tool Quick Selection y I have cleared the selection by applying the mask and with the help of the brush tool.
You you can use the selection tool that you master best, does not matter. Try and use the one that is easiest for you and the one that gives the best results when selecting the specific element you want to work on.
Selection is important
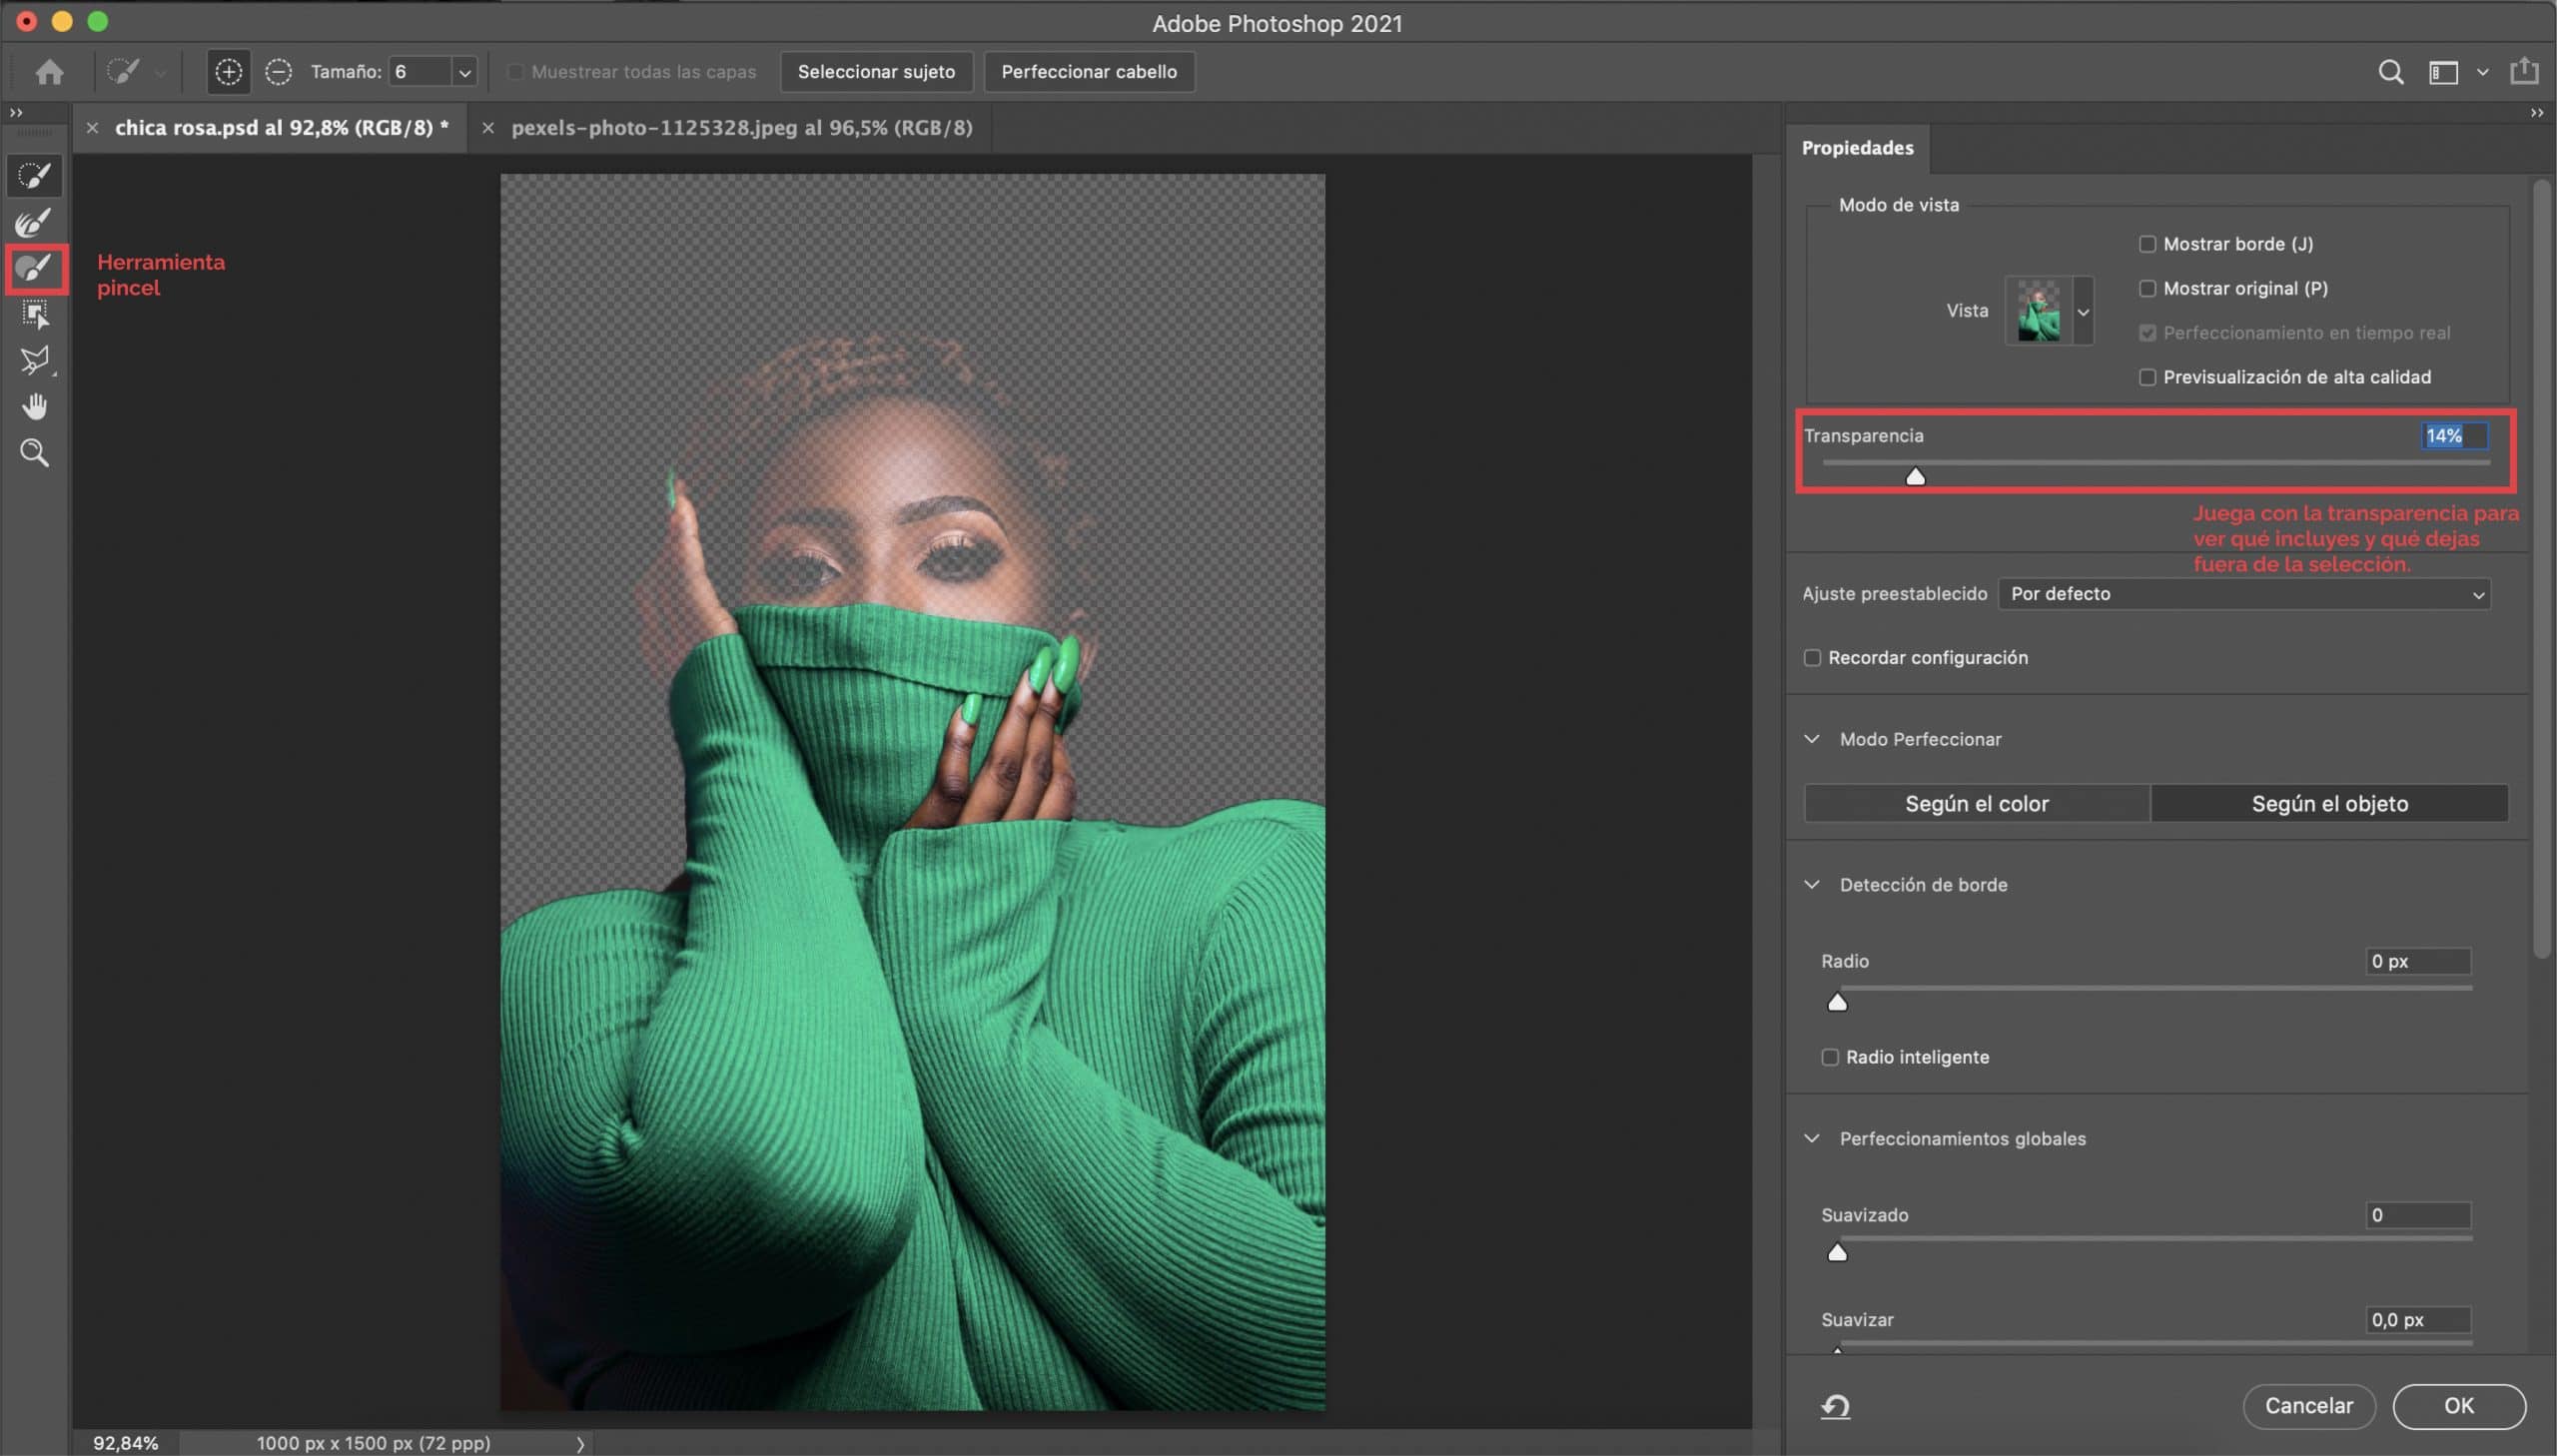
The most important thing to get good results when changing the color in Photoshop is make a good selection. For this reason, I recommend that you dedicate time to this step and that you use the selection mask to make it as clean as possible. I leave you here a post Creativos Online which includes a more detailed explanation on how to use the selection mask.
Create a gradient map layer
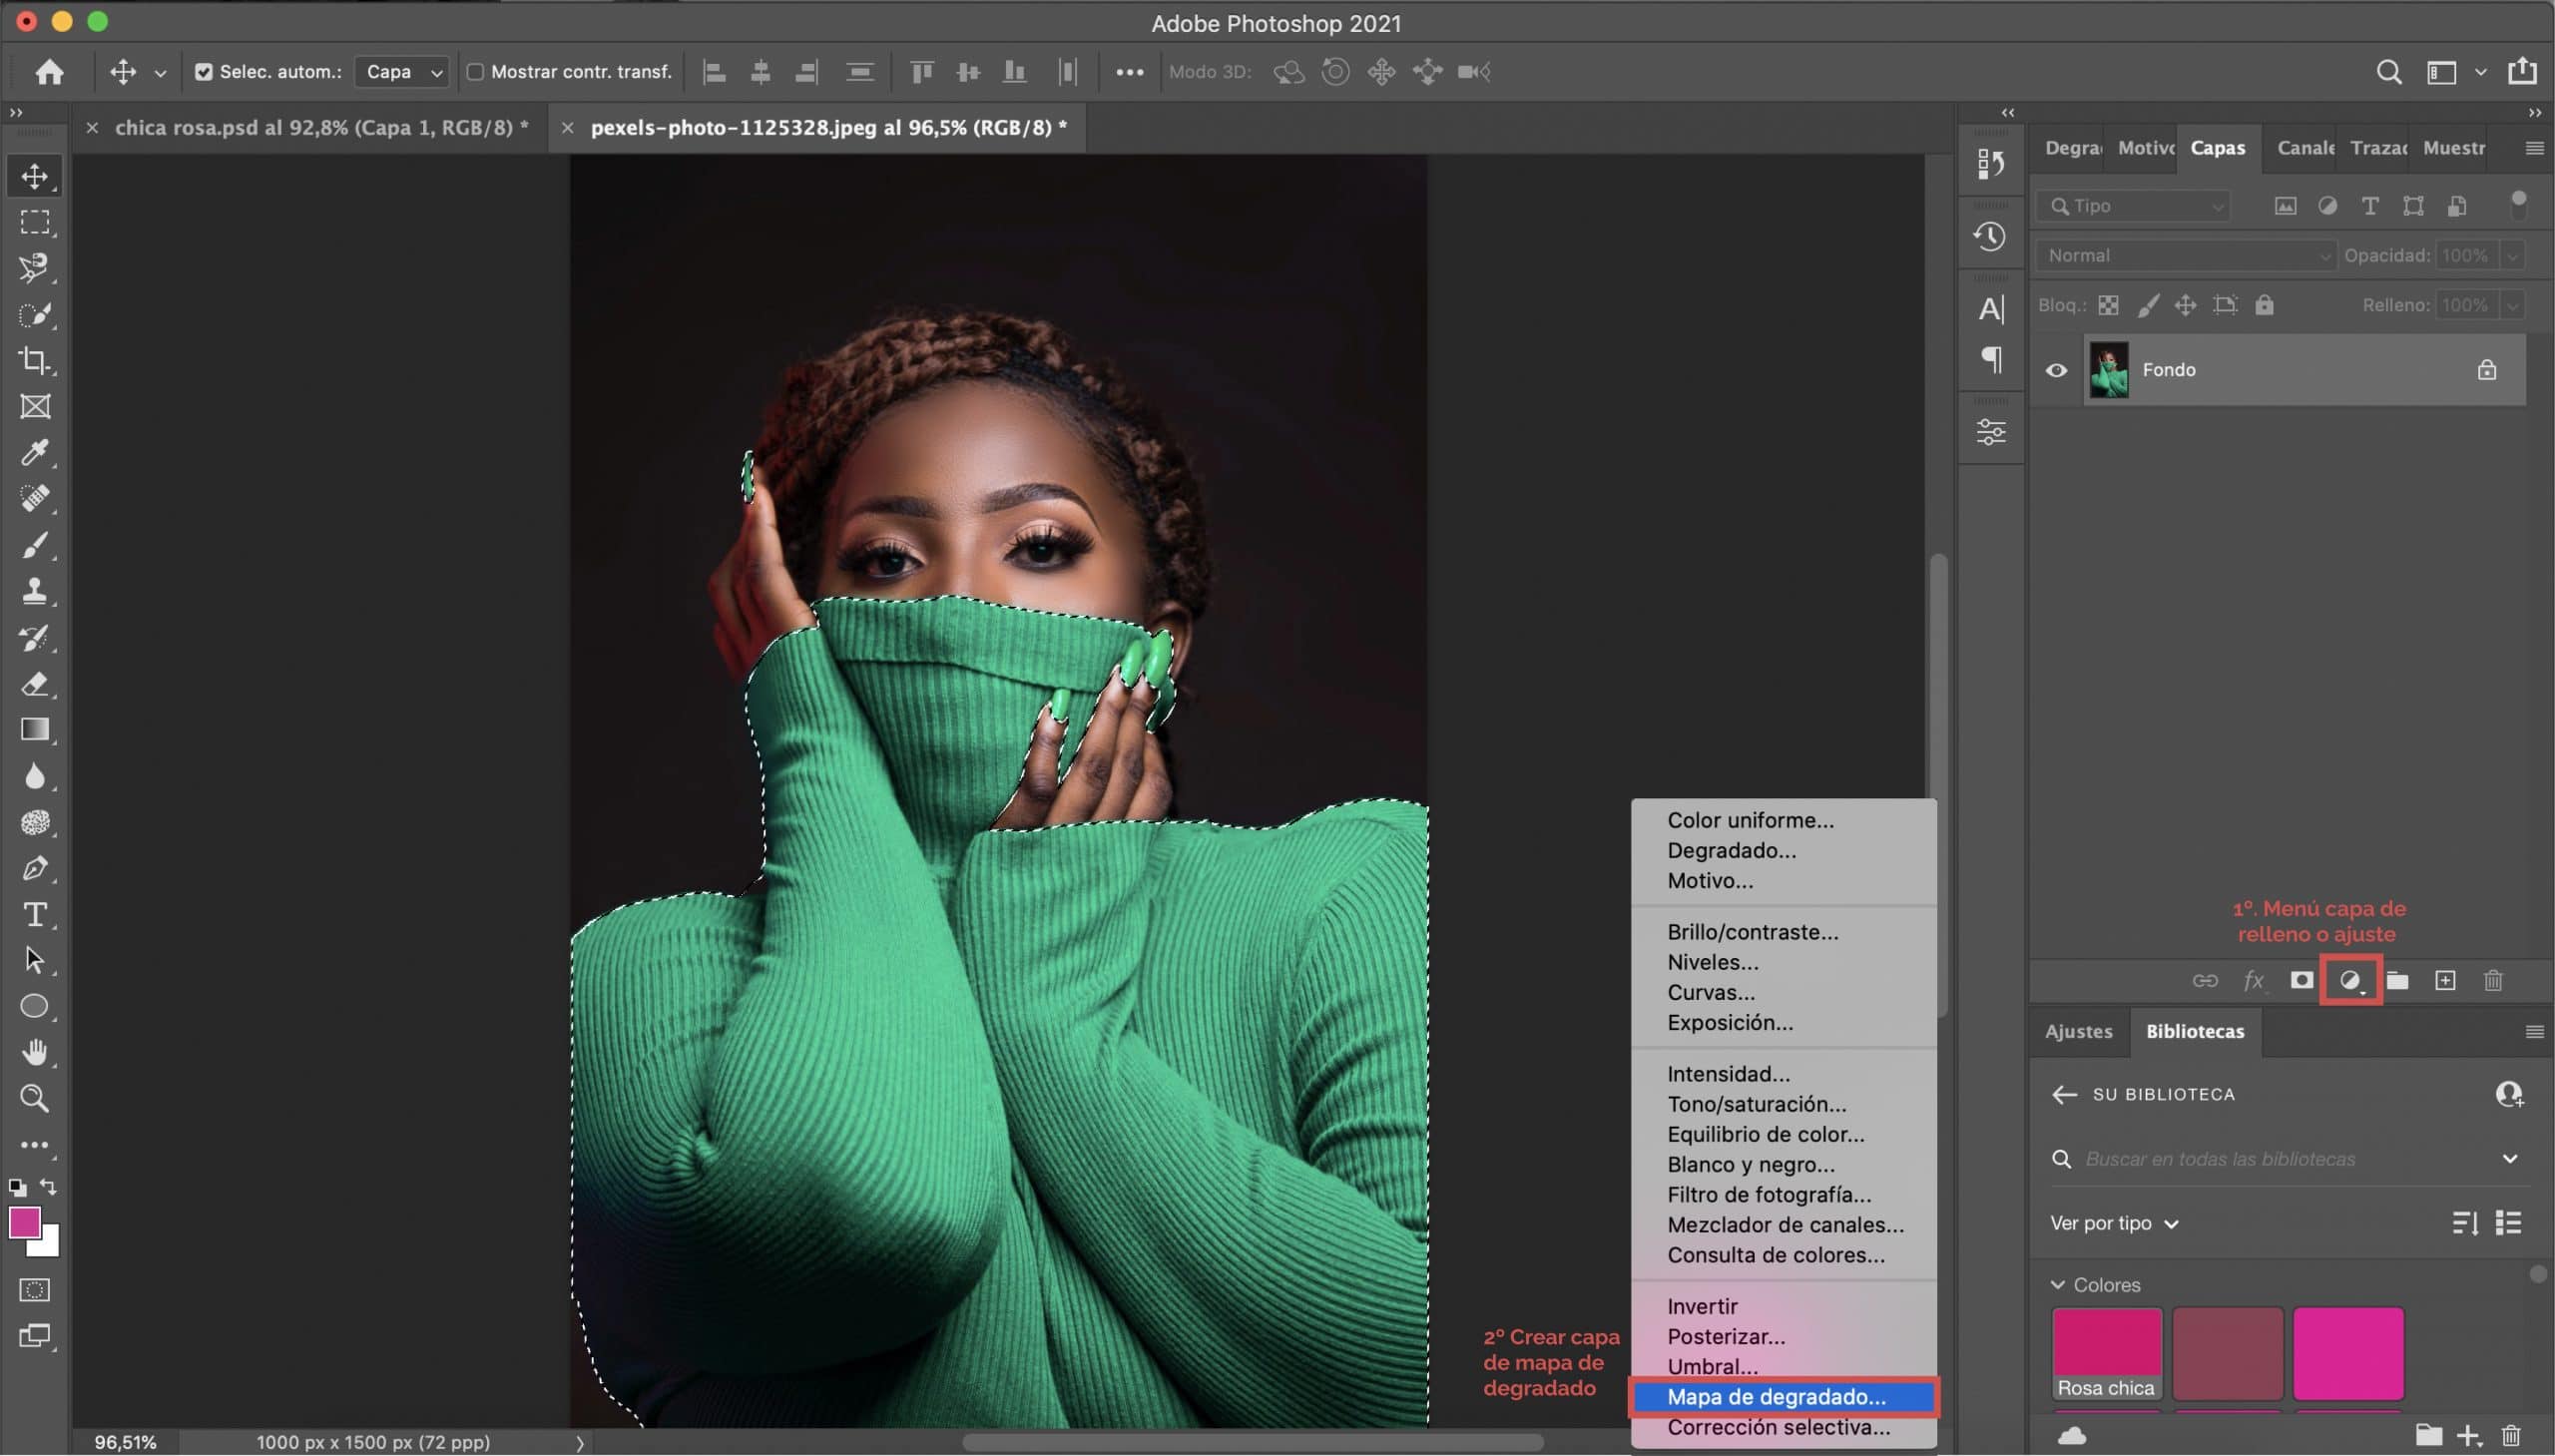
Once the selection is made, the next step will be create a gradient map layer. In the layers tab, at the bottom, you will find a circular symbol which allows you to create fill and fit layers. Click and a menu will be displayed, find the Gradient map option.
You will see that on the background layer (on your photograph) you will have created a new layer corresponding to the gradient map.
Modify the gradient properties
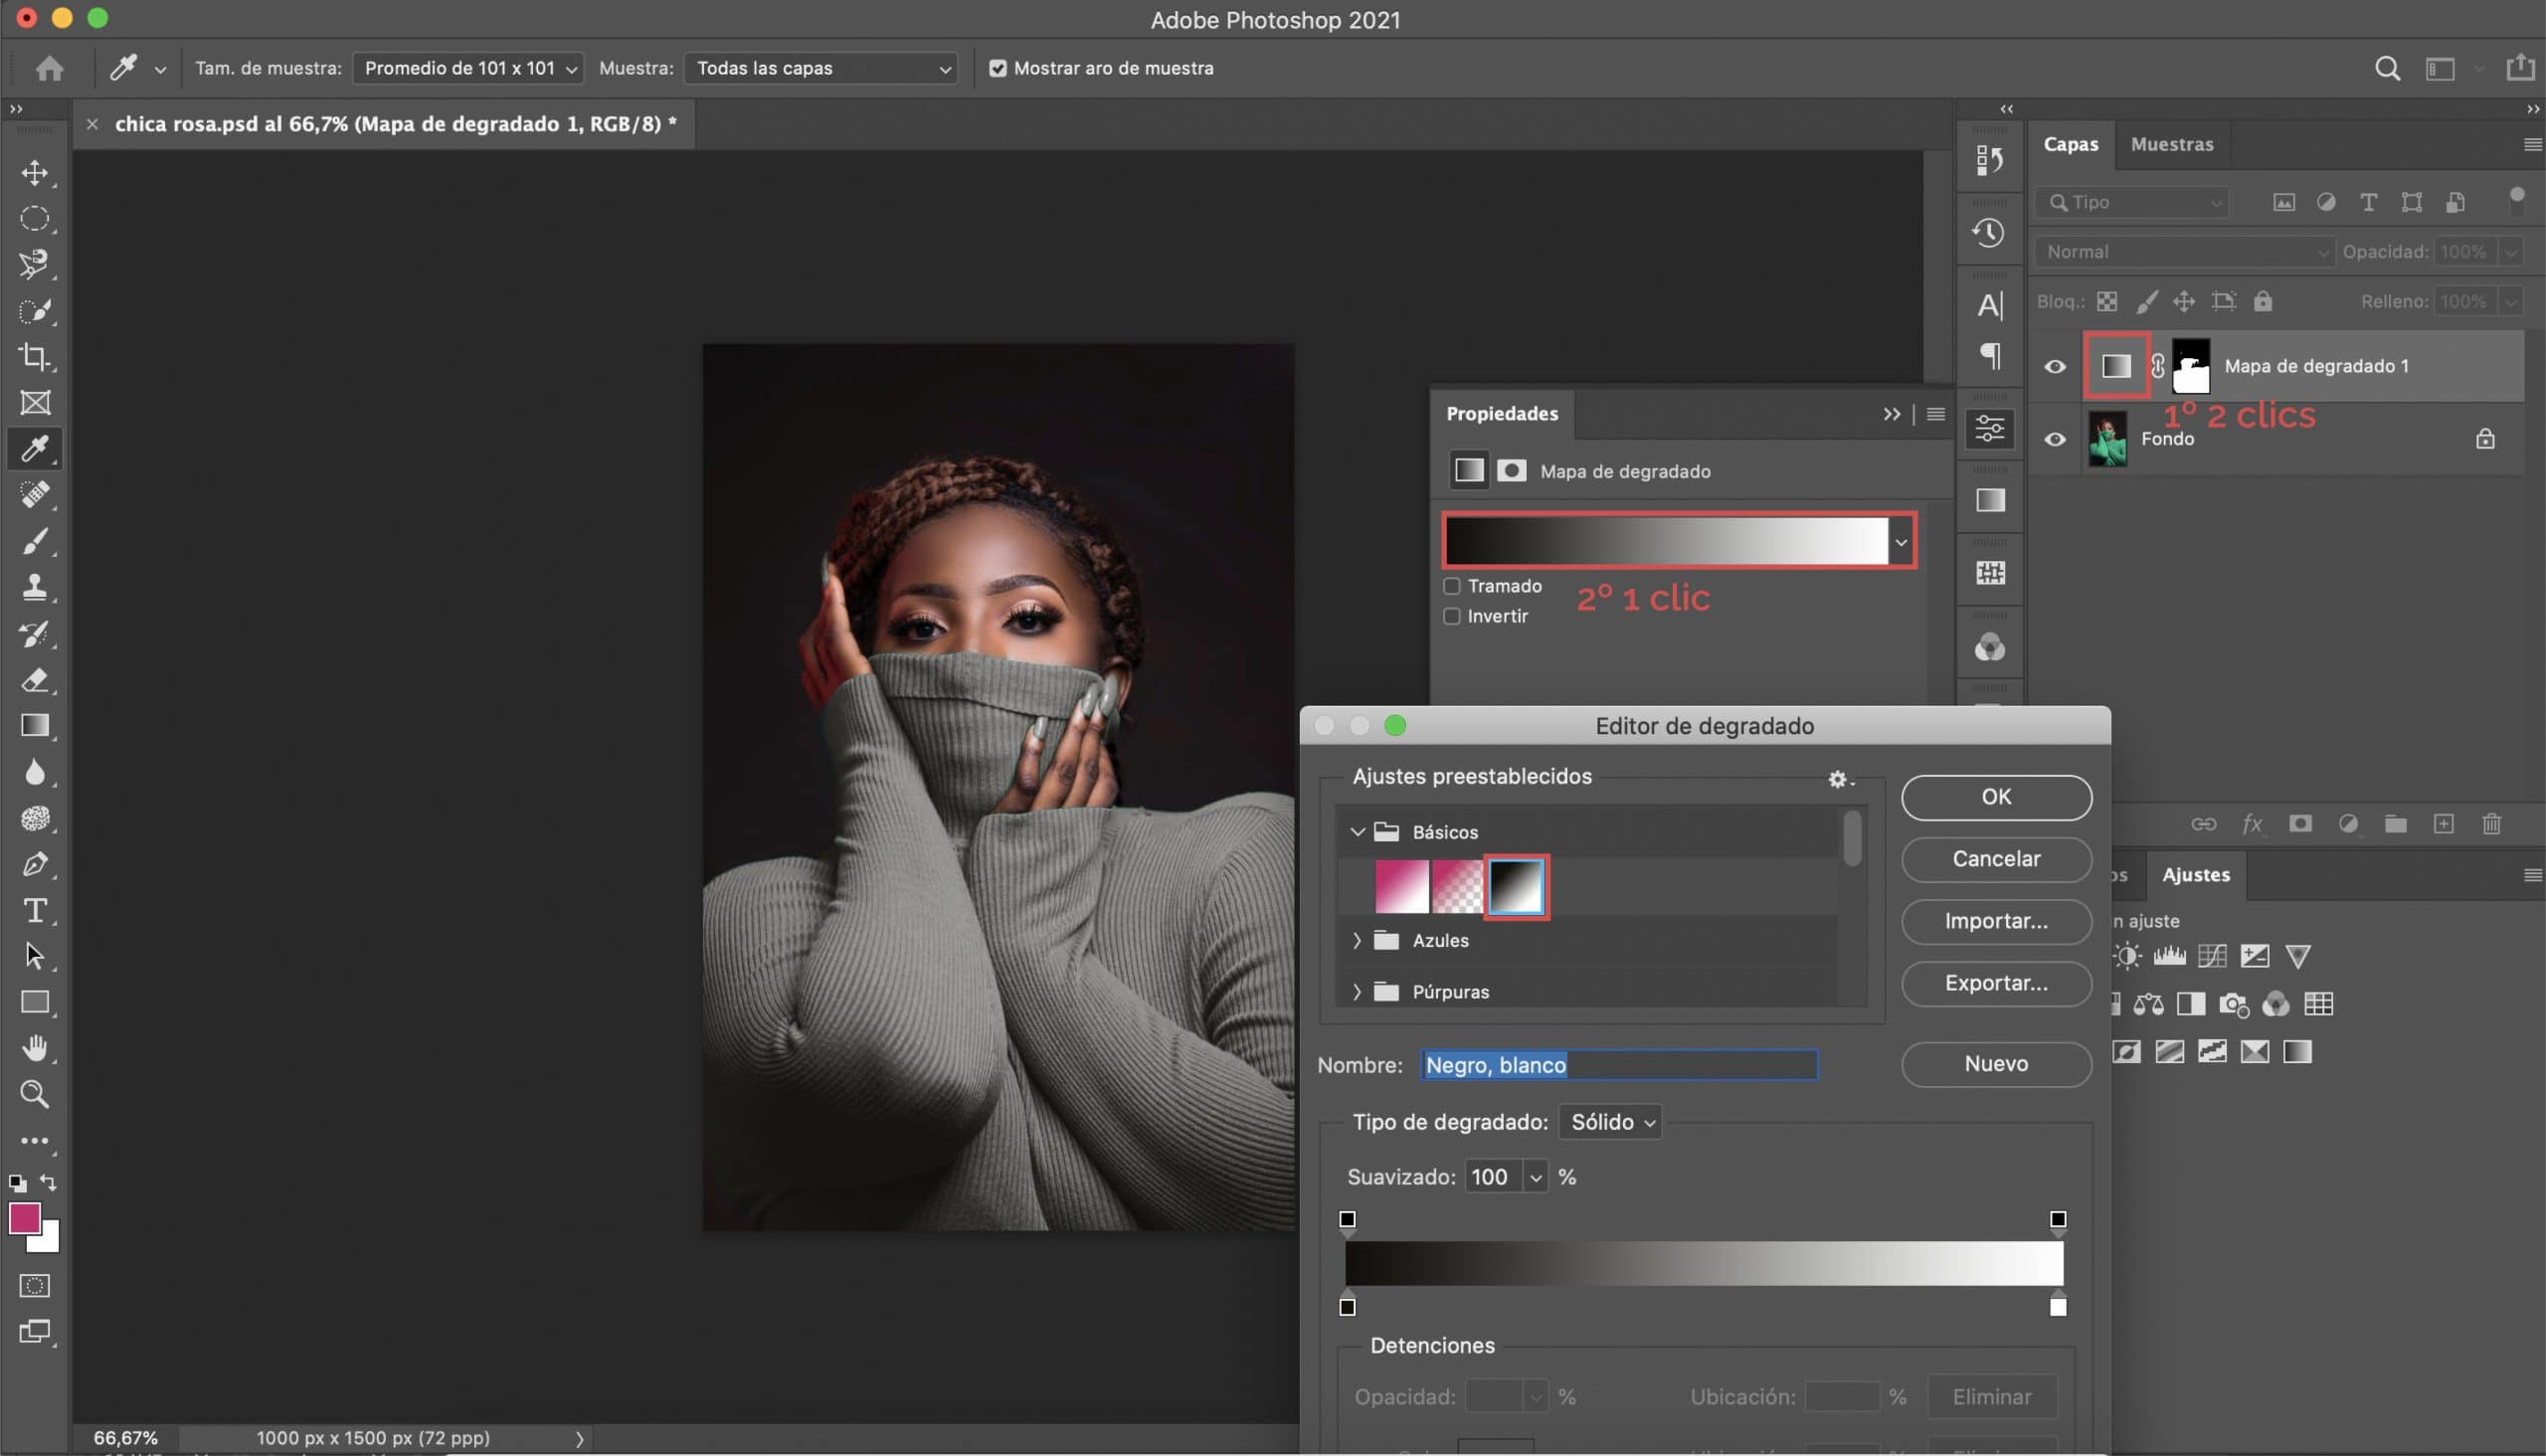
On the gradient map layer, do double click layer thumbnail to display the menu of gradient properties. By pressing the bar, you will open a window from which you can edit the gradient type. We will select one of the default Photoshop basics, the one that goes from black to white.
Change the color
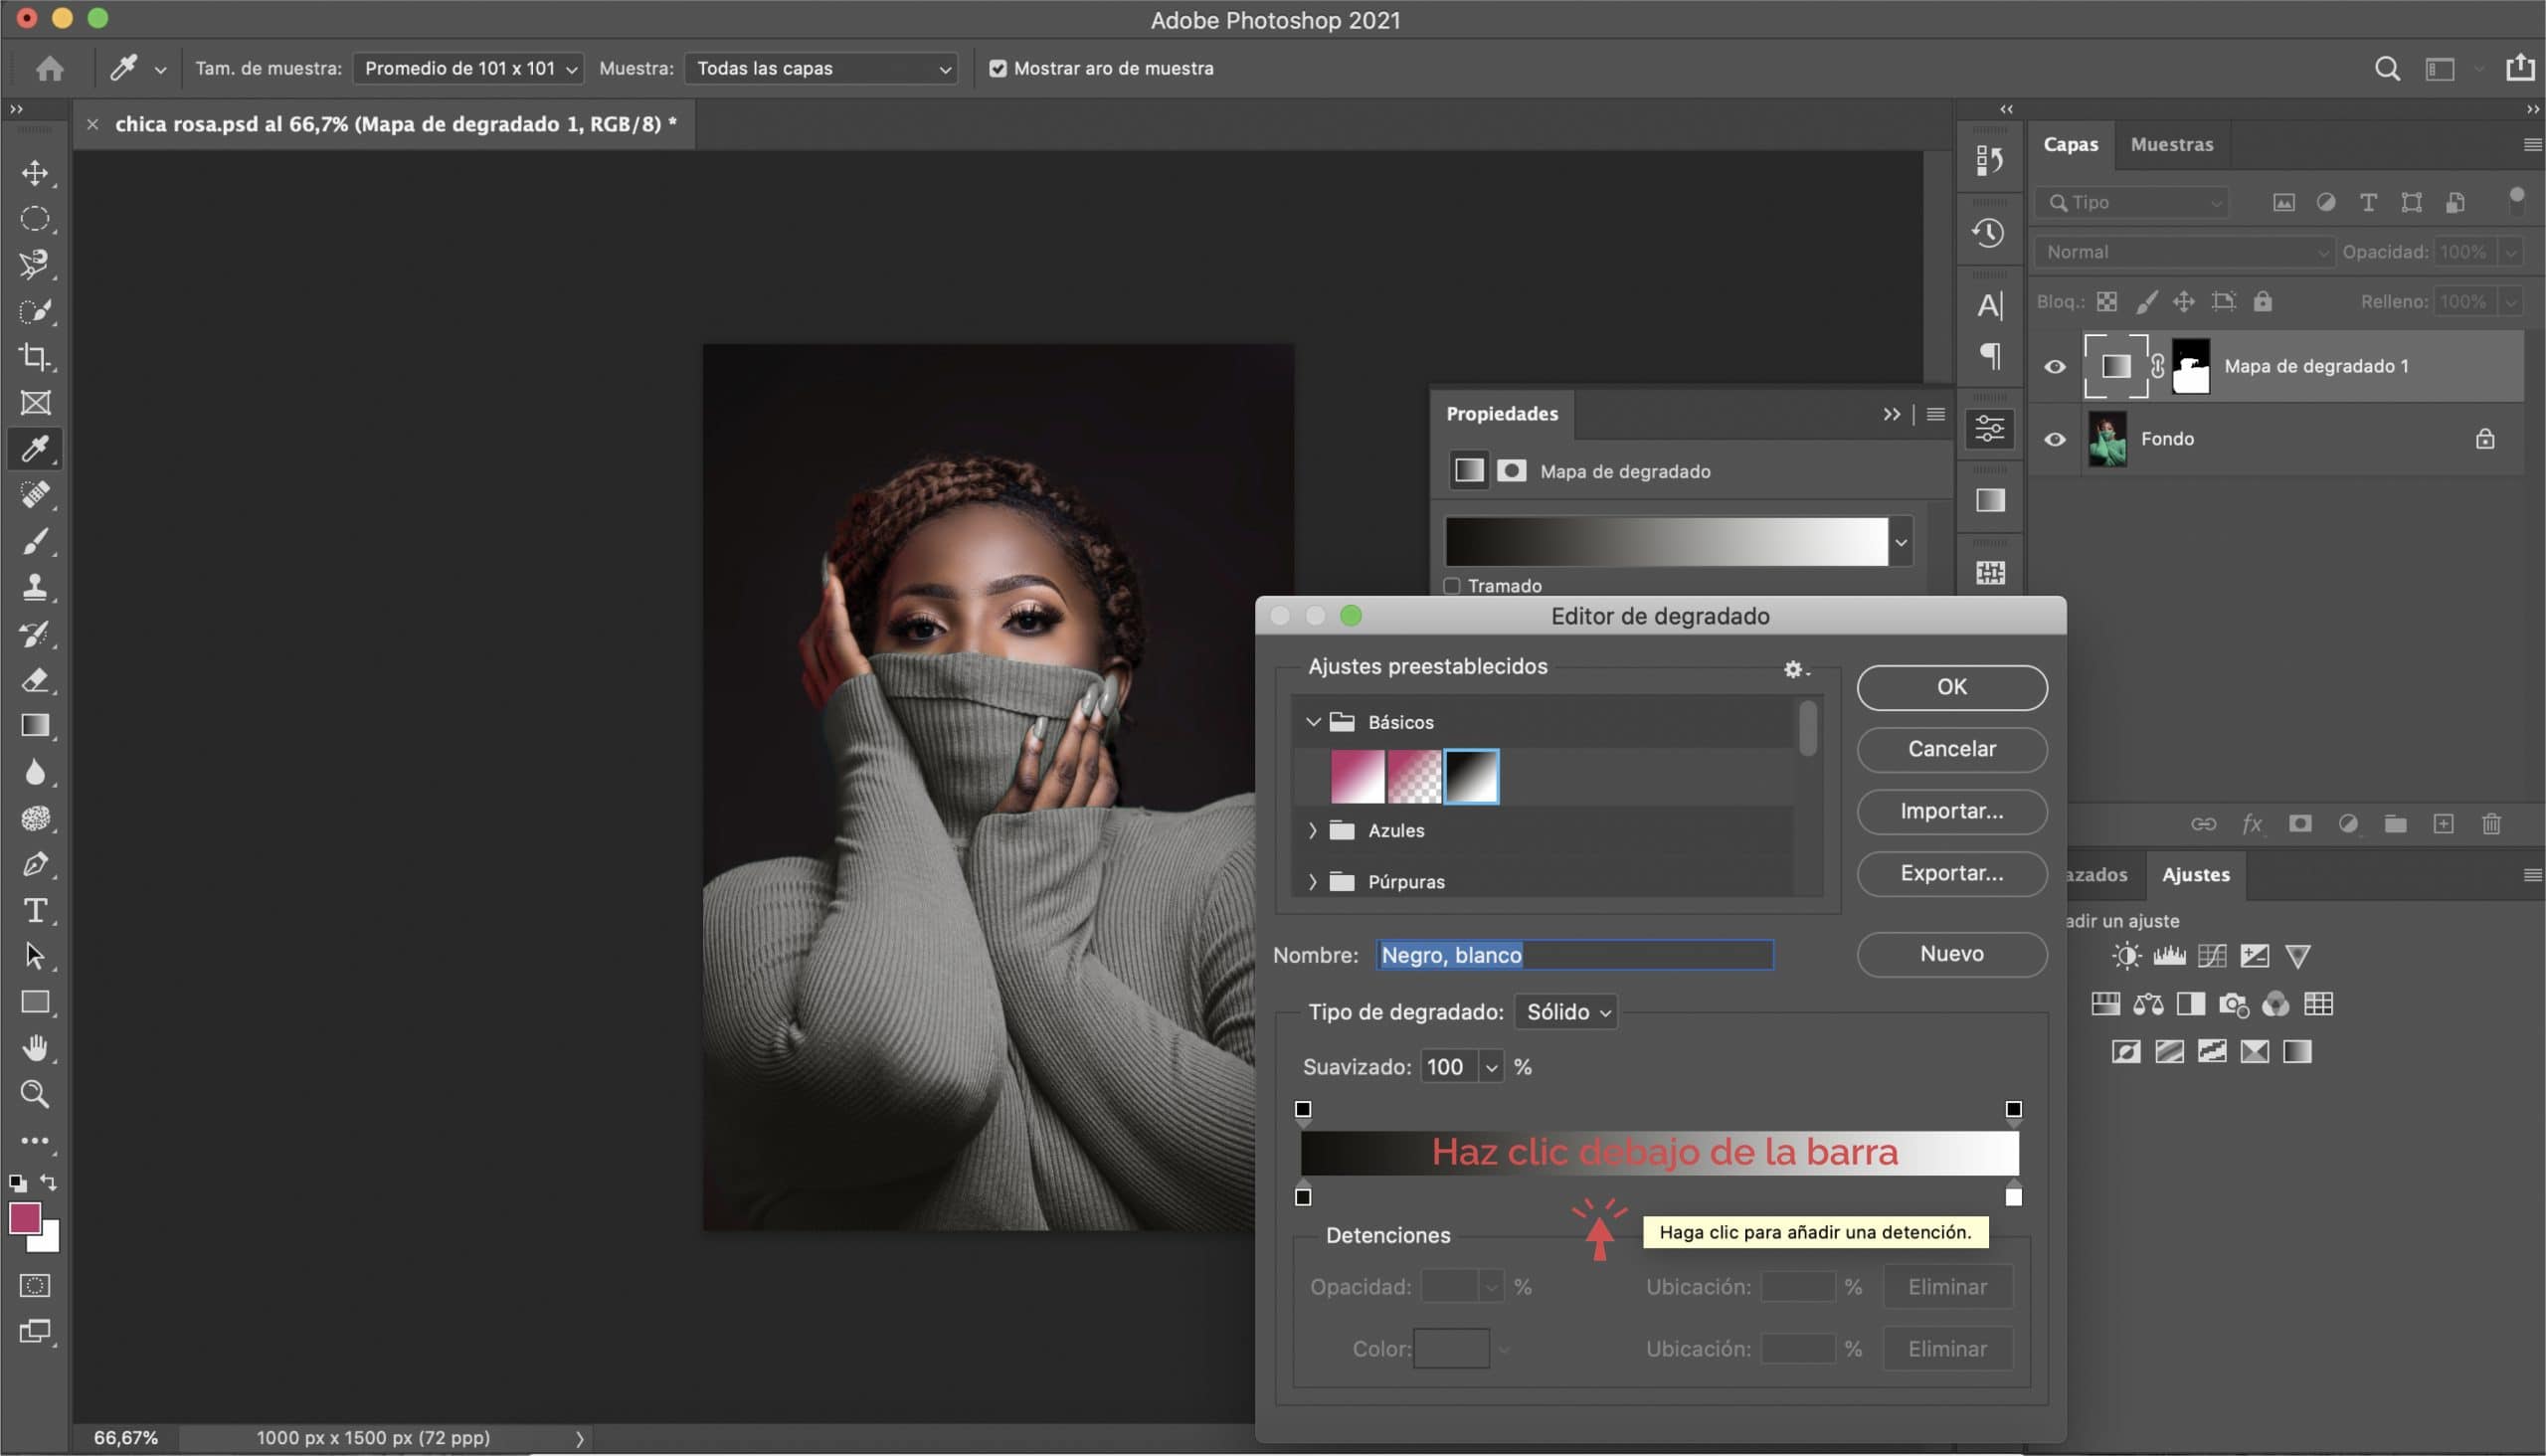
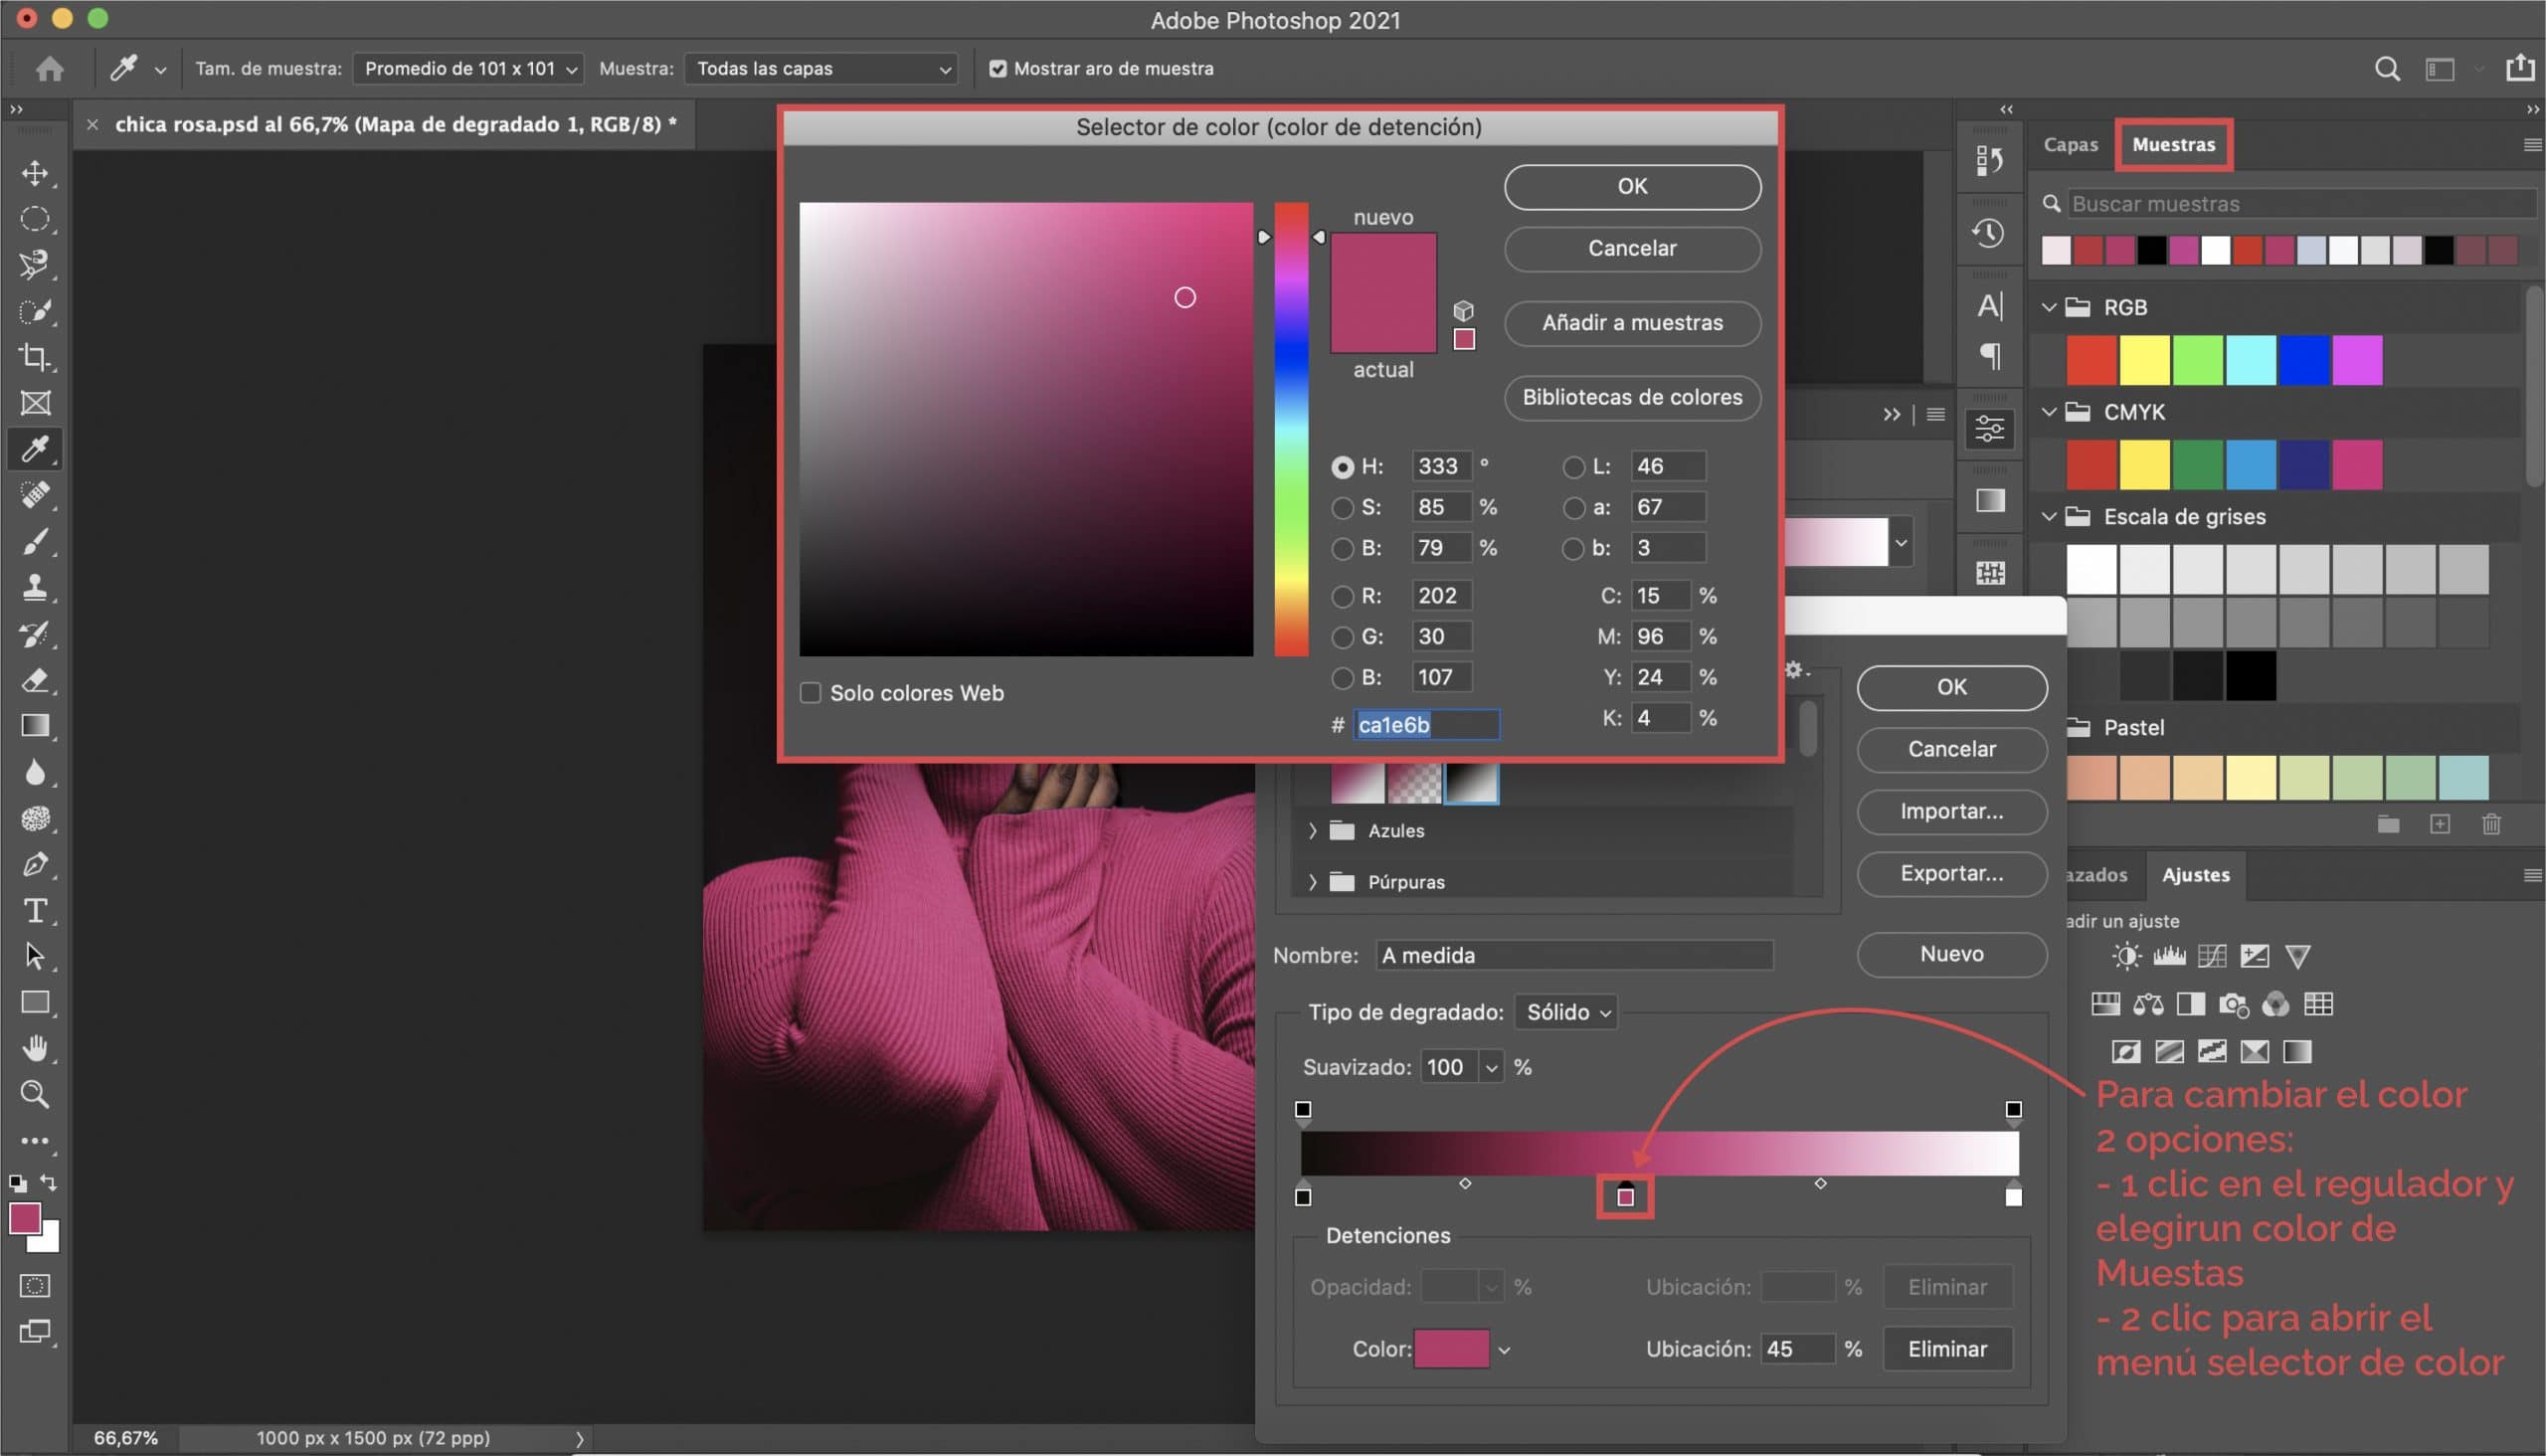
As you can see, the color of the sweater has already changed to a kind of gray. What we will do now will be enter the color we want give the element that you have decided to modify. In the window «gradient editor» you have opened before, you will see a rectangle, click below to create a new "color level" slider.
Pressing that slider, Choose of your samples the desired color. You can also double click on the slider and from the «color selector» window enter the code, as you prefer.
Play with black and white
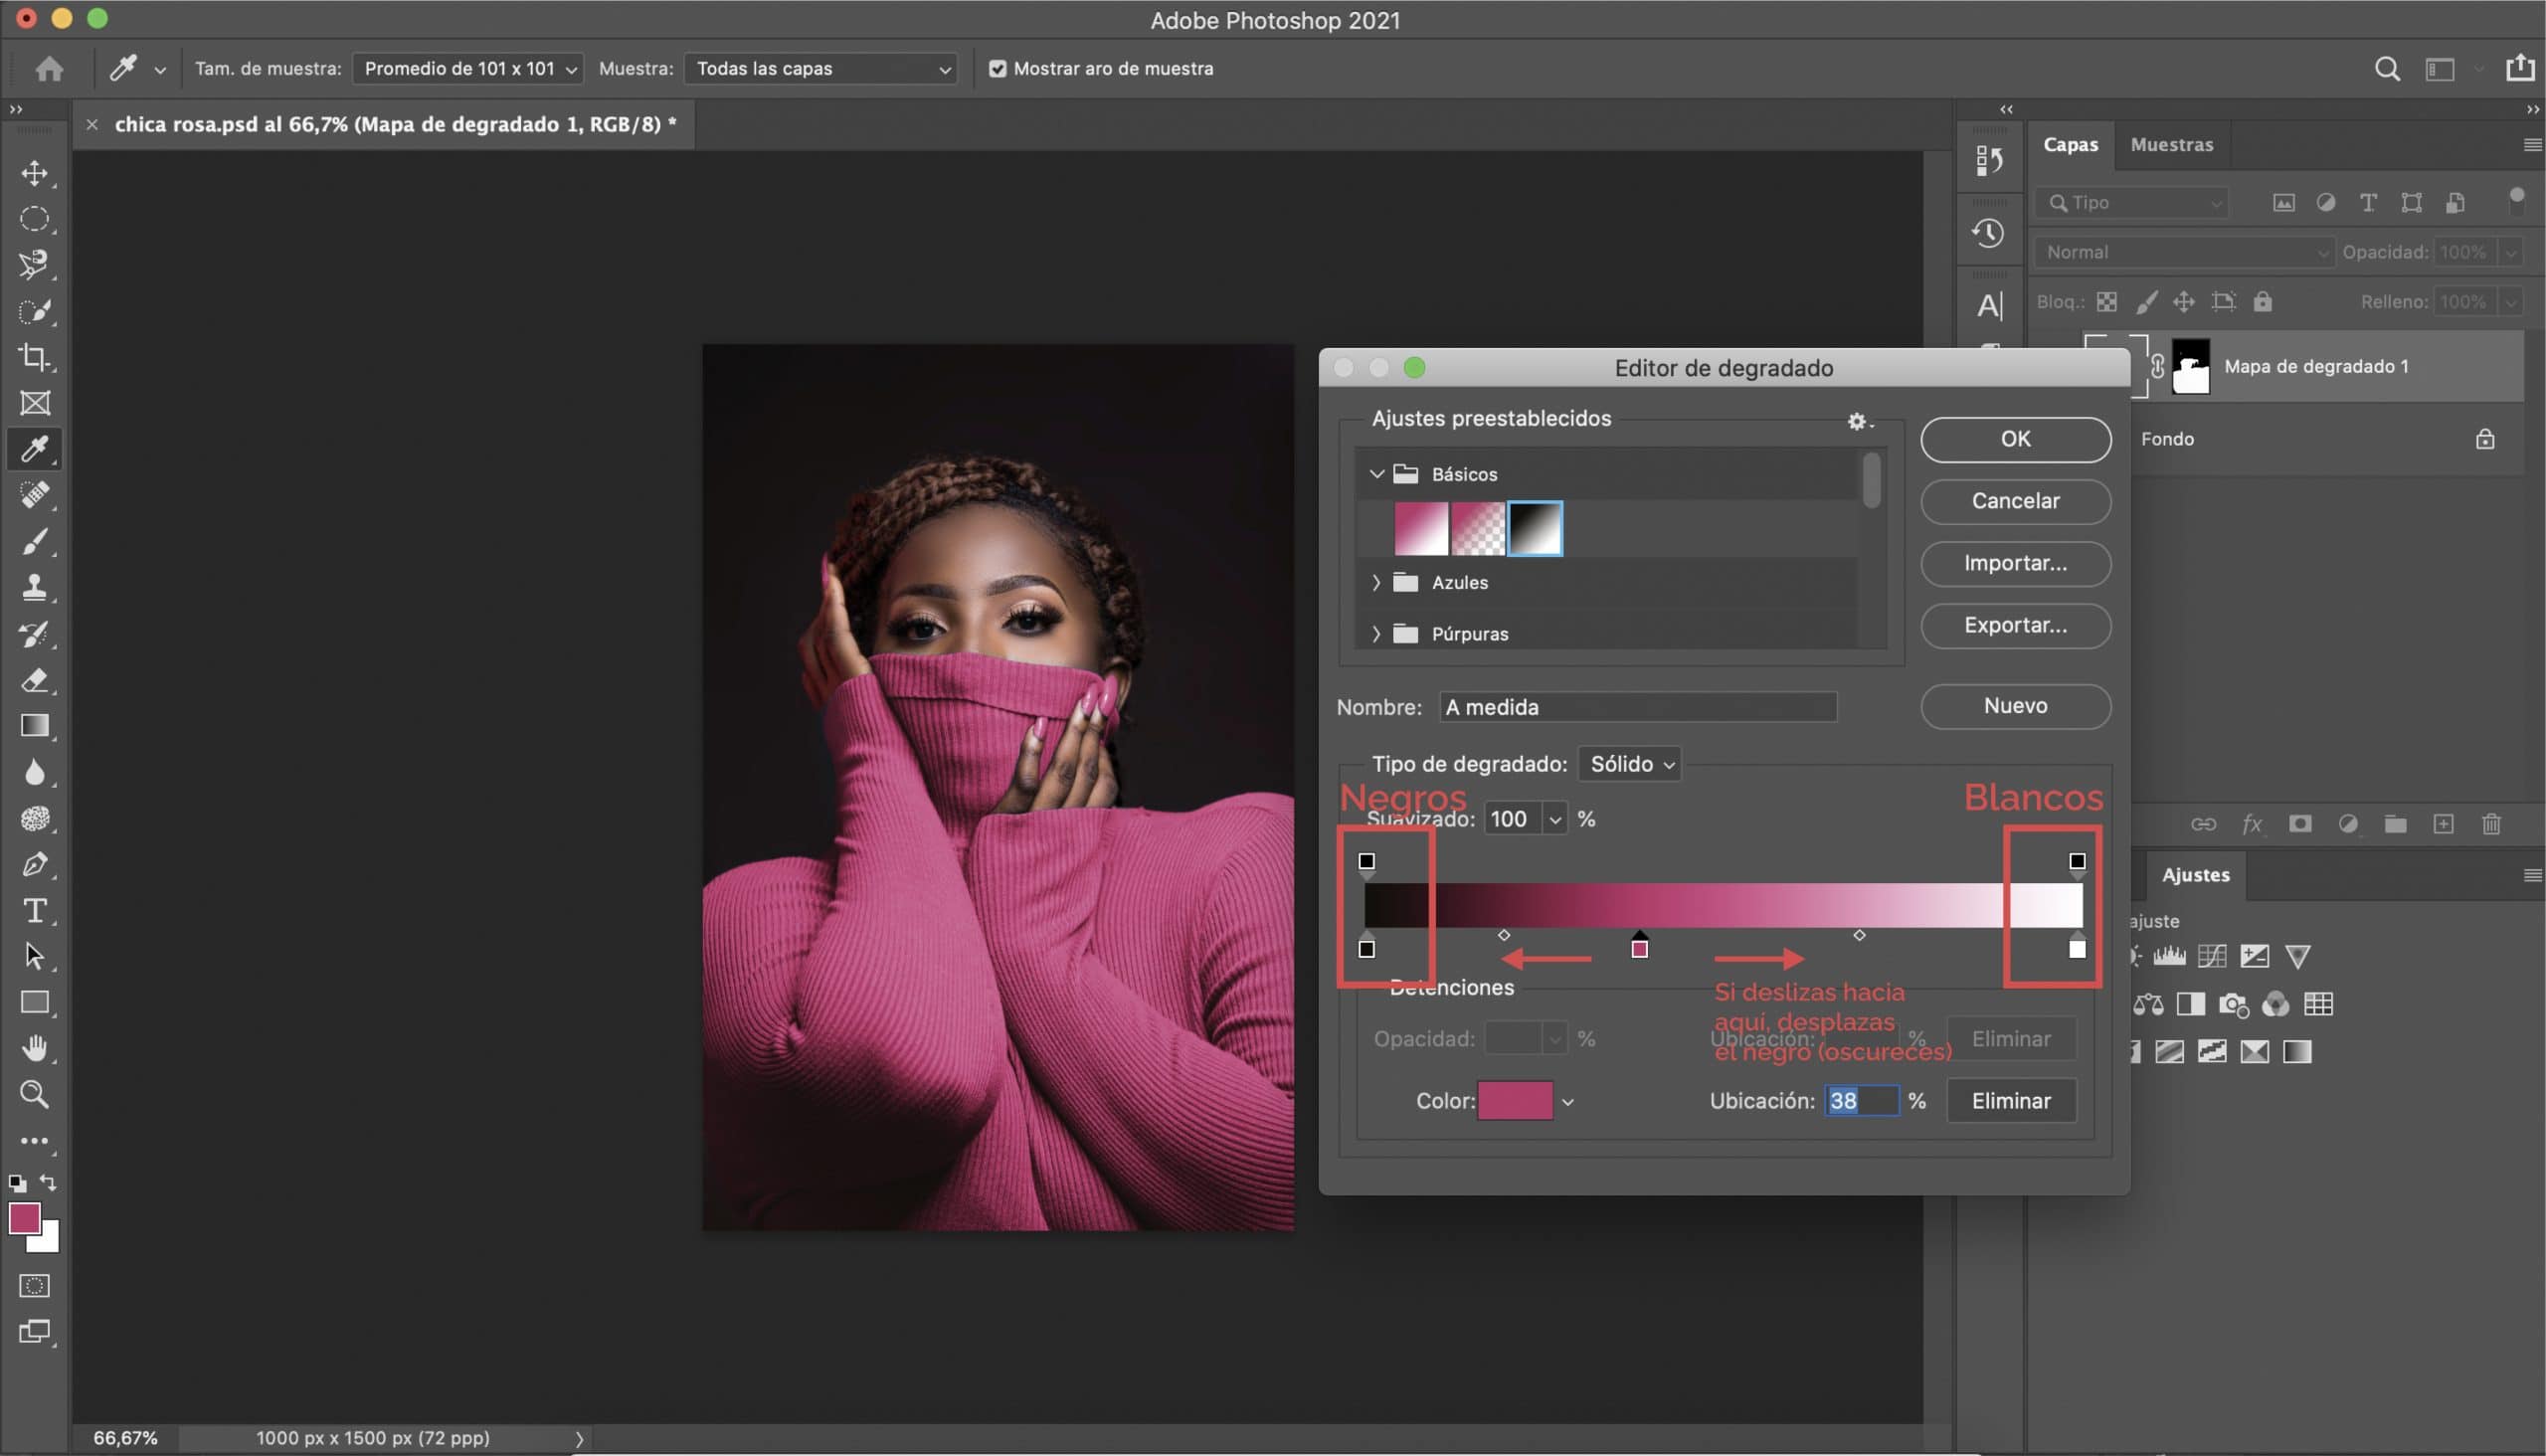
Last, we will play with the gradient so that the color change is as fine as possible. The right part of the gradient rectangle, the one containing the whites, corresponds to the light and the left, the one containing the blacks, to the shadows. Moving the selector from one side to another not only we will modify the tone of the applied color (making it lighter or darker), also we will be able to respect the lights and shadows of the element that we are editing so that when replacing the color it is as less artificial as possible.