
Those black and white photos that we can have in the storage room or in a lost drawer of one of our relatives they can be painted with their natural colors if we know how to handle the tools we have in Photoshop well. We do not need to go through a professional to get a little shine and color if we know how to have the patience to follow the advanced tutorial that we teach you today.
Step by step you can follow this tutorial that will make these photos become more attractive, realistic and striking so that you can pass them on to those social networks. The focus of this tutorial is not to turn that old photo into one that takes the colors as it was in that precise moment in which it was captured, but to maintain that vintage touch by using color to give them our special touch.
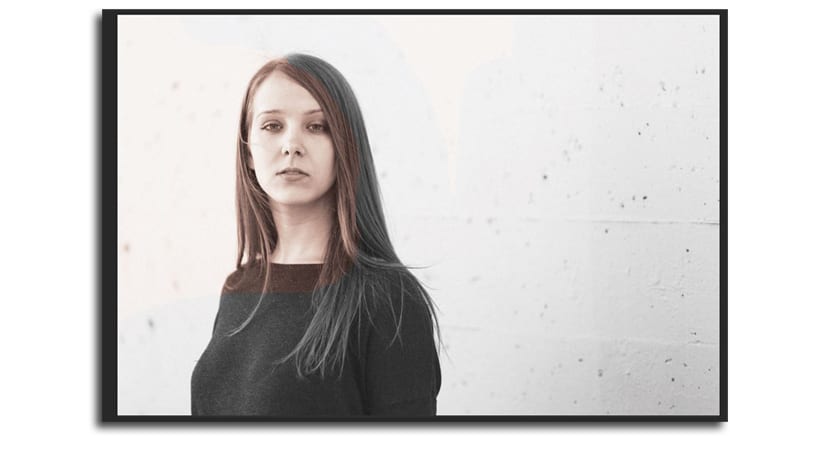
For the tutorial I have taken a black and white photograph that does not have all the resolution we would like, but it will help us to show all the steps to follow to color a photo and give it that most vivid look and full of color.
This technique is valid for a photograph taken a hundred years ago as the one taken in the 70s, so let's move on to it.
How to colorize a photo in Photoshop CC
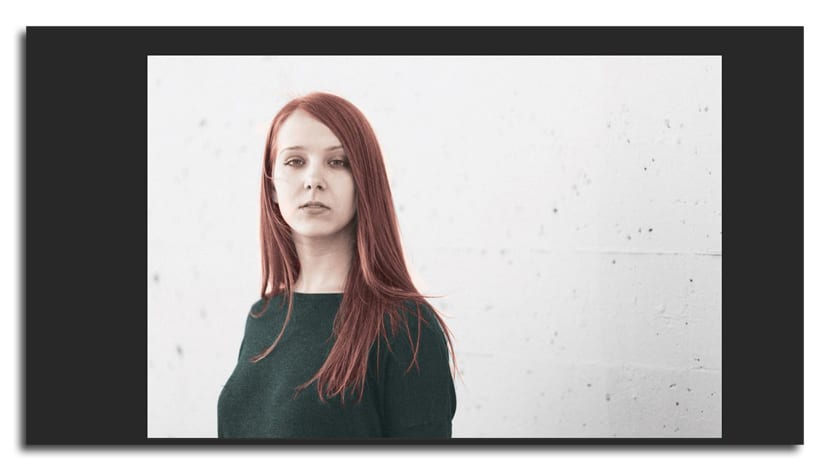
My approach is to give you a redder shade to the model's hair, a darker and colder skin and accentuate a little the color of his eyes to match the green color of his clothes. This will provide a nice contrast.
- Let download the photograph that we have from this link in FindA.Photo

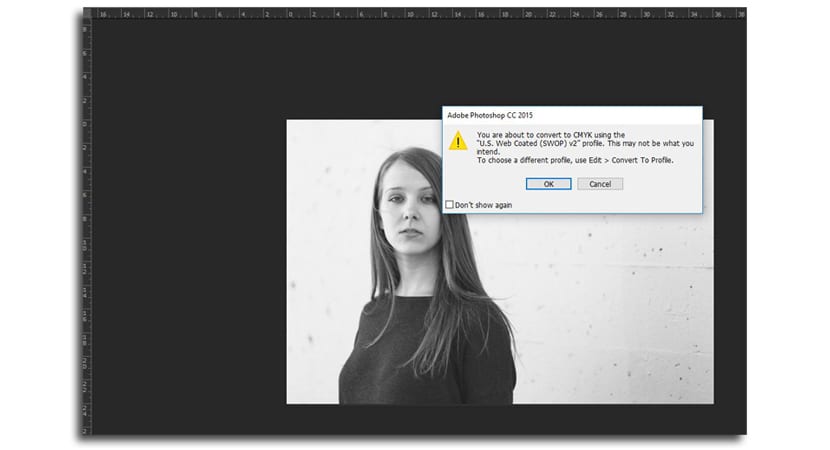
- To make everything easier, let's convert image to CMYK channel which will facilitate us to modify each color applied to each portion of the image
- Let's go to Image> Mode> CMYK Color. A window will appear when selecting which we click on «OK»
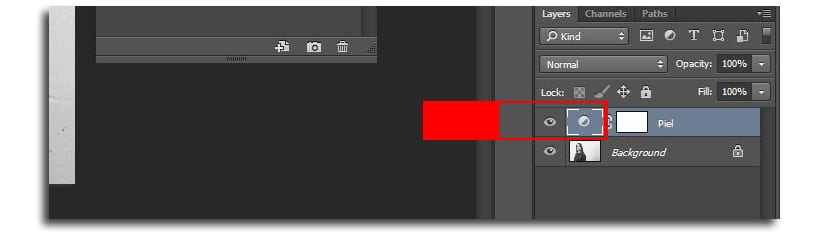
- The first will be add some color To the skin. We will make adjustments to the image completely to limit its effect to areas of the skin
- In the Adjustments panel, we click on the button «Curves«
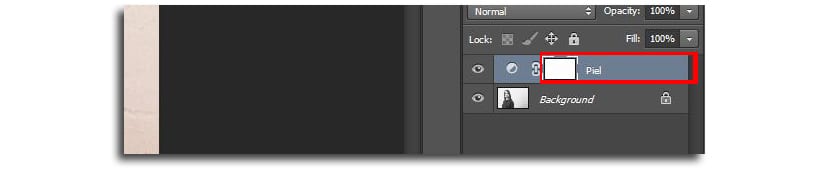
- Now we change the layer name to "Skin" (double click on the letters of the layer name)
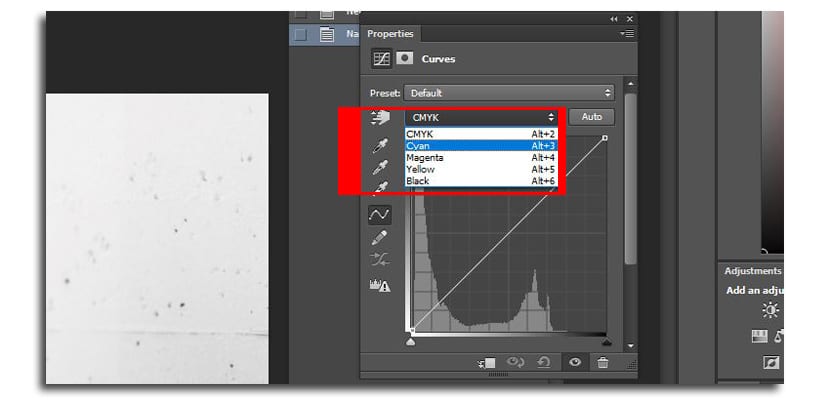
- We do click now on the icon next to the mask layer on the same «Skin» layer to activate the curves panel again
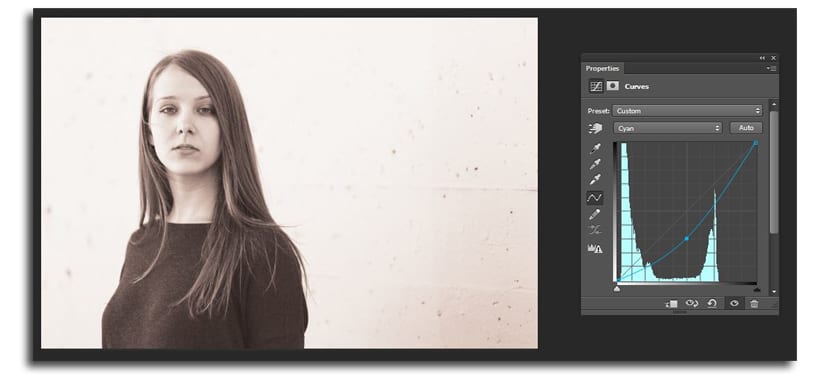
- In the Curves panel, click on CMYK to choose «Cyan«
- Now we do click in the middle of the line that runs diagonally from left to right as seen in the image:
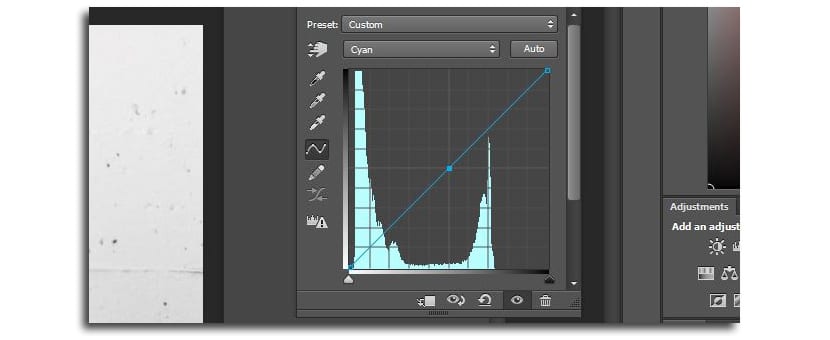
- We lower that created point to one third of the vertical as you can see in the following image:
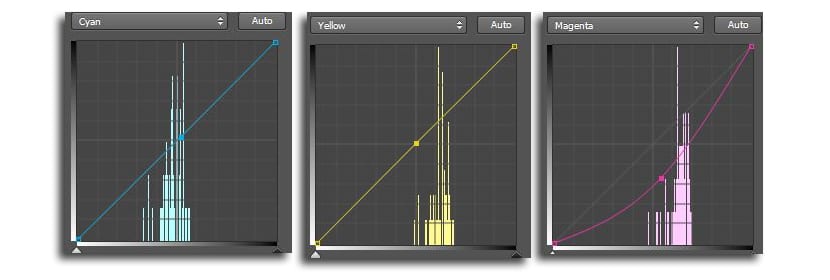
- Now we do the same step in the Curves panel, but we choose «Yellow«
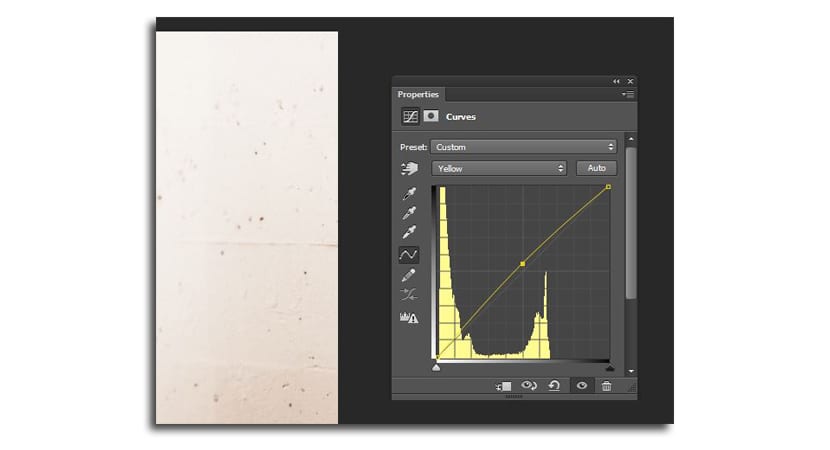
- We create a set point in the middle and we raised it a bit to stay between 52-53
- We do the Curves step again with «Magenta«
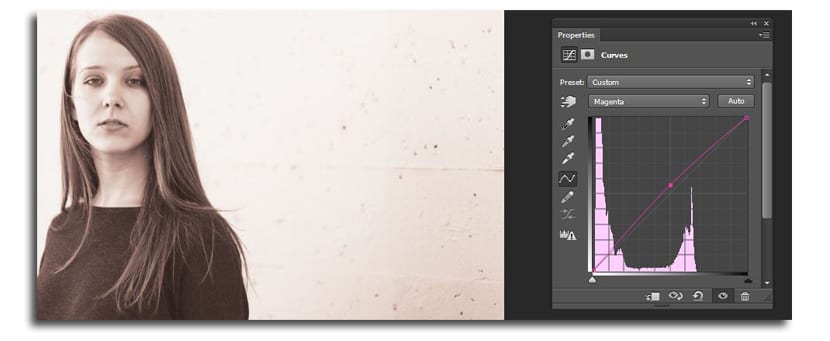
At this point we will have a base for all shades that we are going to apply to the rest of the elements that appear in the image. This is the hair, the color of the eyes, the clothes and the wall.
- Now is the time to do click on the mask layer in the «Skin» layer
- We use the brush (B key) and we put the color to black

- Now you have to paint over all areas of the photograph other than the skin
- Here you can change the size of the brush to get into the details and zoom the image to specify the different contours and leave only the skin color applied
- You should have something like this:
Now you must use the same steps since adding "Curves" from the Adjustments panel for each color that we are going to apply to each element of the photograph. I am going to repeat the same steps so that it is clear to you what the girl's hair is for.
- We click on the «Curves»In the Adjustments panel
- We change the name of the layer to «Hair«
- We give click the circular icon on the new layer created to activate the curves panel
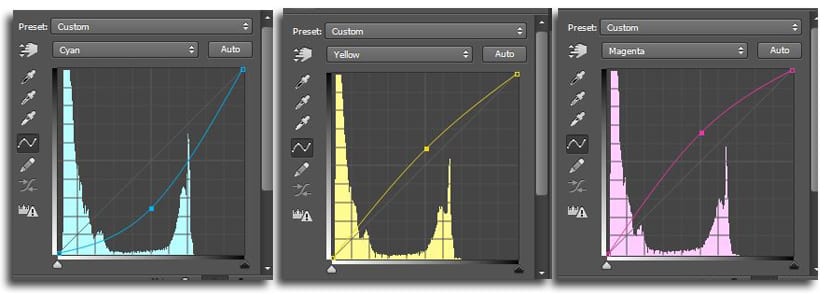
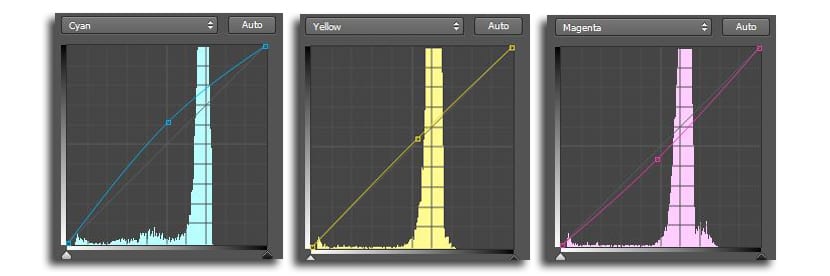
- And now we are selecting «Cyan», then «Yellow» and finally «Magenta», to choose the color that we will give to the girl's hair. My idea is a more reddish color as if it were a little redhead. You have in this image how I have left the three values to give you an idea:
- Now we select the brush (B), black color and click on the mask layer on the «Hair» layer
- Let's painting everything except the hair area carefully. Remember to change the size of the brush to specify in all parts, just as you can use the zoom to focus on the most difficult parts such as the strands of hair
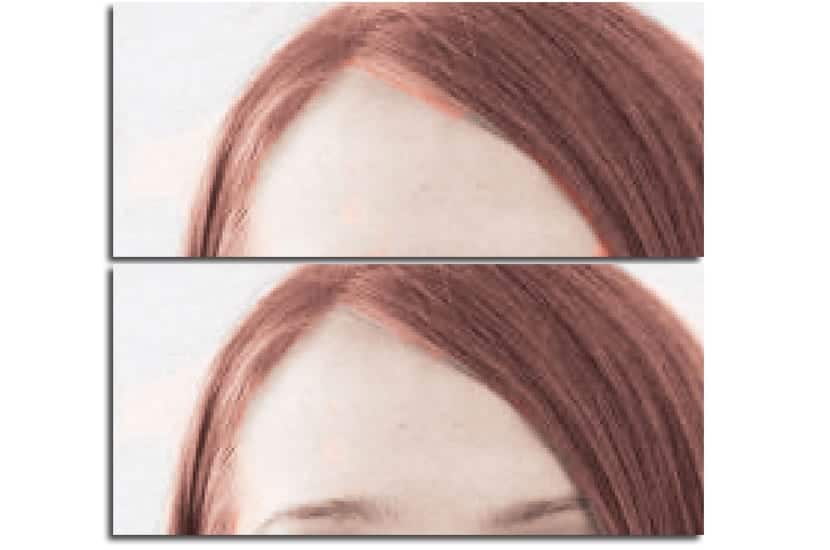
- In the following image you can see how the most orange areas They are the ones that mark the darkest tone of the hair and that must be cleaned with the brush. The comparison shows it well:
- For the areas of hair where the strands are loose, what I do is trim areas with more hair and leave the hairs loose to paint them with the white color that will paint the hair:
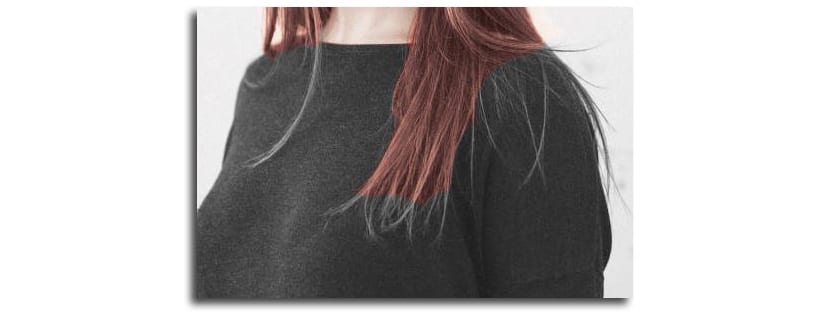
- I apply the zoom and a size of very fine brush to go painting on the blank lines that mark the curvature and direction of the different strands
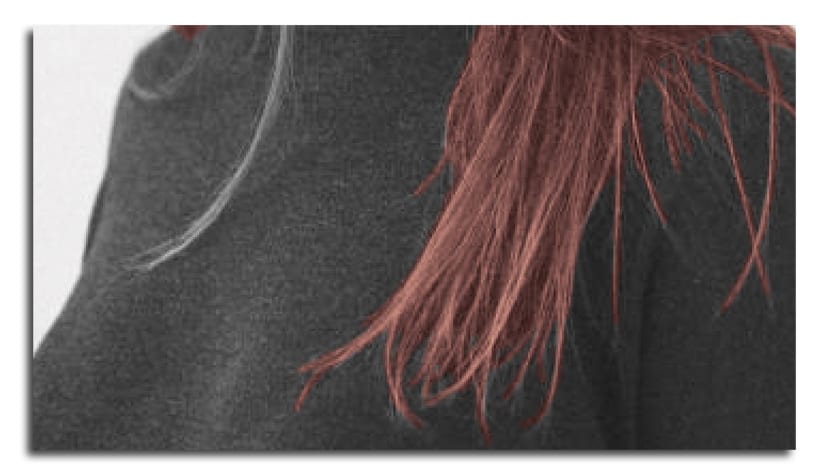
- It would look like this with the color of the painted hair:
We only have to do this step with the color of the eyes and the color of the clothes. I will use a green tone in what is the color of the eyes, but very light and a greener one for the clothes. I'll skip the step of changing the wall color finally.
- With the clothes I have followed the same technique for locks with these values for the color a little green:
- Finally, the eye color to delimit it with the brush and leave only the iris
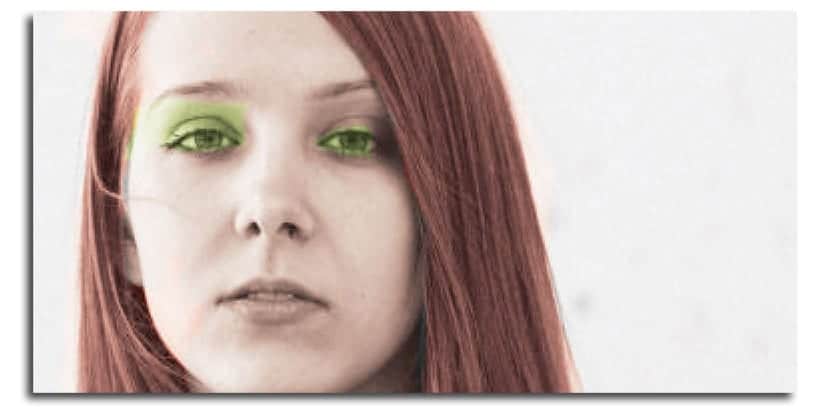
- Profiled shape:
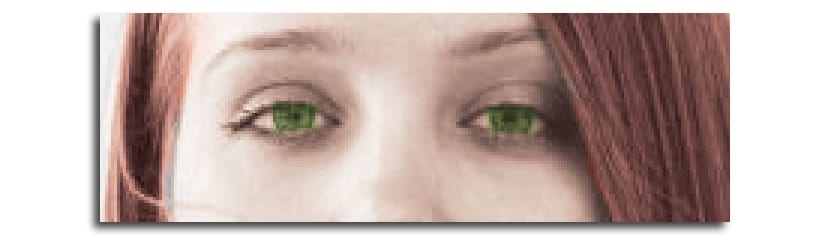
- Already defined the shape of the iris, I retouch the Yellow, Magenta and Cyan values to leave a tone more consistent with the entire composition
- I end up adding another "Curves" for the color to the lips to define them, since it is an element that can play with the rest of the tones to give it a more lively tone without overdoing it:
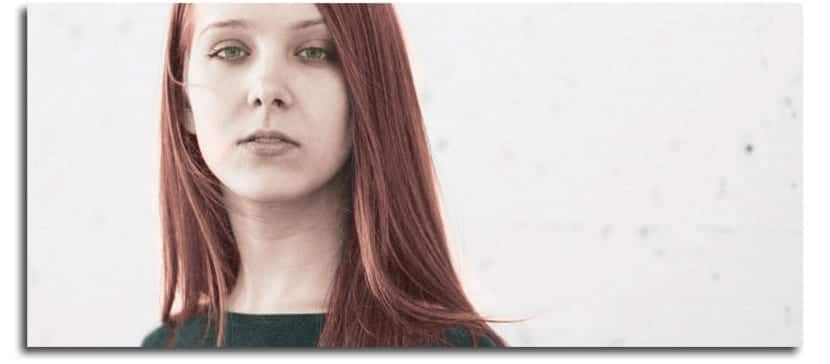
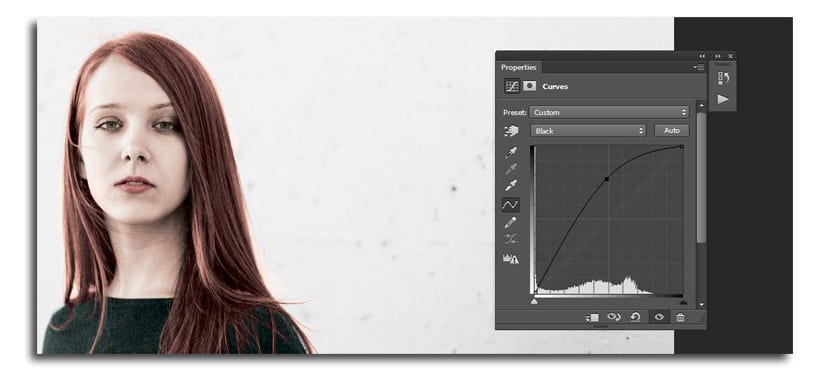
To give it the final touch, we are going to create a new curve to modify the contrast a little of the composition in general and that it takes all greater consonance
- You create a new curve and we head to channel K (Black). We create a point in the middle of the diagonal and bring it to as shown in the image:
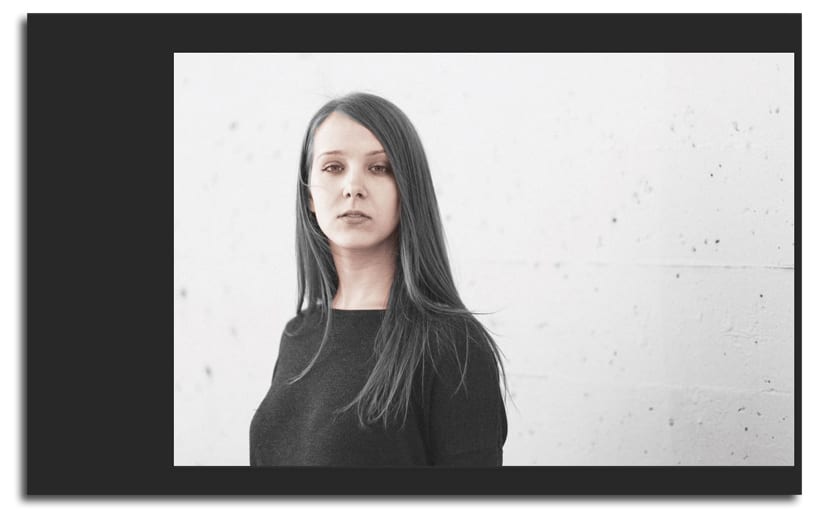
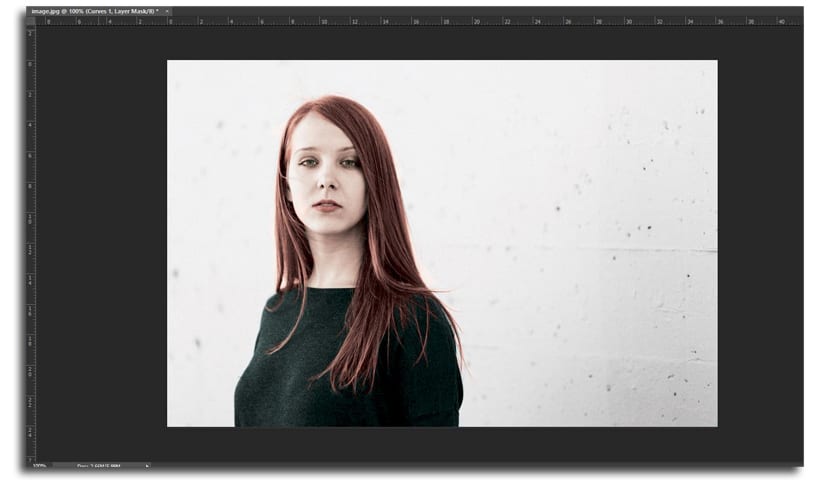
- We are finally left with the colored photograph:
Very good tutorial thanks.
You're welcome Jose! a greeting :)