When we take a picture, especially buildings, we find a somewhat distorted result that does not conform to reality.
If we do not have the opportunity to take another photograph, or you simply want to take advantage of the material we have, you will be interested in knowing how to solve it. Adobe Photoshop allows us to modify the perspective of an image.
Problems with digital solutions
One of the most common situations in which we find this problem is when we enhance a photograph of the facade of a high-altitude building, and therefore we must capture the snapshot from a lower angle. This we causes us to distort the angles.
Technology allows us to modify and retouch the images with a set of tools that will give us a totally realistic result.
We change the perspective of a building
Next we will teach you through a tutorial, step by step, to learn to change the perspective of a building.
Through different images of the work table, and applying it to a practical case, you will learn in an easy and visual way to retouch the perspective of a building. With the tricks that we will show you below you can apply this effect to any circumstances that require similar characteristics.
Image
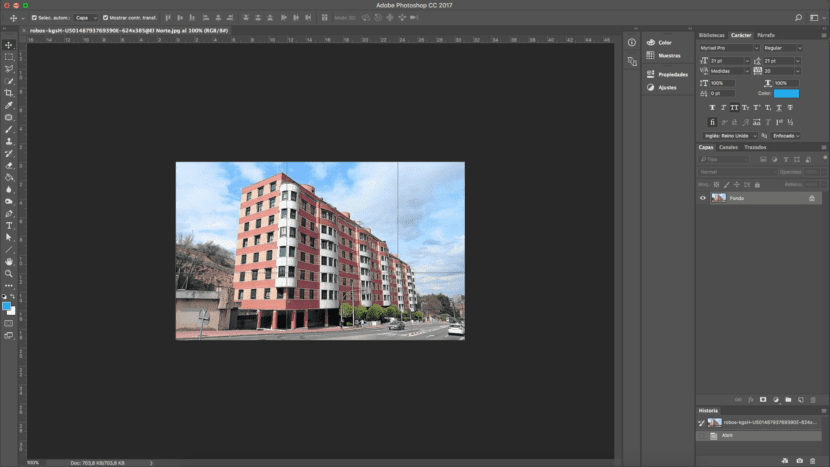
First of all we must, we must open the image that we want to retouch in Photoshop. In our case we will retouch a building. If you look closely, because of the original perspective of the photograph and the distortion that the lens has been able to generate, the front of the building looks somewhat deformed, much higher than the rest. We are going to learn how to smooth and correct this effect as much as possible.
Visual guides
If we need it we can draw some reference lines that will serve as guides to ensure that we are getting the angles well, and avoid distorting the image even more. To enable this tool we must follow the following route:
- View - Rules, or we can use the keyboard shortcut by pressing: cmd + R.
We can draw as many lines as we need, since they are not visible when we save the file.
Distort the image
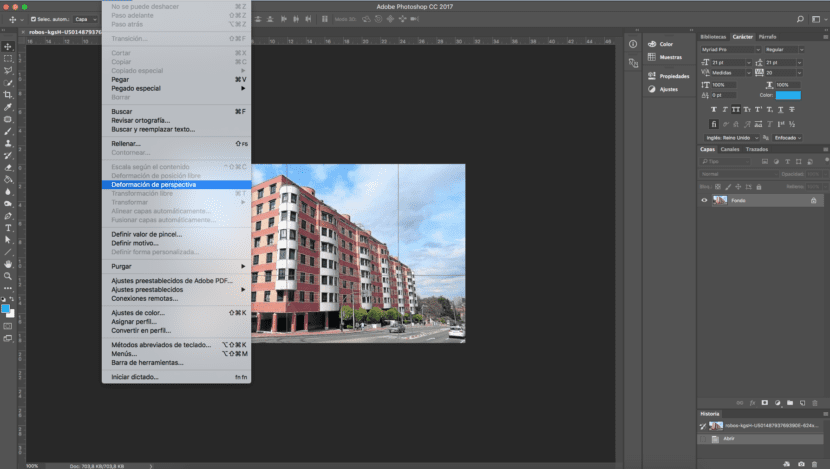
The next step, and first of all, we will duplicate the image. Then we will start transform the image. We will go to the top menu and follow the following route:
- Editing - Perspective Warp.
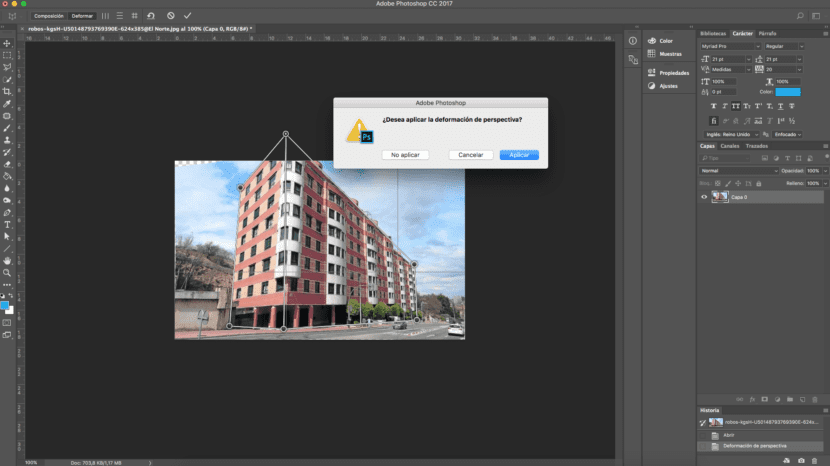
When checking this option we must click and drag to define the planes. We will adjust a minimum of two planes to be able to define the vertices of the building in this case.
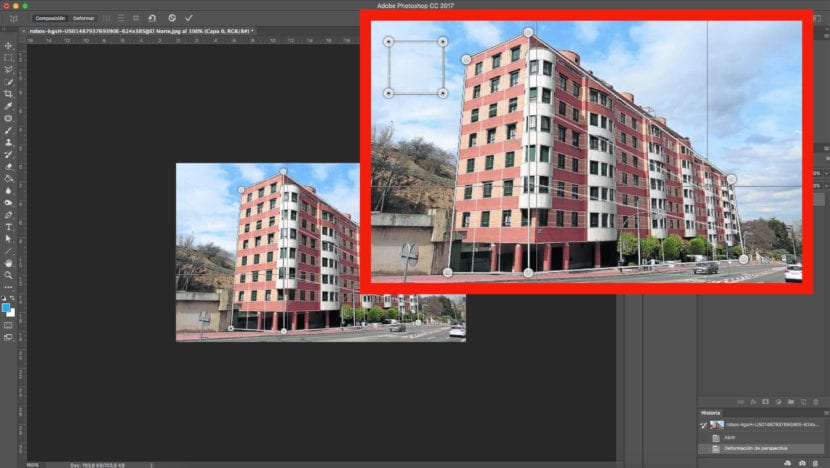
Once we have defined the element we will look for the button "deform" on the top of the worktable to be able to move the position. This means that we can manipulate the perspective of the building in our opinion.
Apply the modification
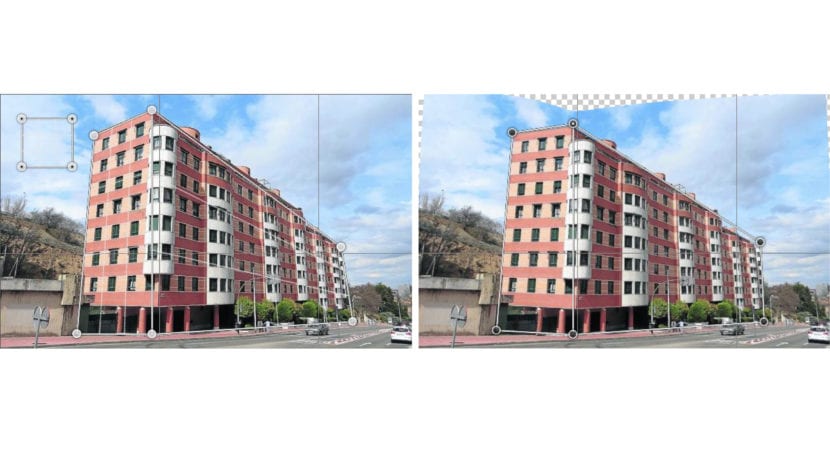
When we decide that we have finished our modification we will press "enter". At that time the correction will be applied. As we can see, the end result is a much more unified building. The only problem with which we can find is that, probably, when correcting the perspective our photograph is with holes around. The easiest solution, in case you don't know how to multiply those parts, is to reframe. This option is possible if you have enough margin.
Fill according to content
If we don't have the option to cut the image, Photoshop gives us the option to fill in those gaps automatically.
We will have to select those empty spaces that have been in the photograph and we will follow this route: Edit - Fill. A window will be displayed in which we will select the option "Fill according to content". Taking the rest of the image as a reference, the program will automatically fill in the spaces that we had without content.
The result of the "before" and "after retouching can be seen below.