![]()
These days more and more brands choose to have a handwritten logoMost of them are usually made with brushes or calligraphic pens, the imperfections and uneven lines that these tools give away from the coldness and rigidity of the digital format.
The problem comes when we want to use this logo and we have to transfer it to the computer, it seems complicated, but with a few simple steps and our photoshop we can get a professional result and highly polished.
The first thing we should do is create a logo by hand, I recommend using black ink so that digitization will be easier for us later (it is also the perfect excuse to join inktober)
Once created you must scan it or take a quality photograph of it, I recommend that it be scanned since it will be easier for us to digitize it.
In my case I have decided to do it through a photograph to show you that even with few resources we can have a good result.
We started creating the logo:
- The first step is to select in settings the option of niveles (If you can't find the settings option, you will have to go to window> settings to see it on the screen)

- Once the niveles we have to drag the triangles that we find in the panel and join them, the position of the triangles between them and along the spectrum will depend on our image, what we should try achieve is that there are black areas and white areas, since those that are of other colors will be discarded by the program. When finished, we must select both layers (Background and Levels) we right-click on the layers and choose the option to combine layers.

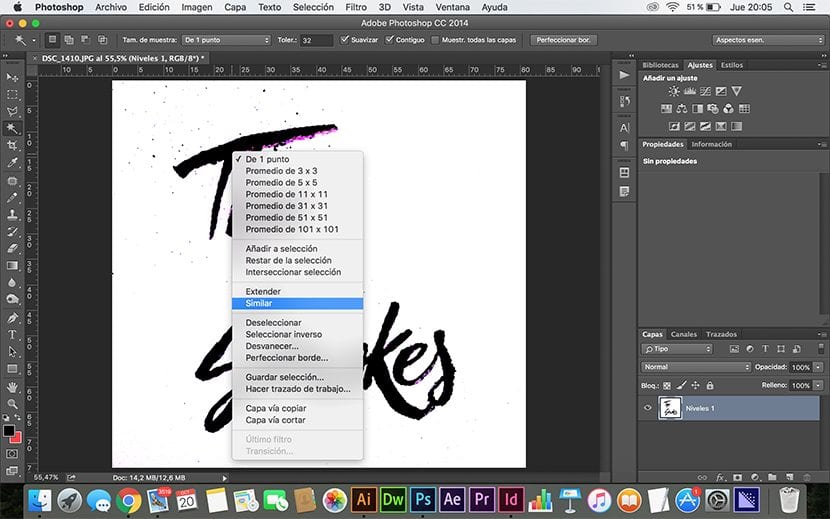
- The next step would be to use the tool Magic wand (W key, from English Wand) and select a black part of the logo, when we have selected a part we click on the right button and select the option similar, this will select all the black parts of the image.
- Once the black color is selected we can remove with the eraser tool (E key for English Eraser) spots ink or logo imperfections.
- When we finish cleaning the logo we go to the tab Selection> invert, select the eraser (E key) and we erase the background.

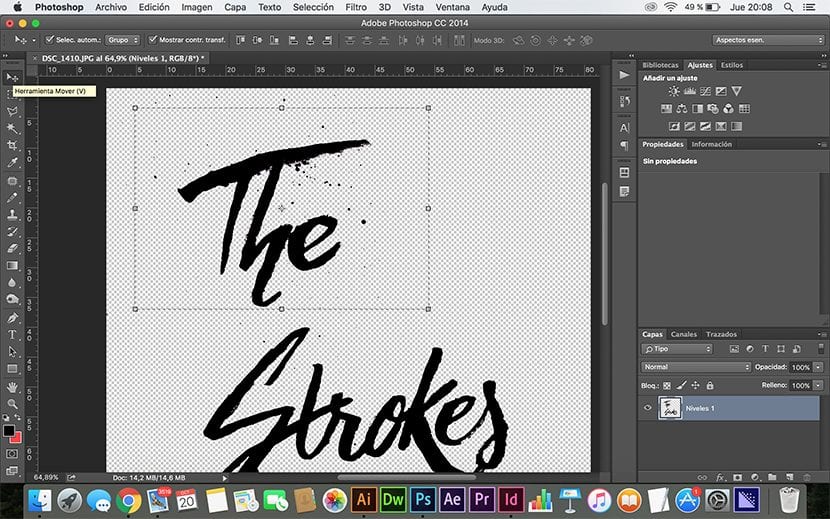
- If the logo has not been centered we can make a selection, in my case I have done it with the rectangular frame tool (M key) then I have resized and centered with the move tool (V key).
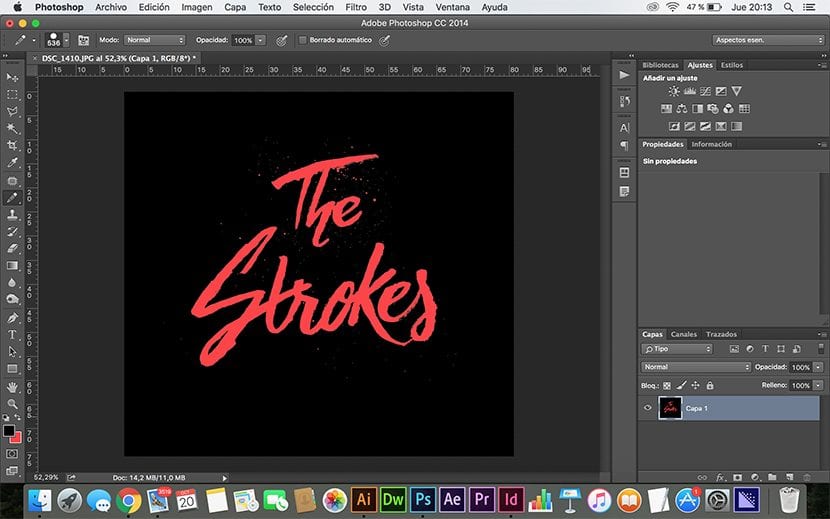
- Using the tool again Magic wand (W key) and the brush (Letter B) we can change and put different colors, letter and background.
In Photoshop? In my life I made a logo in Photoshop for that is Iluustrator, corel or freehand. In Photoshop, the tears come afterwards and you know why. :)
Well it all depends on the type of logo you want, from personal experience the calligraphic logos made by hand are better to do them in photoshop and then if you want to vectorize them, but it is not necessary if you export to a specific and correct format and quality taking into account the support, the final arts etc.