
How create a GIF animated in Photoshopp quickly and easily is no longer a problem thanks to Photoshop, the quintessential photo retouching tool, but did you know that you could create GIF with Photoshop very quickly? in just a few 10 minutes depending on the complexity of your animation you can create a fantastic GIF on the go to use wherever you want. Very intuitive and in very few steps Photoshop allows us work with movement at the same time as we do photo retouching.
The only thing you need to keep in mind is you need to make a GIF animated in Photoshop es get the idea how you want to do the animation and prepare all the necessary images to create the animation. This type of animation is based on the frames to create movement very similar to Adobe Cheer up. Photoshop allows us to hide and leave frames visible to start creating movement. In this type of animation, each frame is a movement, therefore we have to change the objects on the layers every time we want to create a movement. Easy, fast and very intuitive.
In this case we are going to do a GIF blink where an icon will alternate its visibility, later we will also add a font.
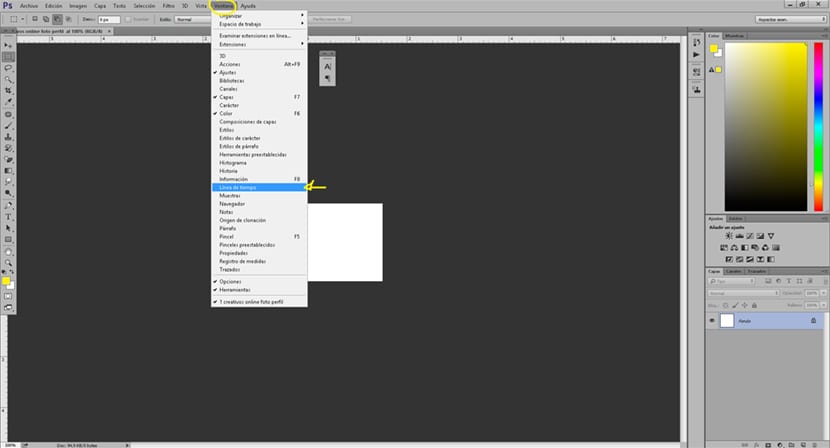
The first thing we have to do is take out the animation menu, for this we go to the tab window / timeline de Photoshop. We had already seen the timeline in other Adobe programs: Animate, Premiere, After Effects and all kinds of programs that edit video or animations.
Once we have our timeline ready, what we are going to do is start create frames. Each frame if we look closely at the bottom has an icon with a time counter, this counter will mark the duration of that frame. The idea of animation is toggle between the layers of our images and the duration of those frames, each frame box is a move (a jump in this case of the icon) when we toggle the visibility layer of the icon. In short, what we have to do is toggle a frame with icon and another without icon, in this way it will visually appear that it is flashing.
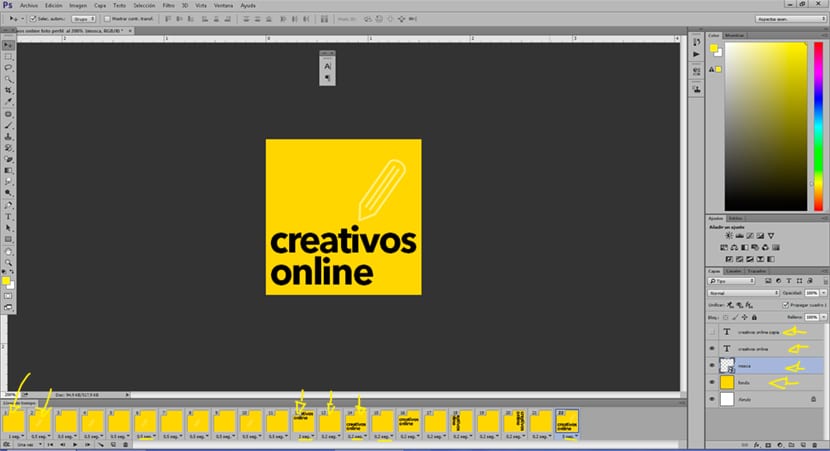
If we look at the image above, we see how the visibility of our icon alternates, thus achieving the flicker effect. The same happens with typography, we can alternate its movement in any way possible: size, color, shape ... any possibility is possible as long as we alternate between each frame.
El time of each frame It will depend on what we are looking for with our GIFIf we want more speed we will give each frame less time, on the other hand if we want less speed we will give each frame more time.
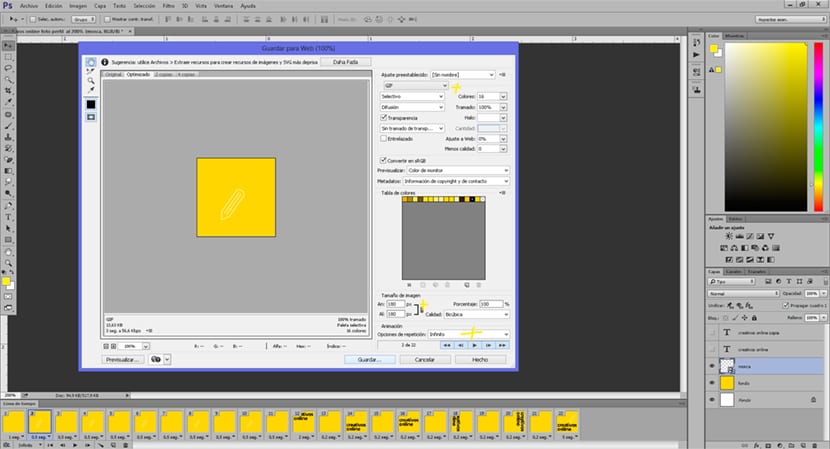
The last step consists of export our GIF, for this we go to the file menu Photoshop and we select the option to export for web.
In a very short time we have been able to create a GIF animated using Photoshop, our favorite tool for all those who love design and photography. Remember that the only limitation to creating anything is our own imagination. Create all kinds of GIF and practice without stopping until you master the technique perfectly.
Julio Eduardo so they won't talk to me later! : D