
As designers, when of using photographs in our design projects, we are quite used to editing and retouching them, to use different filters and effects on them to give them a more striking visual aspect.
Photo editing programs give us a multitude of options to apply to our images, from black and white filters, brightness and contrast adjustments, color filters, etc.
About the latter, about color filters, is what we are going to talk about today in this post, more specifically about a graphic trend that became fashionable around the year 2017, the duotone effect.
we are going to teach you how to create images with duotone effect in photoshop from scratch.
What is the duotone effect?
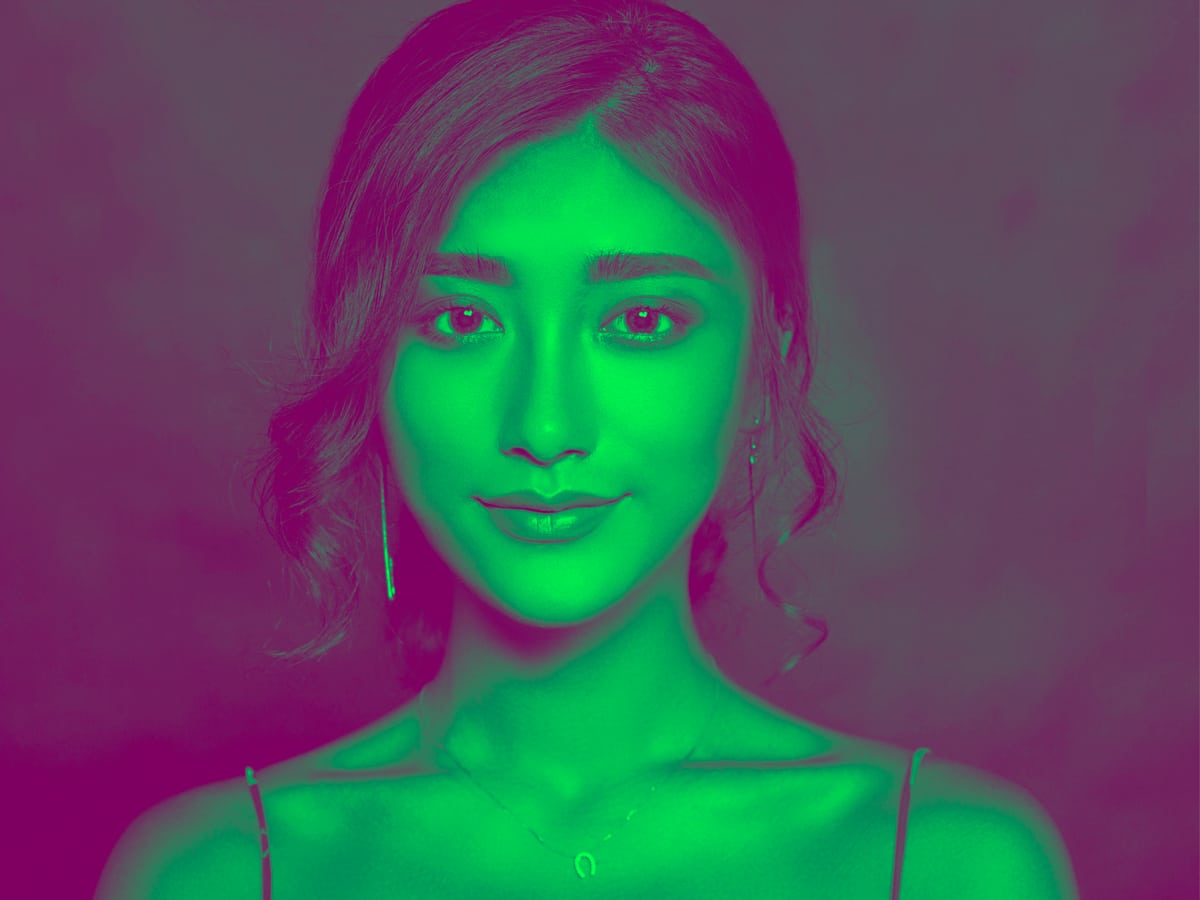
As its name suggests, they are images or photographs in which two different colors have been used. It originates from the traditional printing process with two inks, only two inks were used to reduce costs, since only two plates were needed and not four for the colors.
In the graphic world, using the duotone technique is used, to add to the photographs or icons, a certain personality, since it is the designer who can choose the colors to work with.
But not all the images we see work correctly with this technique.. The duotone is best applied to simple images, such as a portrait, but with a high contrast of light and shadow, so the effect is more noticeable.
Step by step duotone effect in Photoshop
One of the fastest and easiest ways to create this effect is through the editing program Adobe Photoshop, since thanks to its tools we can work on image channels and layer adjustments.
The first thing we must have before opening the program is the image with which we are going to work, in our case we will work with the portrait of this nice dog.
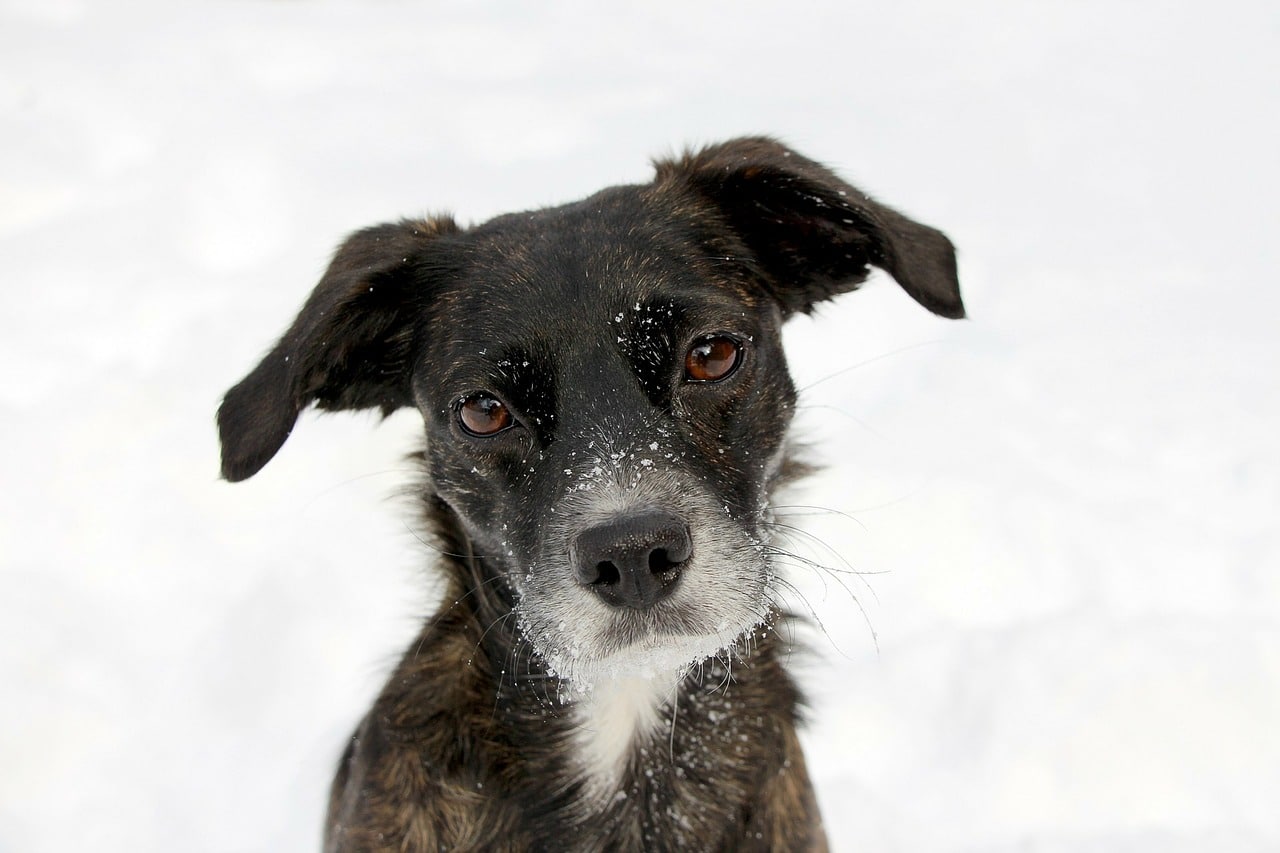
They do not have to be images with any requirements, but the more contrast such an image has, the more intense the duotone effect will be on it.
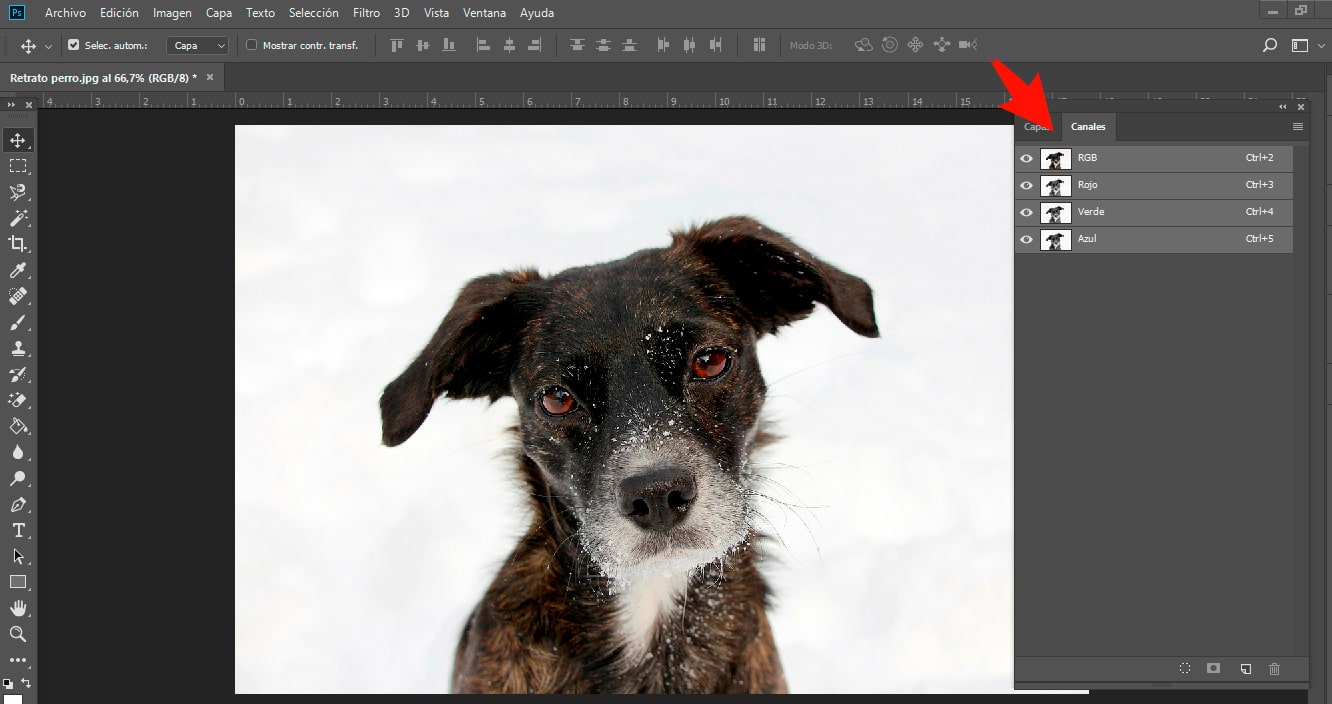
Once we have the image we are going to work with, we will open it in Photoshop, an important step is to have layers and channels tabs activated in the program.
If we don't have them, we activate them, it's very easy to do, we just have to go to the window tab and look for the layer and channel options and click on them.
In the channels panel, we are shown that the image we are working with is divided into four different channels, on the one hand the image in RGB, and the channels that make it up; red, green and blue. If we click on any of them, we will see how our image changes.
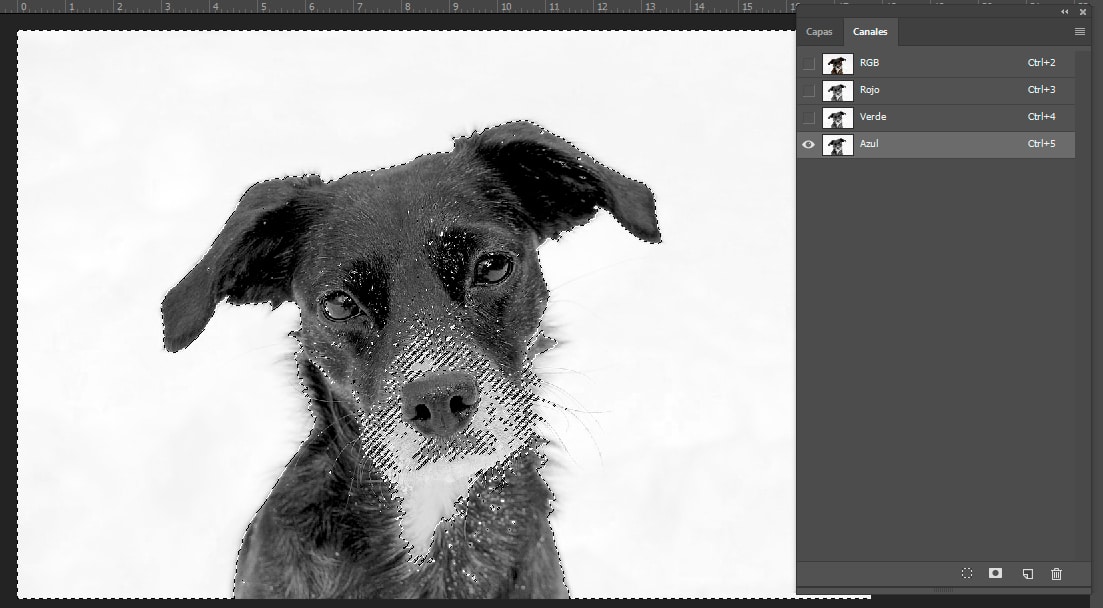
The most important thing in this step is choose the channel that does not provide more contrast, so that when applying the duotone effect it is more visible. This choice of channel is different in each image, there is not one that works for all photographs.
In our case, it is the blue channel, the one that does not give the most contrast. The channel that we have chosen must be loaded as a selection, that is, you have to click on the channel and at the same time hold down the control key on your keyboard. When complying with these indications, a dashed line appears on our image.
The next step is to go to the layers panel and choose the color layer adjustments option, and then, in the menu that appears, select uniform color.
Immediately after selecting the uniform color option, a window opens to select the color. The color that we choose now, will be the one applied in the illuminated areas of our photograph.
What we recommend is that you try different colors until you find the one you like the most, unless you have already chosen these colors beforehand.
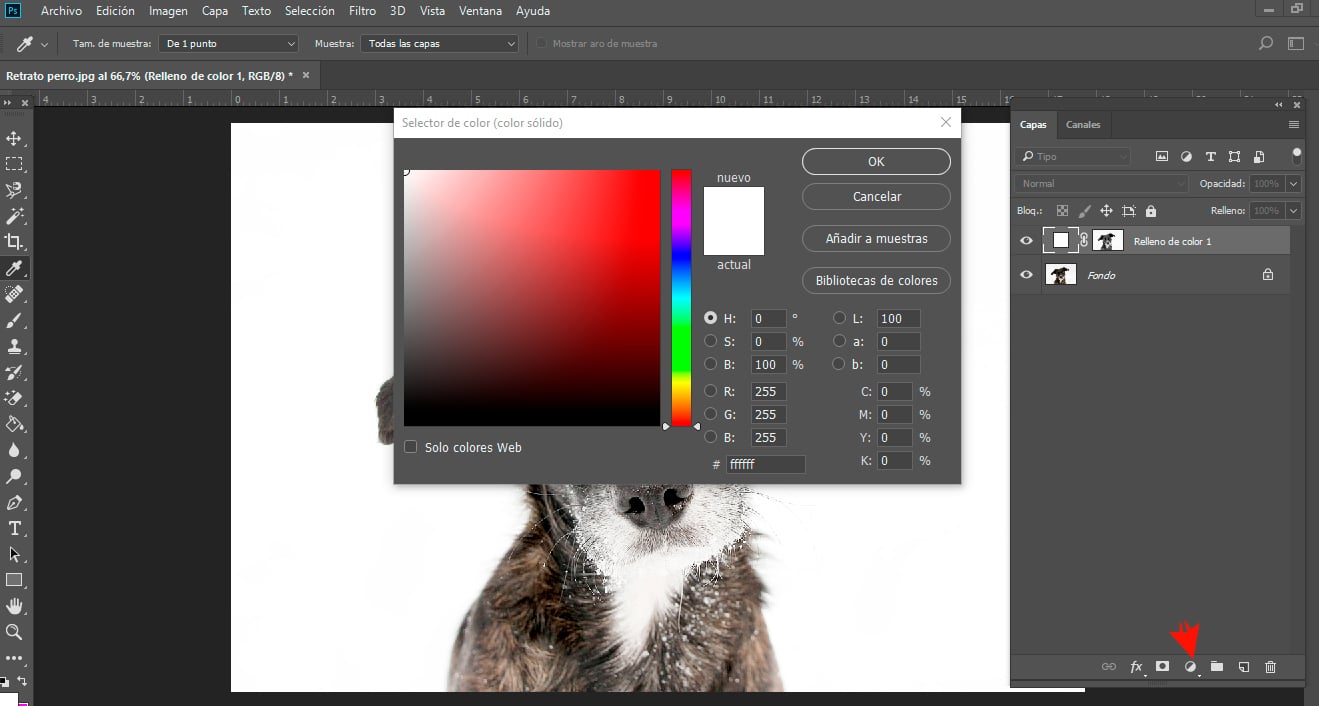
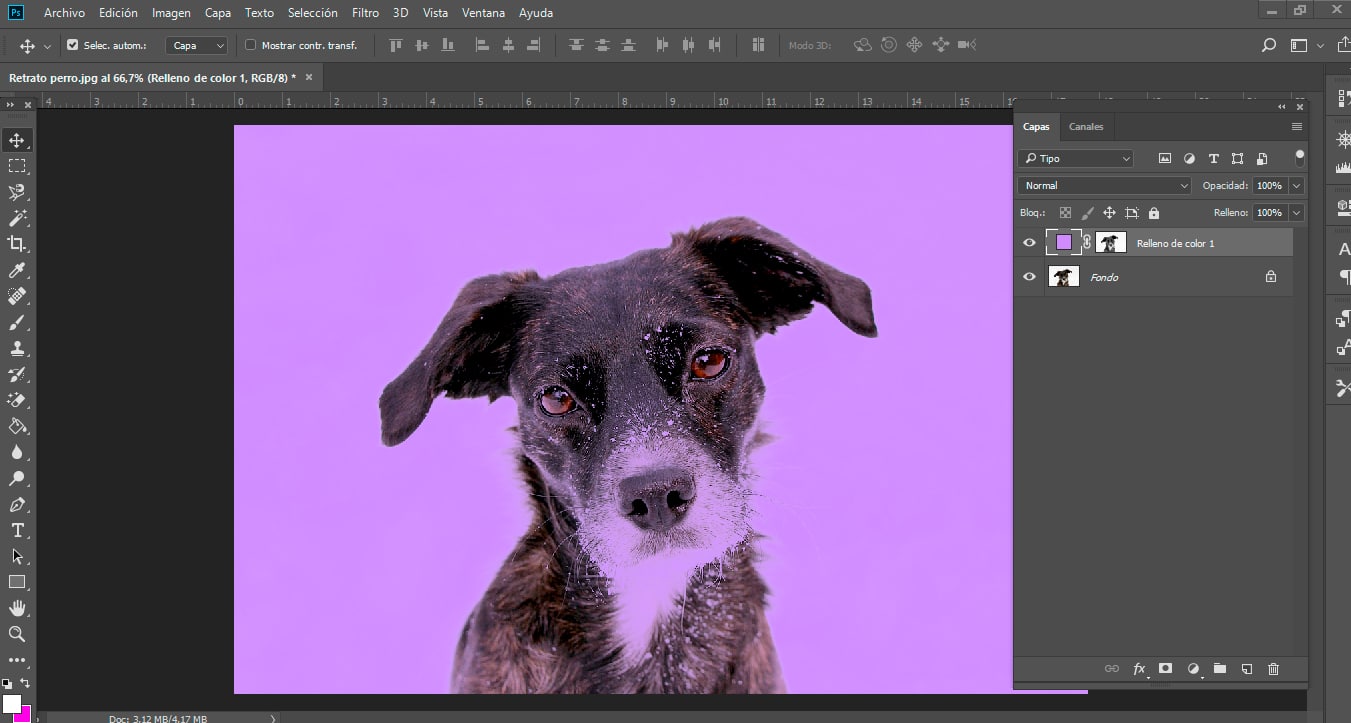
In our case, we are going to apply a purple tone, which looks like this. Once we have the chosen color, we just have to press the accept button at the top right.
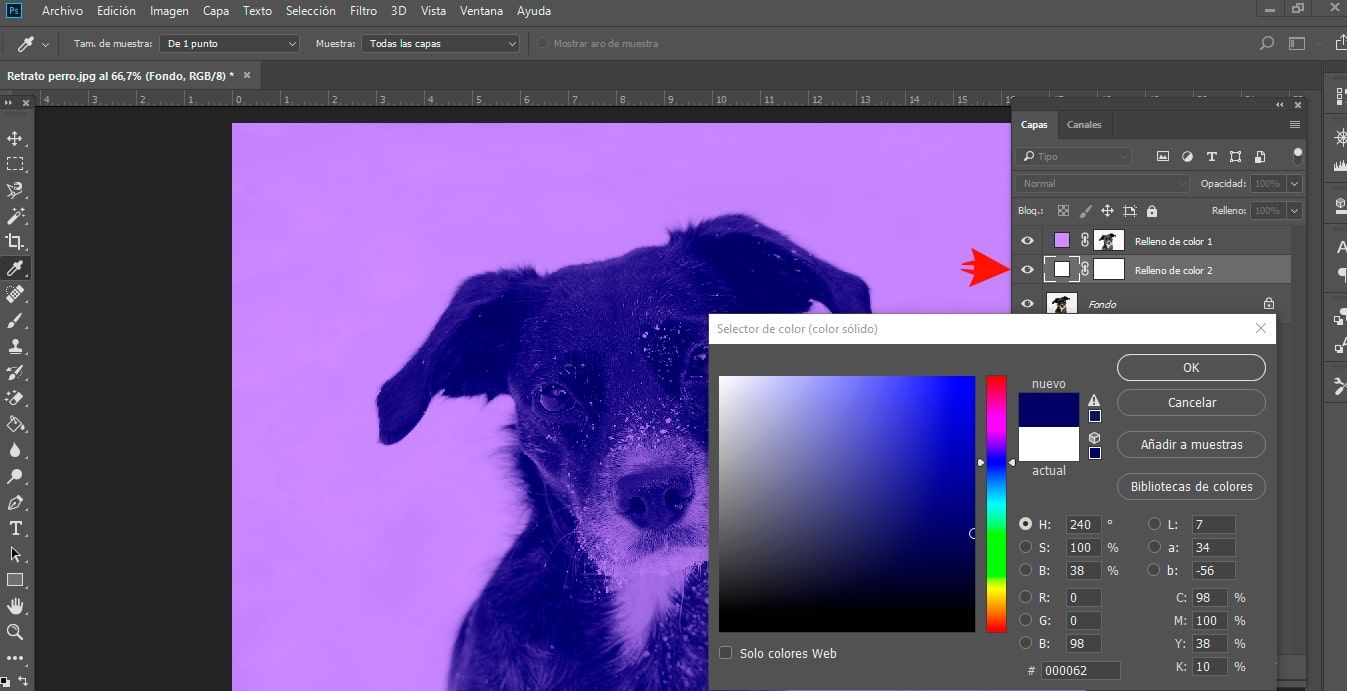
Now we are going to apply a second color to the darkest and shadow areas of our image. To do this, we go back to layers and select the layer where we have our original image. We reopen the color layers adjustment option, and we point to uniform color again.
The window will open again where we must select another color for these dark and shadow areas. As we can see, in the layers tab, a new one has been created with this new color that we are going to select, in our case a dark blue tone.
The good thing about this tool is that if, for some reason, you don't like how the chosen colors look to create the duotone effect, they can be changed. in a very simple way, you just have to double click on the color layer that we want to change. Double-clicking it does not open the screen again to select the color and be able to change it.
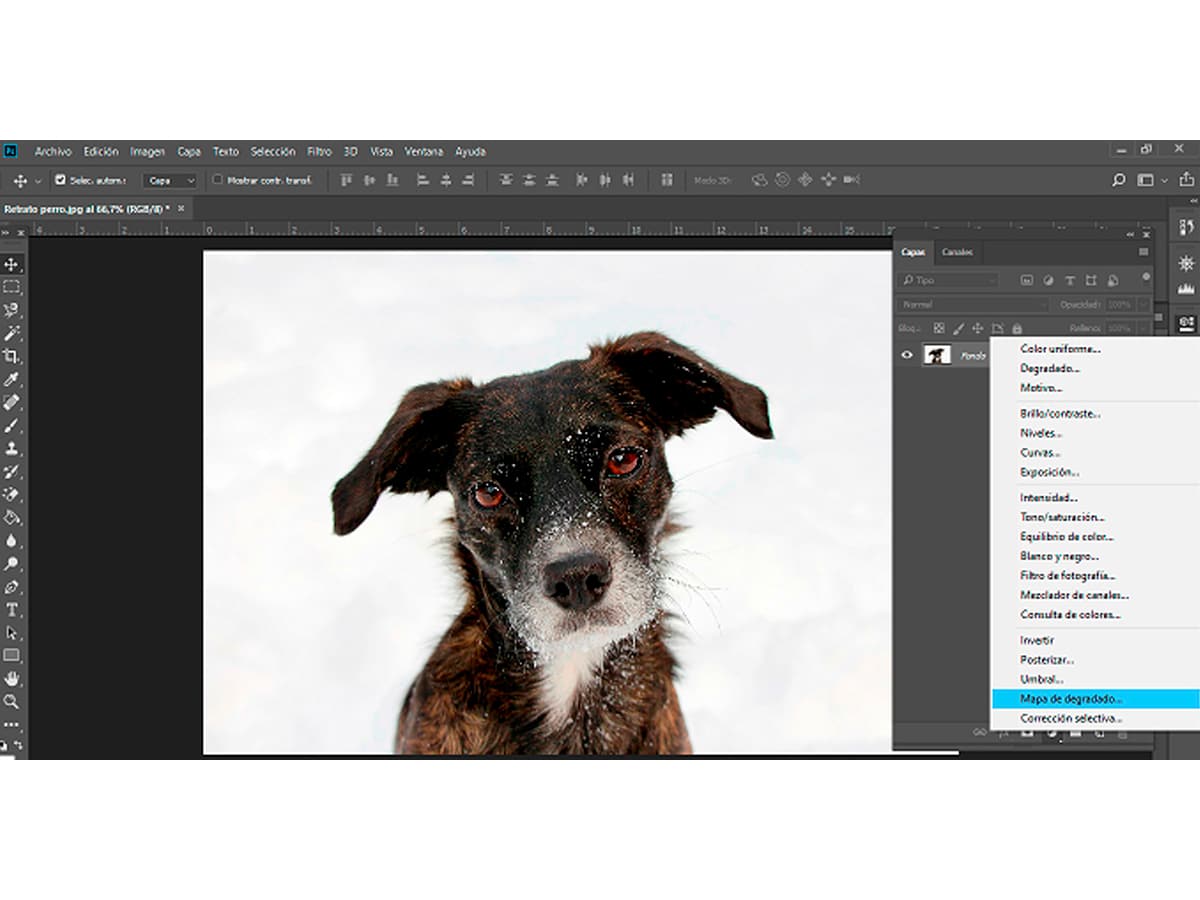
If you want to go one step further, you can add gradient effects to your duotone images.. You will simply have to change the option from uniform color to gradient map and adjust the balance between the different colors.
With these simple steps, you will be able to have your image ready with a duotone effect in Photoshop. It is very important to remember that when choosing the channel among the three that the image presents us; blue, red or green, we must choose the one that provides us with a more notable contrast.
If you are working with different images for a website and you want them to be seen as a set, the duotone effect is a style that will allow you to unify them.
We hope that this mini tutorial will help you in your future or present projects. As on many occasions we tell you, you have the comments box available to ask us any questions or suggestions on this topic that we have addressed.