
Una watermark allows you to sign your photos and avoid that, by uploading them to the network, you run the risk of your image being used without attributing the merit you deserve for having taken them. In fact, if you sell your photographs, limiting access to what the user can see and, above all, use is vital.
It is difficult for me personally to introduce watermarks in my photographs, but when I do, I feel more comfortable if that watermark, while fulfilling its function, does not steal the prominence of the image. In this post, I'm going to teach you how to create a watermark in Photoshop, versatile, valid for dark and light backgrounds. I will teach you how to create your watermark from a logo or from scratch so that you are the one who decides how you want to sign your photographs.
Watermark from text
Create a file with transparent background
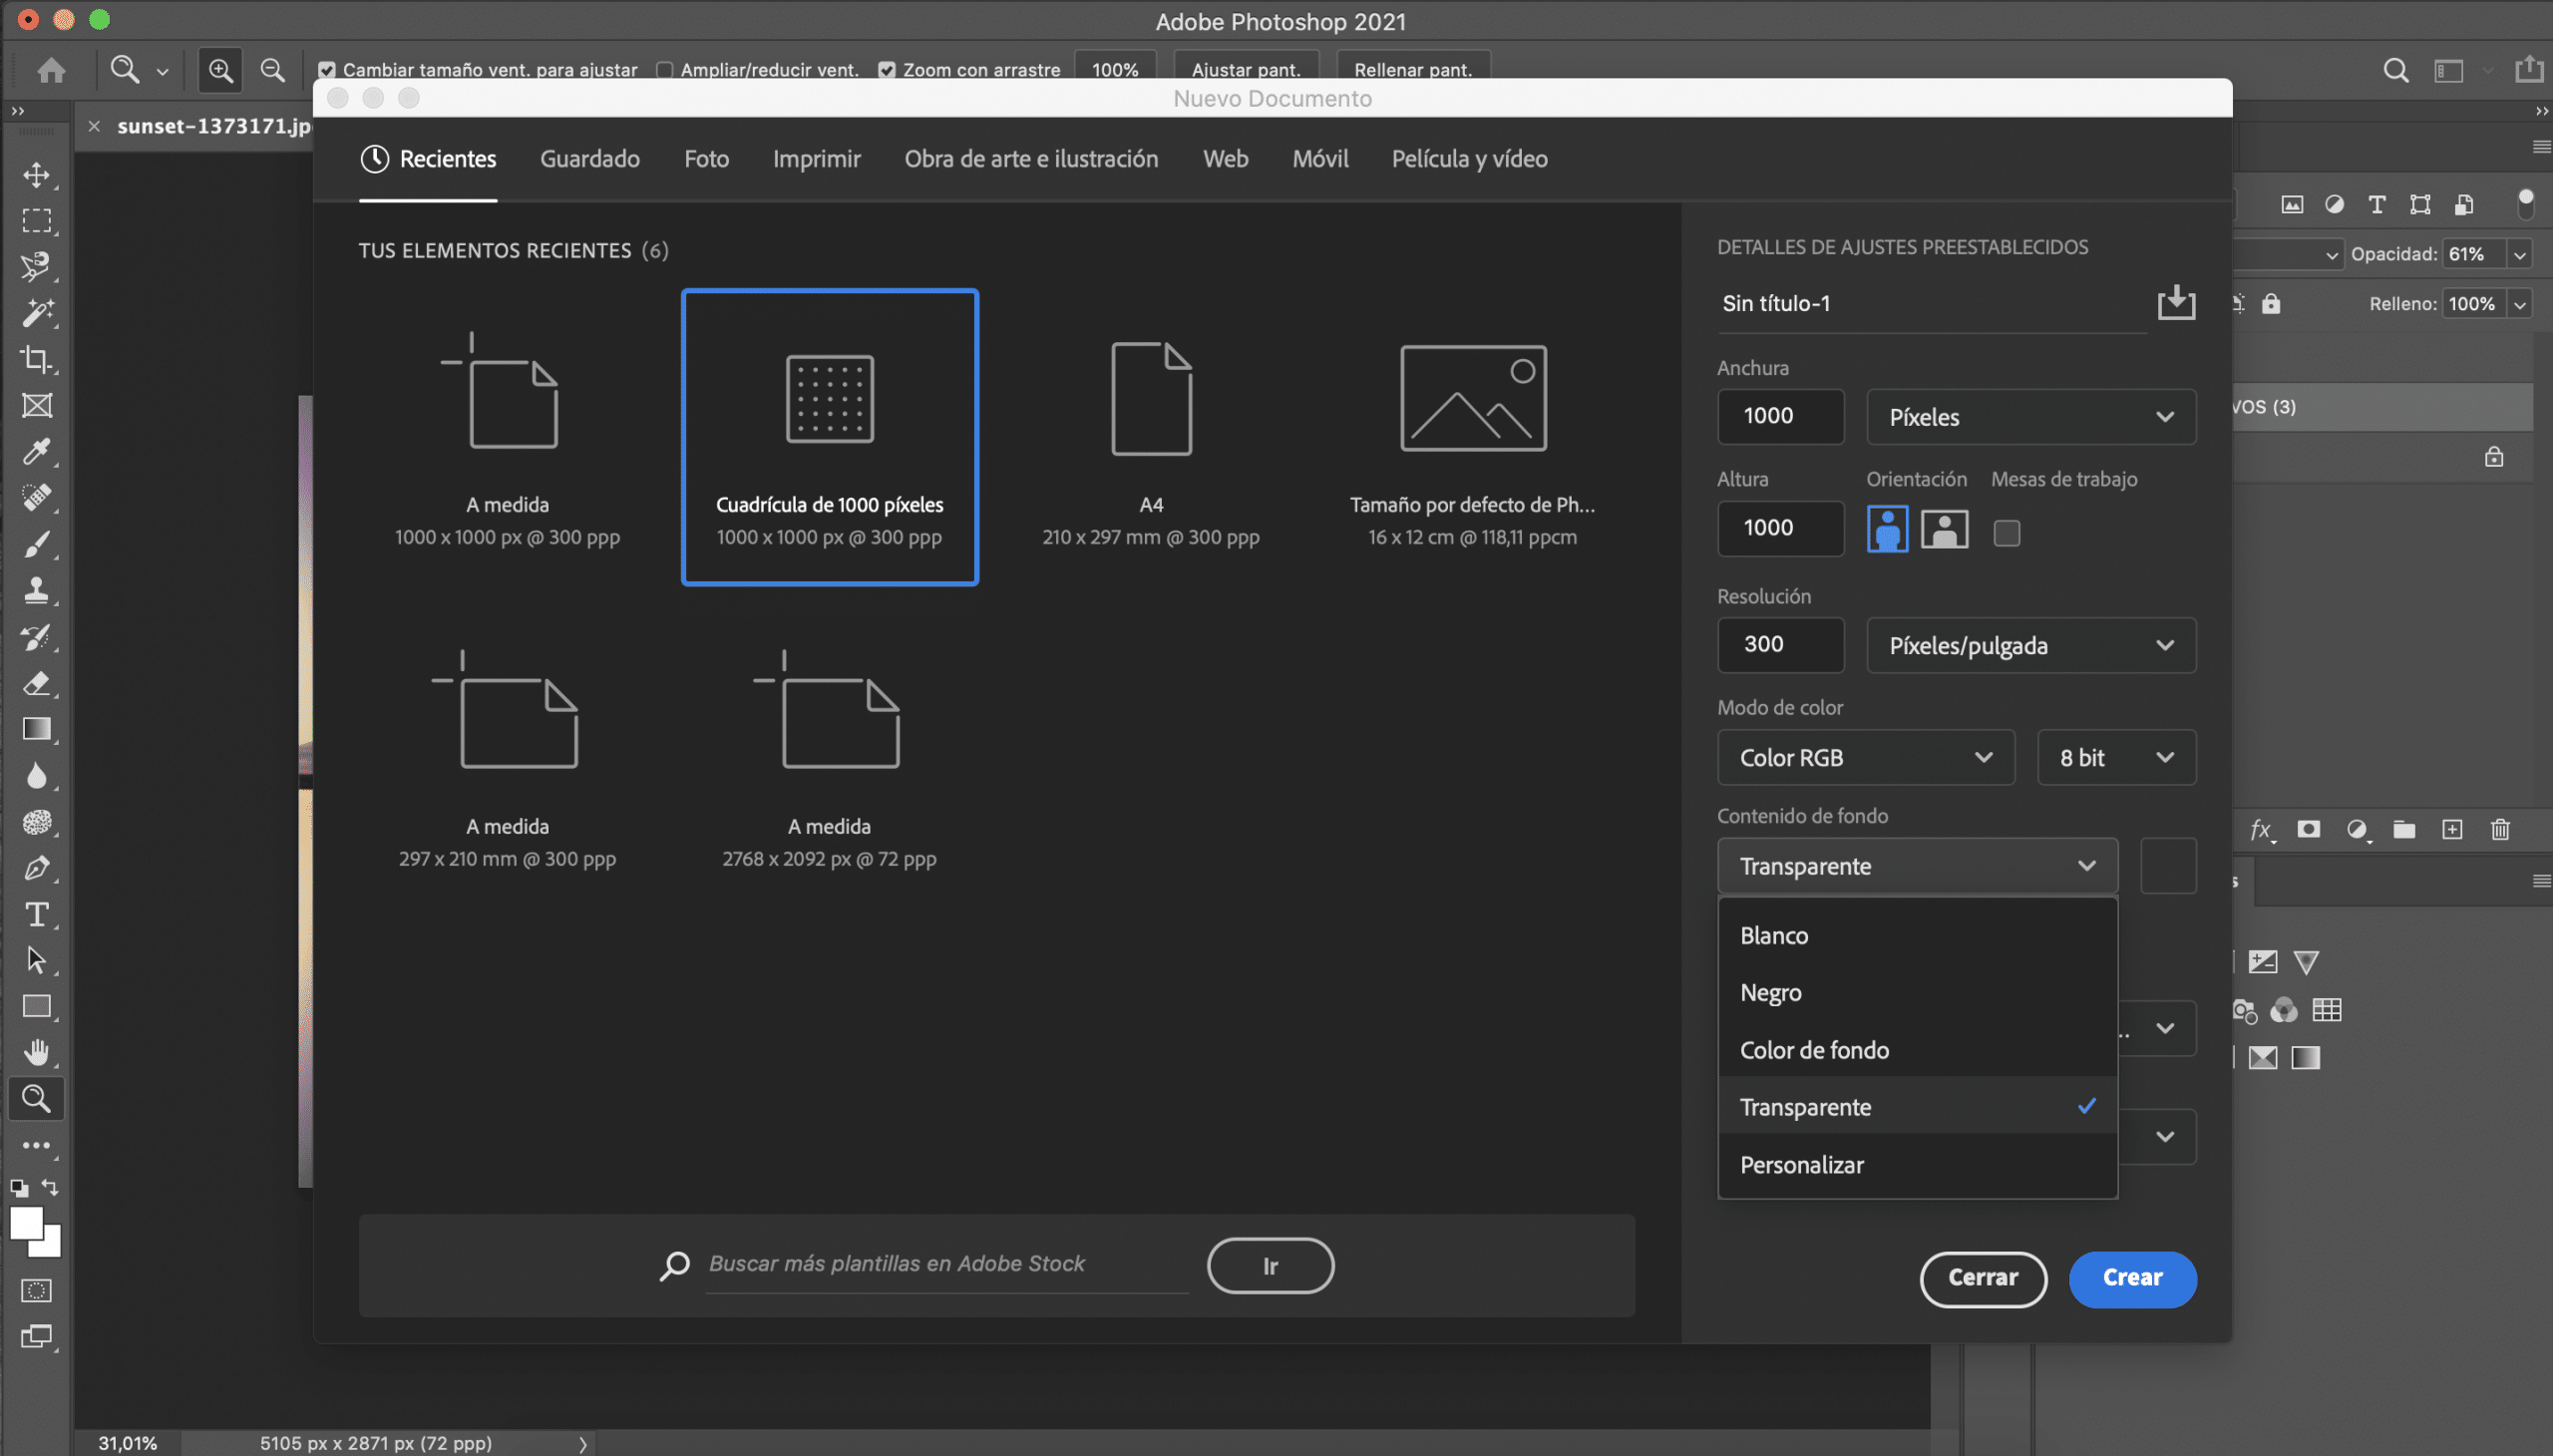
The first thing we will do is create a new file in Adobe Photoshop. The dimensions do not really matter much, but I do recommend that you choose a size not too large, because it will be more comfortable when inserting your watermark in the photographs. I have chosen a thousand pixel grid, it is a suitable size for what we want to do. Before creating the file, in the presets details you have to select a transparent background.
Choose the font
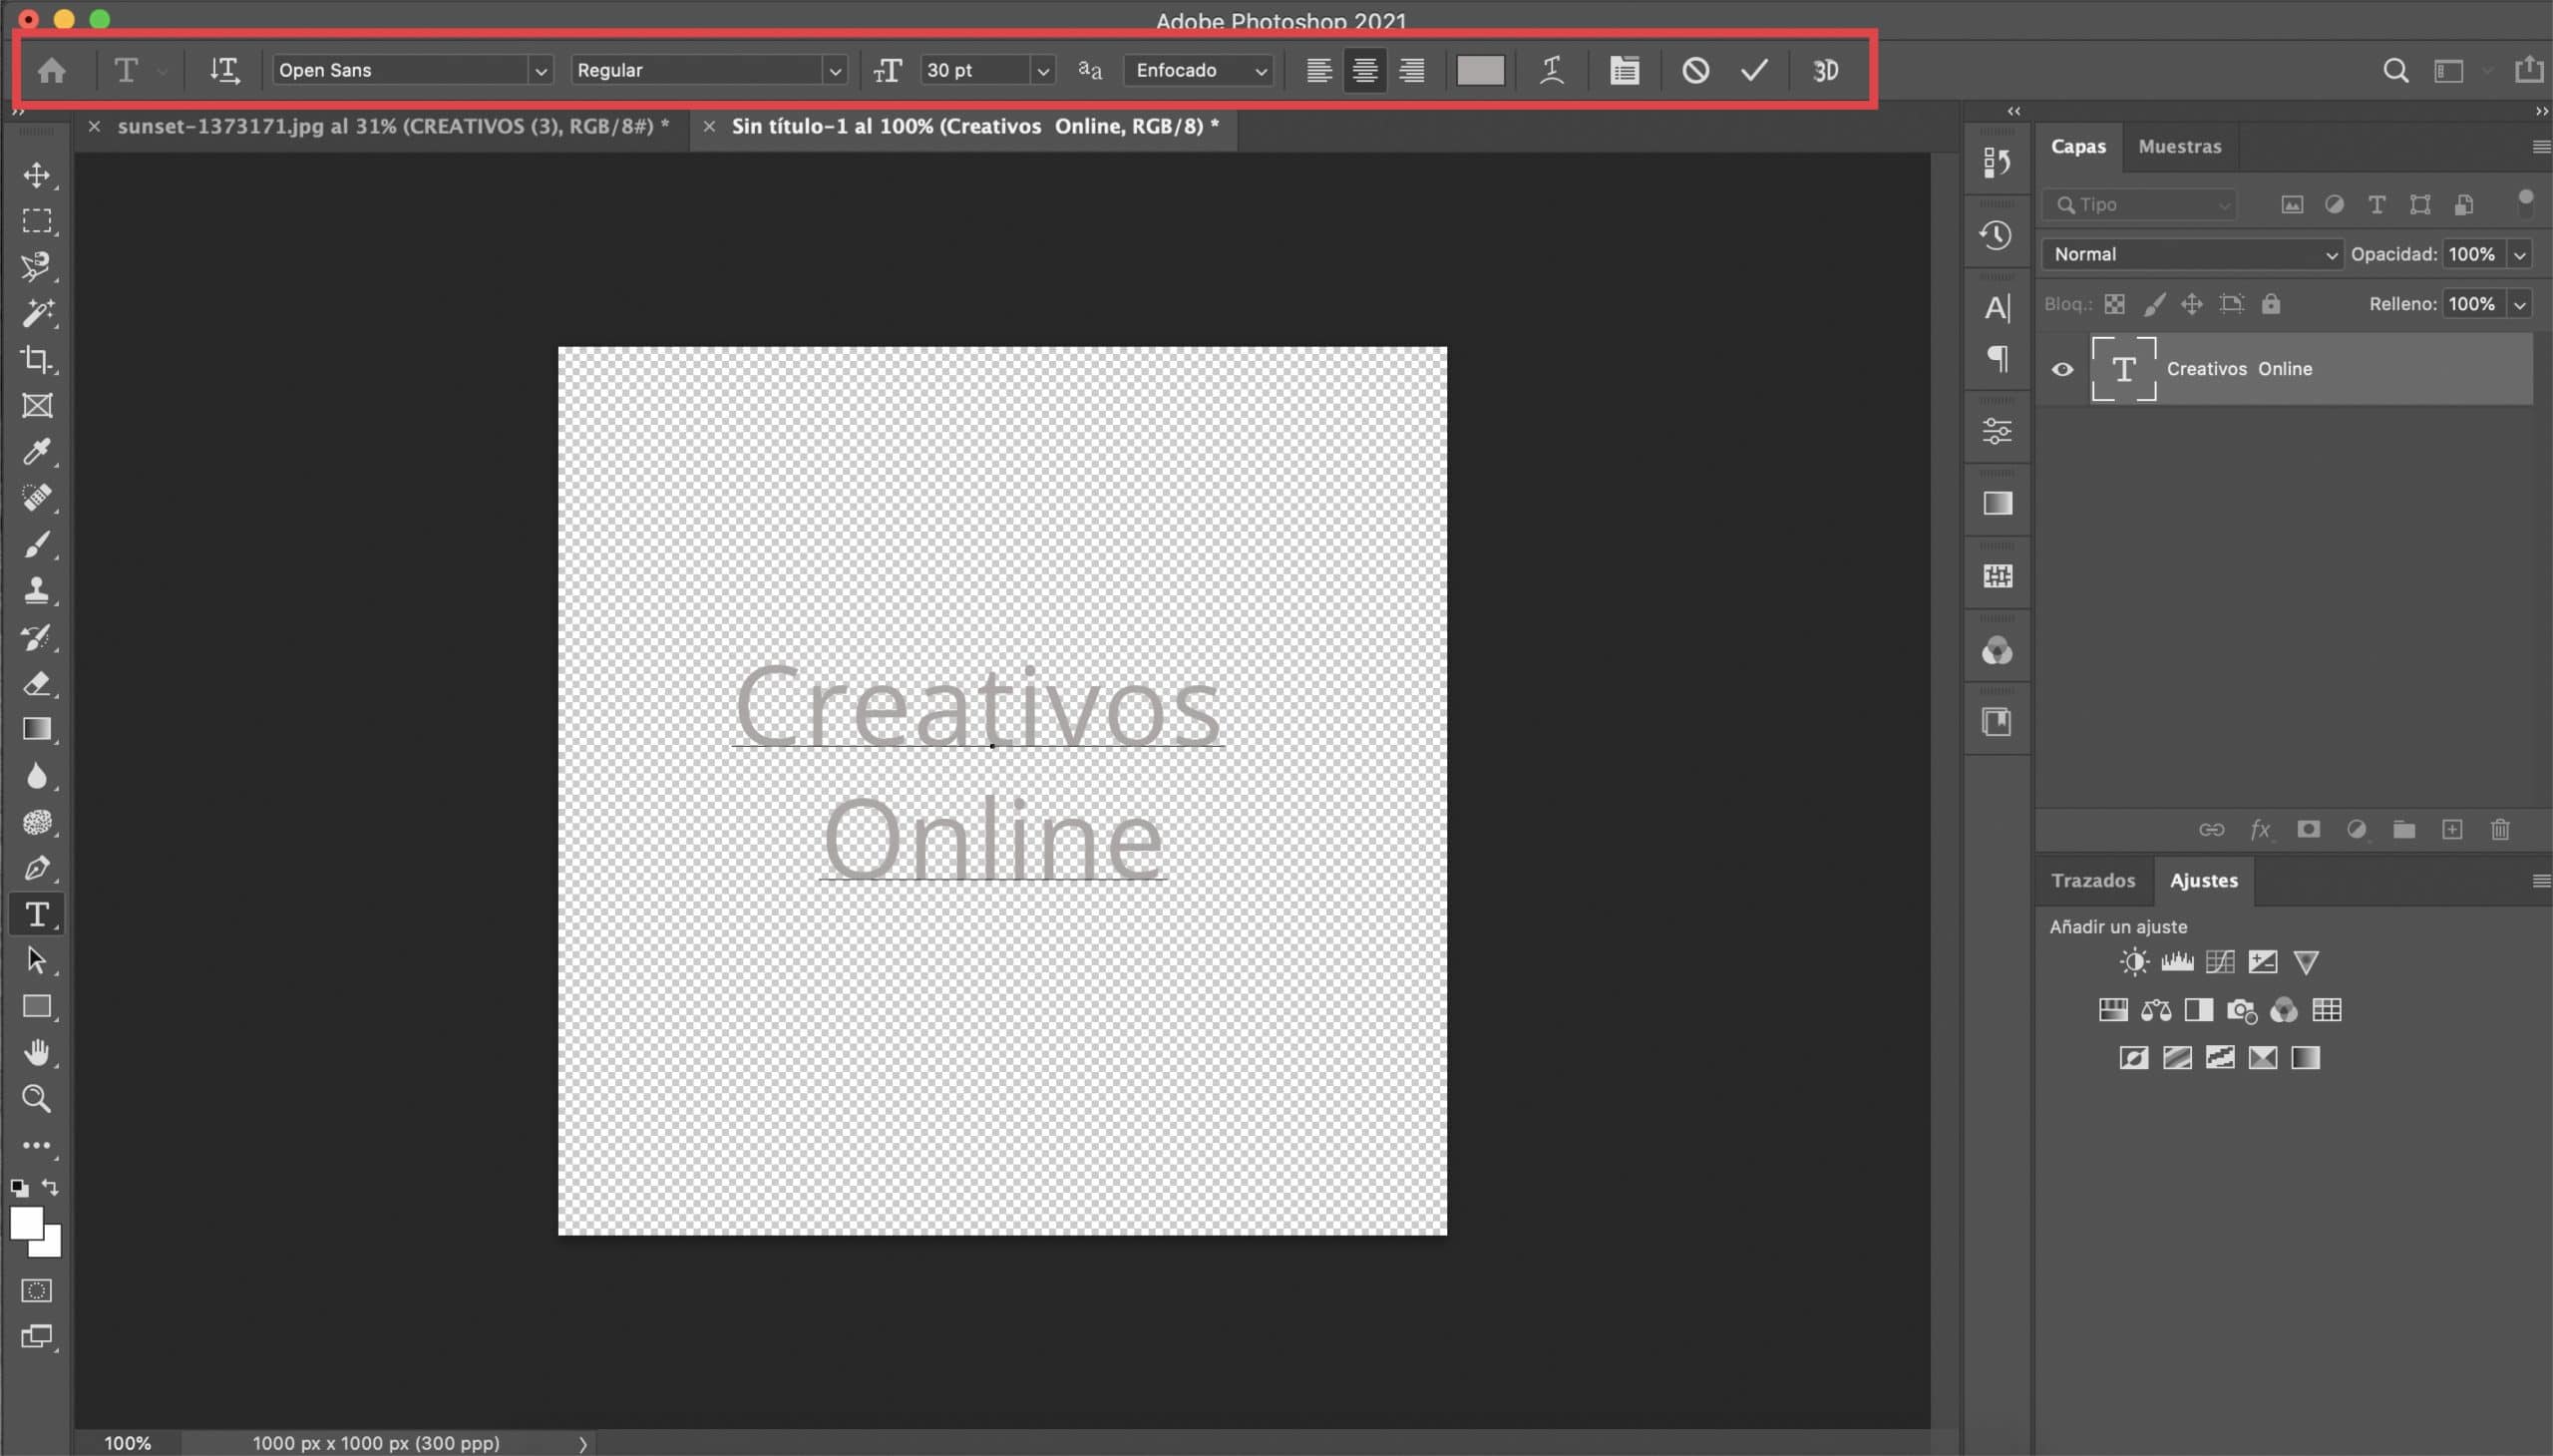
Click on the text tool and choose the font what you wish. In this case, you have total freedom, since this trick usually works quite well with almost any type of font. I have opted for the regular Open Sans and giving it a size of 30 pt I have written in the center the text that will serve as my signature. Give it a white or light gray color.
Modify the characteristics of the text layer and apply the drop shadow effect
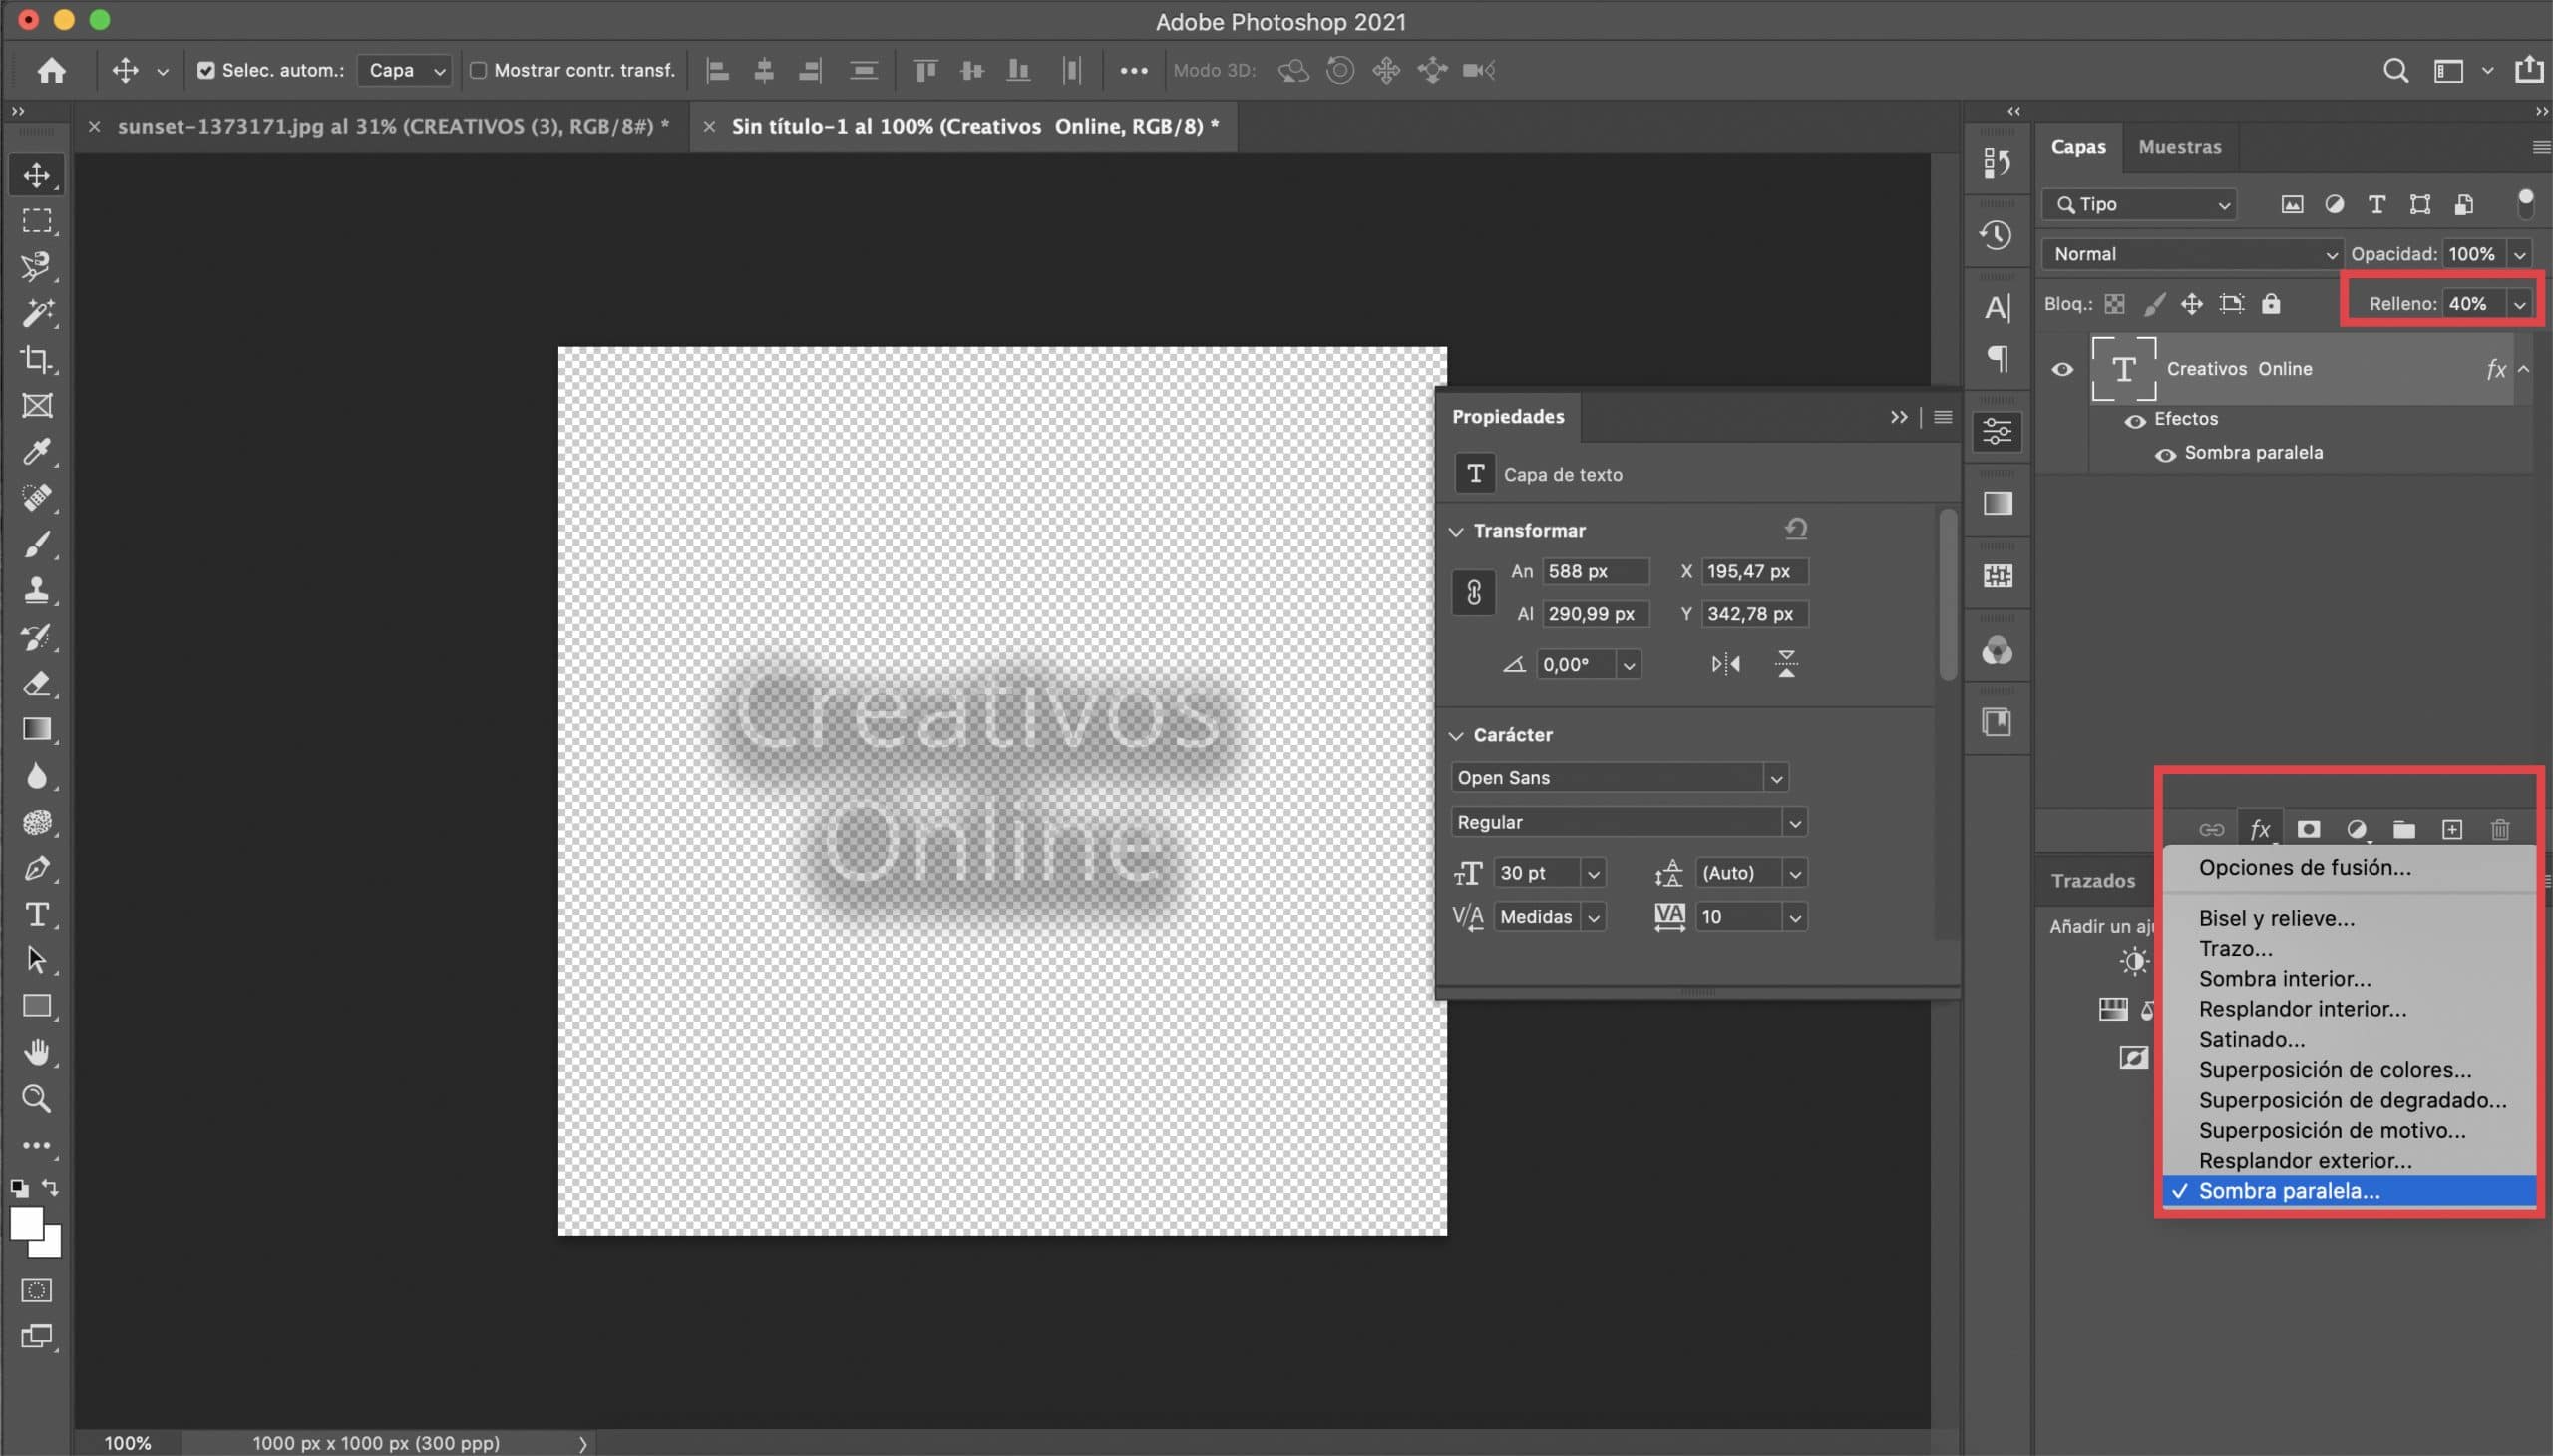
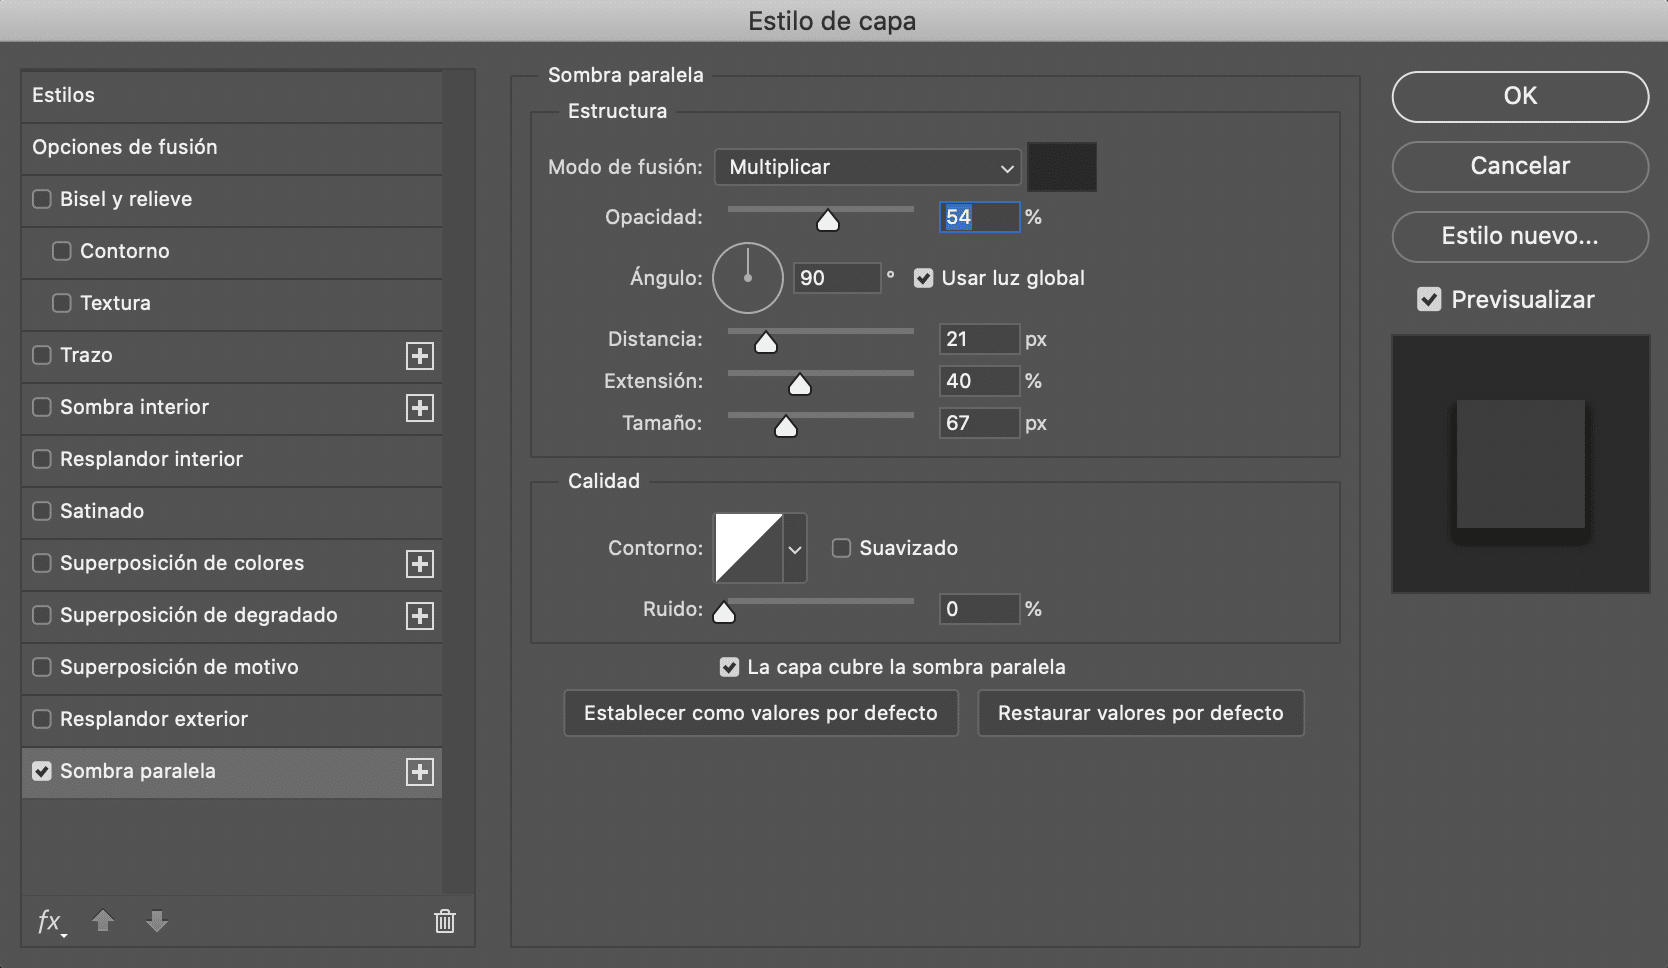
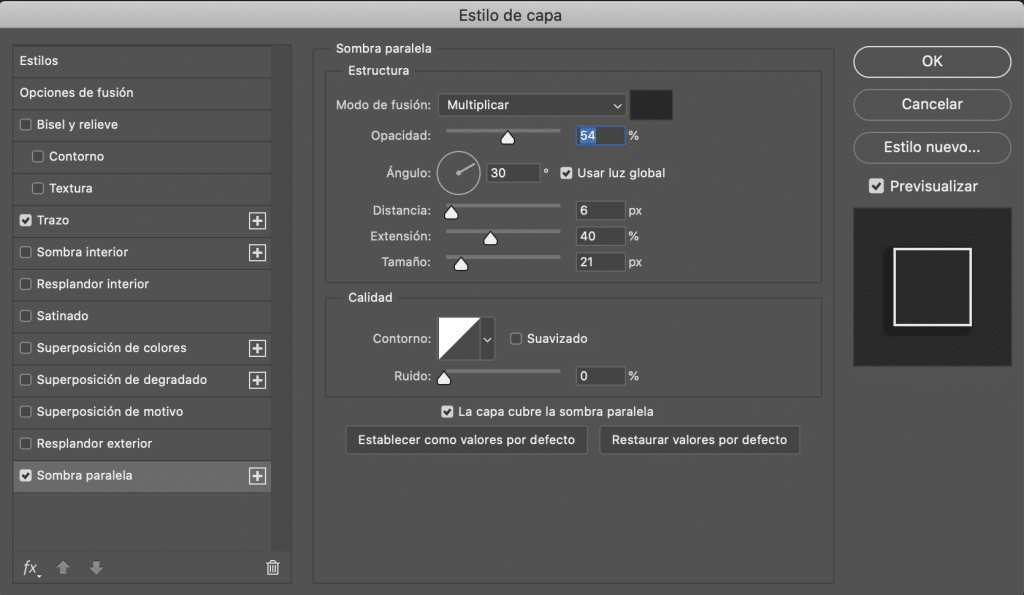
Let lower the fill of the text layer to 40%. What we will do next will help us to make our signature more versatile, so we will avoid having to change it to adapt it to each photograph. First, on the text layer we will explain a drop shadow effectYou just have to press the fx symbol (located at the bottom of the "layers" panel) and select drop shadow. The parameters that they defined for this effect will depend this time on the typeface you have chosen, you will have to test. In case it helps you, I leave you a screenshot with those who have served me. In color I do recommend choosing a dark gray.
Save your watermark in PNG
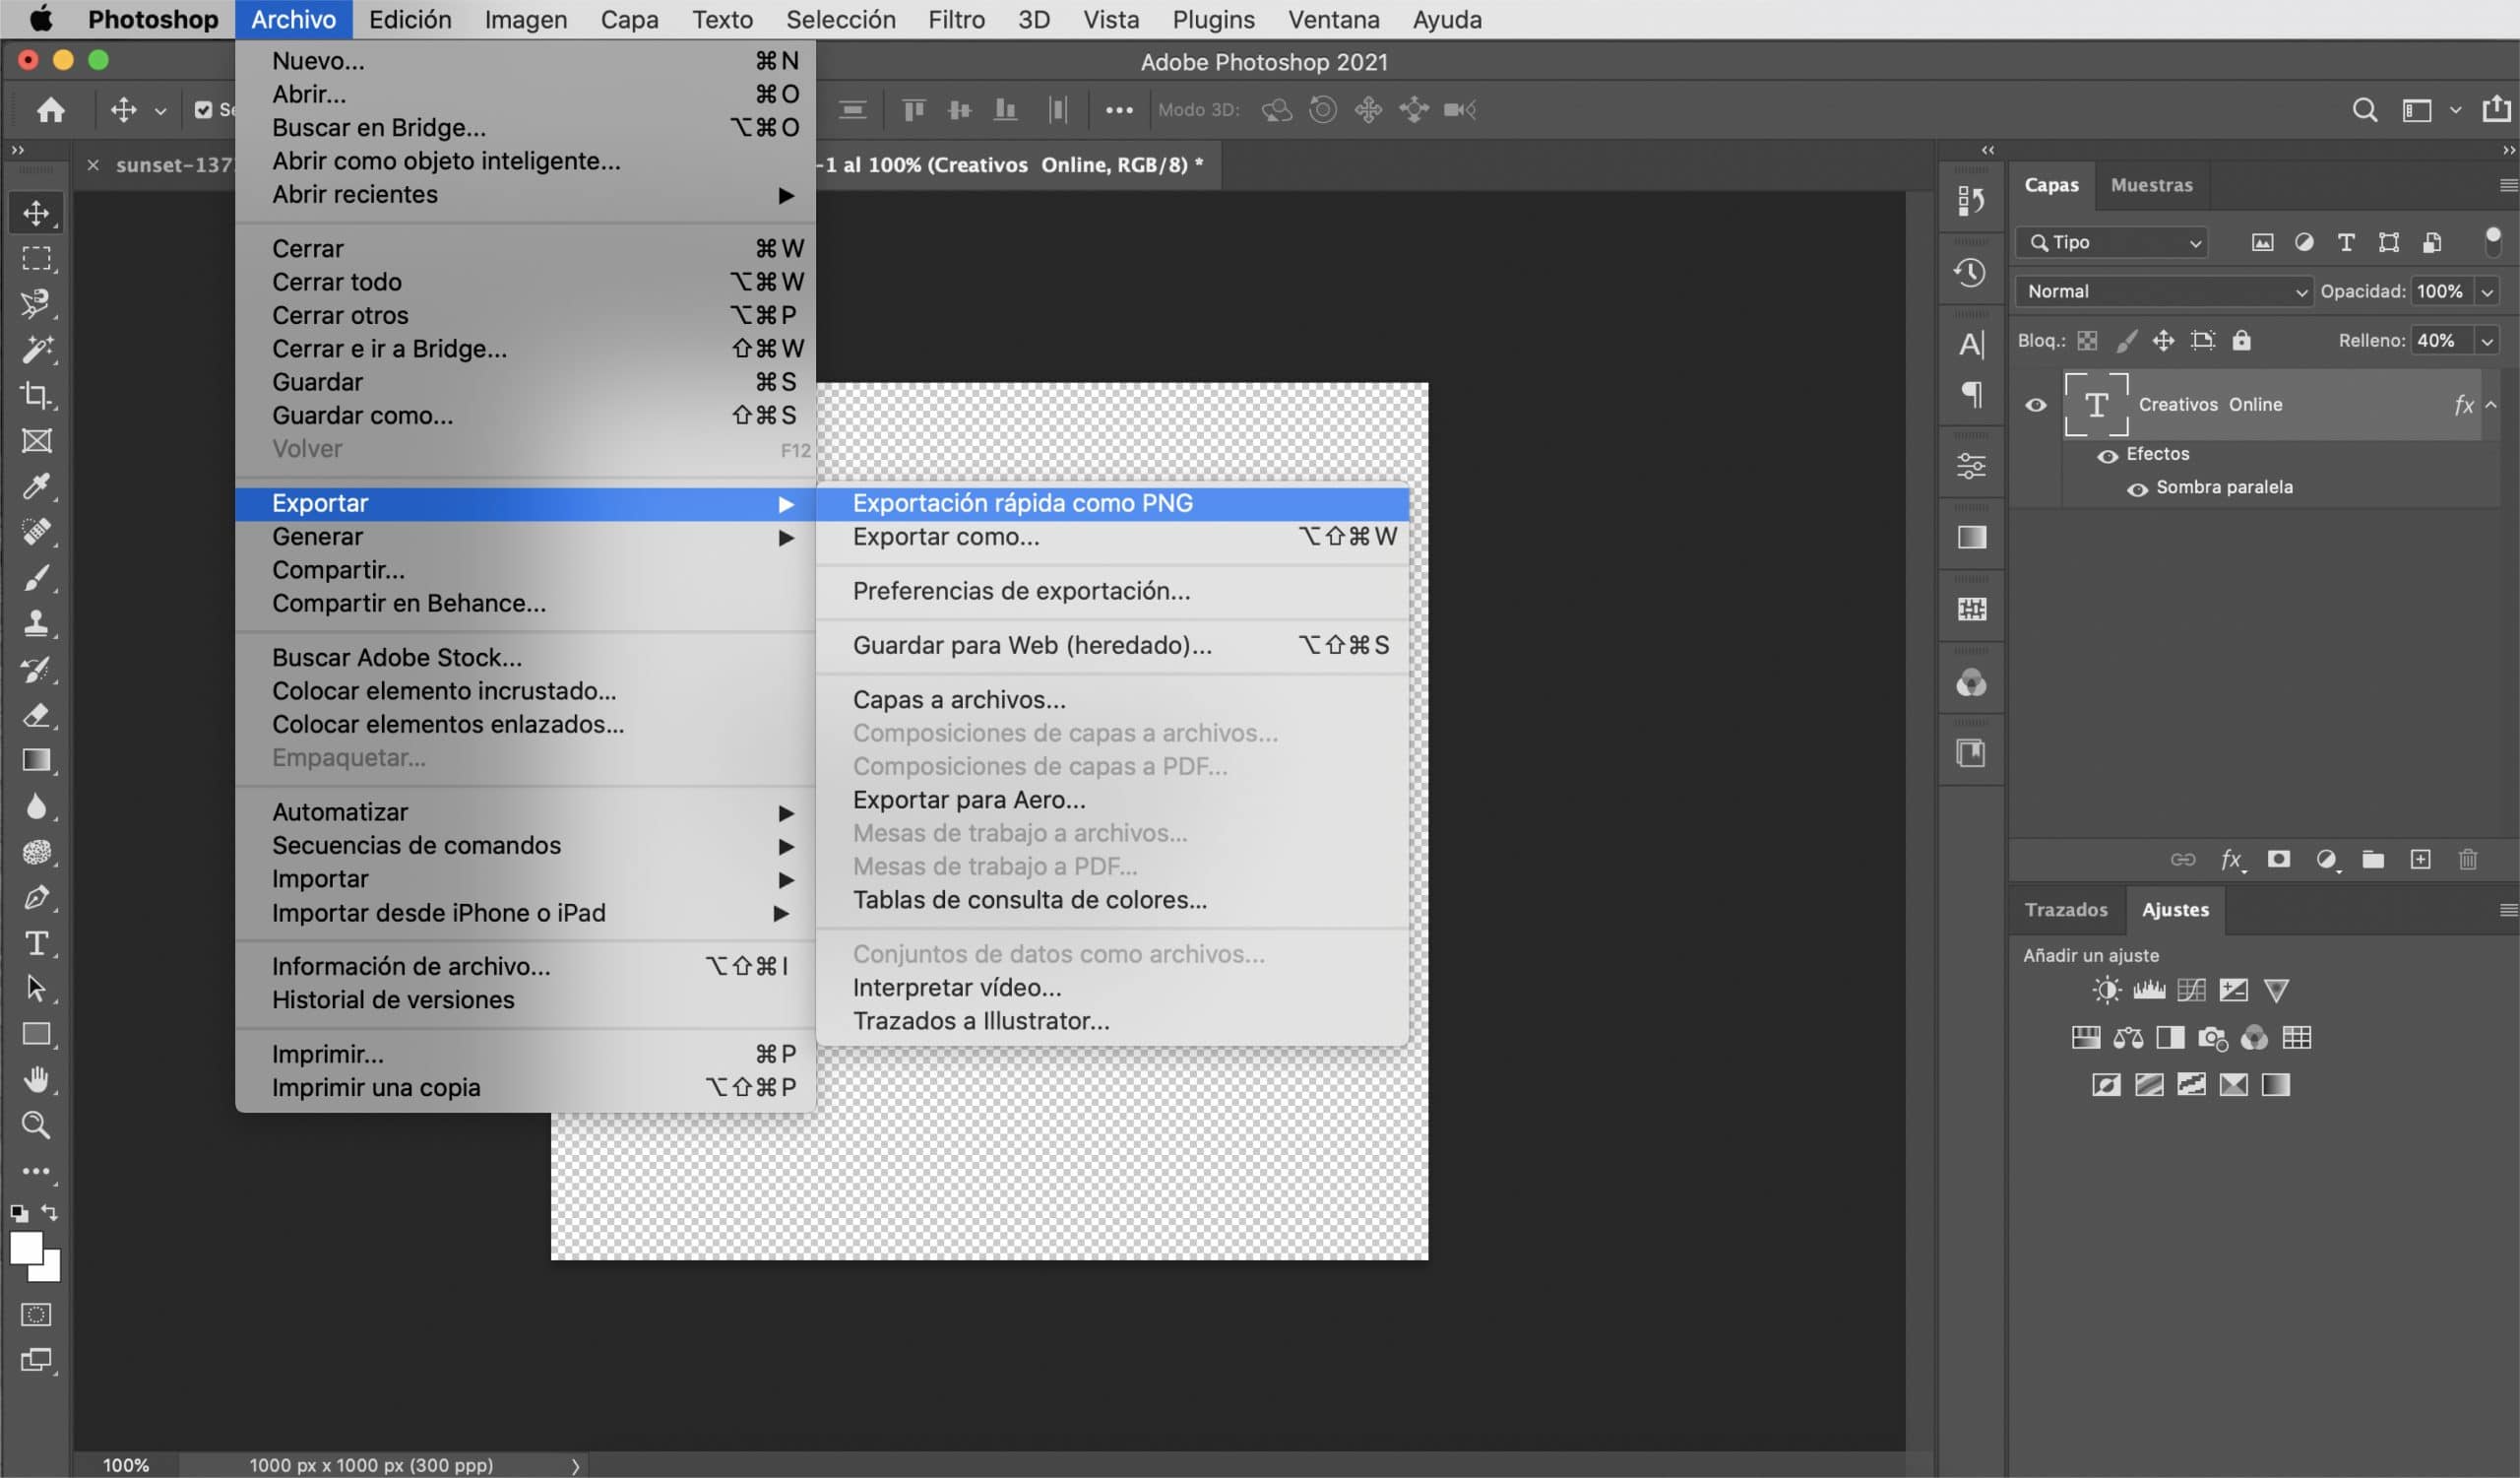
The last step will be to save our work, for it export the file in PNG, always keeping that transparent background. Keep it in a folder and have your new watermark always at hand to sign your photos.

Watermark from a logo
Open the logo and remove the background
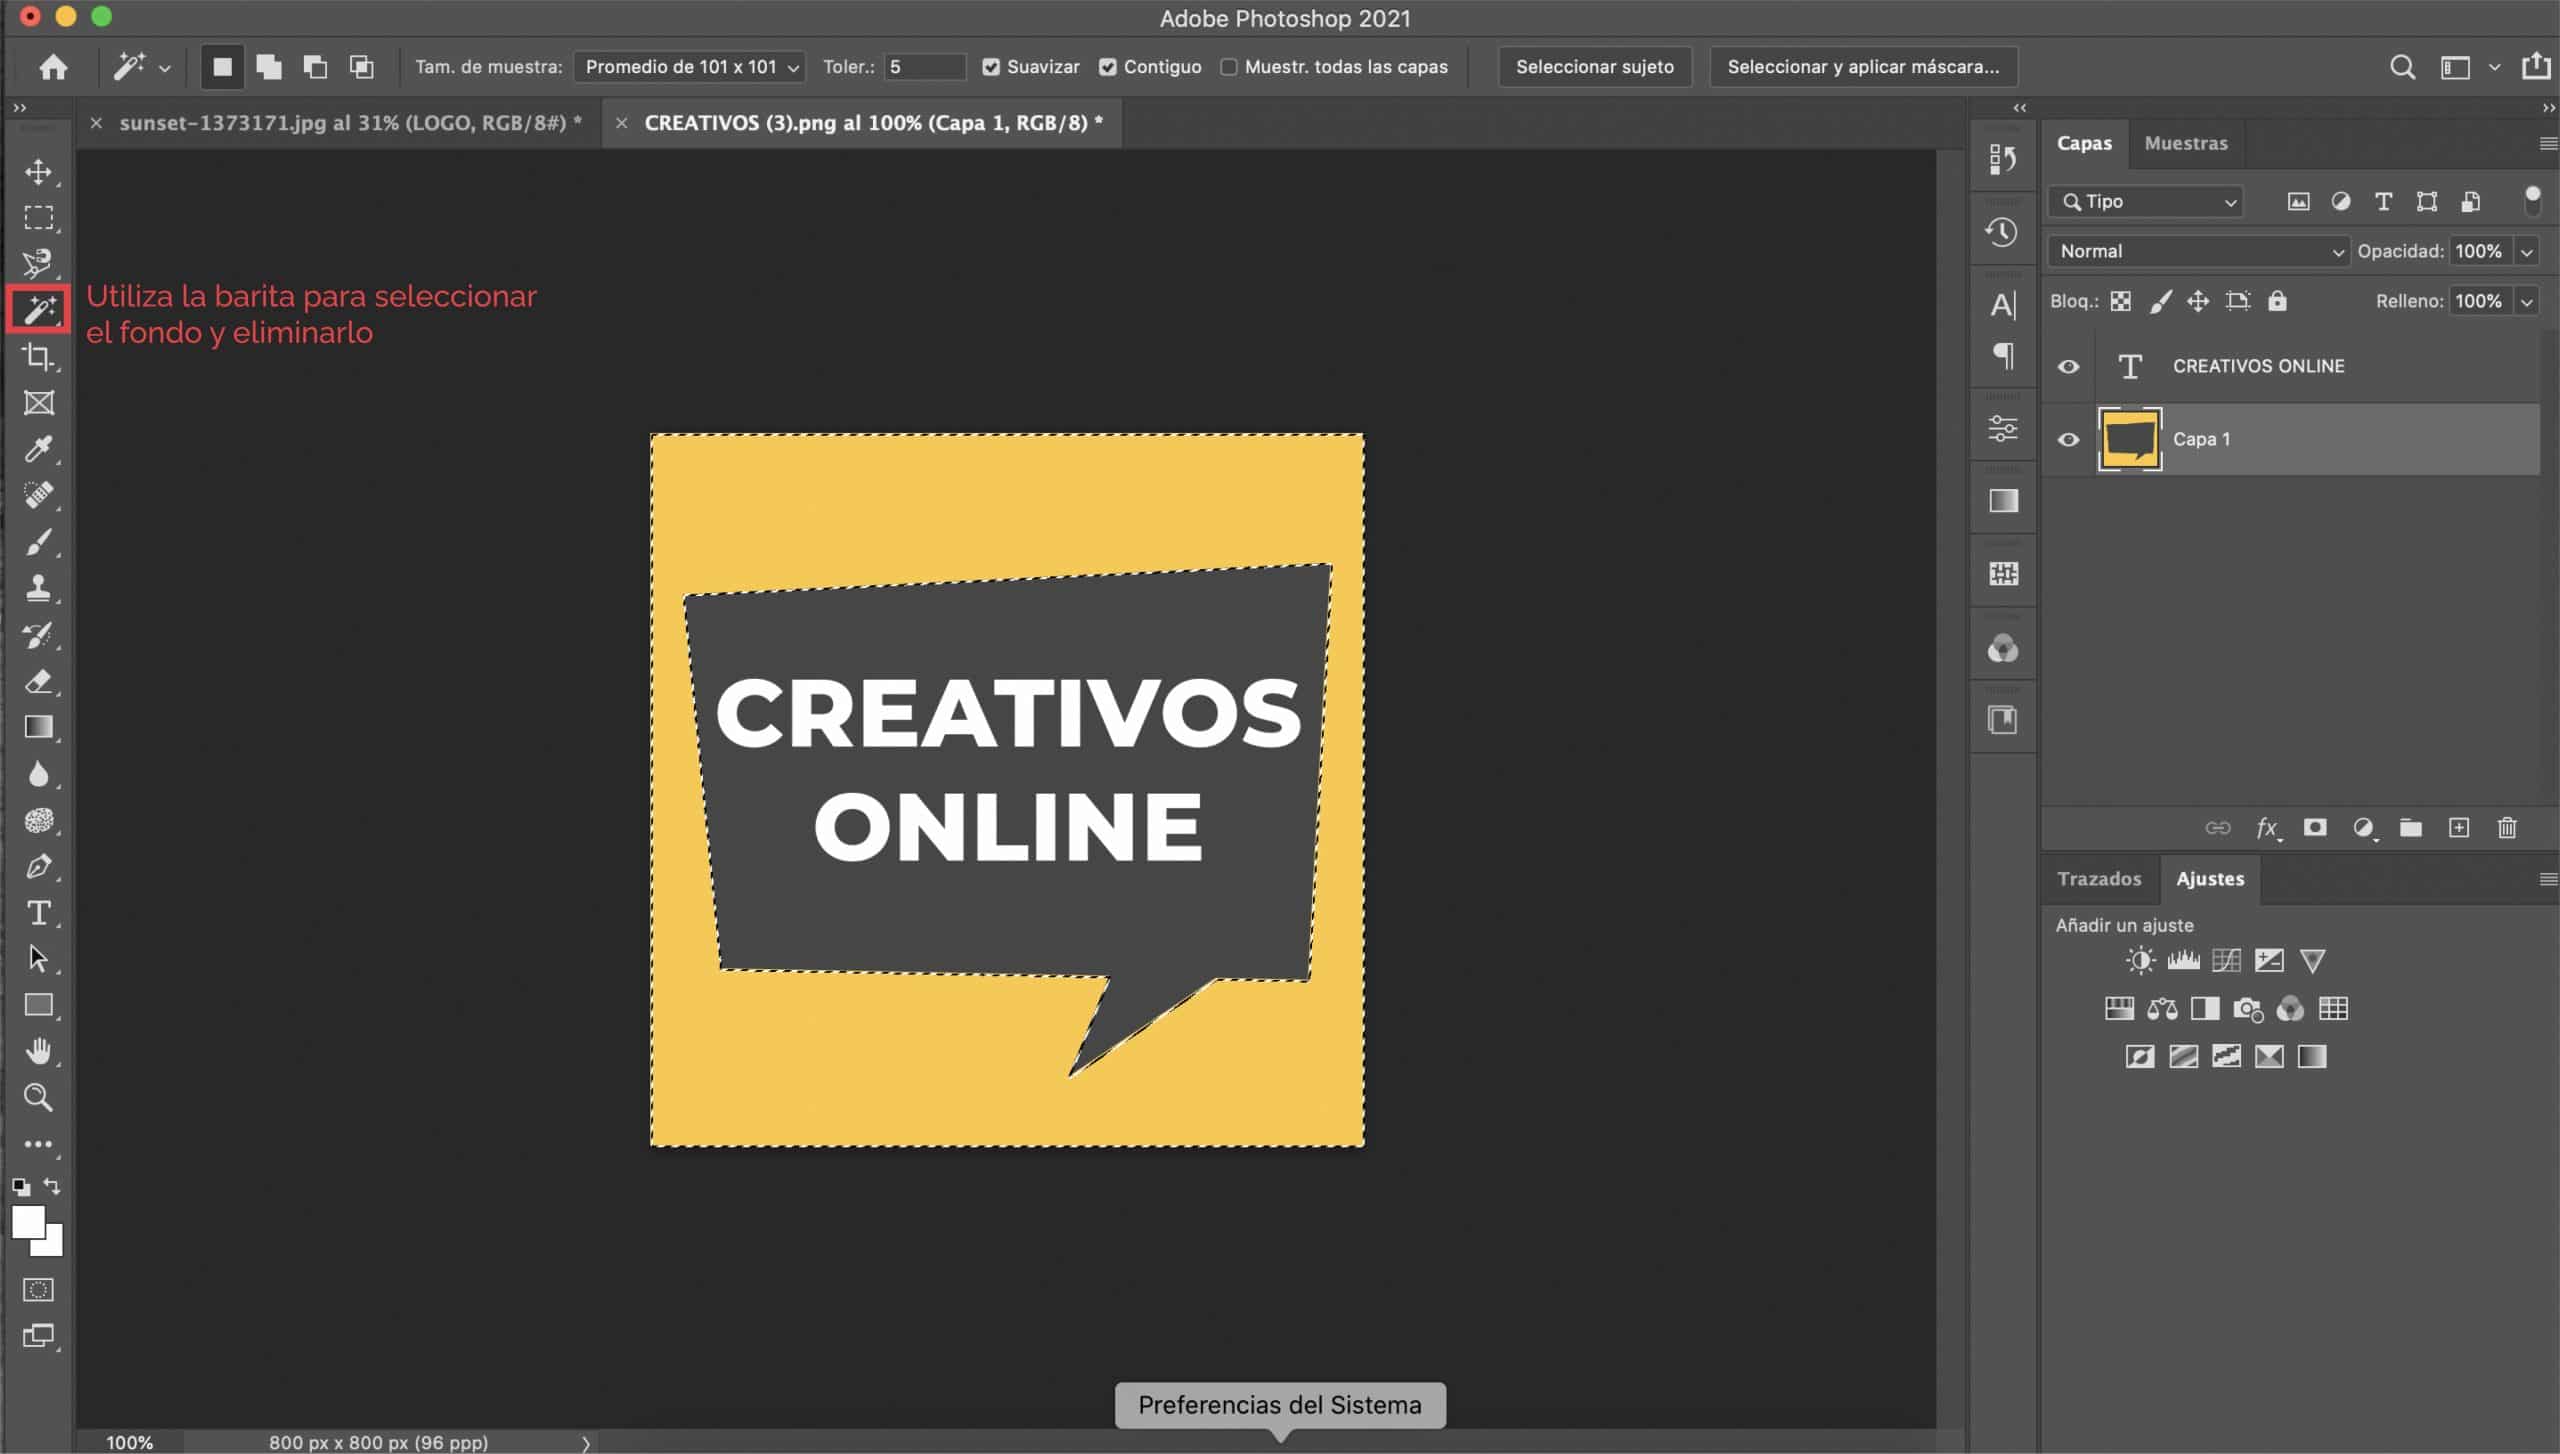
If you already have a logo, or if you have in mind to make one, you should know that using it as a watermark is a great idea. The first thing we will do is open the logo in Photoshop and if it is on a colored background (as in our case the logo is on a yellow background) we will remove it so that we have a transparent background.
Let's modify the characteristics of the text
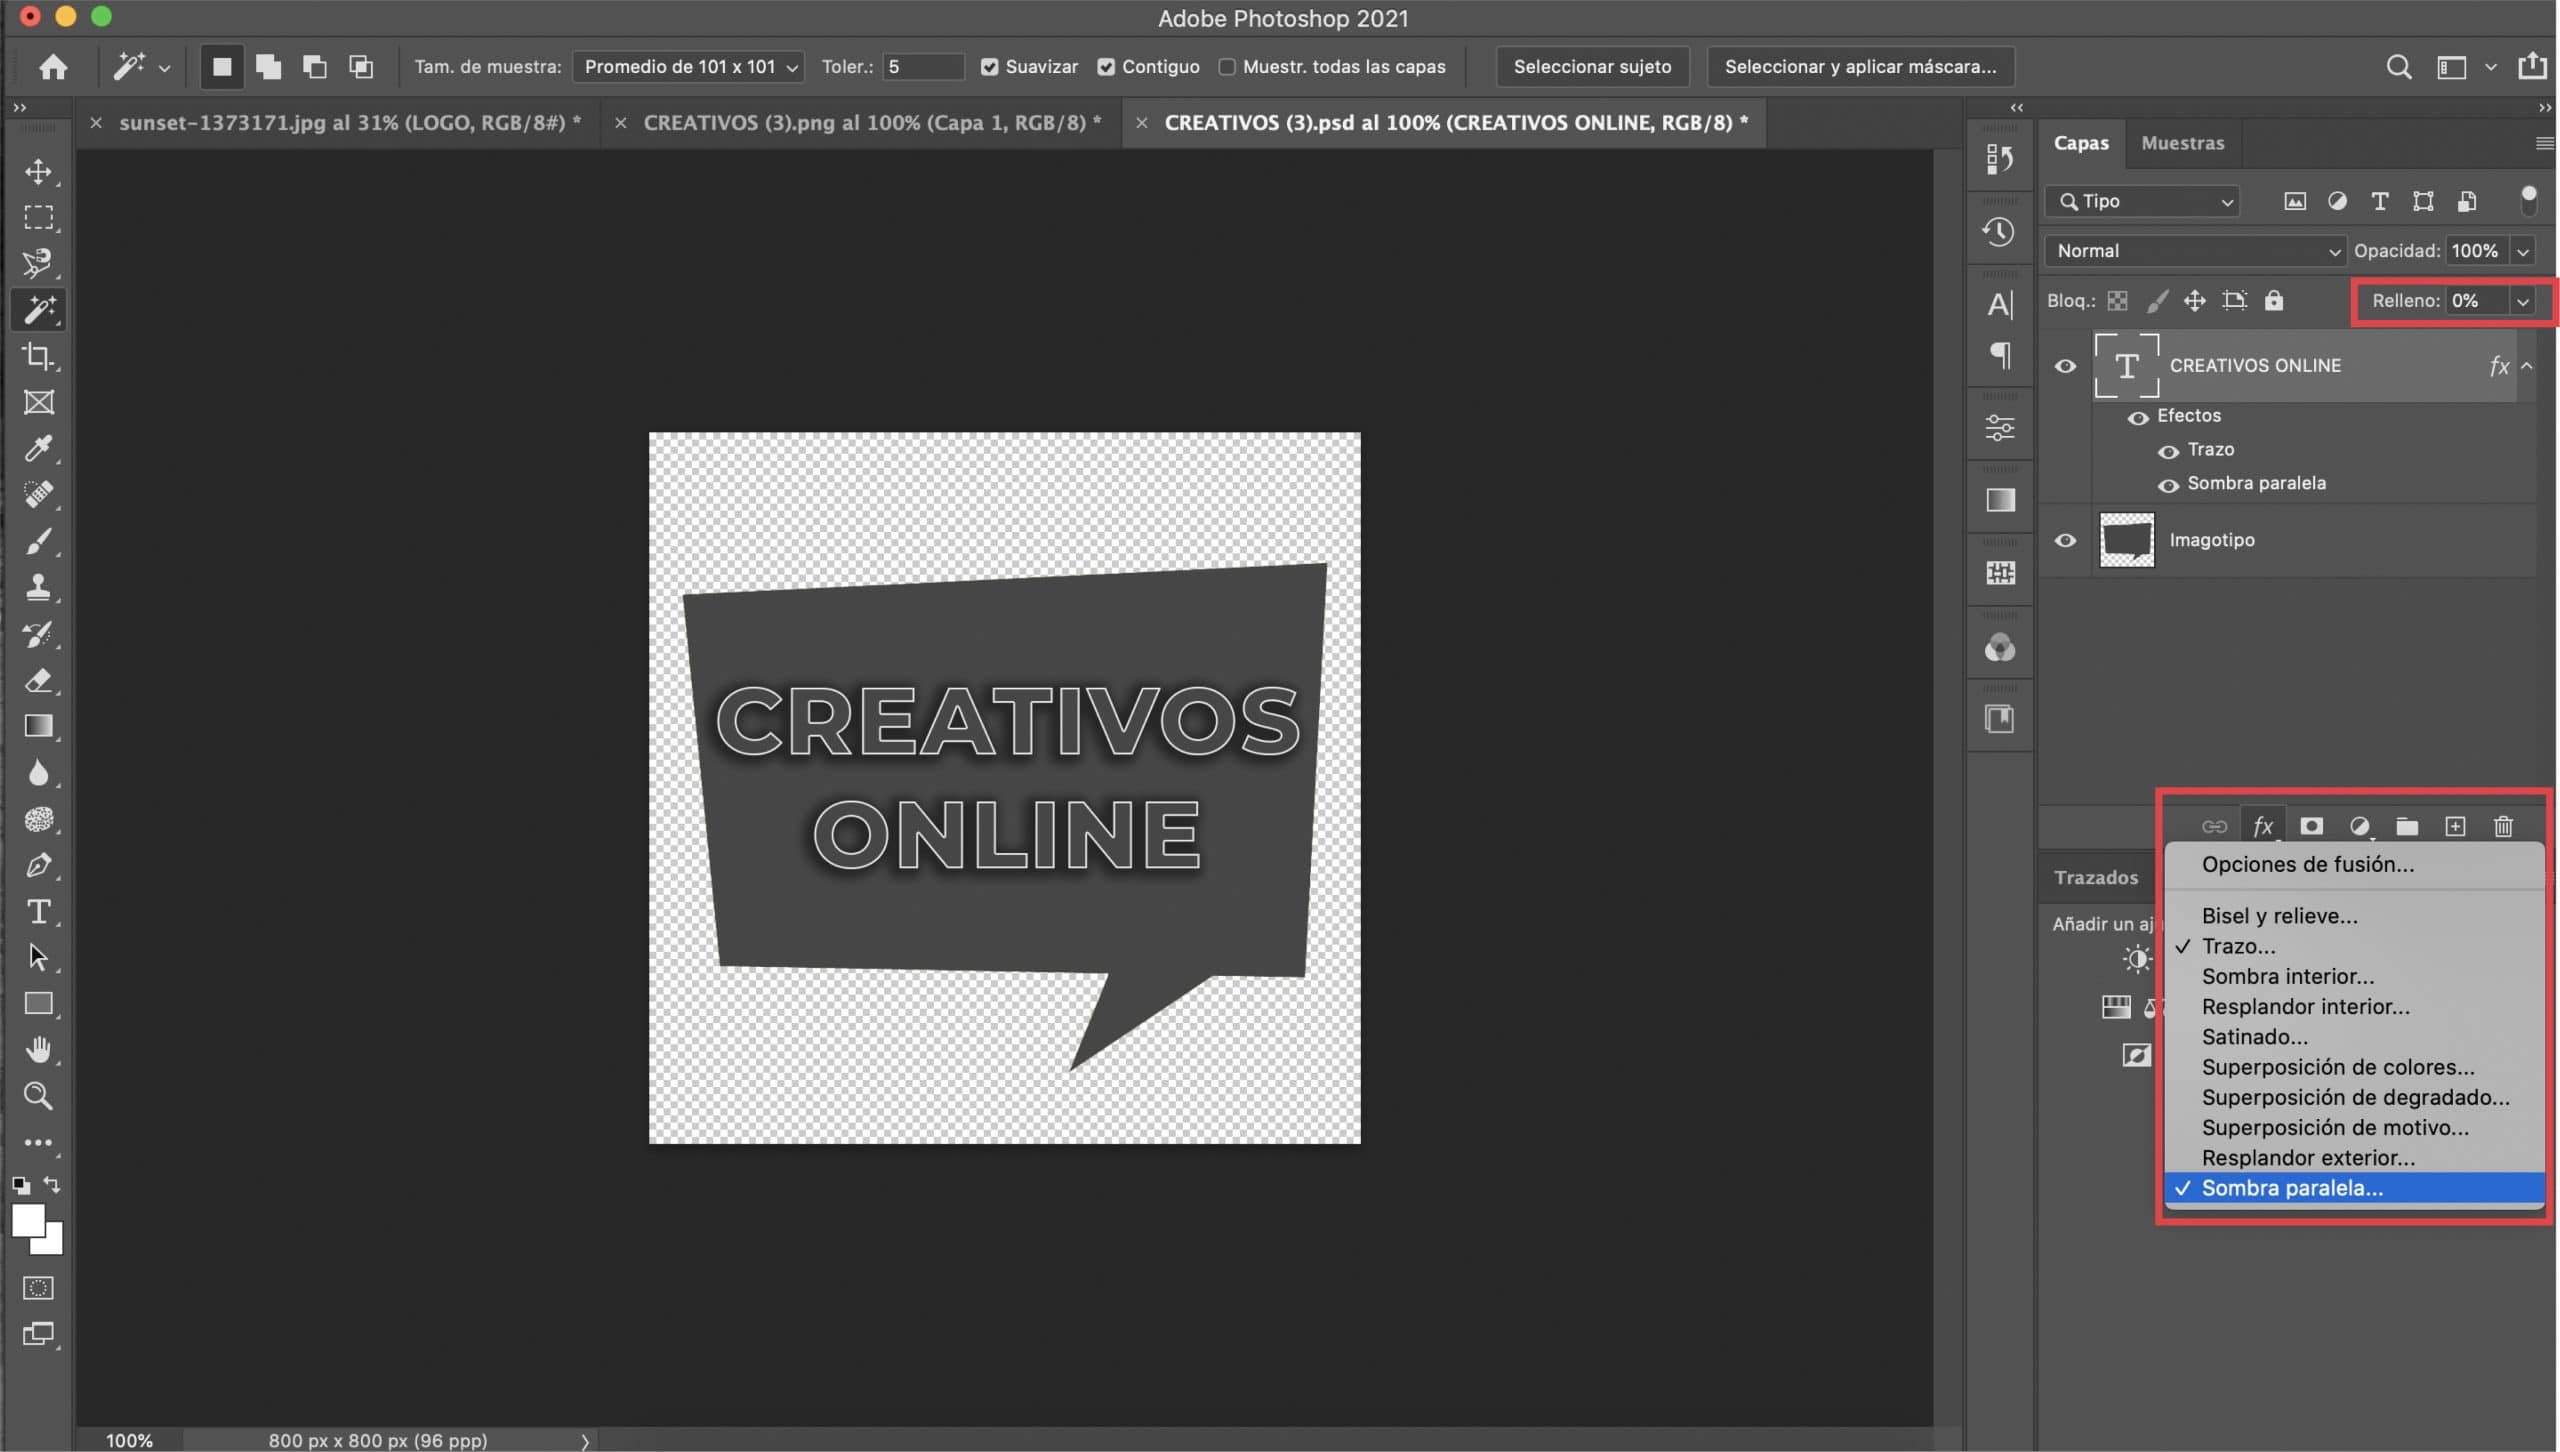
If your logo consists of typography and illustrations, we will focus first on the text. Selecting the text layer, we will lower the filling to 0% and we will open the layer style menu (by pressing the fx symbol in the layers panel and pressing "stroke" in the drop-down menu). We will apply two effects: stroke and drop shadow.
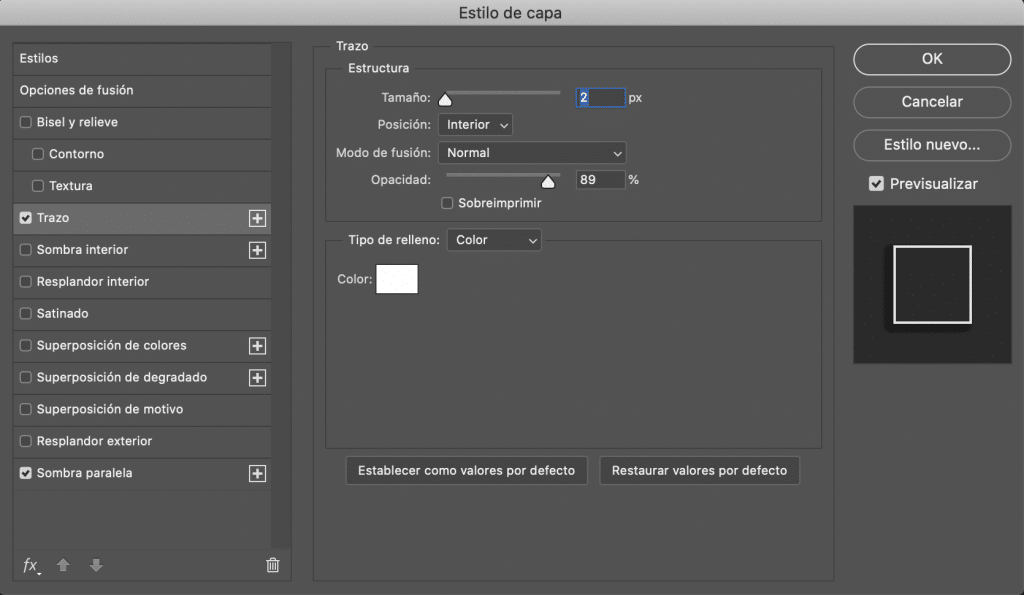
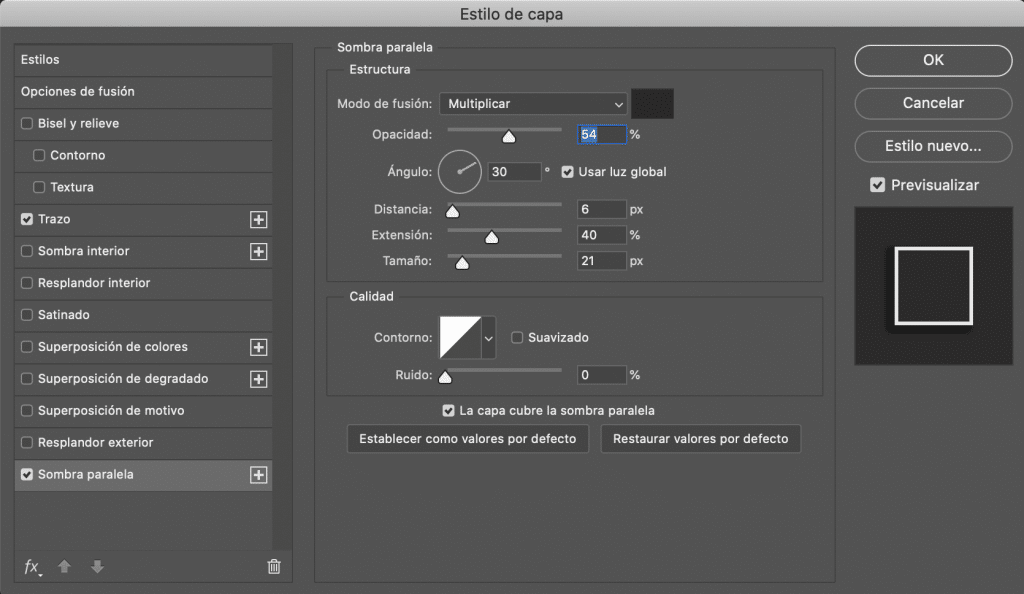
Activating "preview" controls how the changes are. You will have to adjust stroke size, I have given it a value of 2 px, but everything will depend on the typeface you have chosen and your tastes. In «color» choose a white.
We will go to set the drop shadow effect. I recommend you opt for a dark gray color, but you can choose a black if you prefer. The important thing is that it is a dark color. Play with the other parameters until you are happy with the result. Although it is a matter of taste, here are the values that have served me.
Let's modify the characteristics of the illustration
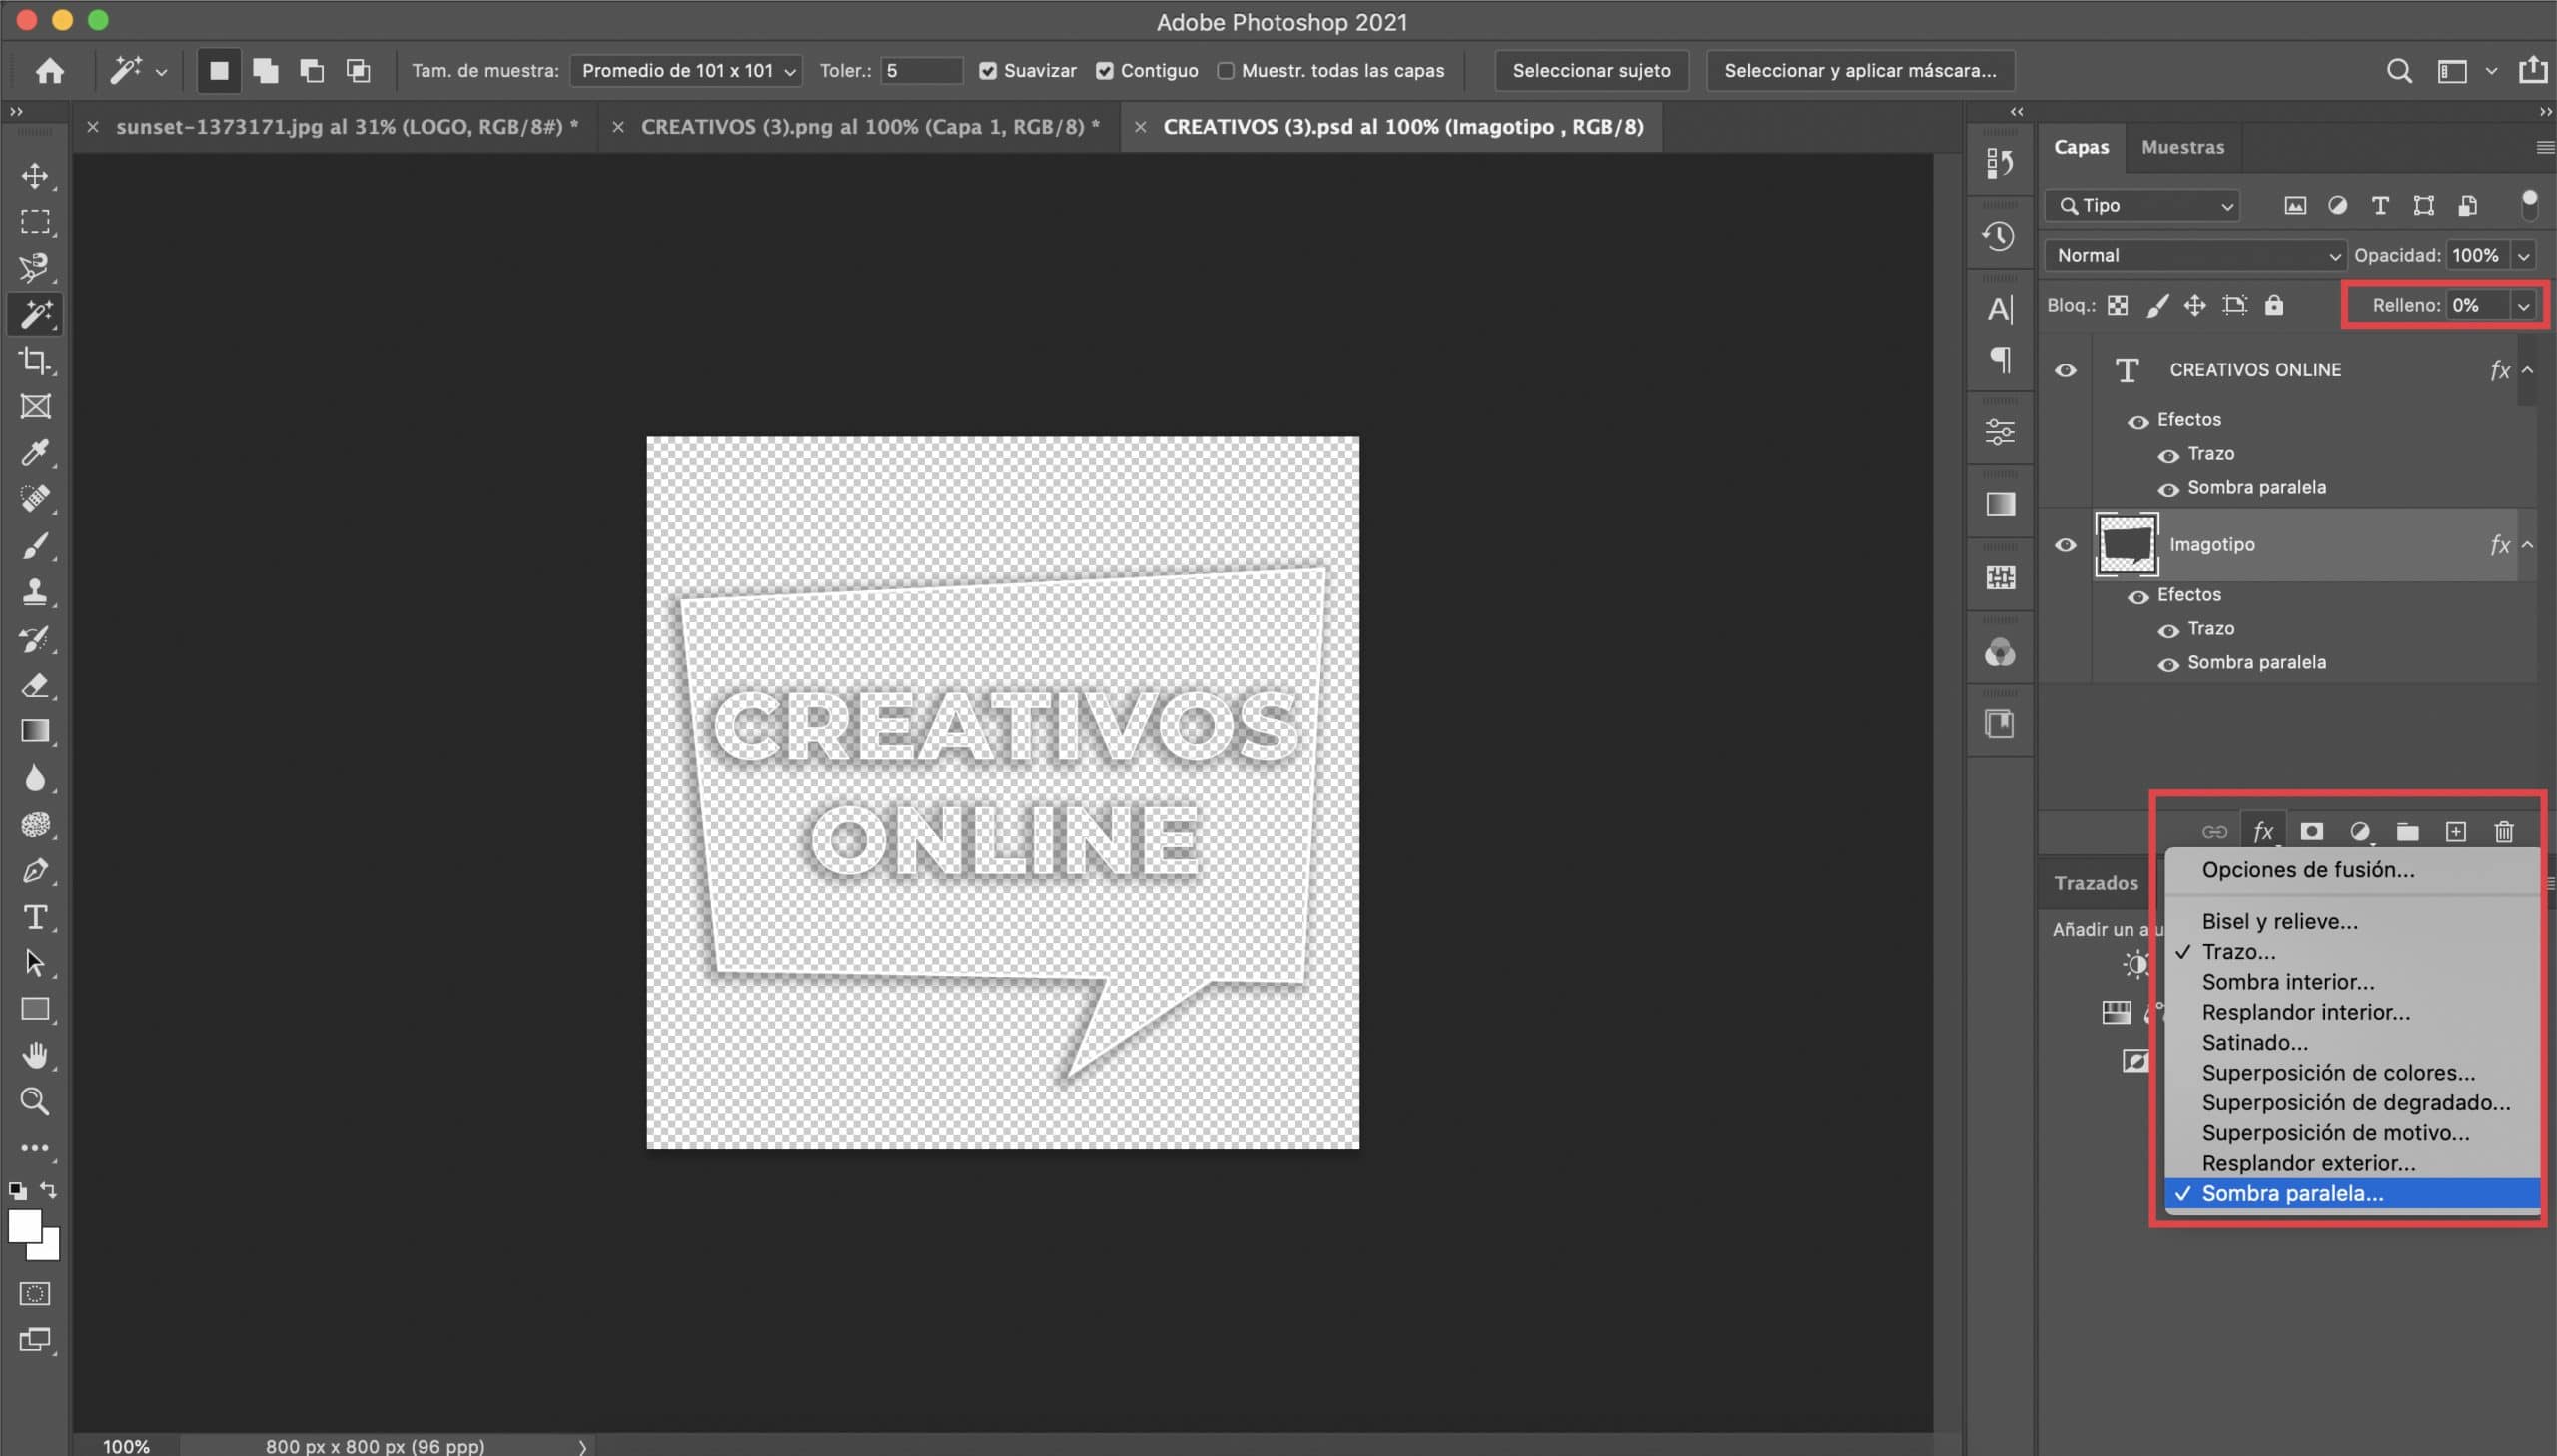
Our logo consists of the typography and an illustration, a speech bubble. The procedure that we will follow will be similar to the previous one. We will apply two effects, but this time selecting the illustration layer: "stroke and drop shadow". We will adapt the parameters so that they fit well with our imagotype (I leave you a screenshot with which I have applied). I recommend that the color of both the stroke and the shadow be exactly the same as the one you chose for the typography.

There would only be export our new version of the logo in PNG format to be able to use it as a watermark in our photographs.

One last note
How do I add my watermark?
You can add your watermark with Photoshop. Open the photo in the program and drag the PNG which will be imported as a separate layer. Place it where you want and give it the size you prefer. Also remember that you can always modify the opacity of the watermark in the upper part of the layers panel, in case you feel that in any photograph your logo is too striking (I usually lower the opacity of the watermark to approximately 50%).