
Do you love drawing and painting and don't know how to digitize your illustrations? Are they not the same on your computer compared to reality? You are in the right place.
In this post I am going to explain to you how to convert your works of art from analog to digital correctly, without losing quality in them.
Scan Artwork - Scanner Resolution and Color Depth
Decision
First of all we have to scan them, to go from a document physical one in digital. There are many scanners with different characteristics on the market, as well as in print shops. It is important to know them to get the most out of them. It is essential to know the OPTICAL RESOLUTION of the scanner. This determines the number of points in the image that the scanner sensor is able to detect, therefore, the higher the resolution, the higher the image quality. This resolution is measured in dots per inch, DPI, or DPI. So that our images can be enlarged without losing quality (in case, for example, we would like to apply them to a quilt), it would be advisable to scan them at 800 DPI. In the event that we are talking about an image pattern or pattern, in which it is not necessary to enlarge too much, 300 DPI would be enough.
Color depth
Color depth is measured in bits per pixel or BPP. The higher the bit depth, the greater the number of tones that can be represented in an image. Scanners are usually 24-bit, but 32-bit or 48-bit scanners will generate results that are more faithful to reality.
Retouching Color in Photoshop: CMYK Mode and Levels
CMYK mode
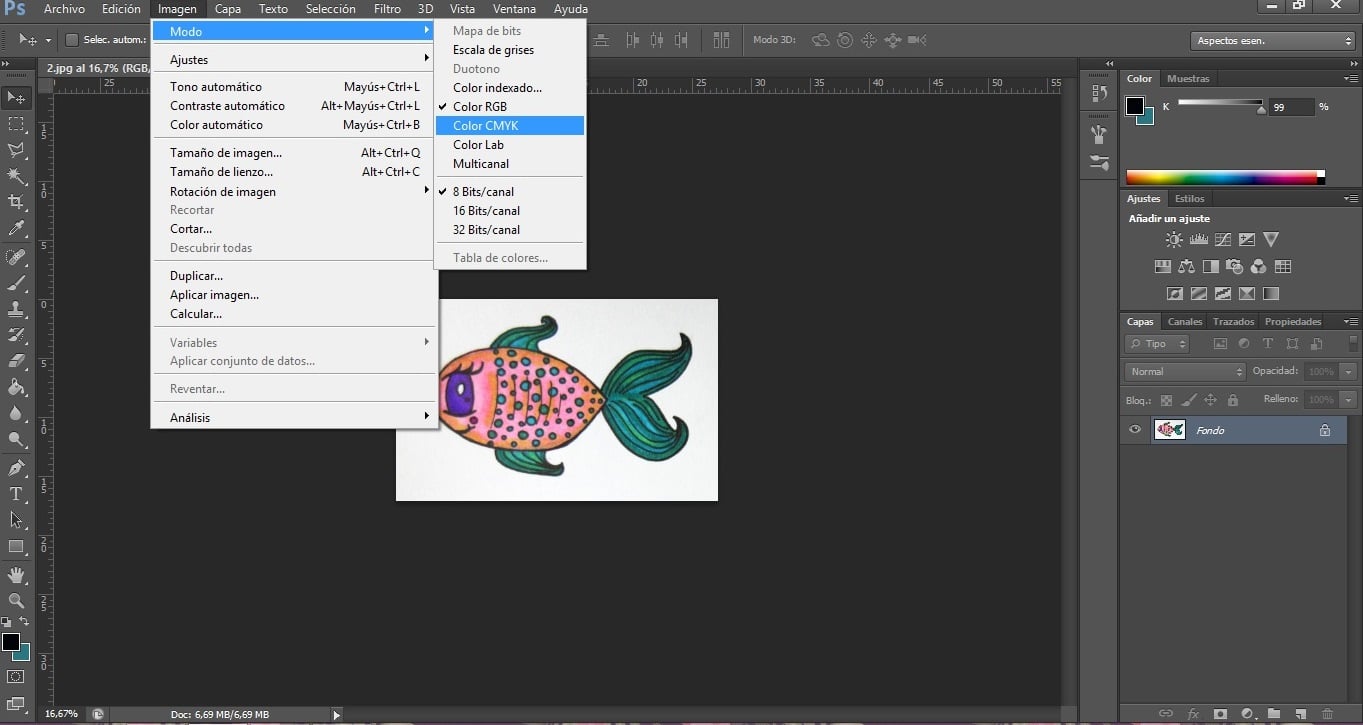
After properly scanning our illustration, we are going to open it in Photoshop. First of all we will go to Image> Mode> CMYK Color. The CMYK color mode (Cyan, Magenta, Yellow and Key black / Cyan, Magenta, Yellow and Black) tends to be closer to the colors of analog or manual images, so in this case it would be the most faithful to reality. RGB color mode (Red, Green and Blue / Red, Green and Blue) is the most used in the digital world, because the colors come out much more saturated. If we want to promote our illustrations on the Internet, this mode would be more attractive.
But if we want to print them on a product, working with the CMYK mode will be more appropriate, since printers usually use this mode (for this reason it is very common that, for example, when printing a photograph, it loses its color, since we usually take them in RGB and the printer works in CMYK, so if we retouch it previously in this mode, it guarantees that there is no color loss).
Levels

It is convenient to use the Levels. We can increase the two levels on the left and decrease the one on the rightIn this way we will clarify the background of the image and highlight its colors.
How to change image background in Photoshop?
Create a new file
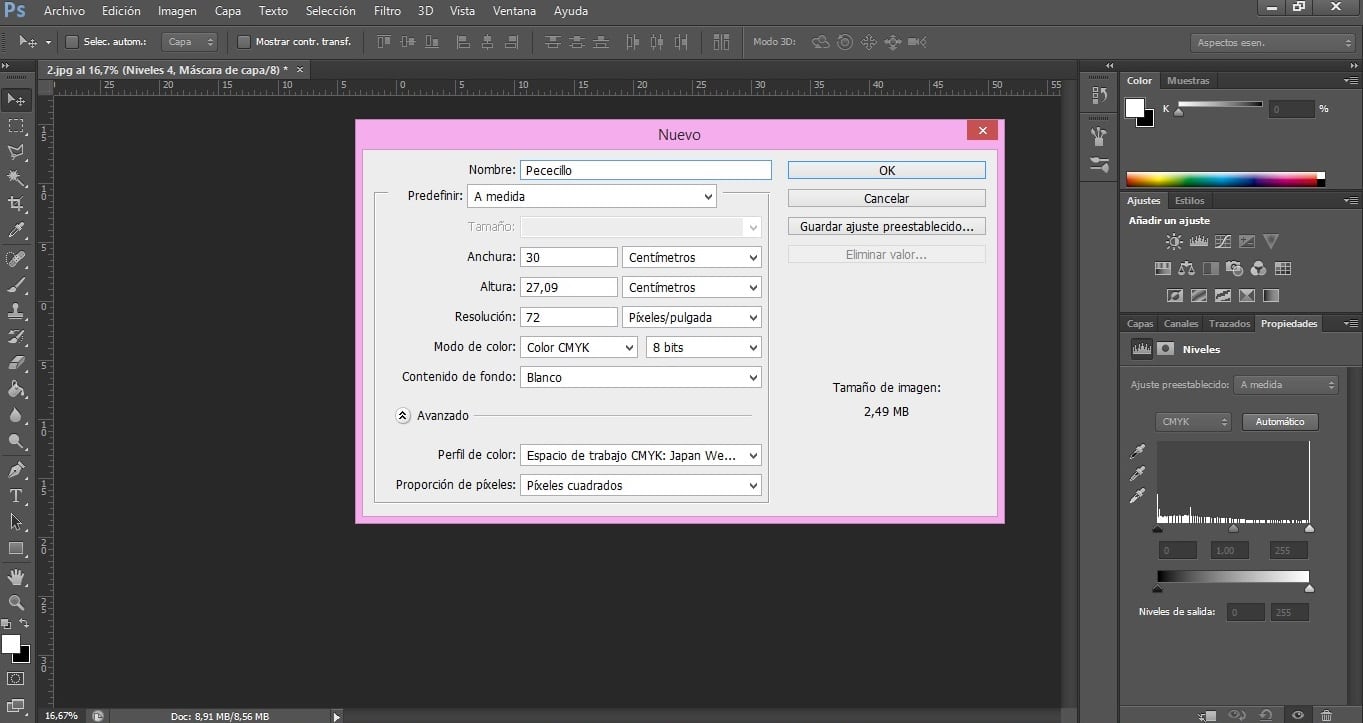
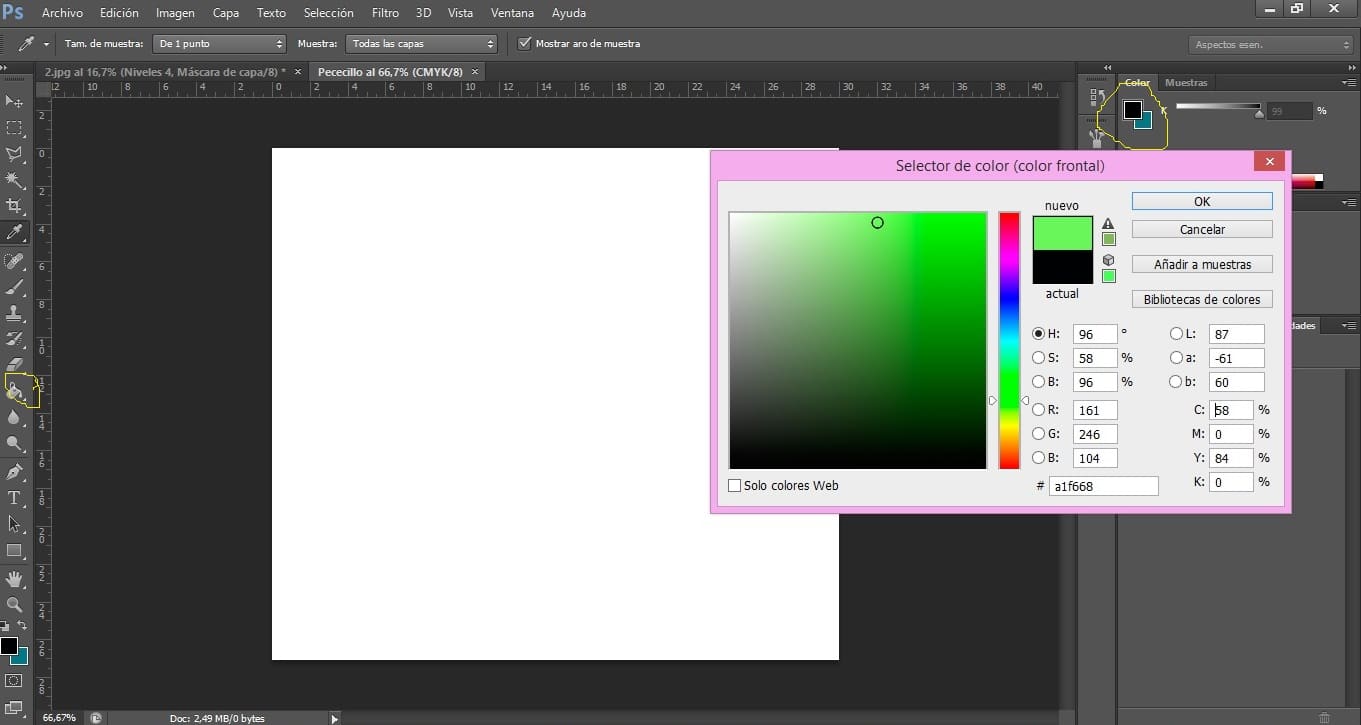
Now, let's highlight your drawing changing the background. For this we will start by creating a new document in Photoshop: File> New. In the new file we will continue to use the same color mode used previously. We are going to choose a colorful background color, which contrasts with our illustration. For this we will use the color selector (we press the two colored squares of the program), choosing the one we want. To apply it, click on the tool paint pot and then on the file, which will be colored.
Using the magic wand
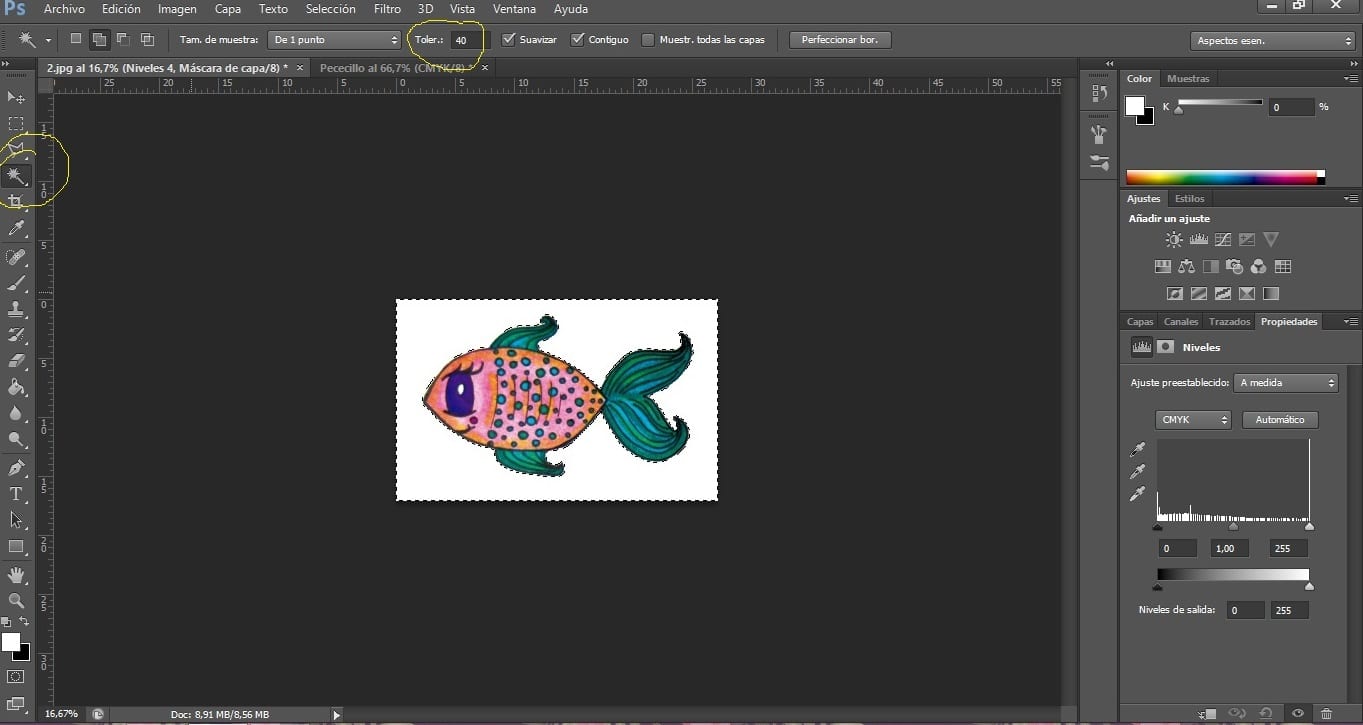
Having already prepared our background, we return to the drawing document, and we select the Magic Wand tool. Then we click on the DRAWING BACKGROUND. If it did not include our drawing in its entirety, we would have to increase the TOLERANCE value, which is shown in the upper bar of the program.
We press Selection> Invert, leaving only our selected drawing, without a background.
Behind this: Edit> Copy. We return to the new colored background and Edit> Paste.
We already have our featured image with its new background!
We hope that from now on you can digitize your masterpieces more easily.