
Those times when, in the 80's, for to be able to create Pixel Art you had to pull binary code to form the shape of a ship or an animated person with a series of icons that were superimposed one on the other. That binary code was able to give us gems of video games to be almost the basis so that today we can enjoy a new golden age of Pixel Art thanks to games for mobile devices.
And at the same time that times have changed with these mobile devices, we can access a series of tools that make it easier for us to create Pixel Art with our PC. One of those tools is Pixel Art Studio, a free program that you have available from the Windows Store in Windows 10. We are going to comment on each of the features of this program, as well as show the steps to create Pixel Art in a fairly simple way with the useful tools that this app provides.
The features of Pixel Art Studio
We are facing a tool of great power that can be used by anyone who wants to delve into pixel art design. Among its striking features is that it is optimized for digital pens and those with touch input, so if you have a Wacom pen or a Windows Surface, you can almost fly in the Pixel Art design.
But not only does it stay there, it also has a series of features such as its previous sprite mode, ability to import / export PNG, different types of brushes, settings for brush size and opacity, brush pressure, special effects on layers, custom canvas size, advanced layer functionality, symmetrical drawing, control over each of the pixels of our work and the possibility of drawing shapes with some specific brushes.
![]()
It is the ability to draw symmetrically one of the most useful, since with this tool we will be able to create objects in a jiffy, such as a spaceship or a specific object that comes in handy for that friend who is getting down to business to create his own video game for Android or iOS.
Pixel Art Studio too has its web version, although it is available in alpha, so you may run into some bugs. So to be able to enter the world of Pixel Art, we recommend that you go through the download of the program from the Windows 10 store.
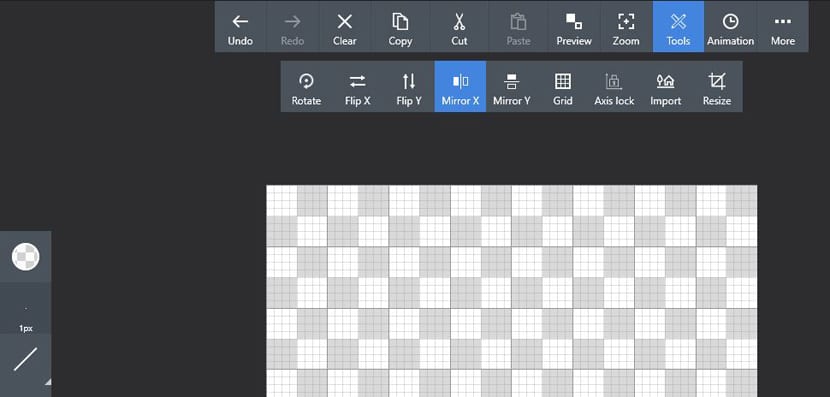
The Pixel Art Studio tools and interface
By the time we have installed and launched the program, we will have before us the grid-shaped canvas that will allow us to draw with the different brushes that we can find in the left side toolbar.
As you can see, it has many similarities with other design programs, so if we are used to Photoshop and others, you will feel at home. That said, let's go over the different parts of the program. At the top we have the erase tools, reverse, paste, preview and zoom.
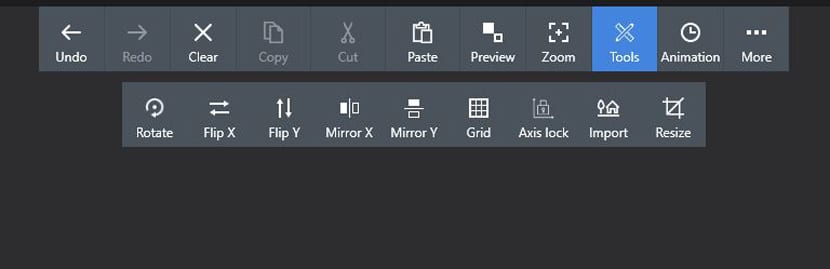
Apart from these, what they will be widely used for different purposes, we have a very important one: tools or tools. If we click on it, we can access a series of very important tools to start with the drawing of our first Pixel Art.
We have Rotate, who will be in charge of rotating the drawing that we have already made; Flip X, to flip the created drawing sideways; Flip Y, with the same function although it will do it vertically from the Y axis; and Mirror X and Mirror Y, two essential tools to facilitate the creation of Pixel Art. Each pixel that you draw on the canvas will be folded in the other part of it. It will depend on using the Mirror X tool to be copied on the side, or Mirror Y to be on the vertical part.
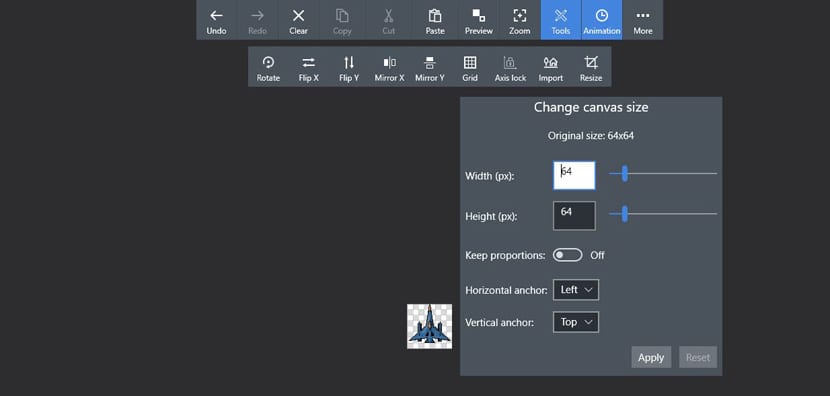
The rest of the tools in this part is Grid, to resize the grid; Axis lock, to lock the X and Y axes; Import, to import an image and thus play with a pixel base if the one we imported is small enough; and Resize, to change the size of the canvas.
We also have the option to use Animation, although we will leave this for another tutorial. It means that you can animate pixels to create explosions or all that kind of necessary effects just like animating characters. Finally you have «More», in order to access to save, load, new art, export or view the gallery; a series of basic tools for artistic creation with this program.
Drawing tools and layers
On the left we have the main drawing tools plus the color selector. The color picker is pretty basic with a history of recent colors and custom colors for quick access to them. This part is interesting, since many of the drawings we make will not need so many colors, with a few we will be able to make quality Pixel Art.
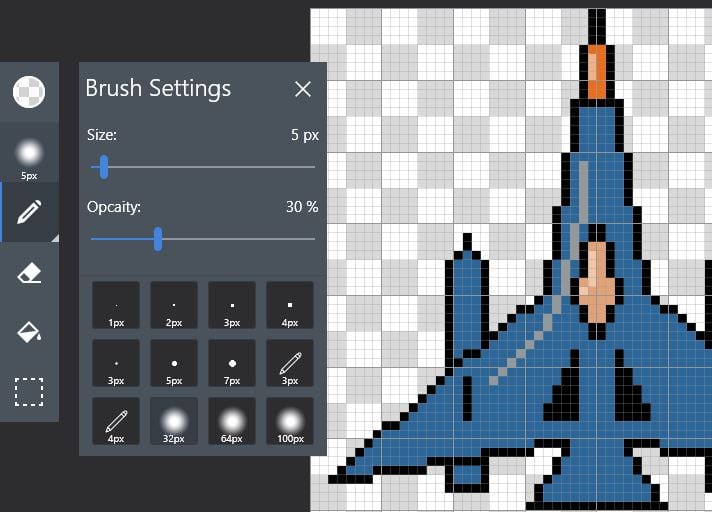
The next tool is the brush settings, which allow us to adjust its size and opacity. We have some configured by default so that you can quickly access them without wasting any time.
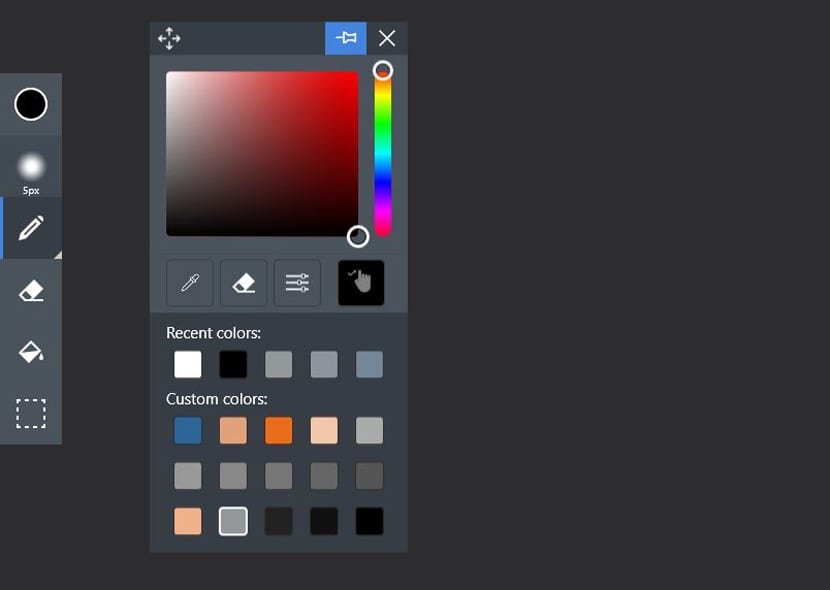
If we now click on the brush tool, we can also choose line, square or circle. The other tools are well known as erase, paint bucket to fill an area and selection.
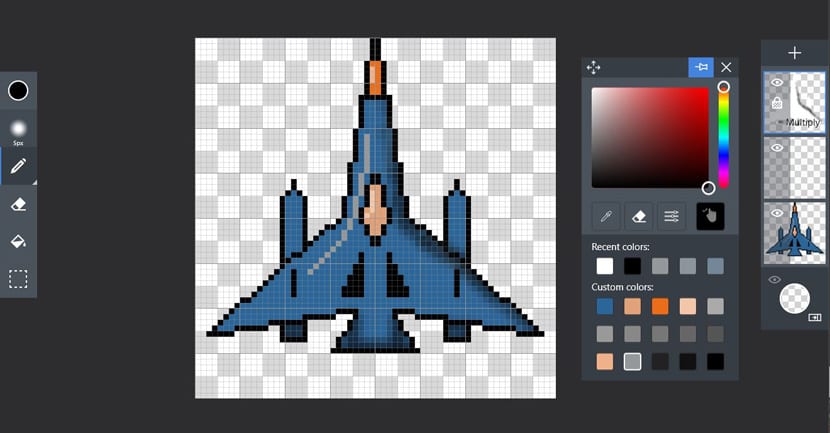
On the other side we have the part of the layers that they will allow us to draw the layers that interest us. The + sign to create a new layer that will be added to the current one in order to have all the ones we want. We can block them with the padlock sign or make them visible with the eye sign.
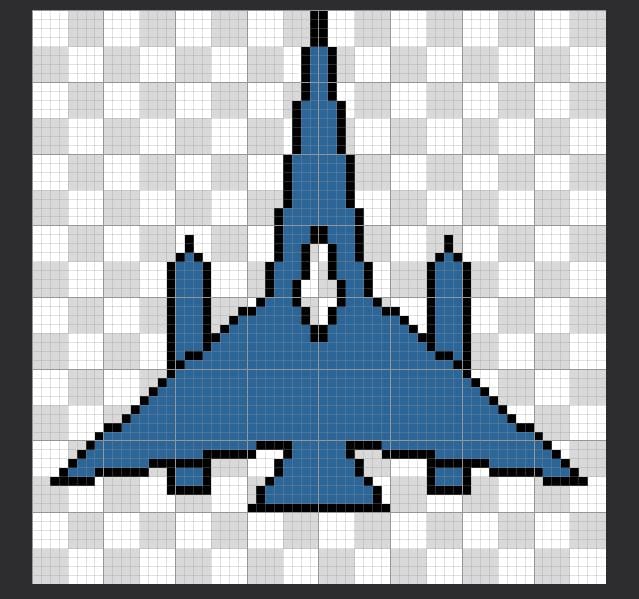
As you can see, Pixel Art Studio takes us to a program very simple in its dynamics so that we can quickly create a Pixel Art drawing. In this case we are going to create an intergalactic ship that we could use in a shoot 'em up of those with many explosions and many enemies.
How to Draw a Pixel Art Spaceship with Pixel Art Studio
Download Pixel Art Studio from here.
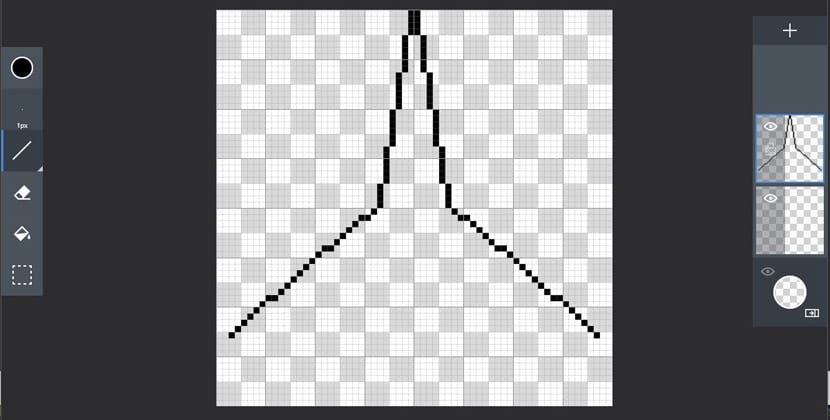
- Let select line brush and 1 pixel in size to start drawing.
- Once this is done, we go to Tools and select Mirror X.
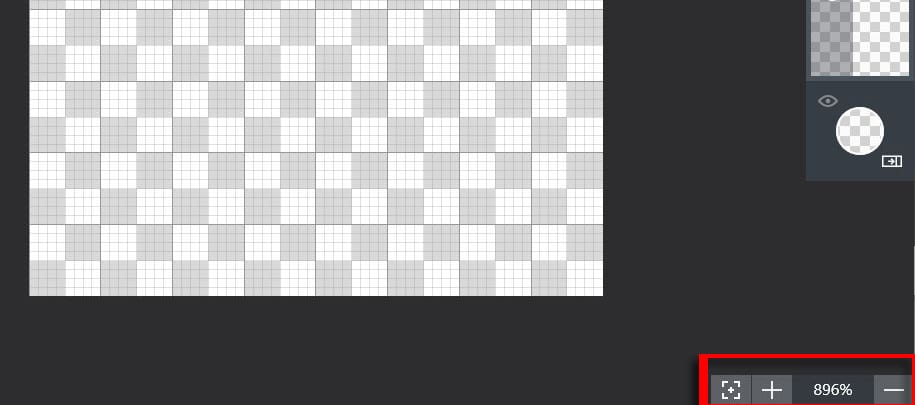
- We can reduce canvas size with the zoom view in the lower left with the + or - sign.
- We bring the mouse pointer to the top of the canvas right in the middle; with the guide it will be very easy.
- We press and draw down the oblique shape that will lead to the front of the ship.
- We open the wings of the ship a little as you can see in the image below with another line at a different angle:
- Now we close the wings of the ship and we create the lower propulsion part as you see in the image:
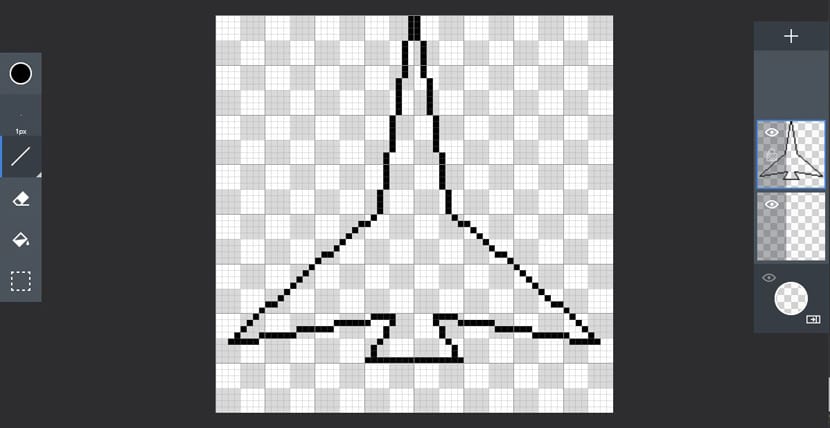
- It's time create the cabin from a third of the front of the nave, almost like we made the same part but smaller to close it finely:

- Now the missiles placed on the wings:

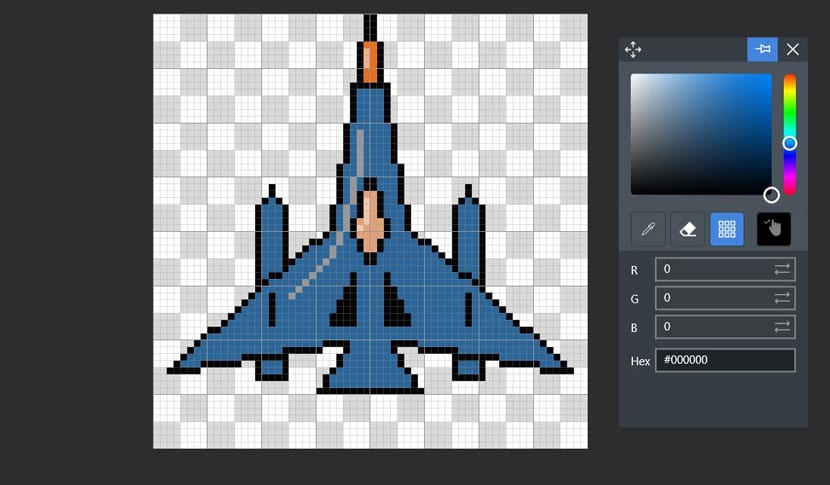
- We are going to color the ship by selecting the color selector.
- Un blue with Hex code # 2c6598. And we pass it to custom color by clicking on the hand icon and dragging it to the position we want.
- We now choose the cube and click on the inside of the drawn ship and on the missiles.
- We give color to the cabin with this shade: # e1a279
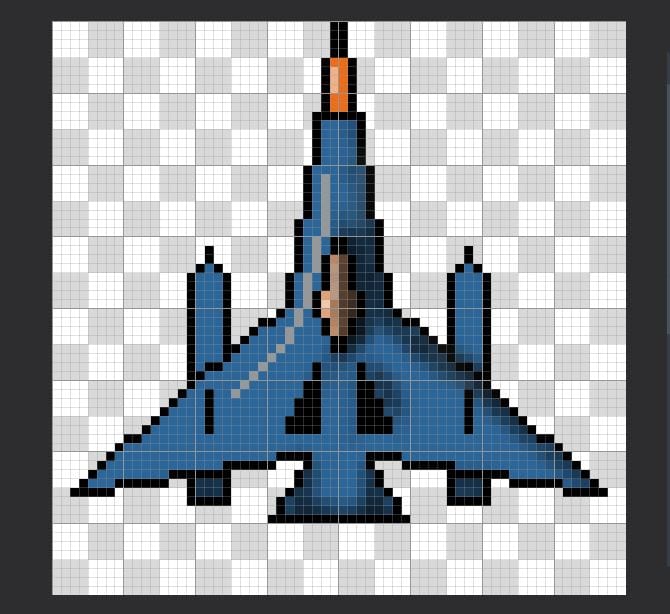
- We selected the black color, a gray color could suit it better, and we drew the ailerons on the bottom of the ship. We can take the vertical of the cabin as a starting point.
- As well we create a vertical line of 5 pixels located just above the missiles.
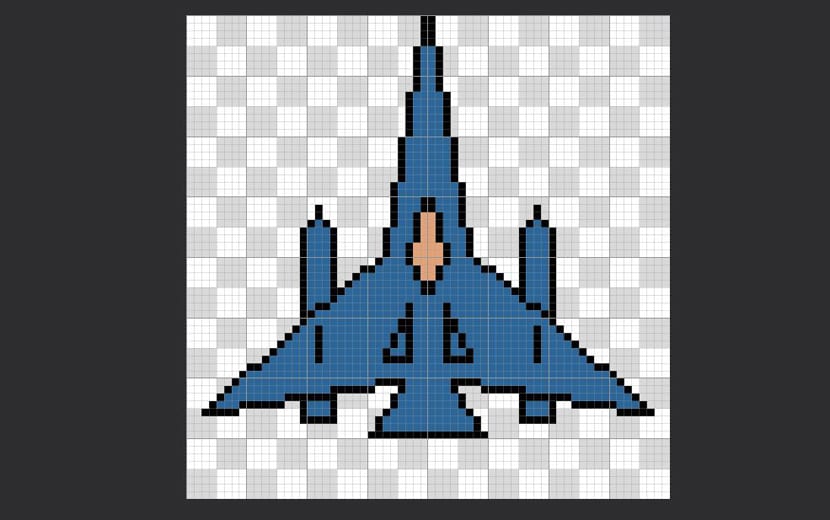
- We close the tip of the front of the ship with a horizontal line. We also color that part with a tone: # ec6d19
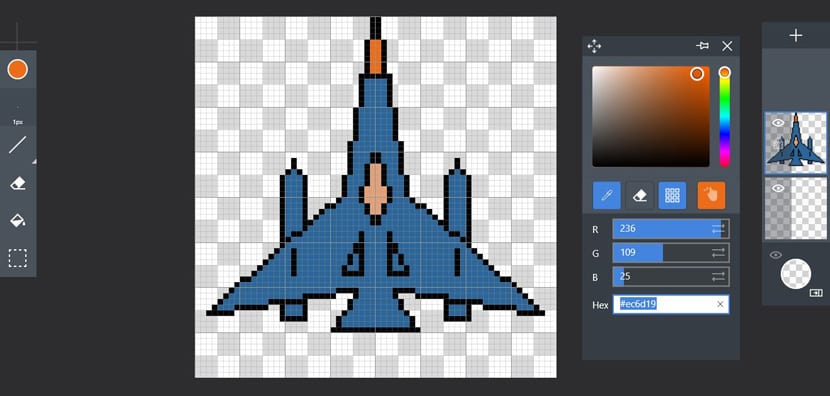
- It is time to create the reflections of the ship with the brush.
- We deactivate Mirror X and with a lighter tone: # f2c6a8, we draw the reflection with a few pixels on the left side of the cabin as indicated in the image:
- For the tip of the ship, with the color picker, we can use the dropper to take the orange and thus choose a lighter shade.
- We are going to give it to you anyway: # eeb18a
- Important: save as custom colors to be able to return to them at any time.
- Now we change to a line, we choose the blue tone, we look for a lighter one (# 94989b) and we draw the reflections on the left side of the ship:

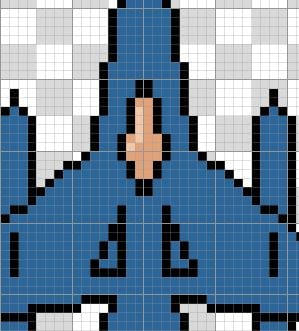
- Let coloring the ailerons black as in the picture with the paint pot:
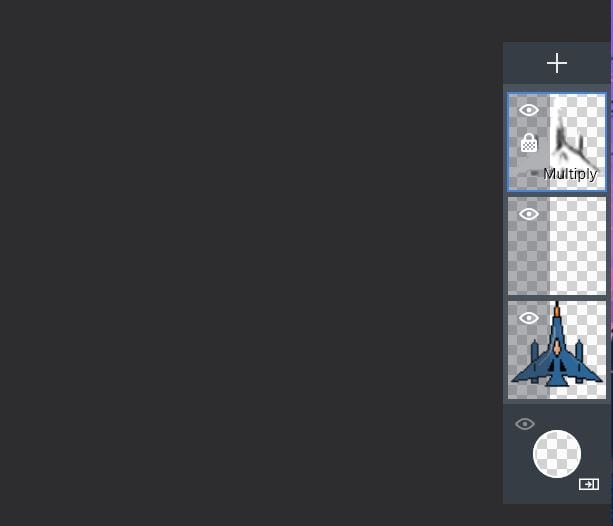
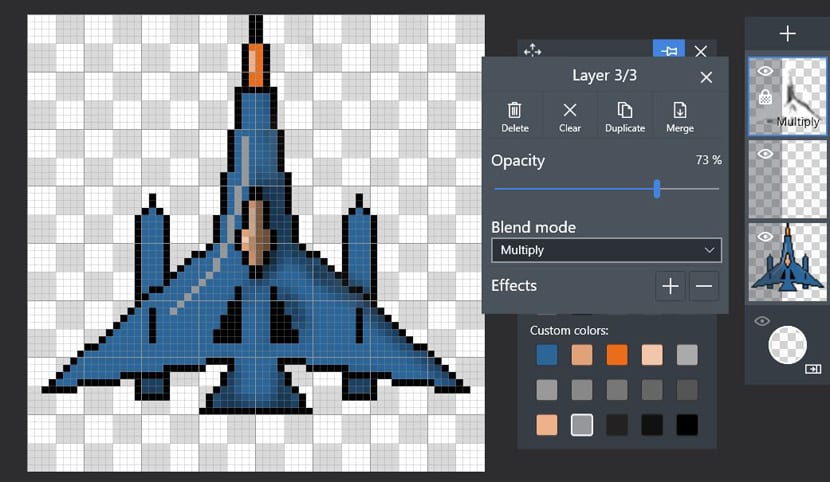
- We go to the layers and select the one in the drawing to duplicate it with Duplicate. We also lock the new layer with the padlock.
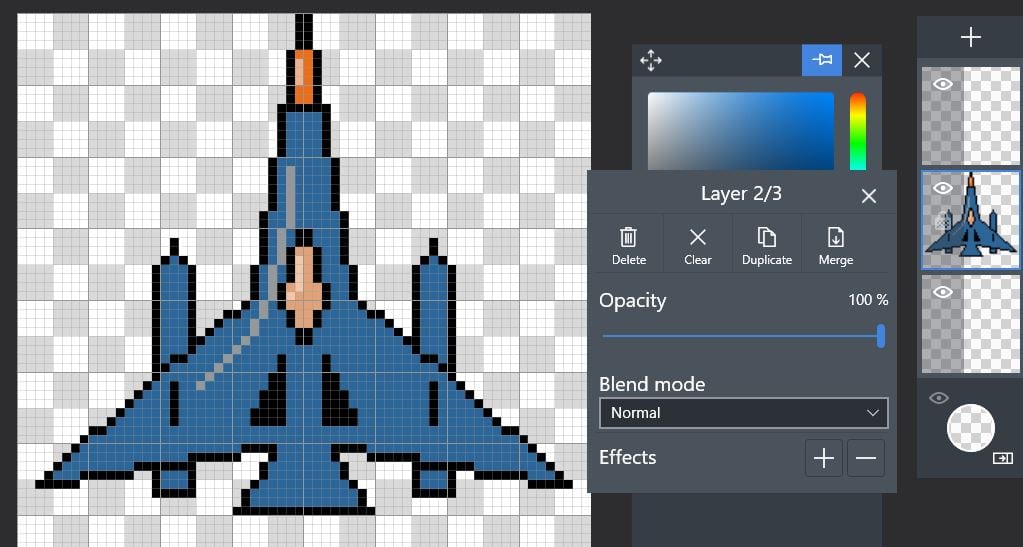
- We choose the white color and in the new duplicated layer we use the paint pot to color all the blue color and even the reflections given above:
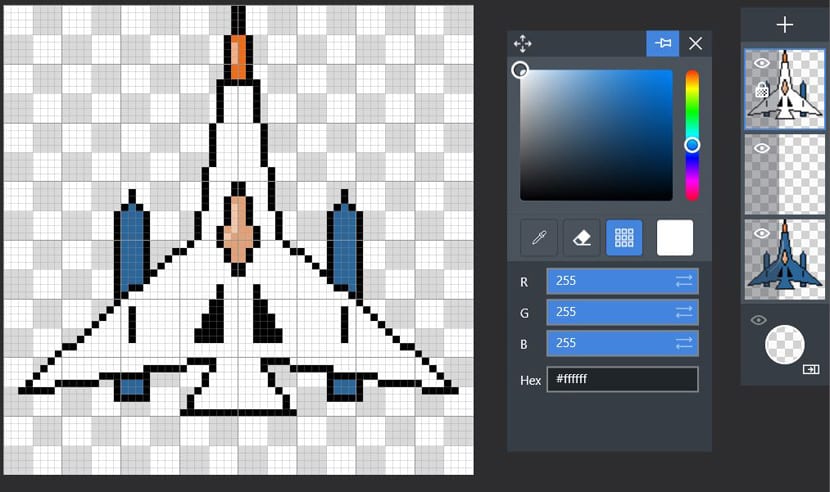
- Now it is time to select the pencil or brush, we change the size of the brush to 7px and paint the entire canvas with the color white.
- On the duplicate layer, right where we are, select the blend mode «Multiply» for the ship to appear.
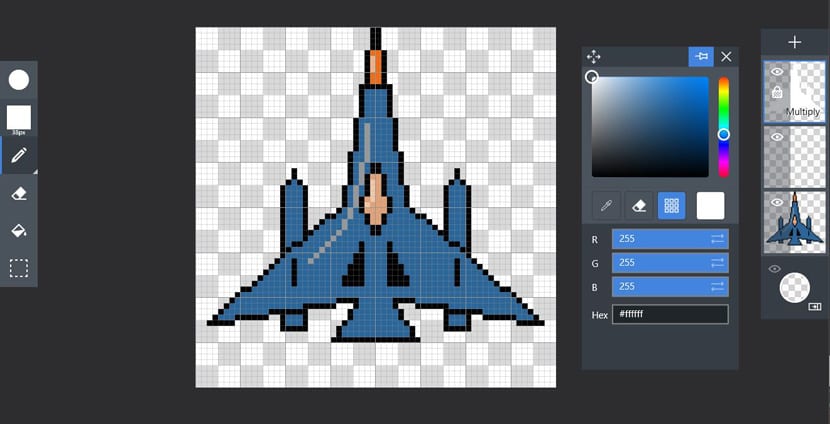
- We go to the brush settings and choose the diffuser at a size of 5px. Also the black color and the opacity of the brush at 10%.
- What we are going to do is shade the right side of the shed and the propeller in the lower one as well as the lower part of the missiles:
- We go to Preview at the top to show a preview of the ship and we take the eraser to clean the shadows.
- We take the pencil in hand and we continue drawing shadows around the cabin. Even in the cabin to add volume to the shade.
- At all times we can reduce the intensity of the shadows with the layer opacity.
- We give shadow to missiles and we will have our ship ready.
- Click on More> Export.
- We scale the image to 400% or we even add pixel spacing to make it appear more pixelated. This will depend on our taste and art.
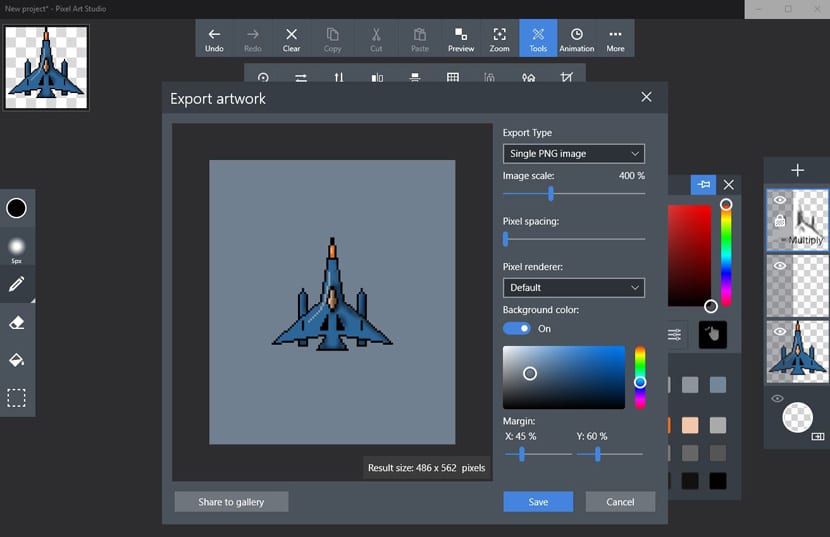
- We can also change the background in background color and add margin in X and Y to 45% and 60% respectively.
- Ya we have our super ship ready to save it as .PNG.
![]()
Now to create alien ships of all kinds in order to form a series of them to pass it on to that friend who is looking forward to their game.