
Now we are going to start working directly on the drawing, more specifically, before starting the line art to which we are going to submit our drawing, we will begin by cleaning the canvas where our drawing is located. Let's start with How to ink and color our drawings with Adobe Photoshop (2nd part).
In a previous post of this tutorial, riding a How to ink and color our drawings with Adobe Photoshop (part 1), we saw how we should scan our pencil drawing and what file we should convert it into. Now we will start preparing it for ink and color.
Creating a new document
We create a new document, and we will do it as if we were going to print the image once developed, and for this we will open a new document (Ctrl + N) and in the selection box that comes out, we will choose international paper, A5, and we will go to the color mode box and choose Grayscale. Once this is done, we will open the new document.
Cleaning the drawing
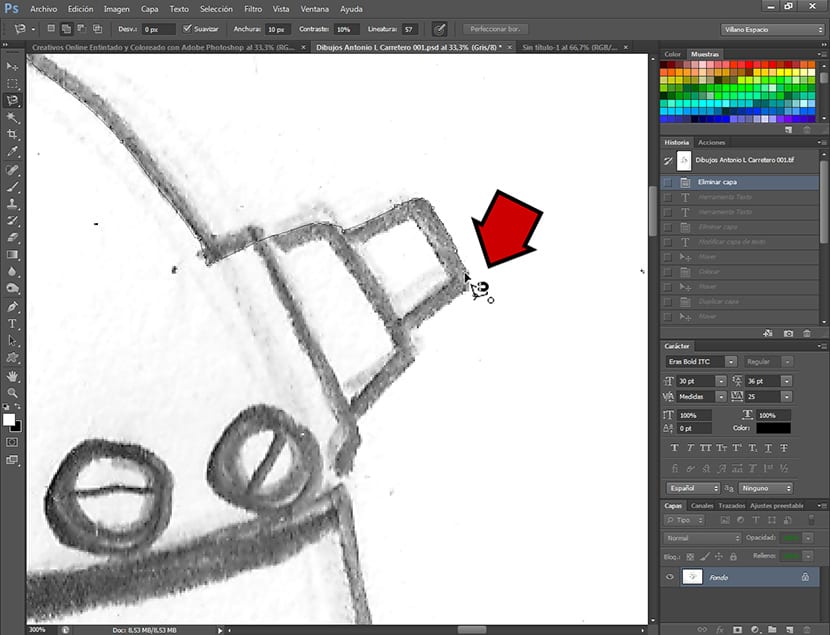
Before importing the drawing to work, we are going to separate it from the background where it is located, which will be a stained paper from having been drawing. To do this, in the drawing that I propose as an example, I will use the selection tool Bow Magnetic, and I am going to outline the figure by its outer line, guiding the loop as finely as we can. Soon, I will do a monograph where I will only talk about the selection tools of Adobe Photoshop. Once the entire drawing has been outlined with the selection tool, we will make sure to leave the gaps that are free also selected, that is, to create a defined silhouette of the figure.
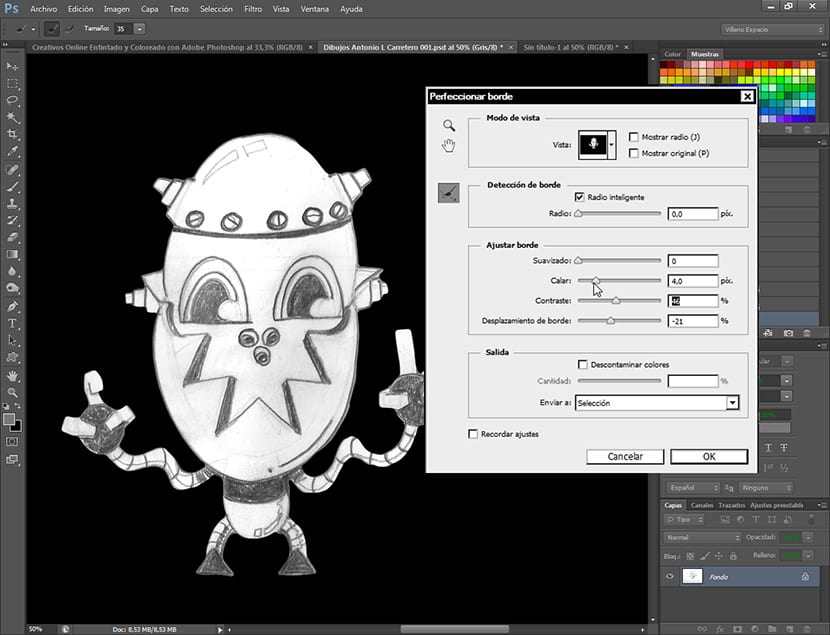
Once silhouetted, we headed for the route Selection- Refine Edge. A dialog box will open, from where we will refine a bit (we are not going to spend a lot of time on this step either, it is just so as not to lose much information about the border of the drawing) the selection we are in. Within that dialog box, we will choose the type of view called About Black, where we will see perfectly which part of the line we are losing. I activate the checkbox Smart Radio and I apply the Adjust edge values, trying as much as possible that the line outside the drawing maintains its shape and does not lose much information. For this we must use the values Cutwork, Contrast and Edge Shifte accordingly, regulating them in such a way that the outer line is always sharp and without blurring. Once we have satisfactorily outlined our drawing, we press the keyboard shortcut Ctrl + J, thus creating a new layer with the selection already trimmed. We click in the thumbnail of the layer where the figure is already trimmed in order to select it and we click to copy.
Export selection
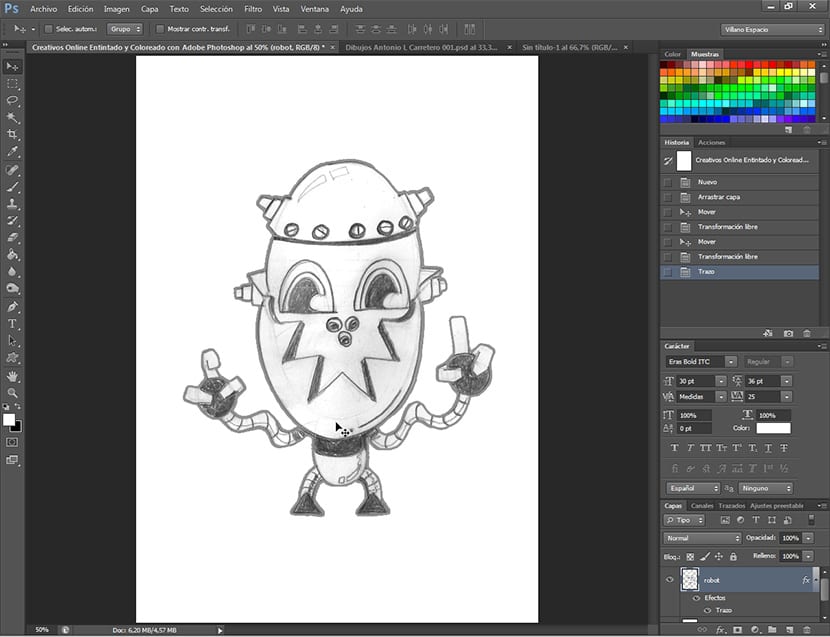
Once we have copied the content of the layer, we go to the new document that we had opened and hit it. The new document I remind you that it must be an A5 of international paper at 300 dpi resolution, with a white background. Once we have the exported layer, it will come in format Inteligent object, rasterize the layer (by right clicking on the layer and giving the option rasterize) and we go on to dock it with the white background. We create a group that we will name pencil drawing and we will duplicate it. We will call the new group Inked, and we create a new layer that we will name as Ink 1 above the copy layer Pencil drawing, which we will rename as Ink 2. We turn off the display of the group that contains the Pencil drawing, clicking on the eye that has the layer group next to its thumbnail in the layers palette and we choose the group Inked and the cape Ink 1 to start tracing the inking on it.
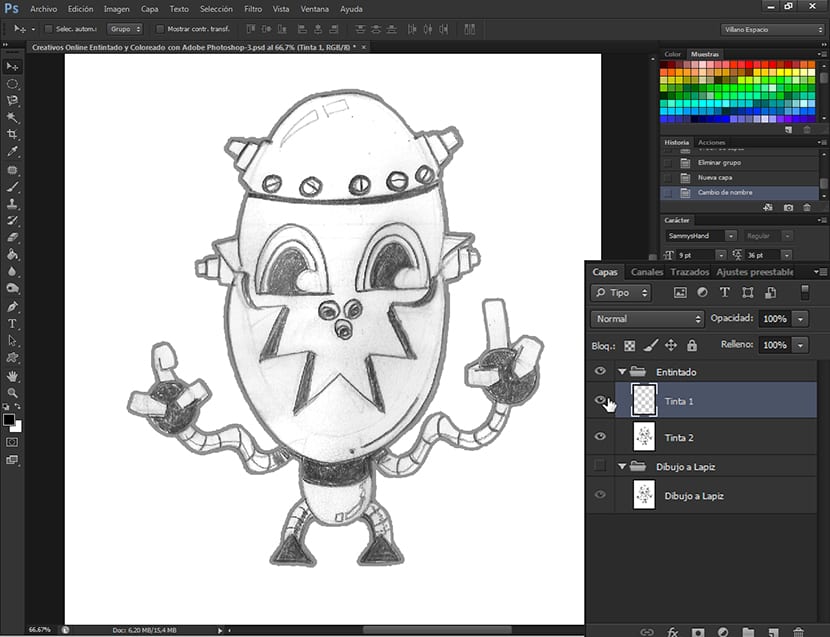
We start inking
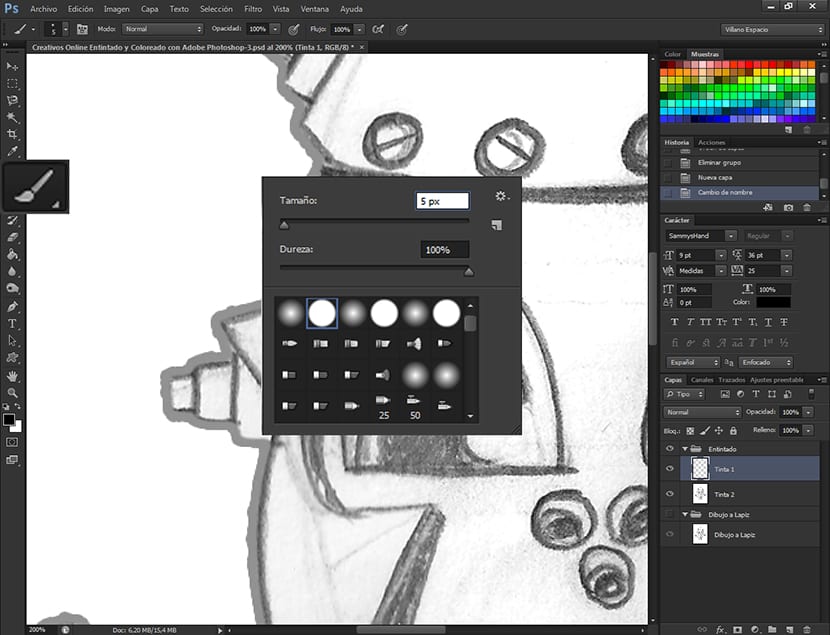
We stand in the layer Ink 1 As we have said, and from here we will start to generate the inking of the drawing. The first thing to tell you that we are going to do it using the tool Feather in combination with the tool Brush, a very easy and practical way to work the inks. To begin with, we will regulate the size of the Brush, for this we will choose the tool Brush and we will right click on the image to access the panel for choosing the shape and size of the tool. Once in that panel, we choose a brush that has hard edges and without blurring, and we place it at 5 px of size.
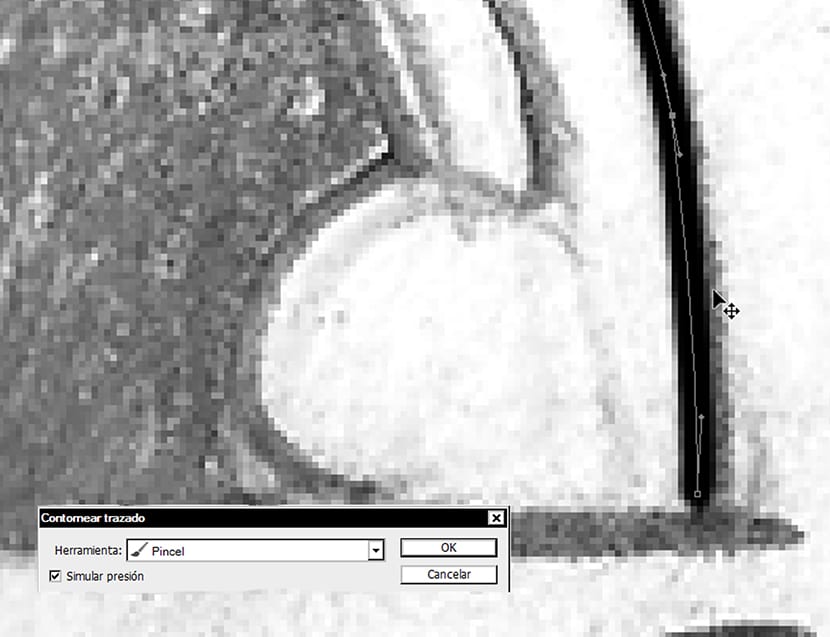
Once we have chosen the size of the brush, we go to the tool Feather, and we will begin to make a trace on one of the lines of the drawing.

When you have a line already drawn, we right click and we will Stroke path, and from there we give the brush, leaving the option pressed Simulate pressure.
So little by little we will be inking the lines of the drawing on the layer Ink 1, little by little until you have the entire figure.
In the next tutorial we will finish ink the drawing, and the next we will start color. Do not miss it.
? it to every single one, it's? n fact a good for me to ppay a visit this
site, it contains helpful information.