
Photoshop is an experience in itself that improves considerably over time and touches the moment of how to make a GIF with Photoshop CC 2020. That is, we are going to use the latest version of Photoshop to create one of those multimedia contents that are so fashionable.
You can see the GIFs in the chat apps that allow us to share them from Giphy, a web platform that allows us to download them and even upload our own. So as here we become masters of content creation, we go with this guide that leaves no headless puppet for a well optimized GIF and visually suitable to upload wherever we want.
What is a GIF?

First of all make it clear that a GIF is a compressed image file format that result in a cyclical and infinite animation; In other words, if the GIF player is left playing, it will not stop playing. In fact, there are artistic GIFs that reproduce a video in which the same scene seems alive, such as a drop falling to fall another in an infinite process.
Like the animation of a lifetime, a GIF is made up of a series of images that Played in sequence create the illusion of movement. It is a format that today has become essential for all types of websites such as IMGUR or the same chat apps that help us to search for a GIF of any subject and play a sequence from a movie or an «Oh» well original exclamation mark.
We can download any GIF from the web to transfer it to Photoshop and realize that sequence of images in a row and it is those frames that we are going to work on in this tutorial.
How to make a GIF from images in Photoshop CC 2020
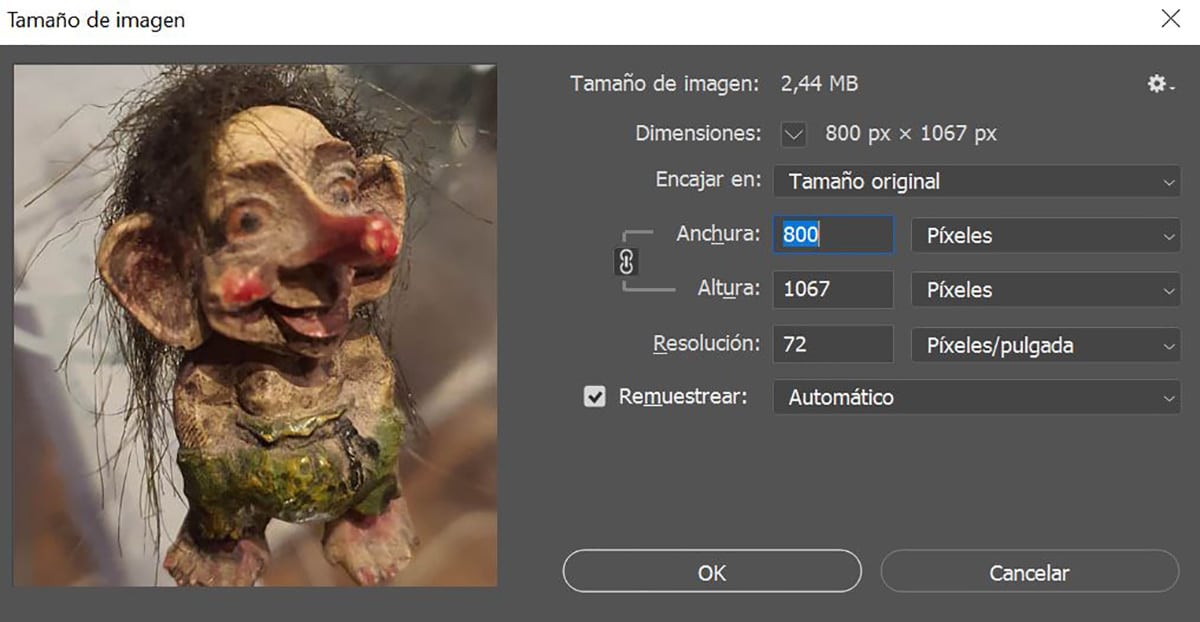
First we are going to use the latest version of Photoshop from Creative Cloud. With this on the table, let's create a GIF from images. We go through the whole process with a document with the same width and length ratio as the images that we will use for the GIF:
- We create a layout of 800 x 1067 pixels with a resolution of 72 pixels (We could lower it so that the final weight of the GIF would be lower)
- The image mode we keep it in RGB
- We create the document
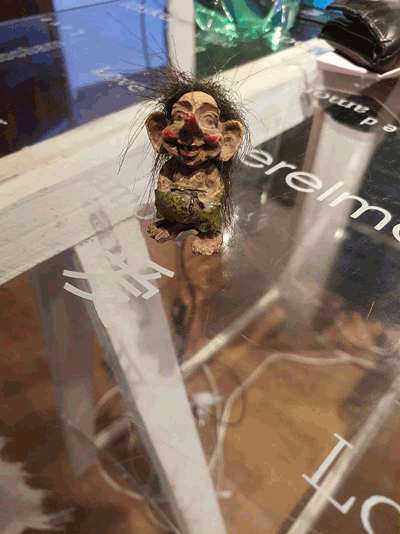
Now what we are going to do is import all images to create GIF sequence. In this case, I have encouraged the little troll to make it move towards the camera with a series of images captured with my Galaxy Note10 + phone. In total there are about 23 images so it could last for a second or two. Remember that normal movies that you watch are 24 or 30 FPS.
- Let's go to Script> Load Files to Stack
- This opens the image browser so that we can select all those that we want to include in the GIF from the folder location
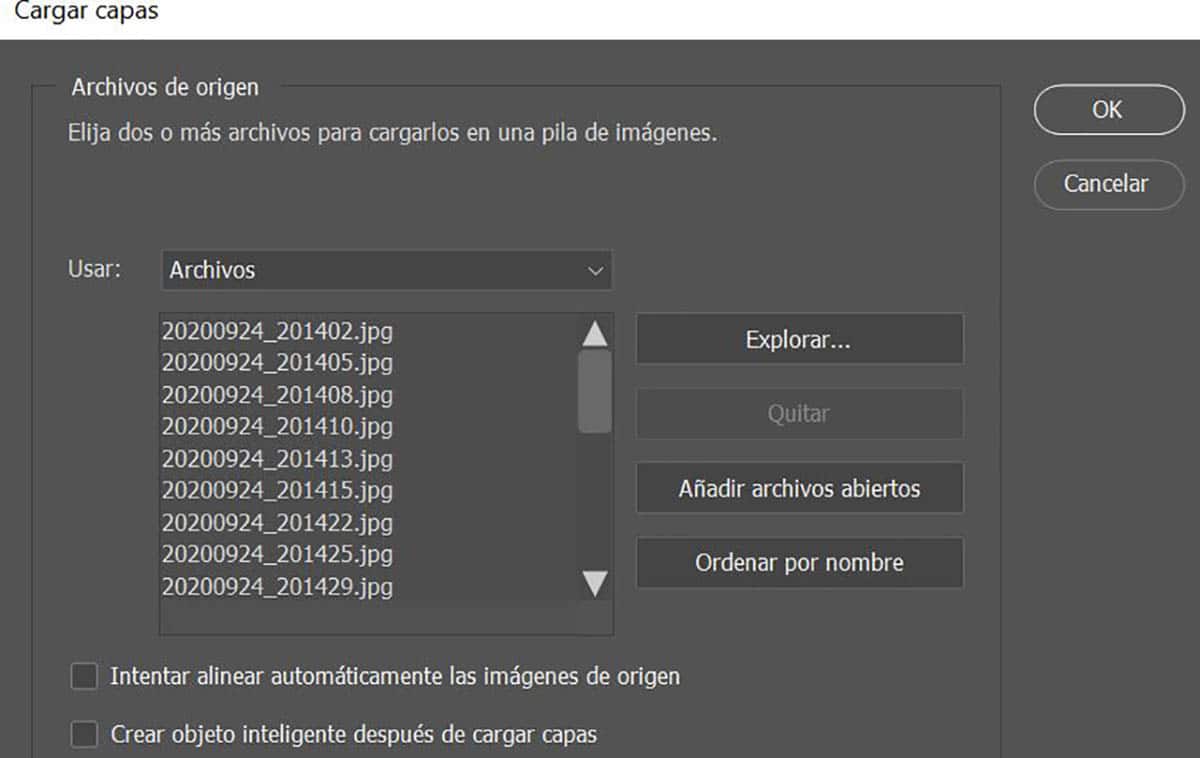
- We load them and all the images will be opened in the same document (it will take a while depending on the number of images and their size)
This could also be applied from a video as a source to later create a GIF:
- Simply from File> Import> Layered Video Frames
- And we would have as a result the same previous document with all the frames, but pay attention to the size of the same since for every second we could have 24 frames or 12 if it was a short or classic animation
Preparing the sequence for our animated GIF
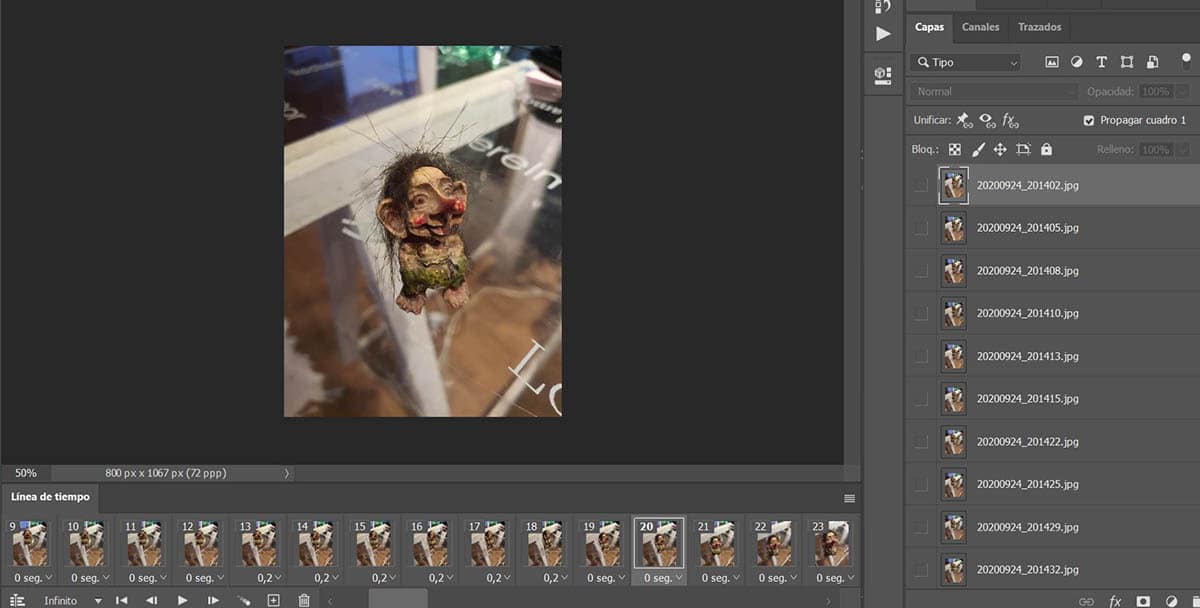
Now let's open the timeline to handle the whole sequence:
- Let's go to Window> Timeline
- Select the button "Create frame animation"

- Now we have to click on the three horizontal bars icon in timeline
- From the pop-up menu we select "Flatten frames to layers". In this way, all the layers created previously with the images that we have imported into Photoshop will be passed

- Now in Timeline we click on the play button to check if we have to click on «Invert frames»; precisely in the same hamburger button that we have pressed previously
- We do it to see if the playback is continuous and as we want, since it may be that it is reproduced in reverse when importing the images of our animated GIF
Now you will see that in timeline we have all the pictures of the images that make up the GIF animated. In each of these frames we have a downward arrow that shows the number of seconds that each "frame" or frame lasts.

If we like animation, and in this case we have used a series of images to create our own sequence With our little troll, what we are going to do is increase or decrease the time of each frame or frame to make the animation more realistic.
From 1 to 8 we leave it as is, and from frame 9 we are going to increase the duration a little:
- Select with the shift key the strip of frames or frames that we want to modify the duration
- We press on the down arrow and we change the time to increase it a bit. For example, at 0,5 seconds
- We reproduce and assess whether the movement is too slow. In my case it is, so I try again selecting all the frames and use 0,2 seconds
- Optimized animation and can take timeLet's check that the GIF stays in an infinite loop.
- Just below Timeline you will see that it is already configured as Infinity
Exporting our frame sequence as a GIF
Now we have the part of export when we have already defined the animation or the sequence we want. Everything will depend on the amount of images that we have imported or simply the cut of that video clip that we have used to create the GIF.
- Let's go to File> Export> Save for Web or we just use the key combination: control + uppercase + alt + S
- We select from GIF 128 Preset with Dithering
- 256 colors
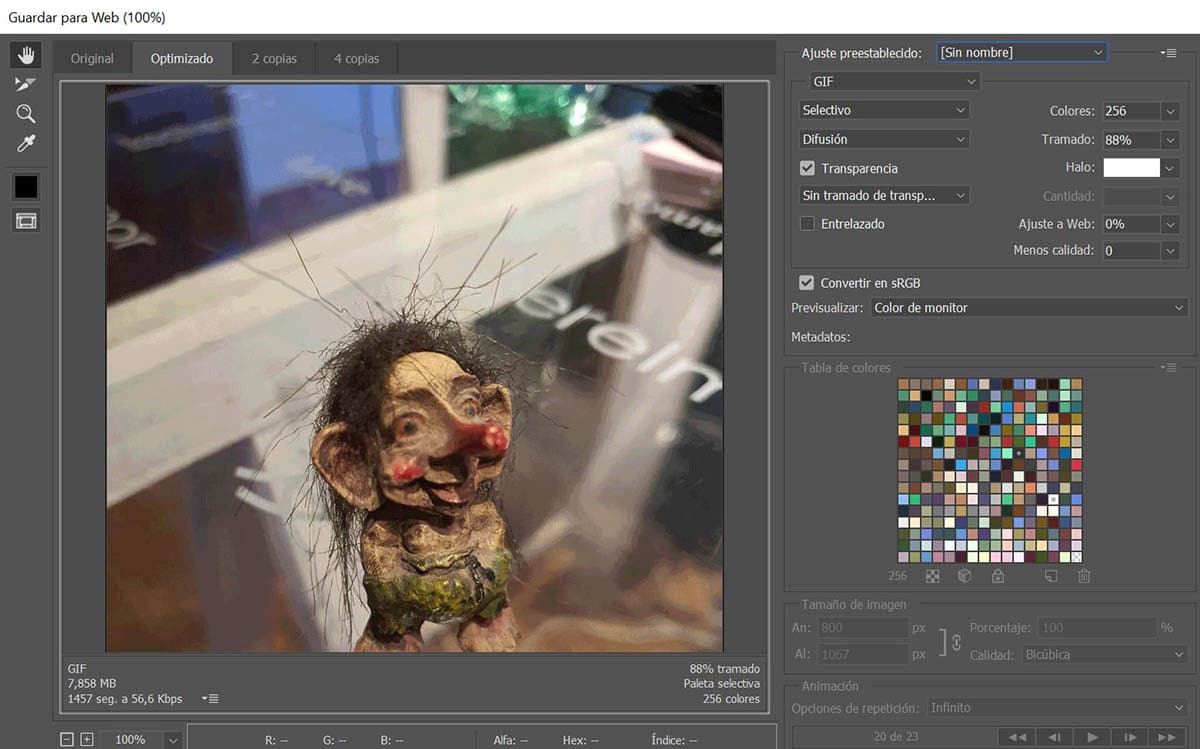
- Now if we want reduce the weight of the animated GIF we can modify the width and height in image size
- Right at the end of the window we have to look for animation and in repetition options choose infinite. This step is important so that it loops non-stop when it plays
- You can check the result of the GIF size at the bottom left. In this case we go with 7MB so we can reduce the size of the image
- It can play with the dithering value to reduce several megabytes the weight of the file. By the way, we reduce the image to 400 width and in our case we have 2MB which is not bad for a GIF
- We export with Save
You can see how the animated GIF we have made looks like and that it is 2MB that to be a small sequence is not bad at all. Now you have to use your magic or simply take a video file of some of your recordings to create your own fully optimized GIFs.
So you can create an animated GIF with Adobe Photoshop CC 2020 with all the ease in the world and from this great professional tool that allows us to do magical things.
Hello Manuel! Thanks for the tutorial! Very interesting! Regards!
Hi Mariana! I like that you like it. Greetings: =)