
Preparing a UV varnish file in Photoshop quickly is not difficult. To achieve a unique and professional result by giving your designs that magical touch of shine that manages to give it a greater visual appeal by going from a simple design to a more professional design, then we will explain how to do it step by step.
UVI varnish is a finish widely used in graphic arts to contrast one area with another by applying a transparent film that converts specific areas of a matte design into gloss. Learn to prepare your files with UVI varnish in a professional, fast and practical way.
The first thing we have to know when applying a UVI varnish is to know what a Varnish is and why we are going to apply it, the ideal is to apply it based on some need: design, aesthetics, contrast ... etc. Depending on what we need, we will apply the finish in one or another area of our printed design.
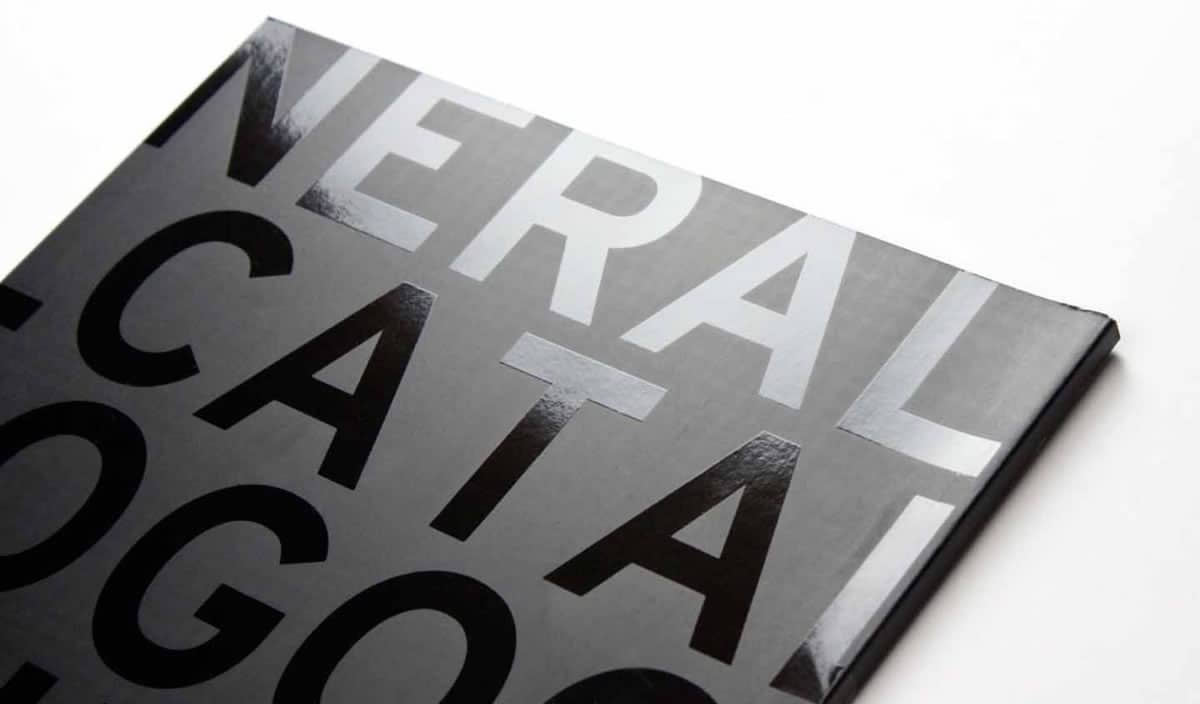
If we look at the image below we can see an application of UVI varnish in a printed format. As we see the varnish manages to give brightness and contrast to the design, highlighting in this case the typography of the background. UVI varnish turns a design with a matte surface into a glossy surface.
Now that we know what UVI Varnish is, we are going to learn how to prepare the UVI file in Photoshop in a simple and fairly fast way. This printing finish is used a lot in printing and the system that we will learn to use will help us to prepare other finishes such as: gold leaf, silver leaf ... etc.
We have to decide which are the areas where we are going to apply the UVI Varnish, once we are clear about this, we will start working with the file in Photoshop.
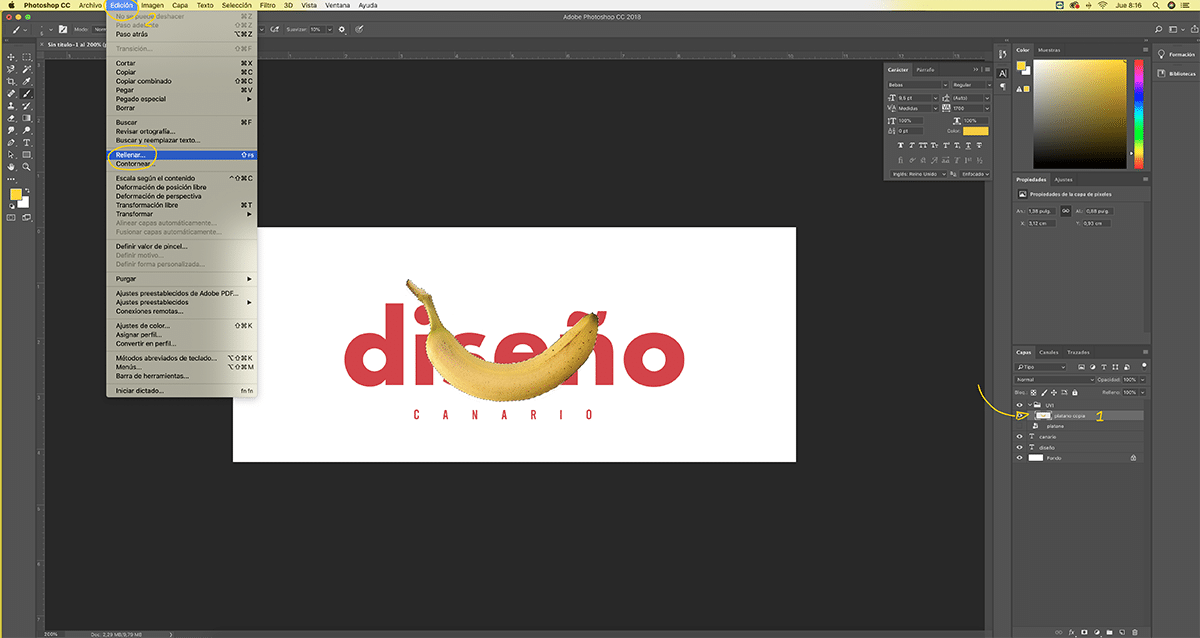
The first thing we will do in Photoshop is work in layers all the design elements, it is necessary to have only the outline of the elements that we are going to fill with UVI Varnish. The ideal is to work in an orderly way through the use of layers and groups, all of which are duly named.
The next thing we should do is create a group where we will only put the layers that will have UVI Varnish, in this way we will have on the one hand the original design and on the other the UVI varnish.

Once we have duplicated the layers that will have UVI Varnish and we have placed them in the group, the next thing we will do is fill the layer with 100% black.
To fill the layer we have to click on the upper menu of Photoshop in the area edit / fill.
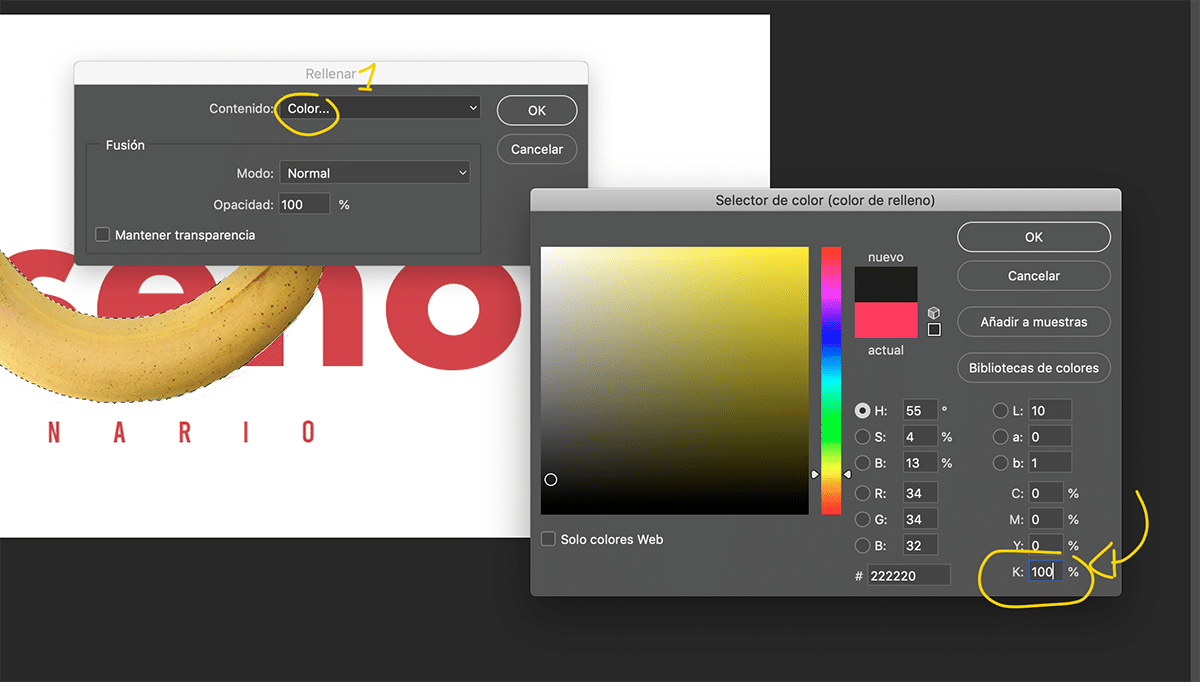
We add 100% black in the areas where we are going to apply the UVI Varnish. In order to make selections we have to click on control + click on the layer that we are going to fill.
In the lower image we can see the new window that opens when filling in an image, we must put 100% K en the CMYK color area. This step is essential so that the areas of UVI Varnish can be correctly located in the press.
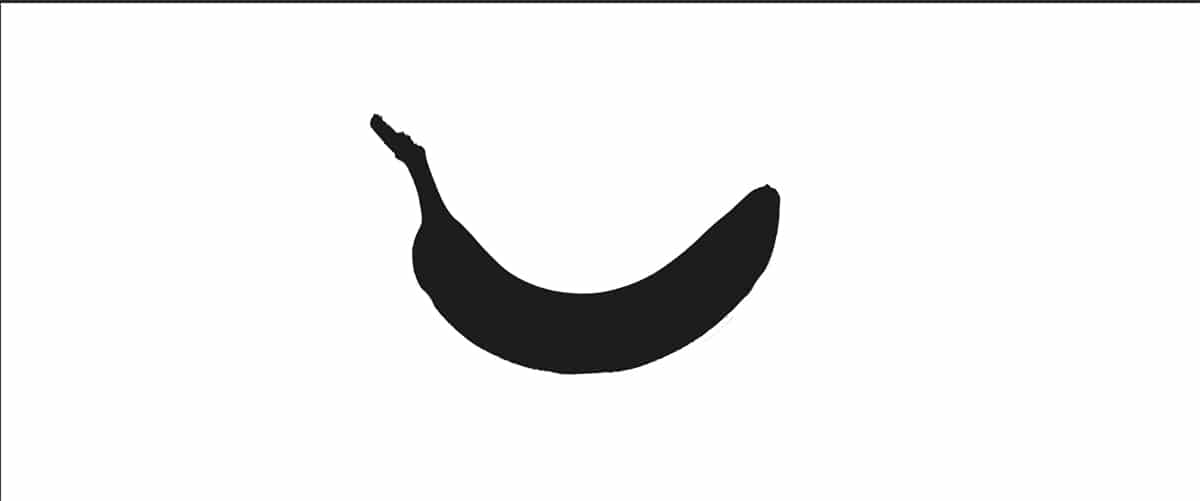
If everything has gone correctly we should have something like the result we see in the image below.

The last step consists of hide all layers of the design that they do not have UVI Varnish, leaving only the black areas that will have the Varnish at the time of printing.
Once we have all the areas with UVI Varnish, the next thing we must do is make sure to hide all the layers that do not have Varnish and leave only the UVI group that we have created from the beginning. Next to this we must dock all the layers and save the file in PDF, we must save the normal design and UVI version.
A UVI file is like a sticker that is placed in certain areas of a design, we must make sure that both files fit one on top of the other, if for any reason we move a layer in either of the two files, the result will be a Displaced UVI. If this happens to us, it is a real bitch because it will be our fault as designers and we will have to pay the possible corrections that the client requests.