
Source: Business
Surely you have ever urgently needed to remove an element that bothered your photo and that turned it into an uninteresting image, but you did not know how. In this post, Photoshop is the protagonist again Since this time, we are going to provide you with a new tutorial or mini guide where you can eliminate and suppress any element that affects your photography.
It is a simple tutorial where we will explain what main Photoshop tools can be used.
Once you have Photoshop ready, we start.
To consider
Source: Photoadictos
The main thing to keep in mind is that not all tools will work in the same case and there is no single process. As you use it You will see that it will depend on the photograph you choose one or the other.
It will not be the same to erase an airplane or a bird in the sky than to eliminate a person next to you. Neither time nor dedication nor complexity nor tools. But, in addition, not always a single tool will do the magic of deleting something for you. It is possible that beyond spending time also you need to adjust different parameters, use combinations of tools or take advantage of one or the other depending on what you want to touch up at every moment.
Spot correction brush
Source: YouTube
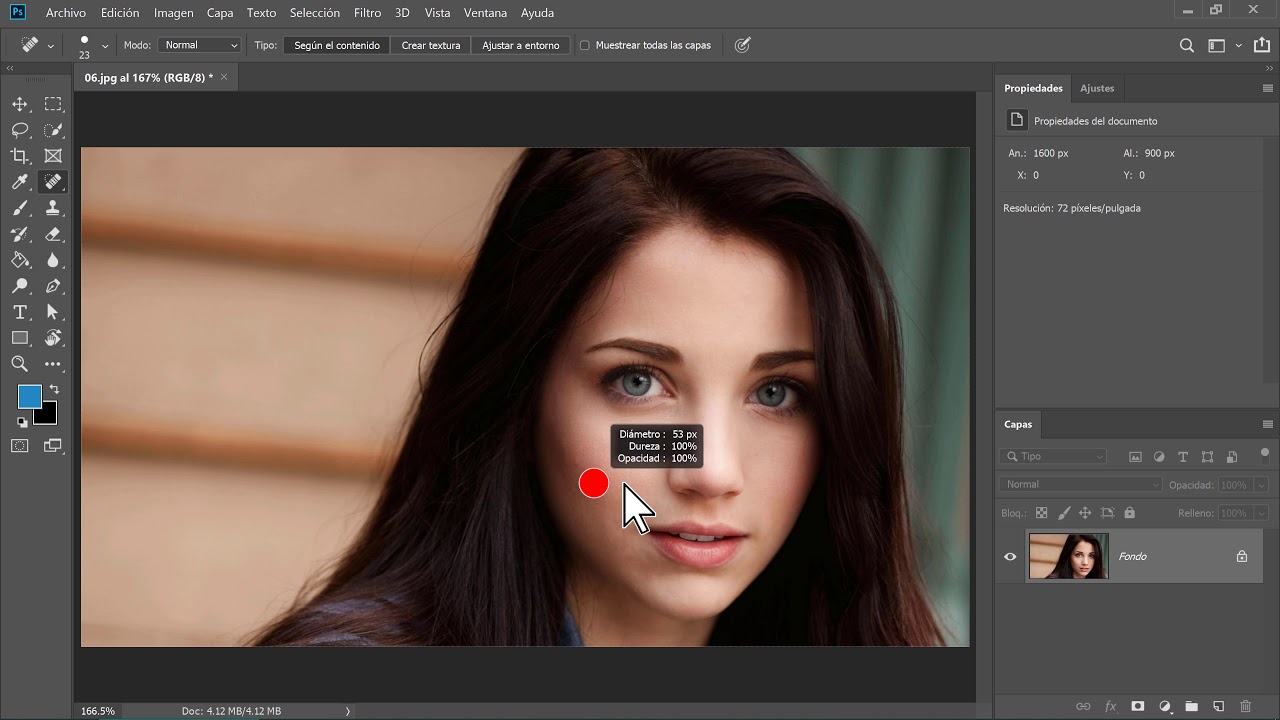
The simplest and most basic thing is the point correction brush that will help you eliminate objects that are in the sky, for example, or on the beach. You can choose the size of the brush in the upper part of the Photoshop screen, it is always advisable that the brush is larger than the object you are going to erase in order to achieve that it blends better with the background once we make it disappear.
Beyond the size of the diameter, we also advise you to avoid this tool if there are color changes in the image you are retouching because it will not be perfect. In case there is shade, make sure that you have also caught it with the specific correction brush.
Create a new layer in Photoshop on top: Layer> Create Layer. Once you have it, go to the spot healing brush in the tools menu, choose the thickness and erase the person you want. It will automatically disappear. It is very fast and simple as you can see in the attached images.
Concealer Brush
Source: YouTube
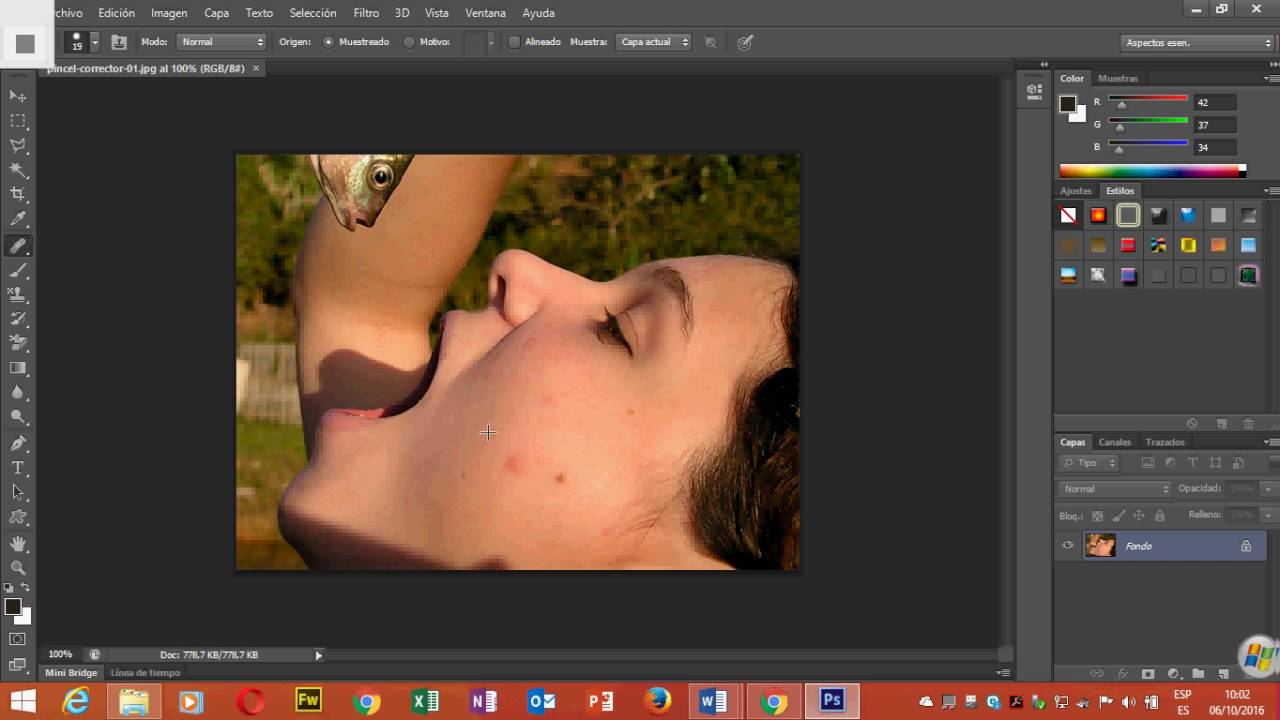
The step that we have shown you previously, will not always work for you and this is another of the most practical tools that we can use in Photoshop and surely you have seen someone use it at some time. You take a point of the image and from that point you get information to eliminate the object. Unlike the previous one, the background is not automatic but you choose exactly where it is going to "copy" the information displayed when you delete what you want to delete. In case you need more precision.
The advisable thing here is that you mark the most similar area. It is useful if the background is not the same at all points and if you want the areas to be consistent. It will take much longer, but the result will be better. You have to mark with ALT the point from which you want to extract the information and move the correction brush over the person or object you want to modify.
Clone Buffer and Patch
Source: Domestika
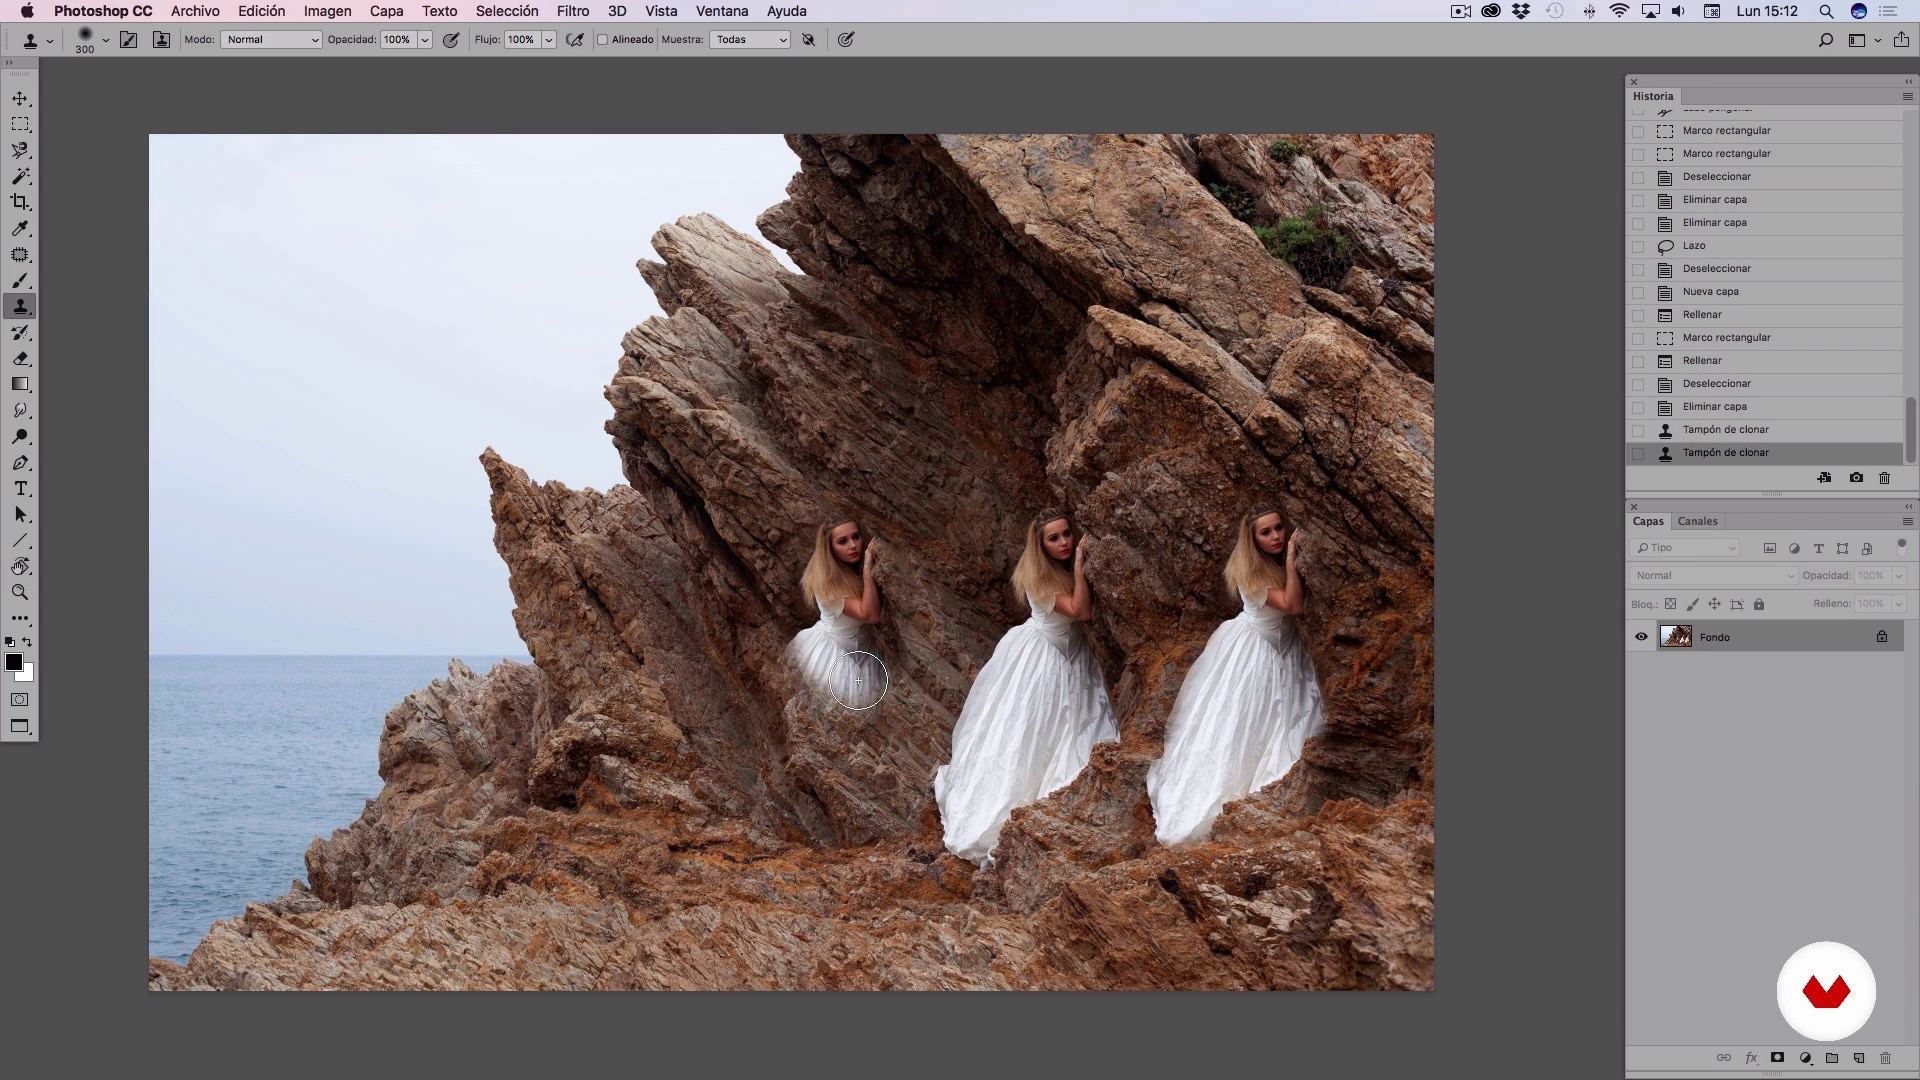
These two tools are similar to the previous one: you choose where they get the information from. The difference between the two is that in one you will have to select the object and move it to another part, as is the case with the patch, and in the other you can select by dialing with ALT similar to the correction brush above.
But there is another very important difference: the clone buffer does not blend with the background, it does not take into account the different values of the photograph such as contrast, but directly or clones and you do not get a realistic effect but it is useful if you combine it with other tools on this list.
The main difference between the correction brush and the clone cap is that one takes information and translates it to merge it with the background. In the other, you will directly clone what you have selected by copying the information as is. For example, you can eliminate a bird by replacing that piece of sky with another that is clean, as you can see in the following screenshot. But it also allows you to trace or clone an entire object or a landscape if you want to continue the clouds, the horizon, etc. It works similar to the previous one and like a brush so you can choose its thickness or opacity as you clone whatever you want.
Patch
The patch fulfills the same function except with the difference that you are not handling the brush and sliding it across the canvas, but you will select a piece of the image and it will automatically clone another. And the other important difference is that here you will get a fusion with the background adjusting to contrast, brightness, texture. Compare the area that you have marked as destination and the area that you have marked as origin and try to achieve harmony, without there being a sudden change in the image that you have tried to fix, without leaving any defect in the middle of the photograph or the sky. In addition, it is much more realistic and useful and has many recommended uses.
The patch is not only useful to eliminate objects or people in a photograph, for which we advise you to combine several tools, but it also allows us to eliminate imperfections of any person in the case of portraits. If you want to remove the classic grain that has appeared in a selfie, the patch finishes doing it in seconds.
It also allows for the opposite effect, as is logical: instead of eliminating something from the sky, you multiply it. For example, if you have taken a night photograph with a particularly bright star, you can replicate it all over the screen if you want to achieve a much more complete starry sky effect.
The lasso and the magic wand
The loop, either normal or magnetic to select more precisely, also helps us to remove objects or people from a photograph. Select the side from the toolbar and make sure that the "Fade: 0 px" option is checked at the top. Once you have it, select the part you want to remove with the lasso tool, without having to do it with complete precision and regardless of whether the background has also been captured by your lasso selection.
Once you have it, tap on the right mouse button and you will see a drop-down with different options. Open the option "Fill out". Once here, choose the Content window with "According to the content" and choose the blending mode and opacity level.
The blending mode you should choose is "Normal" and the opacity will depend on whether you want to make the person or object much less visible or simply want to make it disappear completely. Confirm with OK and the process would be ready and completed, it is also very easy to handle.
Magic wand
The magic wand allows us to eliminate objects from an image although it may not be the most advisable in the case of photographs with very uneven backgrounds, for example. Yes to select objects in an image in illustrations but also in photos when the contrast between the elements is great or when you want to select something perfectly differentiated. You just have to choose the magic wand from the toolbar and select the part you want from image.
The magic wand allows us to choose the size of the brush and select the part of the image that we want. It will automatically detect what it considers to be the same color so it is important that there are large differences or it will select what you do not intend. Once you have selected it, you can erase that image from the screen, blur it or fill it with colors similar to the background used.
Background eraser and magic eraser
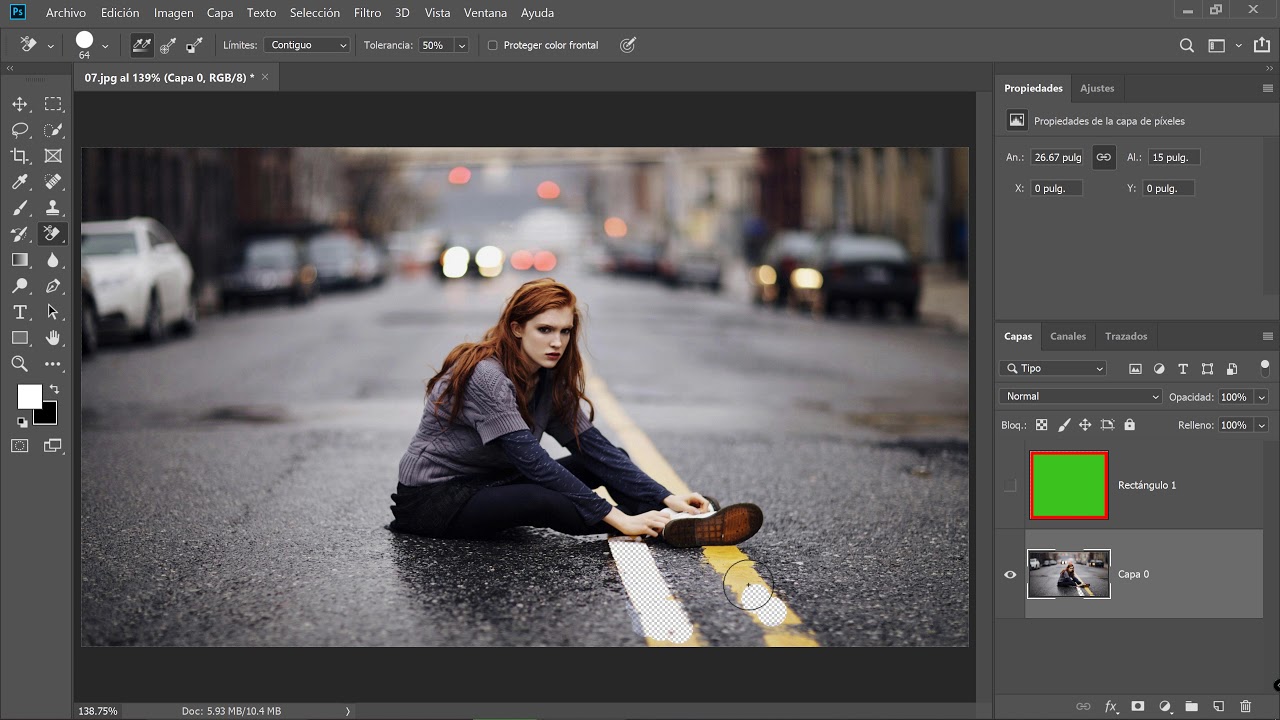
Source: YouTube
As its name suggests, this tool will take care of erasing the background. We can use it manually, erasing everything we want to make disappear as if it were a classic eraser.
But we can also combine it with the magnetic loop or the magic wand to select a part of the image and delete it later with the background eraser without leaving. Once you have removed the image you want from the screen you can fit any other you need, for example, or directly leave it blank.
Magic eraser
Another tool that can come from pearls to erase a person or an object from a photo is the magic eraser that is found together with the other erasing tools. When you click on a layer with the magic eraser tool it automatically removes pixels of similar colors.
To use it in order to erase absolutely everything that you pass the eraser on, you have to define its opacity. With this you will also define the intensity of the erasure. In our case, since what we want is to completely erase someone, we will have to set the opacity of 100% so that the pixels are completely erased. Note that a lower opacity will erase the pixels only partially, so we are not interested.
Conclusion
We hope you have learned even more about Photoshop. As you have seen, there are many tools with which we can carry out this tutorial. Now is the time for you to try them out and edit your photos without anything getting in the way.