
Create a graphic project It is not something that remains forever locked in your computer for centuries and centuries, but many times you will be forced to go through the printing press to print all kinds of graphic projects. In this post you will learn some basic notions about how take a design to print without dying trying by following a series of very simple points.
Know the world of graphic arts forces you in a way to know how this world works, that is why it is necessary know the printing part and we are not limited solely to our role as graphic designers.Print a graphic project is always going to be a headache for designers and all kinds of professionals involved in the world of graphic arts, jobs out of time, unforeseen, last minute corrections and a whole avalanche of possible events that can make our lives a bit bitter.
This is why we must know the functioning of this whole world for at least reduce the number of possible errors that may arise when taking our design to print.
With this little list «I recommend always checking before each project" can reduce possible errors most common and easy to solve.
Key points to take our design to print:
- Know the printing press (papers, machines, finishes ... etc)
- Review the quality of images (300dpi)
- To pass the text to curves
- Always put bleeding in design (3mm on each side)
- Color space CMYK (RGB is for display only)
- Carry on more than one support the design to the press (pendrive, CD, cloud ... etc)
- Try to always carry the computer to the printing press
These points mentioned above are fundamental (our bible) when developing a graphic project. Now we will see in more detail how to review some of them.
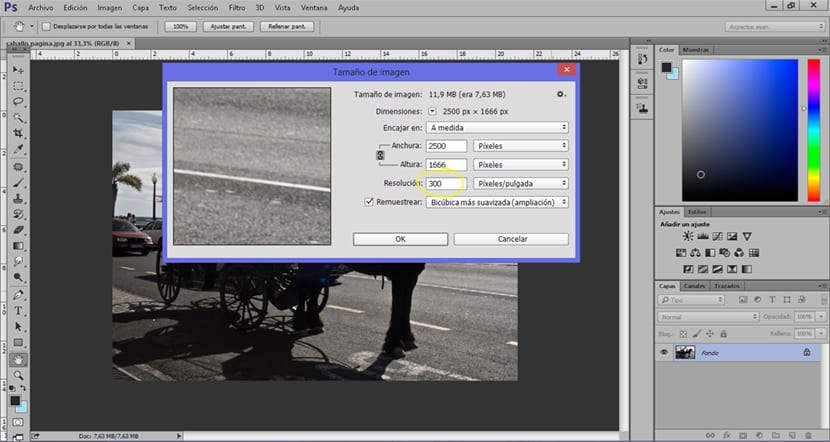
En Photoshop we will be able to look at the resolution of our images, it is highly recommended that the images have a resolution of 300dpi.
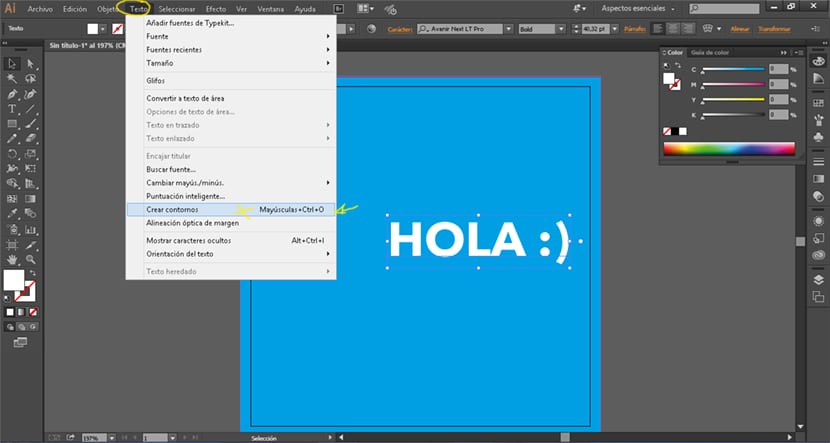
We must never forget pass texts to curves Before going to press, this we avoid many possible mistakes futures. To pass the text to curves we just have to go to Illustration (or other) in the text option and look for the tab that says create outlines.
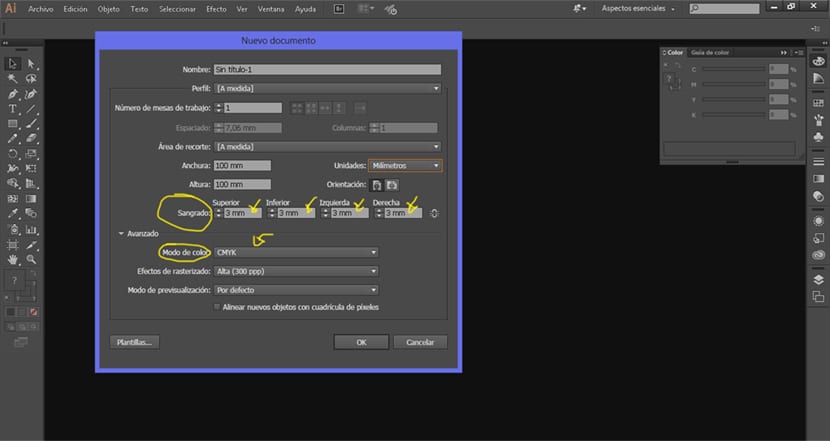
Our designs must always have a error range For the trimming process, some prints may have white fillets after trimming the format due to a small margin of error that this process has, that is why we must leave 3mm of blood for each side of our design.
We must also ensure that our color mode is CMYK (ink color) and not RGB (light color).
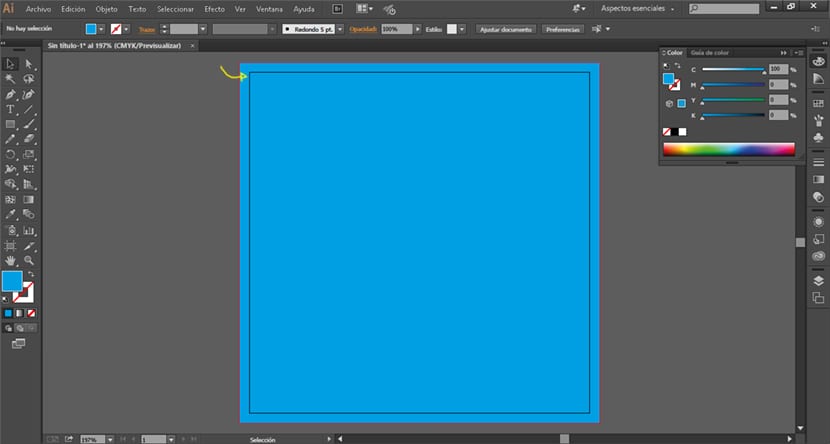
Our bleed design it should look like the one in the image below. The system is quite simple, we extend the design (be it spot color or photography) to the limit of the bleed.
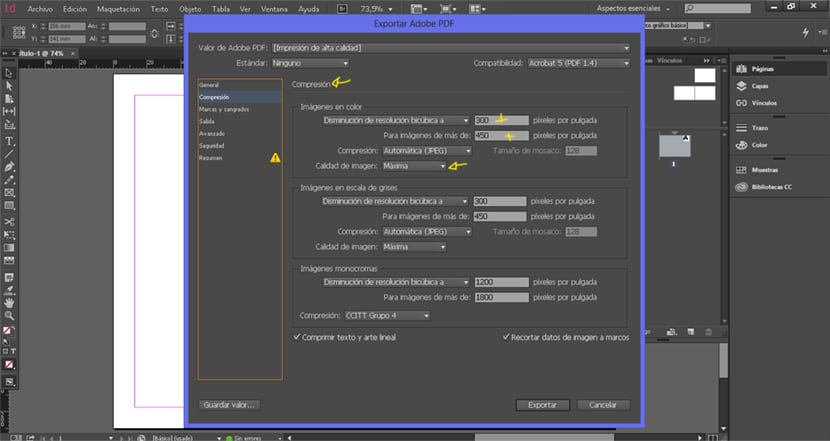
The last step is export the design and generate the PDF for printing. In this part we must look very well that the quality of the images is high and that there is no loss of quality.
We already know some basic points to be able to take our graphic projects to print in a more professional way and without so many headaches.
This manual to take jobs to print (before photomechanics + print), is very good, although I have missed some points such as: be careful with overprinting when drawing text, color profile, both in illustrator and indesign (European profile in my case), when exporting as pdf make sure it is PDF / x1a (ready for printing).
A final four-color art has been made, and that is fine, because it is how works are usually sent, although it can also be sent with: dry blow, Pantone spot colors, stampings, etc.
I think it is a good manual that you have explained to send final artwork for printing in CMYK.