
When we treat an image with pixels, modifying it is very difficult. Once we dwarf its original size, going back by enlarging it becomes impossible. Since it fills with bitmap and becomes unreadable and unusable for use. That is why vectorizing an image is necessary in some of these cases. To do this, there are many formulas. Some very simple and others a little more complex, in which you can handle the result to your liking.
If on the internet we look for how to vector images, many tutorials can come out or video tutorials that deal with it, but none gives you all the possible options. At Creativos we know that each person has tools and possibilities. That is why we are going to give several examples and different tools on how to do it. For you to reach any of them.
Do you want to know how to vectorize an image with Illustrator? Photoshop? Or, maybe, do you need to do it online? We will discuss the different ways of doing it here.
How to vectorize an image in Photoshop
We choose a new image that we want to vectorize. By previewing the results first, it will be more convenient for you to know how it works to work with that idea. Thus, the first step we will take is to duplicate the layer. To leave the original and work with the copy, in case we have to go back. This step is always effective for all the projects you do.
Always duplicate a working layer. If we make a mistake we can return directly without having lost our job
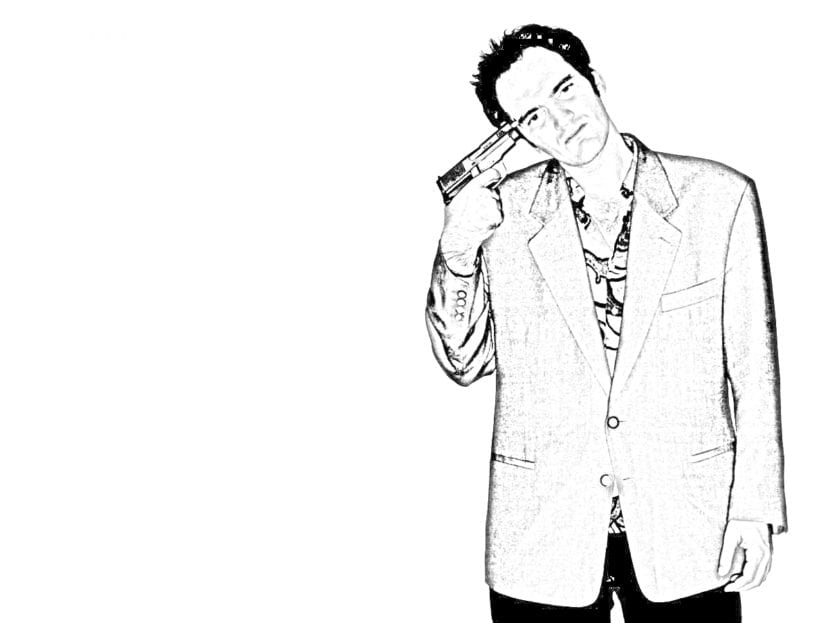
Let's go to Filter> Blur> Gaussian Blur. Depending on the quality of the image we must blur a little more or less, so you will have to check. Try to make it look like the following image. Still, I place six points. Also this point will depend on the distance or proximity of the image, to detail the less visible points.
In the next step and on this layer already blurred, we go to the image blending mode. In it we put 'Divide'.
Now we are going to create a fill or adjustment layer with the 'Threshold' feature. In this, we will add noise to highlight the details of the image. It won't matter if we add a lot of noise to the background, because we'll remove it. The important thing is that the details of the image are well marked. We will make a copy of the steps created with the following shortcuts:
- Windows: Ctrl + Alt + Shift + E
- MAC OS: Cmd + Alt + Shift + E
We then go to selection> range of colors. In the preview image we must click and it will make a change. There we set a tolerance that usually ranges between 9 and 20. But to get it right, make sure there are enough pixels covered in the image. We select the option to 'invest' and click OK. This without the need to give any other configuration.
We will see how our image is marked. We choose the Lasso tool and right click on the image «Make work path». 2 pixel tolerance and voila. To save this we go to Edit> Define custom shape.

How to vectorize an image in Adobe Illustrator
In this case, illustrator is a vector specialization program. Since, unlike Photoshop, it works directly with them and not with pixels. So it will be much easier to explain.
Insert an image into Illustrator at File> Open. When you insert your image into Illustrator, it will appear selected, if not, just click on it. With the image selected, you must go to the window menu and enter the "Image tracing" option. Next, the Image Tracing tool window will appear, where you can see a series of options that you can configure according to your tastes or needs.
Next, you must go to the Preset Settings, where you have the option to select the type of vectorization quality for your image. Also in Threshold you can adjust the quality in a more comfortable way, likewise, in color mode, you can choose grayscale or B / W.
This time, you can proceed to select Hi-Fi Photo within the presets, automatically observing the work that the program begins to carry out on your photograph. This process may take a few seconds depending on the capacity of your computer and the complexity of the image.
You will get an image already worked by the Illustrator software and go to the color bar for its quality. Configure to taste, each image may be different. So you should try until it is to your liking. This part deals with the image and the person. Then you will go to the 'Object' menu and select 'Expand'. There you will have your converted image.
How to vectorize images in Gimp
One of the ways to vectorize an image is usually with the pen tool. This shape is more sophisticated and gives more headaches. Some say that doing it this way and converting it to drawing is not vectorizing. Which by the definition of vectorization may be true. Since it tries to transform the image in size without losing its quality.
In Gimp we can use this form for what is called 'Digitize the image', but in no case, when enlarging or reducing the image remains intact. It still looks like a bit image. The solution to this may be to get it reduced with the 'Gaussian blur' tool to drastically reduce pixelation. Once out of focus, we apply a medium 'Threshold'. 120/255 more or less and it will be something like vectorized.
To improve this image, we can go to the following online vectorization tools. And save them in a .svg format for use in any tool.
How to vectorize an image online
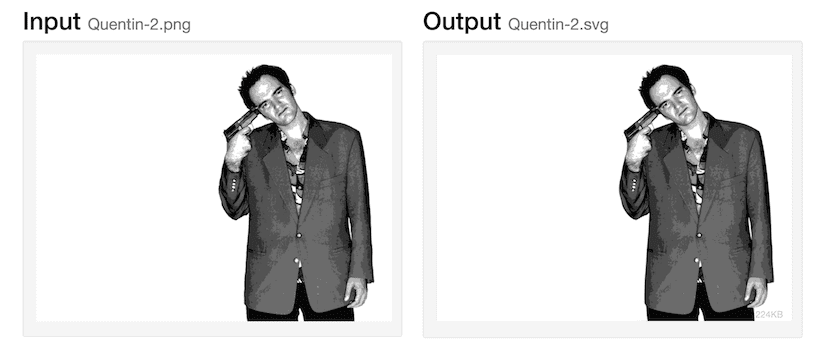
This is the easiest way to vectorize an image. There are multiple pages that are dedicated to this. You just have to follow three simple steps. First, select the image downloaded from your computer and upload it to the web. There is usually an 'Upload' icon. This image will sometimes have a limited space of 1MB or 2MB at most. (That is why it is not always a useful resource) You mark the vectorization process and then download a .svg format. This way you will get your vectorized image. It has no more science.
In the following list we are going to give you the most recommended ones to use in this format.
vectorizer.io
This website has no additional functions. As I said in the introduction, prepare, upload and download. Clever.
vectormagic
It is one of the most complete and most recommended. Vectormagic does have more options, such as the quality of the details and colors. Edit the result, remove the background ... among others.
Vectorization
Again we have a tool that allows us to go from a bitmap to a vectorized image but without respecting the colors. It is also possible to access images online and not just local. Otherwise we will not be able to perform any more functions: neither edit the outline, nor the colors, nor the background or anything.
Vectorize images in Corel Draw
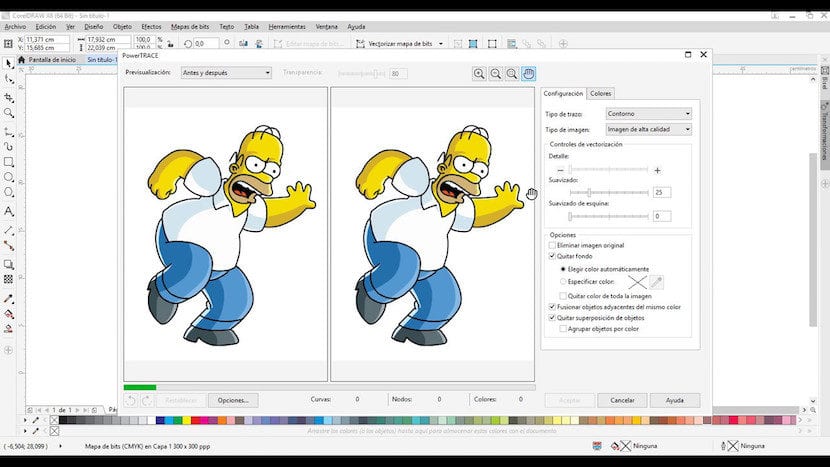
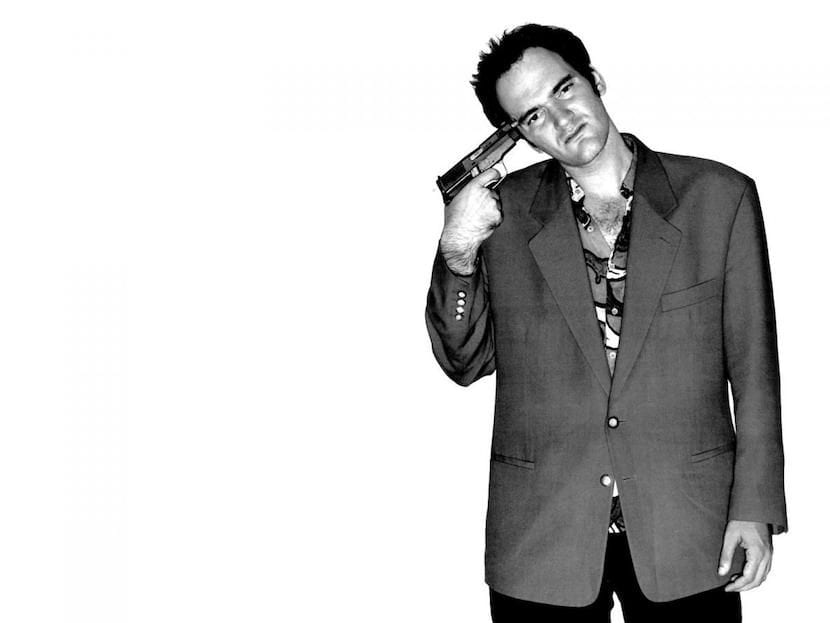
Corel Draw, together with online vectorization, is perhaps the simplest tool. If we choose an image as before we have done with 'Tarantino' and we increase the original, we will see the pixelation. Now we are going to introduce it in our Corel Draw.
Once we have it, we are going to 'vectorize bitmap' (trace bitmap); 'Outline trace' and 'detailed logo' (Detailed logo). In the left image the original image will appear and in the right the vectorized image. Where we can check how the pixels are removed. No more. Of course, there are higher settings to detail even more depending on the image. Details, smoothing, corners, and color details. Once you are convinced, click 'OK'.
Well, I just have to say one thing, Fantastic, I work with Photoshop and autocad, at the moment I was in a paradigm with images and vectorizations, but thanks to your publication I have been able to reach the goal.
Thank you