
Today I bring you this simple and yet useful tutorial where you can learn to create Flash animations, using only the Illustration for it. The Illustration is a vector drawing and design program that belongs just like Photoshop to the programs that Adobe has been working with, and one of those that led the company to become the standard in the graphics industry today.
The Adobe suite is becoming more and more extensive and brings us new applications for new branches of creation at levels that years ago we could only dream of, with programs dedicated to creating forms to audio and video editors. Adobe programs usually promote the integration of the different platforms that the suite brings, including, for example, tools from one to the other, or transferring features from one program to another. Today as a sample of this we are going to show you how to make a simple animation with Illustration and export it to Flash. Today I bring you, Illustrator Tutorial : How to do animations with Illustration.
Open a new document
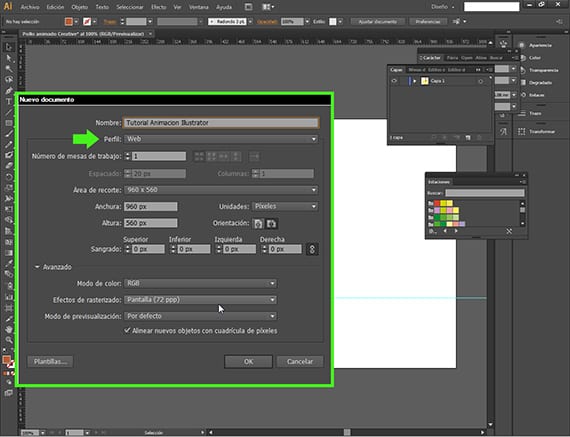
We are going to make an animation for the web in Flash (SWF), however we are going to create it with Adobe Illustrator. To begin we are going to open a new document, in the path File-New Document and we will get a dialog box with a menu, where we will put the name and make sure that the profile we choose is for the Web.
Let's cheer up this chicken
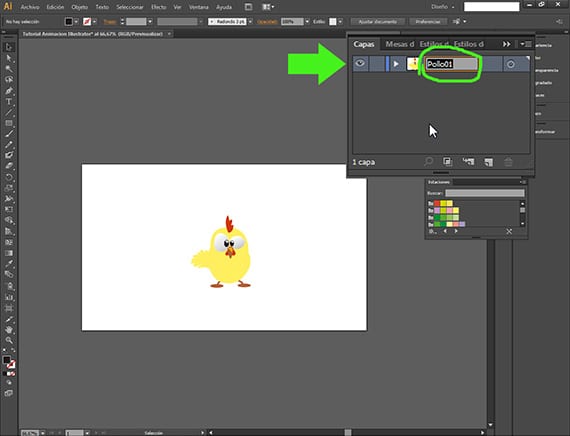
Already in the new document, we will start working on it. For this animation I have chosen a vectorized drawing that I have downloaded from the Internet, from a page that we talked about in a previous post,Freepik, free photo and vector search engine, and I have adapted it a bit. We go to the Layers window and name it correctly. It is very important to be orderly with the layers from the beginning. We will name it as Chicken01.
Let's take out several chickens
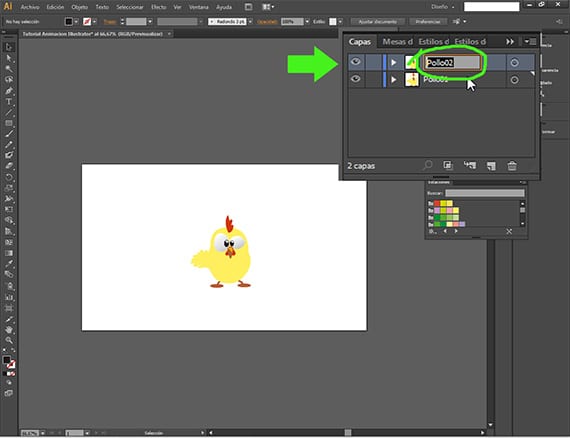
La animation It will be something simple, we will take the chick from one side of the screen to the other and we will give some movement to its eyes. The first thing is to duplicate the layer in the Layers window, clicking on the layer and placing it on the new layer icon for example. Renaming the layer is important.
Moving eyes
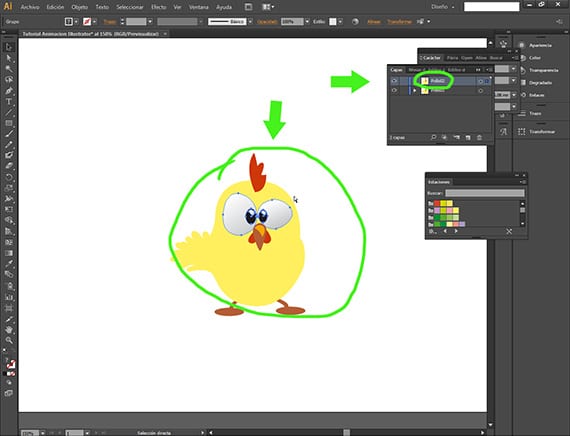
We will select the two eyes of the chicken that is in the layer Chicken02, and then we will select the chicken eyes.
Rolling the eyes.
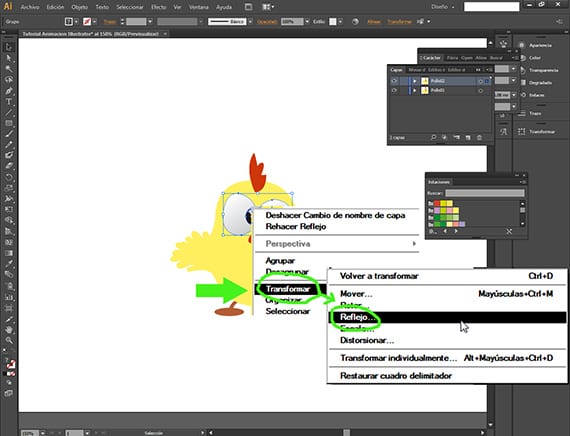
With the eyes of the chicken vector in the layer above, the Chicken02, selected, we click the right button and the corresponding dialog box, we follow the path Transform-Reflect.

Rolling her eyes
Once inside the option Reflection, press the Vertical option and you're done. Now we will have the drawing of the chicken on top with the eyes in one way and in the lower ones in another.

- Now let's double more chickens
Once again, to duplicate layers, we are going to use the button New layer from the Layers menu. Clicking on the layers Chicken01 and Chicken02 while holding the shift key and dragging over the button New layer.
Several more chickens
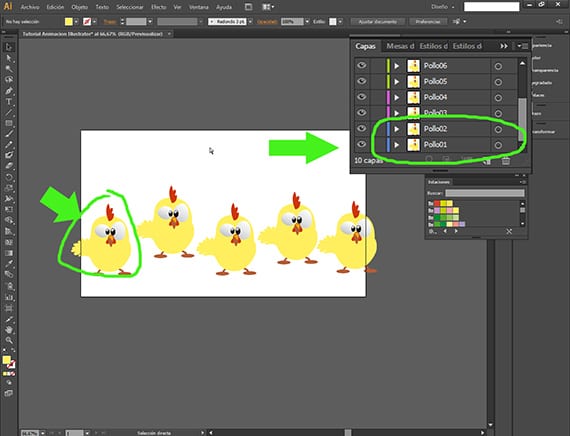
We have to rename all the chickens, making sure to follow the series in such a way that the chicken they form Chicken01 and Chicken02 is to the left of the Worktable, and following their numerical order, the chicken that forms the layers Chicken03 and Poll04, it will be the one on the right, and so on, keeping pace with the order of the layers in the Layers window. This is very important, since you have to know that the animation It will always go in the order of the layers, taking the first layer as the first frame and the last one as the last.
Exporting to SWF
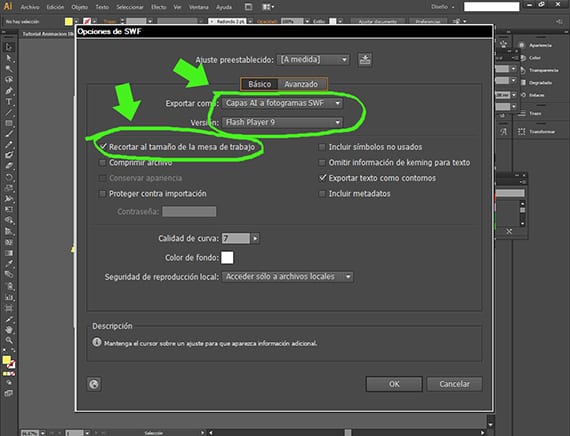
Once all the chickens have been placed in a correct way (according to the previous explanation), we will enter the Export documents window following the File-Export path, and once there, we will choose the file extension as the export format SWF o Flash. From there, we will get another dialog box in which we will configure the last steps. With option Basic chosen, we will choose to export as AI layers to SWF frames and the version of Flash that we will choose will be the last one that he offers us, that of Adobe Flash Player 9. We will also mark the option Crop size of the artboard. It has several more interesting options, which we will analyze in another Tutorial.
Exporting
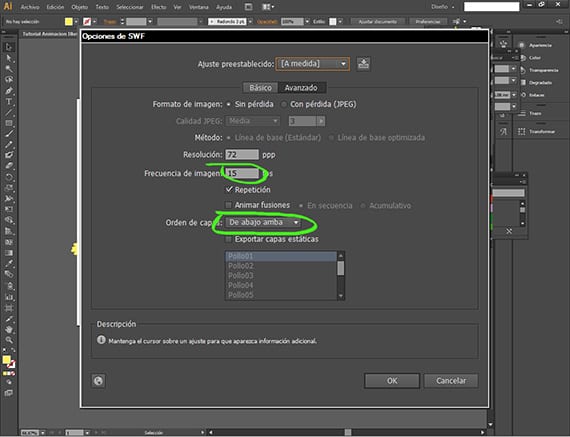
Then marking in the same dialog box the option Advanced, we will choose the resolution and the frequency of images that we will place it in 15. As you can see here we can choose the order of the layers, which, as I said before, we configure so that the animation goes from the bottom (1st layer) to the top (last layer) of the Layers window of your interface. Once exported, look at the result in any video playback program.
More information - Freepik, free photo and vector search engine
Can the final swf be used in after effect ??