
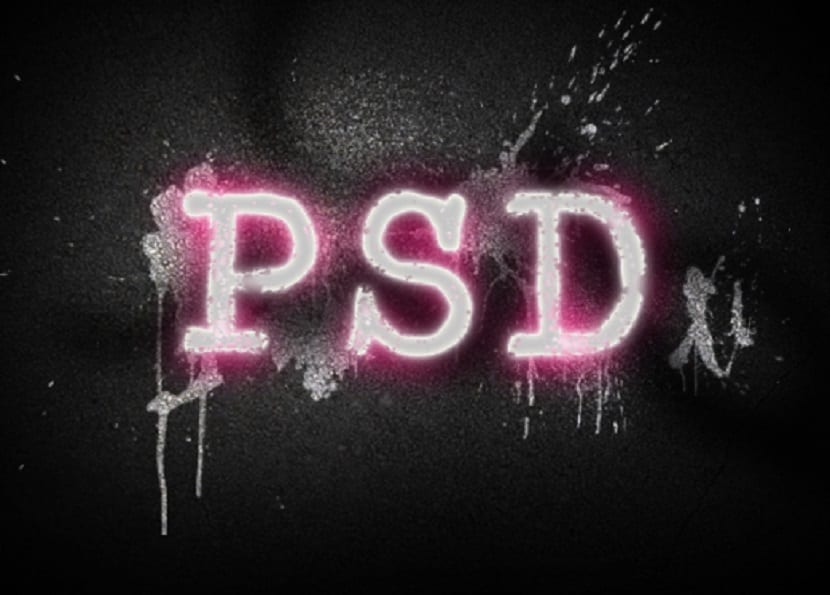
Learn how to create spray text in Photoshop in a simple way and in a few steps.
Creating the background
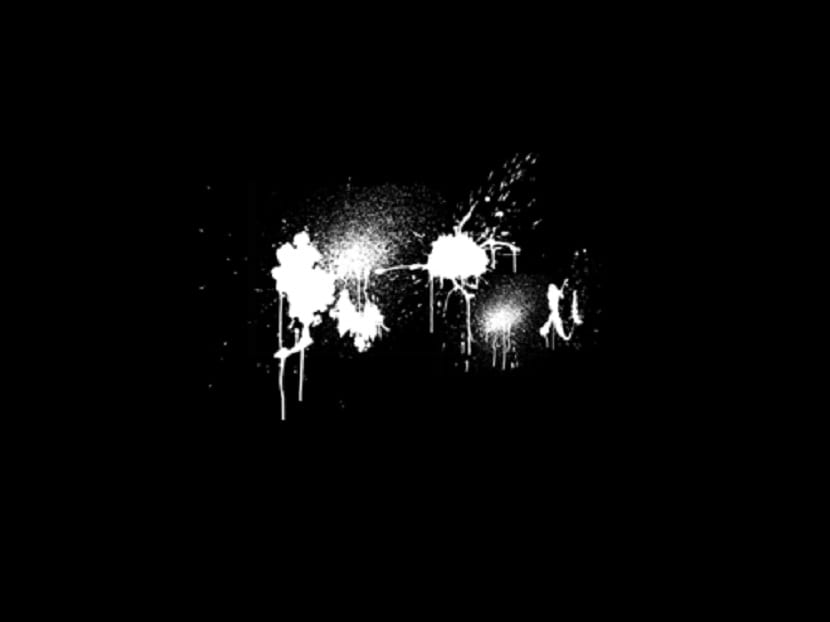
Create a new document with the dimensions; 10240x768px then fill the Black background layer. Now using some splatter brushes they make some splats in the center of the page, like that. From now on the images will all be zoomed into this area of the document. I leave you the following link with different splash brushes so you can vary and adapt it to your liking, since learning to create spray text in Photoshop also includes giving it a touch of its own.
Fusion
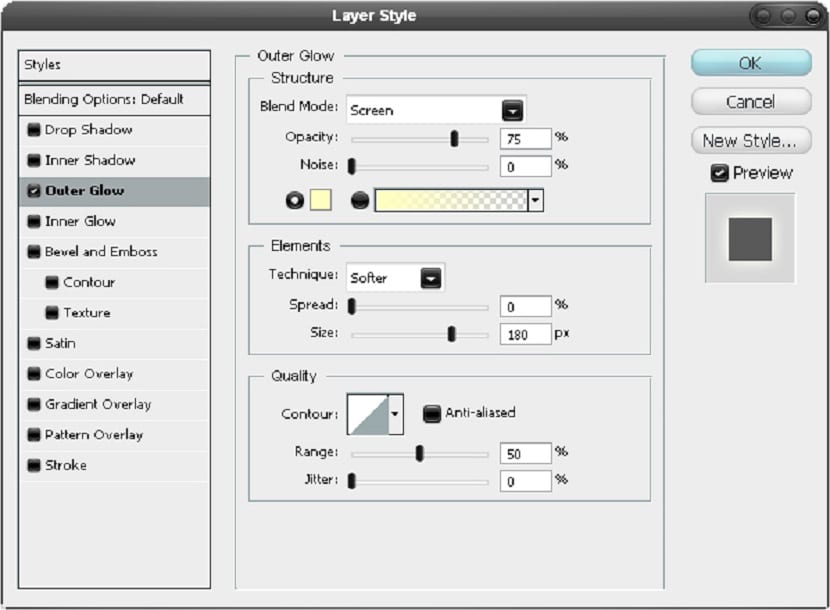
Right click on this layer and select Blending Options and add an outer glow using the settings shown below. We now want to flatten this layer so right click on the layer and then go convert to smart object, if this option does not exist for you then just create a new layer, go under the splatter layer, select the layer of the splash then hit Ctrl + E.
We create texture
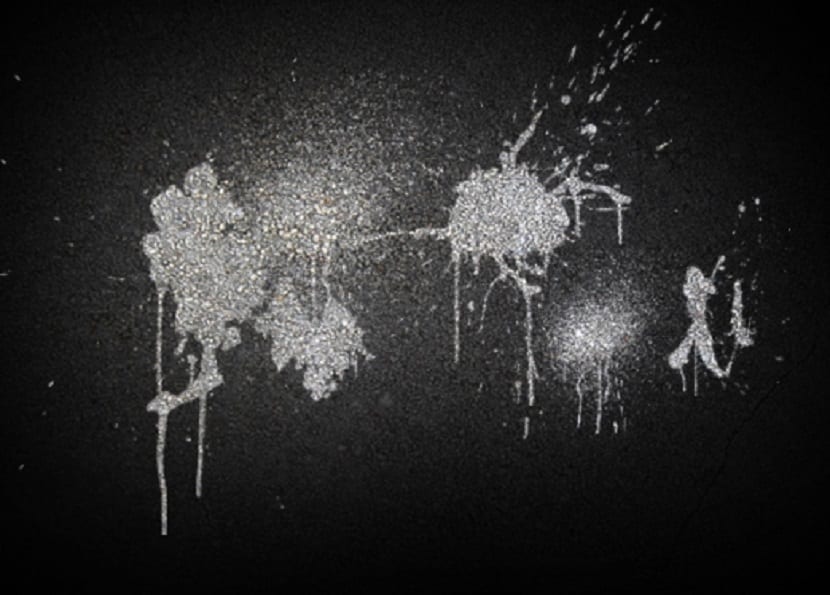
You now have a picture of either a wall, concrete, a rock, or sand. I felt that the best result was with the use of a concrete weathered texture, the one I have used can be found here . Paste the image and make sure its on the layer above the splash then add a clipping mask by holding Alt and clicking between the two layers.
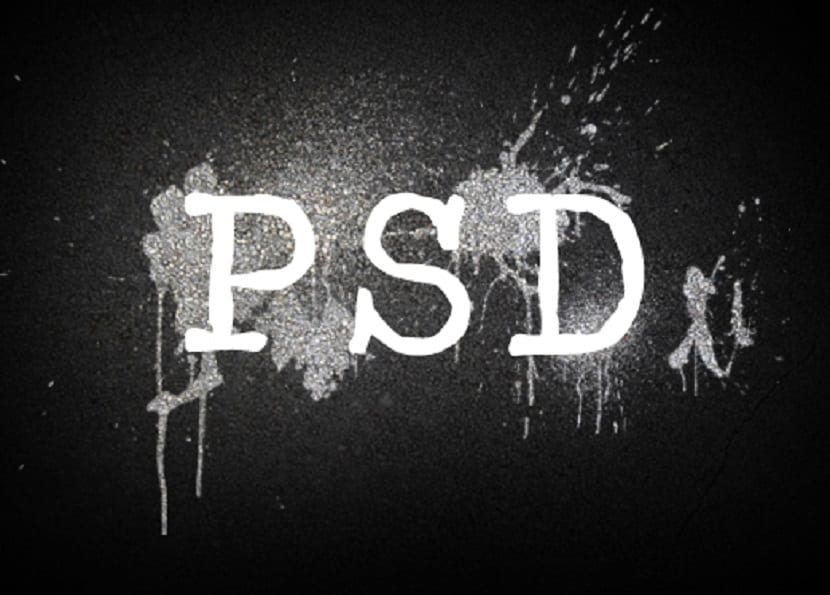
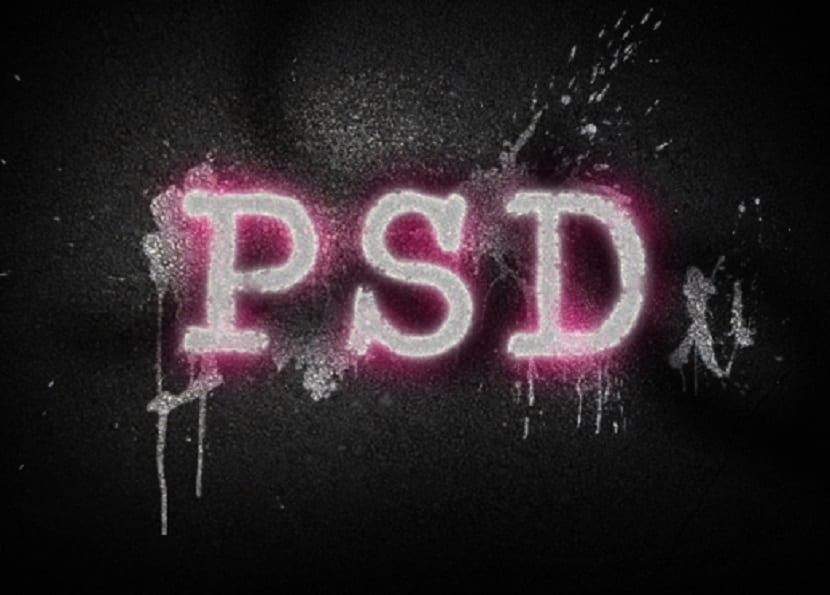
We add text
Next we need to add the text, we need a dirty type of source for this; I used a typewriter fontIf you don't have any fonts like this then download some. Write a word in big letters if you want to mess around with character spacing etc then go Window> Character. Get a look at something like the image shown below.
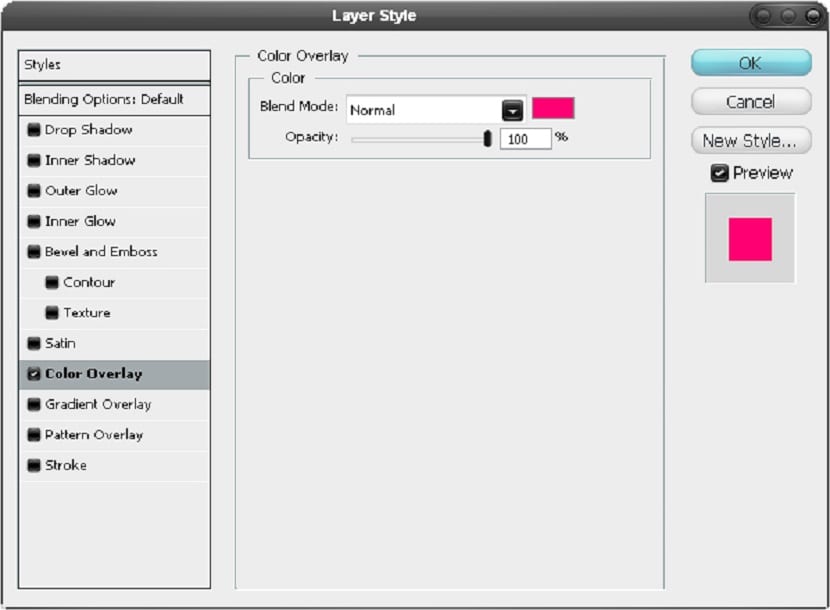
Overlap
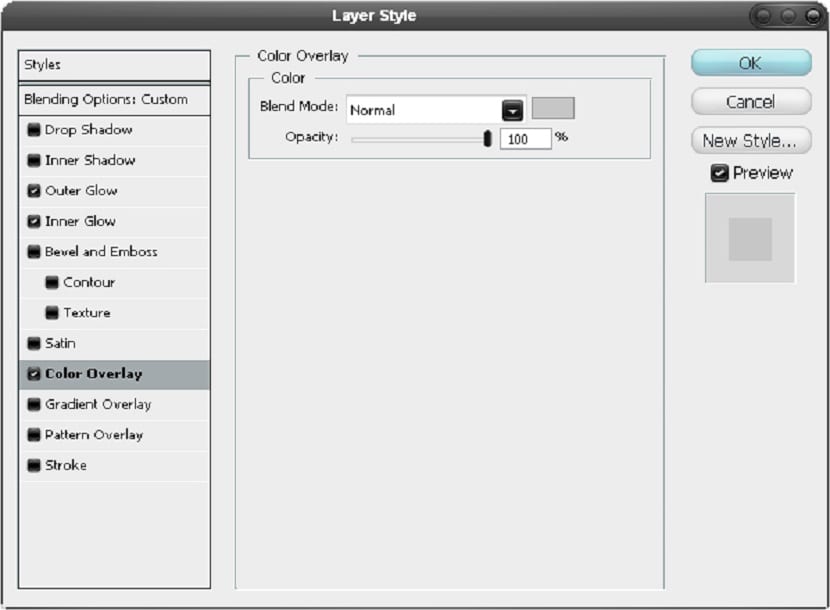
First duplicate this layer (Ctrl + J) and then hide it. From here on you want to make sure that you always have a intact copy of this text layer available as we will use a few times as long as it hides it when it is not being used, although in fact you can just move the duplicate layer to the bottom of the layer stack so I always tell you to get the layer from text you just duplicated, move it to the top of the layer stack, and then display it. Now go into the text layer blending options and add a color overlay with the settings shown below.
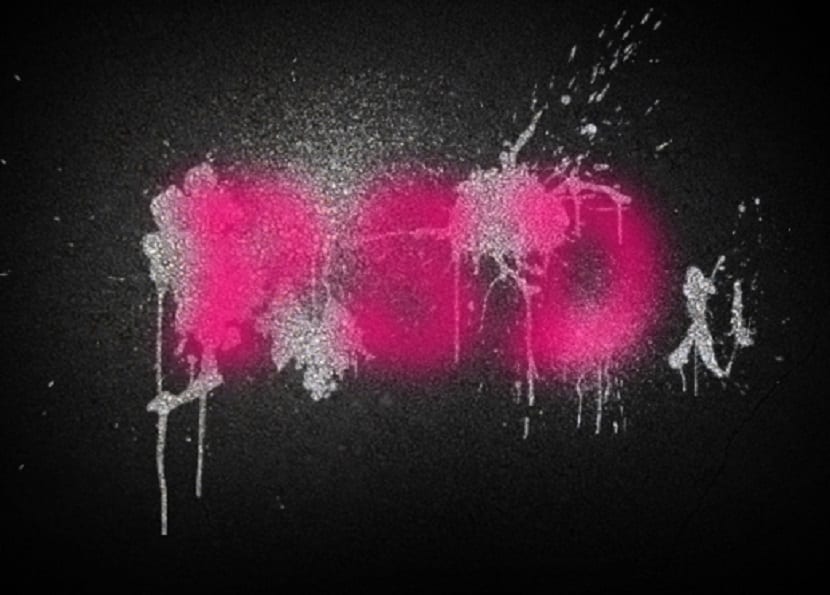
We blur
Go to Filter> Blur> Gaussian Blur and use a value of 13px. Now duplicar this layer as we want it to be a little brighter.
Random strokes
Select the brush tool and a soft round brush of about 30px then just add some random black strokes, like in the following image. Then, in the same way as in the last stage of adding a 13px gaussian blur.

Copy and Blur
Now we get a copy of the text layer in the way I mentioned in step 5. Then add a 5px Gaussian blur to this text layer.
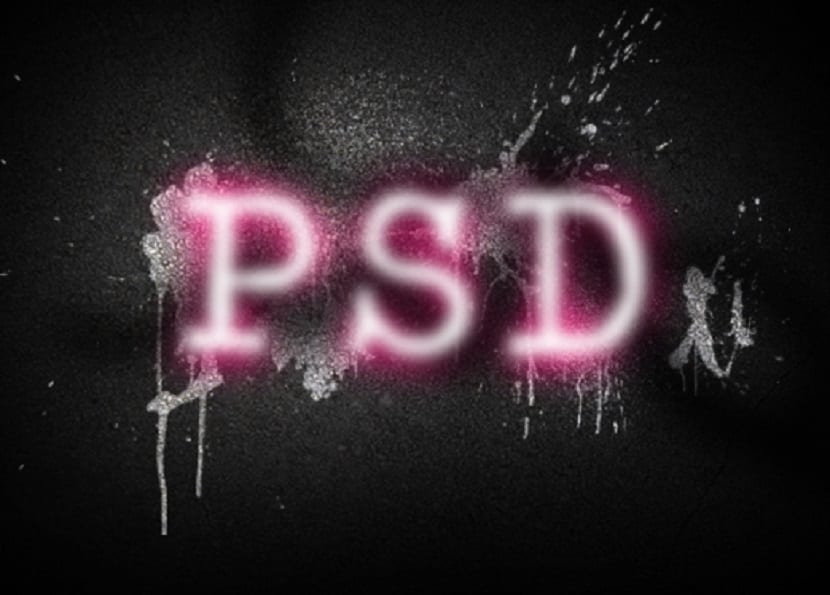
Fusion options
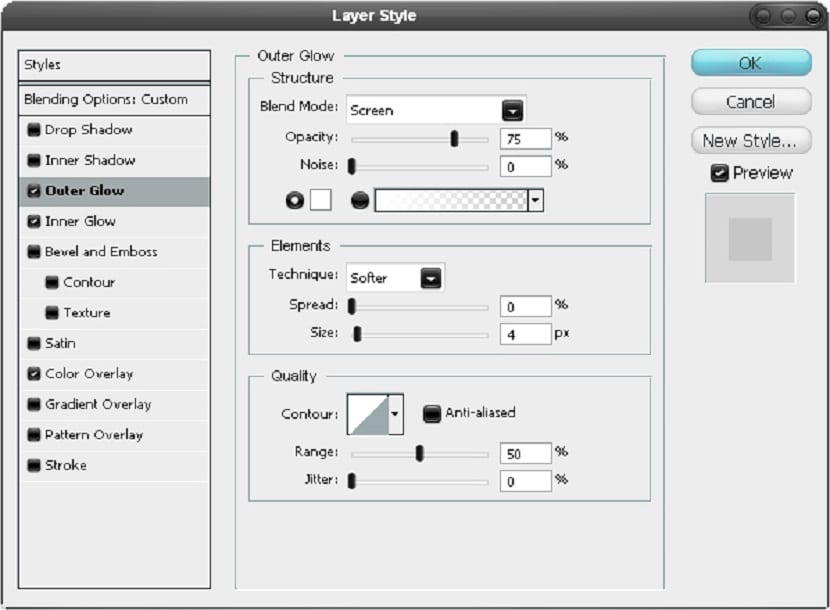
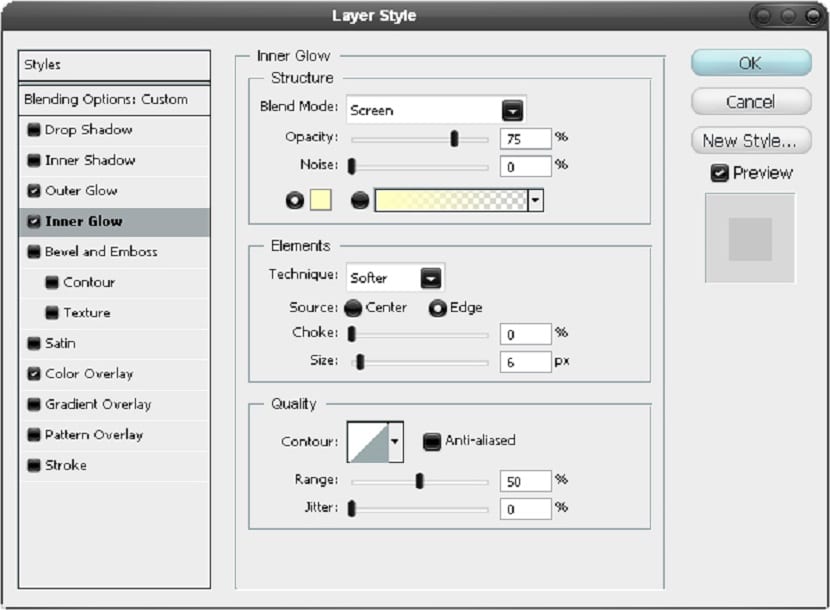
Now get another copy of the text layer and then go to the blending options and add an outer glow, inner glow and color overlay using the settings shown below to get the desired text from spray in photoshop.
Copy and Mix
Remember that the concrete texture was used a couple of steps back, go ahead and make a copy and then move it to the top of the layer stack and set it to 30% opacity and multiply blend mode, this means it won't affect the black background as the background can't get darker.
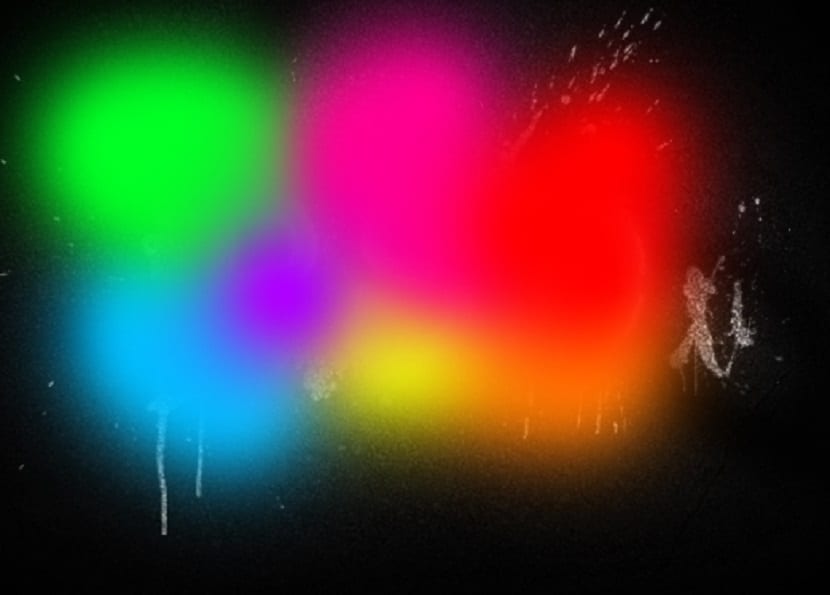
Add colors
Select the Brush Tool and grab a large soft brush and then on a new layer add some strokes in different bright colors until you have something similar to the image below.
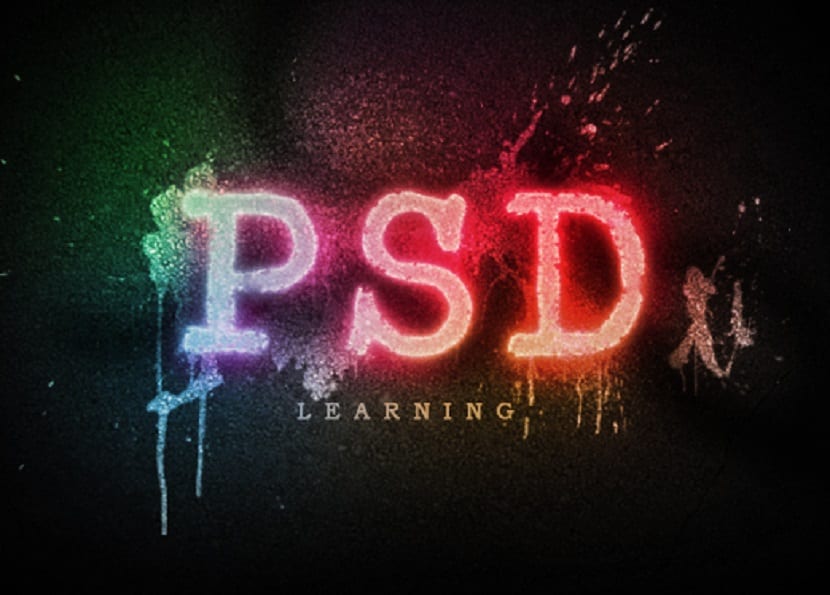
Blur and blend mode
Now add a Gaussian blur to this layer with a value of 50px then set the fusion mode of this layer to be superimposed. I have also added a bit more text below, but this is optional.
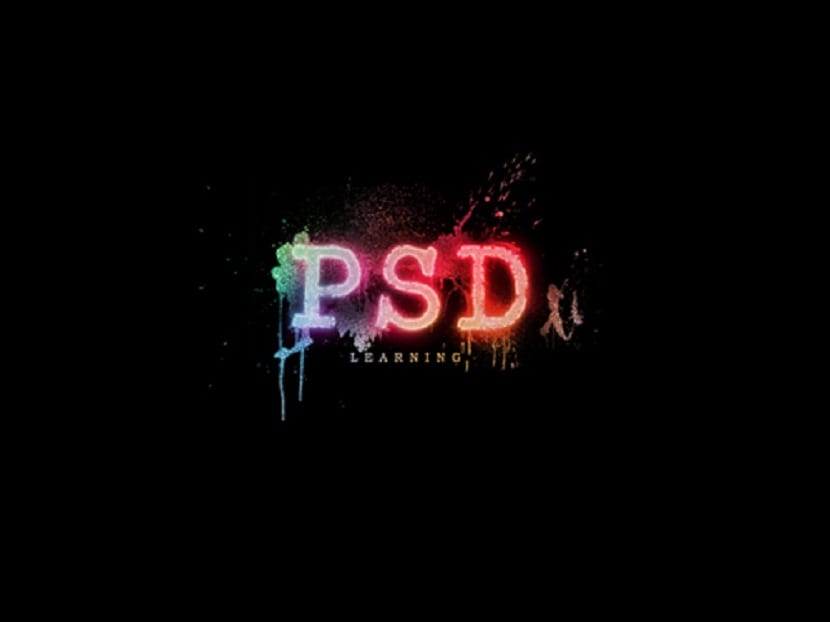
I hope you liked the tutorial learn how to create spray text in Photoshop.