
Close the circle at once and use the Polar Coordinates Filter to create a completely spherical urban panorama. The polar coordinates filter allows you to manipulate the images by making them bend or rotate on themselves. If used with a photo fresh from the camera, it will instantly create an abstract version of the original. But, if it is applied on an ordinary panorama, the result will be a much more pleasant spherical photograph that will give the impression of having been taken from the air with a wide angle. Of course, a series of photos will also be required, as if taking a 360-degree panorama. Next we will learn how to use Photoshop's Photoemerge option to merge the images and then we will apply the filter. Although we can use a panoramic photograph, like the one we use now, you can try cropping the image to a square size. I will leave you the two images so that you can try and experiment.
Creation of the folder
Our first step would be to put all the images that we are going to use in a folder. I know that there are cameras that directly from the camera already creates the panoramic you need to work in this tutorial, if this is your case you can go to step Document size. If this is not your case, create your folder and export all the files to it.
Open files in Photoshop
We open Photoshop and go to File> Automate> Photoemerge.
A dialog box will appear where we will have to add the photographs that we put in the previously created folder. we give to explore and we select the images that we want to use for this tutorial. We give Open. It is convenient to have the photographs numbered in correlative order so that it is faster to create the composition.

Merge into photomerge
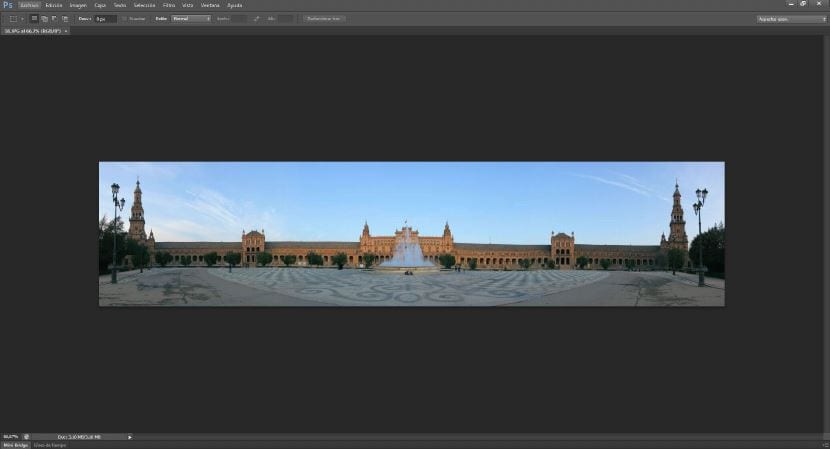
At this point we select Automatic Composition so that photoshop is the one that determines where and how to use each photograph. Remember to have the checkbox checked merge images at the bottom of the panel. We give OK. The program will begin to calculate and make masks to be able to join all the photographs. It may take a few minutes. The result should look something like this. If you have edges that do not fit or protrude, use the Crop tool (pressing C), to leave an image similar to this one.
Crop image
The image, although it is good, to achieve the desired effect we must cut it, so that we have a rectangle and thus achieve the ball effect. You can try different sizes and see what results they give you when applying the filter.
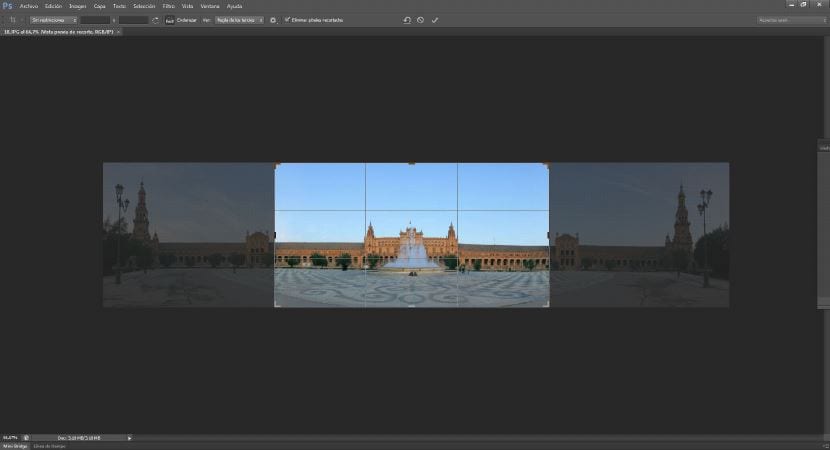
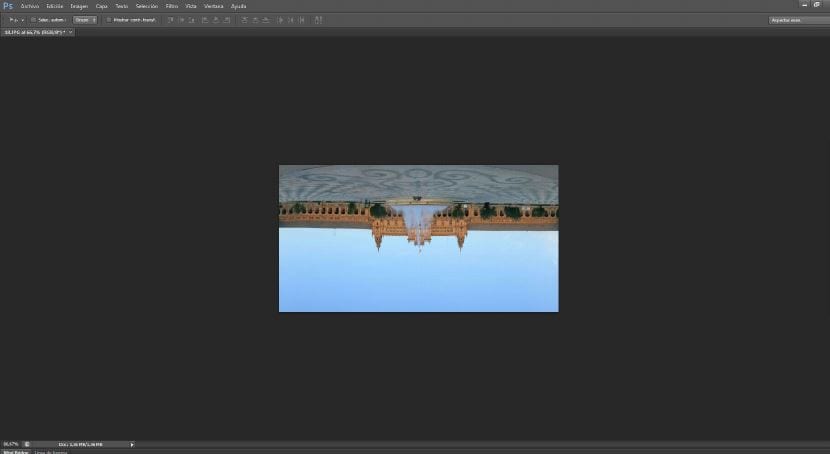
Image rotation
Now we go to Image> Image rotation> 180º. We should get something like this.
Apply filter
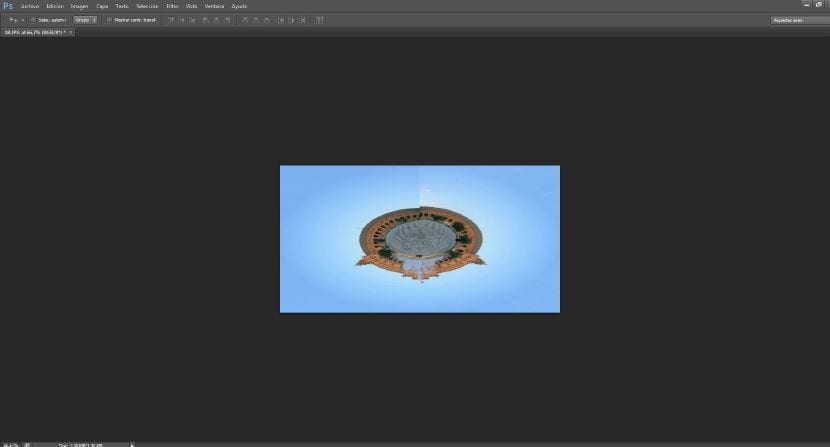
Now we open filter> distort> polar coordinates. Staying like this.
Final touches
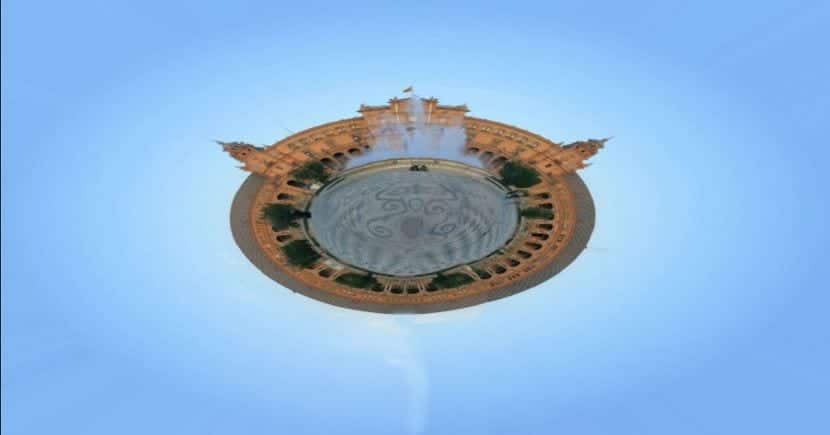
We will only have to retouch the image with the clone stamp, just where the two ends of the image meet, to hide it. I have inverted the image again, because being the source gives it that touch that we like so much about this filter.
I hope you liked it and do not hesitate to subscribe to receive news on many interesting topics.