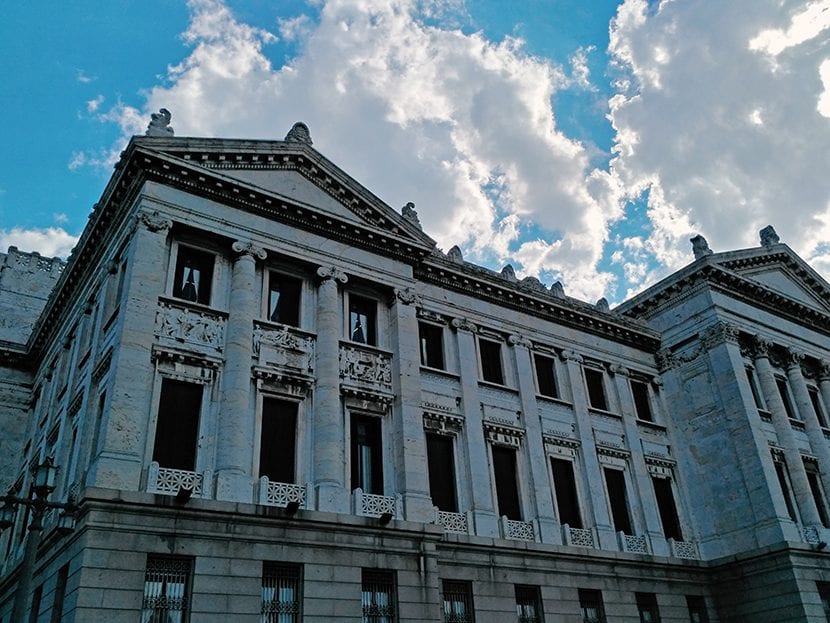
How many of us have it happened that we have a photograph that we like a lot, but without realizing it we were left with little lighting or a little more illuminated than we wanted? The options that we think of at that time many times are, delete the image with pity since "it would have been an excellent image", or if we are lucky and find ourselves in the same place in the same conditions, we have another chance to take the photograph again, but this time it is immaculate.
Well, Do not worry and more if you are not one of the lucky ones who are in the second named option. In this tutorial we will learn about quick and simple steps to get rid of those details that seem to have no choice but to return to the time and place to take a new photograph.
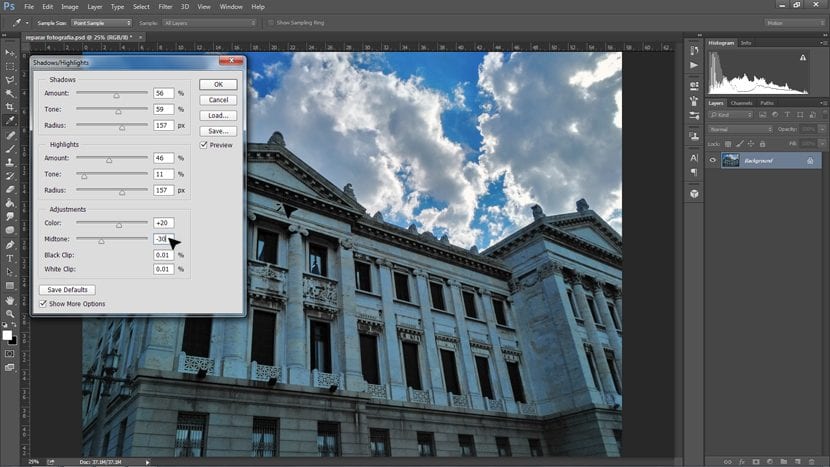
Once the original image is opened in Photoshop, let's go to the tab Image - Adjustments - Shadow / Highlight

Here a pop-up window will open where we can adjust light and shadow balances independently, and together.

La amount, will tell us how much light or shadow we want in the image, tonal width make reference to with what intensity we want that light or shadow, and the more we put radio more I know will blur this difference of lights and shadows, instead if we put less quantity will make it more "sharp".
In the section Settings, below, we will see two options:
- Color correction - gives you a little more or less than saturation to photography.
- Semitone contrast - this provides higher or lower contrast according to the adjustments we made previously.
Settings with this effect they depend a lot on photography that we use, because if it has more shadows and fewer lights, we will only exploit the first frame (taking shadows) and vice versa. And if we have a photograph as it is in this case, which in addition to having a sector with a lot of shade, it has a sector with a lot of light, we must find a balance between the two. To achieve this we even decrease the halftone contrast.
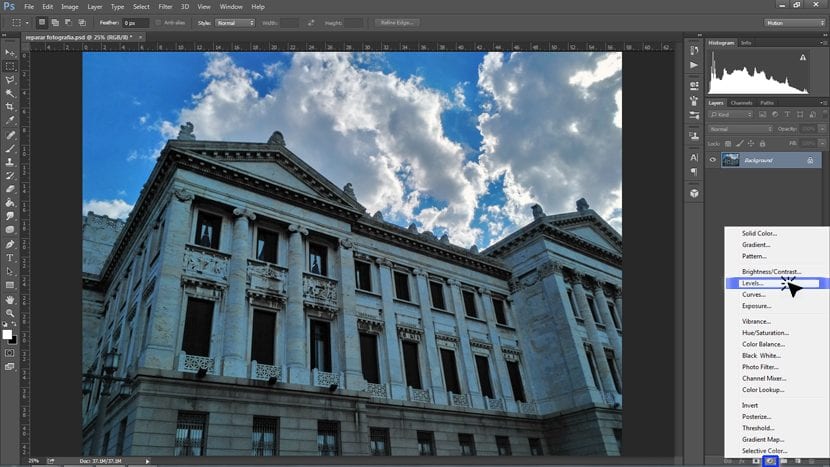
Finally on this occasion, as a finishing touch, and especially so that the clouds are not so gray, we will play with image levels with a new adjustment layer:

This is a small plus for those who are encouraged to keep providing details to your images. In the layers window, below there is a button for quick access to the option New adjustment layer, there we will choose Levels.

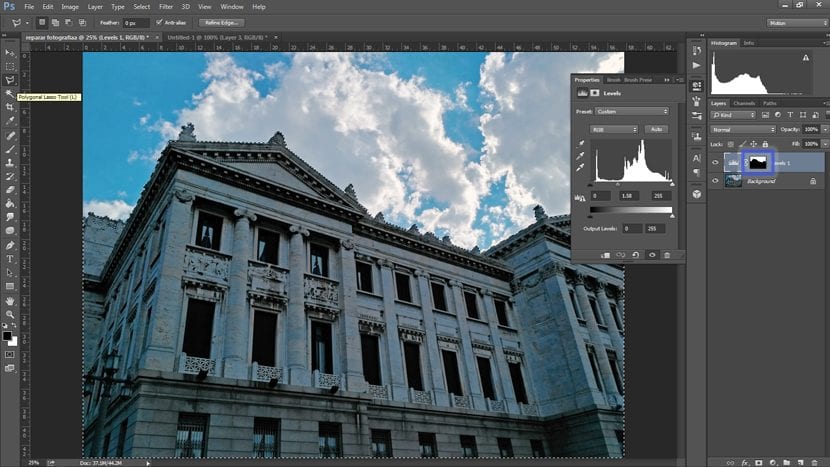
Once the levels have been adjusted to our liking, since we want this effect just for heaven, we select the rest of the image (in this case we use the polygonal loop to be able to select the palace), and we paint the image with black. Having used an adjustments layer, the selection in black indicates that in that sector we do not want to apply the adjustment.
And this is how, in a few steps, we can restore an image that we liked so much, and that with great pain we believed worthy of being deleted.
Excellent contributions. I like it and they help me. Thank you Creativos Online.