
Photography with multicolor effect on Photoshop quickly and easily, thus achieving an interesting, very attractive effect on a visual level thanks to the force emitted by the different colors that we achieve through this effect. This effect can be used in all types of photographs in which we seek to highlight that touch of magic and fantasy.
Photoshop is the great magic wand of photo retouching par excellence allowing us to achieve all kinds of effects for our photographs, without a doubt it is the program that offers us the most possibilities in the world of photographic retouching. In this case we will see a color pastiche In the purest Alice in Wonderland style.
The first thing we have to do to get this interesting effect is to have a photograph where we can apply the photo retouching. We can use any photograph, in this post we have used a butterfly but it is also possible to apply the effect to a human photograph.
MULTICOLOR EFFECT
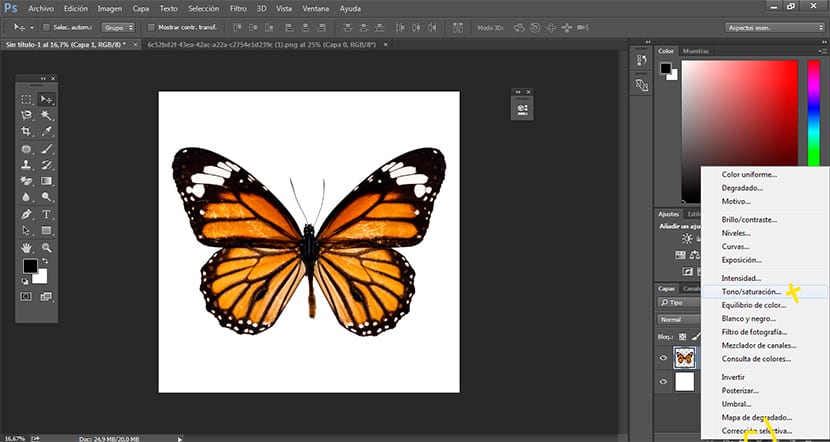
The first thing we have to do is open our image in Photoshop, Following this we will begin to create saturation tone adjustment layers to change the color of our image in each layer, this is the main tool that we are going to use to achieve this effect.
Create a saturation hue adjustment layer
The effect is achieved mainly by applying adjustment layers hue saturationWith this setting we will get each of the colors. We click on the photo layer and choose the saturation tone adjustment layer, after doing this a menu will open with the different modifiable parameters for color. We adjust the color to our liking and recreate another adjustment layer with another color.
Little by little we are creating different adjustment layers with several different colors.
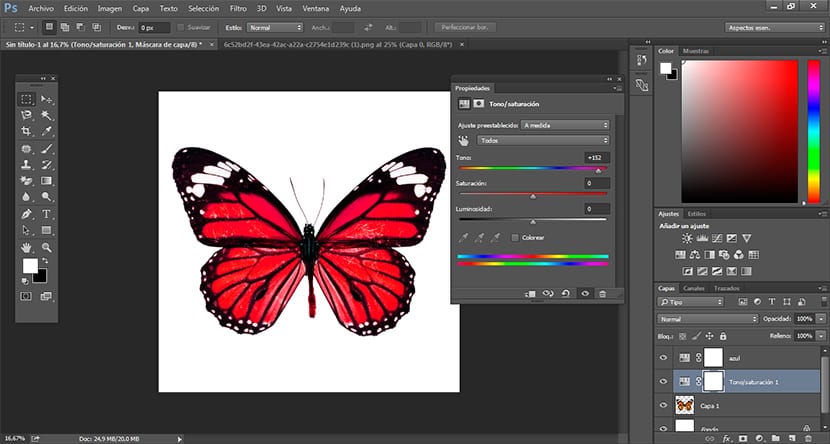
As we can see, each of the adjustment layers have a different color and name, it is ideal always work in an orderly manner so as not to get lost among so many layers. Can be apply all the colors we want, in this case some have been used as an example.
Get a multi-color result
The next and final step is to start erase parts of each of the layers to make lower layers visible thus achieving that multicolored result.
Before starting the ideal is change brush parameters: opacity, flow, size and hardness.
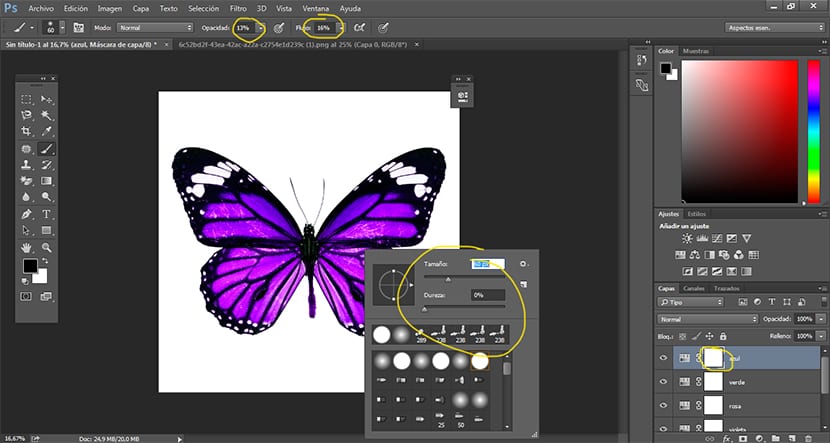
Little by little we are erasing parts in each of the layers, to do this click on the adjustment layer (white square) we are changing layers and doing the same process. If everything went well, we should have a result of multicolor image.
This effect can be done in different waysIn this case, we have seen this process to master a little more the adjustment layers and the possibilities that they allow us when working.