
Depending on the purpose of our photographs will require one treatment or another. It is not the same to configure a photograph that will be printed, be displayed on a digital projector or appear on a web page. Each medium has different deficiencies, characteristics or needs. For this reason, it is necessary that we pay special attention to these types of aspects, otherwise we could reduce the quality of our compositions indirectly and without knowing it.
In this case, we will see in the following tutorial the settings that Adobe Photoshop offers us to save our images in such a way that they have an optimal treatment to be reproduced on web pages and the Internet. In this way we will try to find the cheapest option taking into account aspects such as quality (cutting and pixelation) and on the other hand the size of the file, you already know that when we are going to upload photographs or files to our website they should weigh as little as possible so that the operation of our website is a lot more agile. It is interesting that you take into account these basic options, you already know that we must try to take care of all the details that are at our fingertips.
JPEG image optimization
To begin we will start our application and import the photograph with which we are going to work, in this case a medium image and in JPEG format.
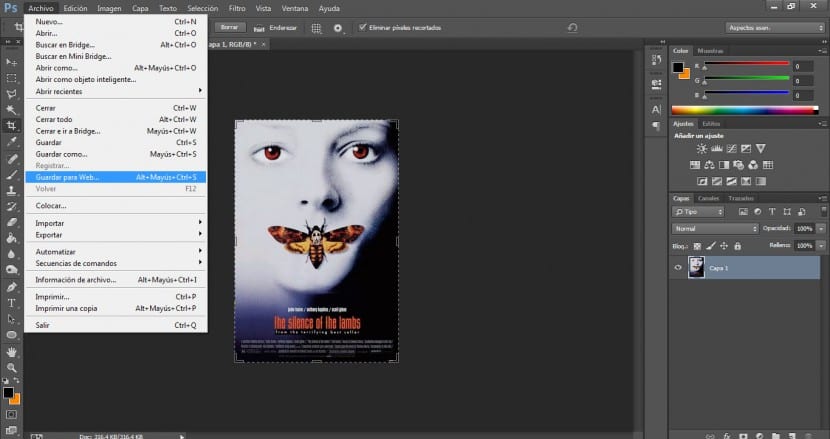
To save this photograph with suitable characteristics for working on the web, we will have to go to the File menu> Save for Web… (we can also access this option through Alt + Shift + Ctrl + S).
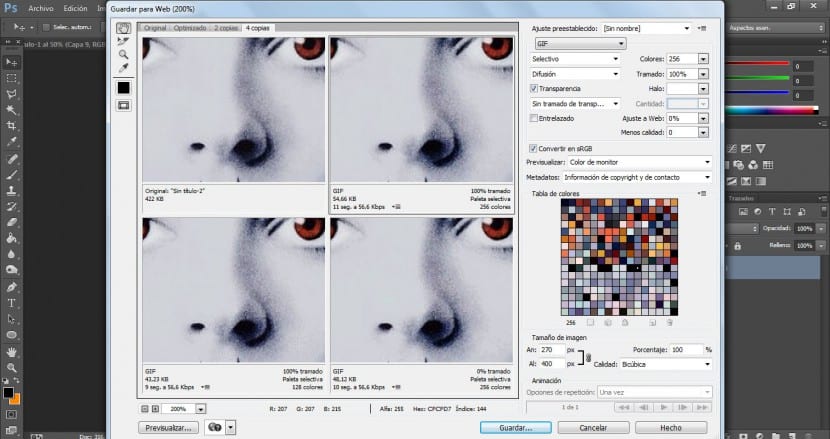
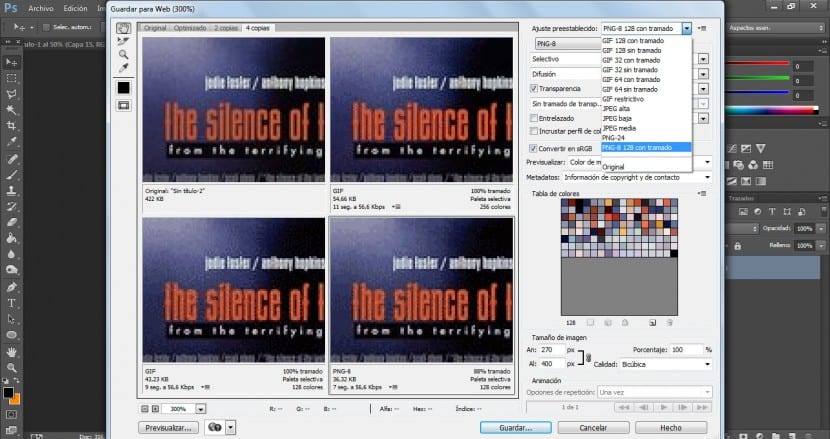
We will click on the tab called "four copies" at the top of the Save for Web dialog. By looking at the four different settings in the file, we can get a good idea of which setting will best suit our purposes. Using the 4 copies views, multiple versions of an image can be displayed in the same image window. We will do that, we will apply different formats and we will see which of them best suits our claims. You can then adjust the optimization assignments for each version of the image to select the best combination of assignments.
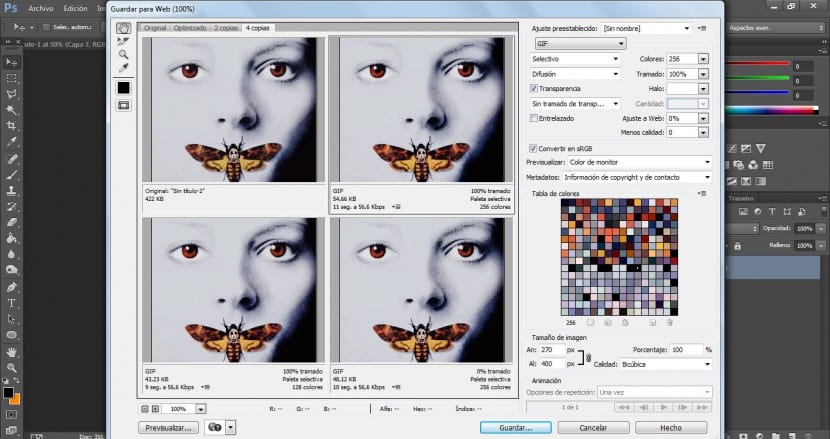
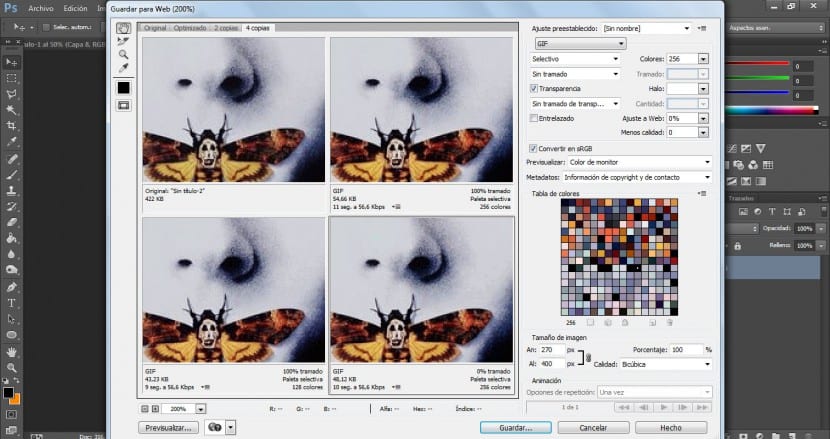
Using the Zoom level drop-down menu at the bottom left of the dialog box, we will change the magnification to 200% or more so that we can analyze our photograph well and appreciate the details of the image.
We will place the mouse cursor over the upper right version of the image (which is the active version as indicated by the darkest border). The cursor will take the shape of a hand, which indicates that we can drag it to move the image. We will drag to change the position of the image so that we find the most suitable area of the image, the one where we find the greatest amount of nuances and contrasts.
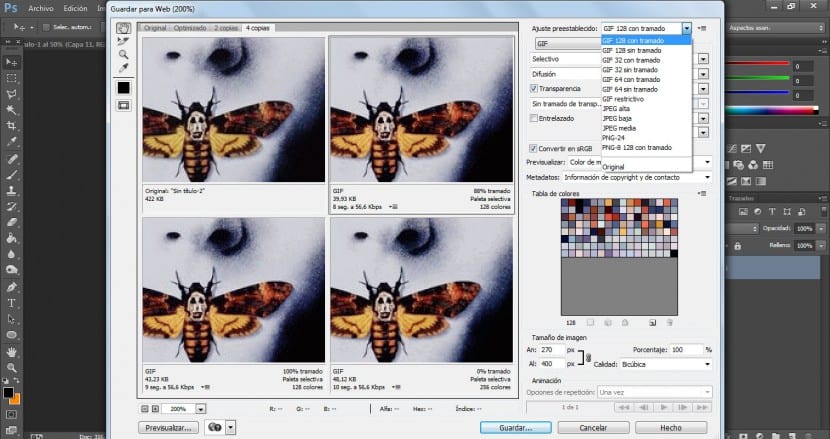
From the Preset drop-down menu in the Optimized panel, we'll choose GIF 128 with Dither. Notice how immediately in the version of the image that we have selected (in this case the upper right) there have been changes making the darker areas more visible. Then we will continue to see the JPEG and PNG settings in the following panels.
We will click on the lower left version of the image to select it. We will choose the Low JPEG version in the presets menu. The image will appear quite pixelated and its quality is unacceptable, especially in the text area it is very noticeable. We will try to increase the quality of the image without obtaining an unacceptable file size.
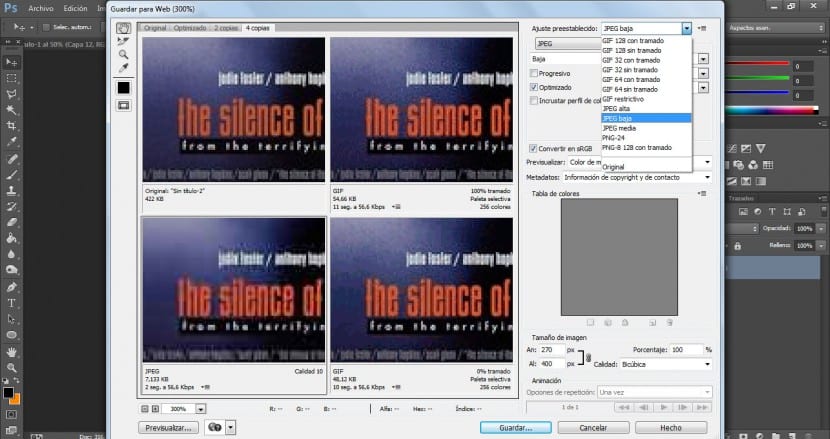
We will choose JPEG High from the settings drop-down menu again. This greatly improves image quality, but also causes a significant increase in file size.

Finally, the best option will be the middle ground. We will choose JPEG Media from the Preset drop-down menu again. The image quality is now acceptable, while the file size is considerably smaller than the JPEG High version or the GIF version.
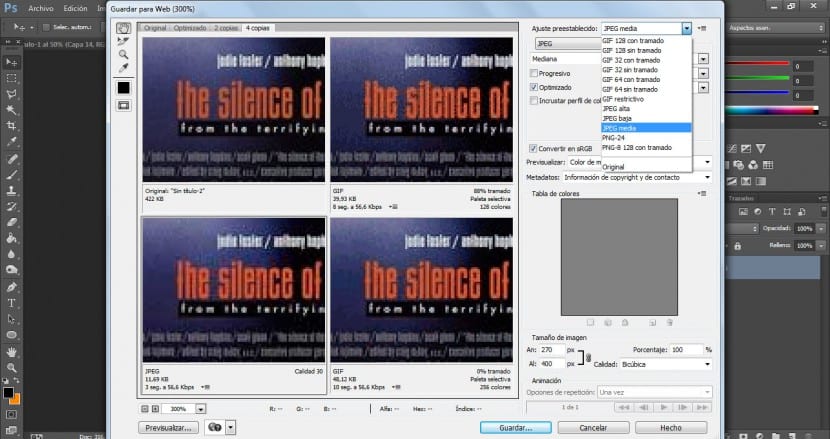
Finally we will select the lower right panel. We will choose PNG-8 128 with hatching from the drop down menu once again. Although this option provides a smaller file size than the original image, the image quality is not as good as the JPEG Medium version, which will also have a smaller file size.
Finally we will click on the JPEG version, that is, the one we have in the lower left. In the Optimized Panel (to the right of the dialog) make sure that the Progressive option is activated (this will cause the image to download in several passes, each of which increases the image quality) and click Ok .
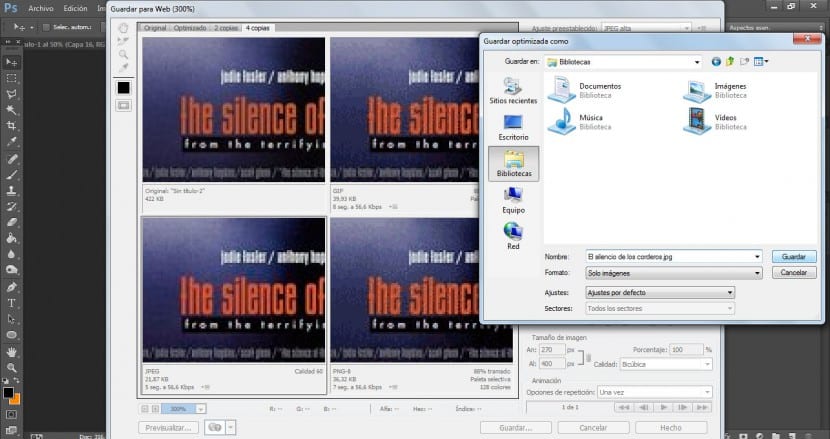
Finally, in the Save Optimized As dialog box, we will use the original name and click on Save. In this way we will save a JPEG version of the original file in the desired folder. Finally we will close this project without saving changes.