
When carrying out this project, you must take into account the importance of source documents. 50% of this work is made up of the choice of the two photographs that we are going to use. We will use two photographs: A portrait of a person and a photograph of a sculpture. Our texturing work technically speaking may be very good, but if those two photographs do not match well or are not the most appropriate, it is most likely that even if the technique is perfect, the result does not fit what we are looking for. So I encourage you to dedicate as much or more effort to find those two ideal photographs as in the fusion and integration technique. What should we take into account when selecting the two photographs on which we are going to work?
- Must be two photographs of a large size and definition.
- The angle from which both photographs are taken it must be similar. Likewise, the position of our protagonist must be as similar as possible to the position that the selected sculpture maintains.
- Hair is an important aspect. Both characters must have a hair as similar as possible. Converting the hair of a photograph into a sculpture hair is something very complex, so we should try to take advantage of all or the maximum possible hairs of our sculpture.
This time we will create a bust. We will use a portrait of Tom Cruise and the sculpture of the Greek playwright Menander.
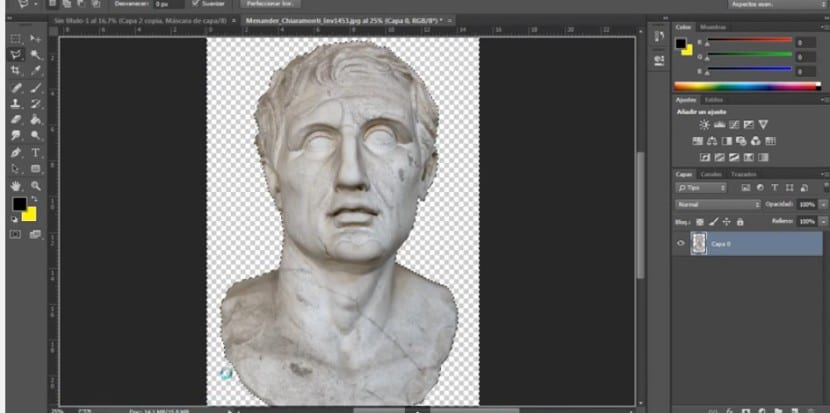
The first step will consist of import our sculpture and cut it in the most precise way, we can use the selection and clipping tool that we like, the limits of our figure must be very well defined, a bad clipping will steal truth from our assembly.
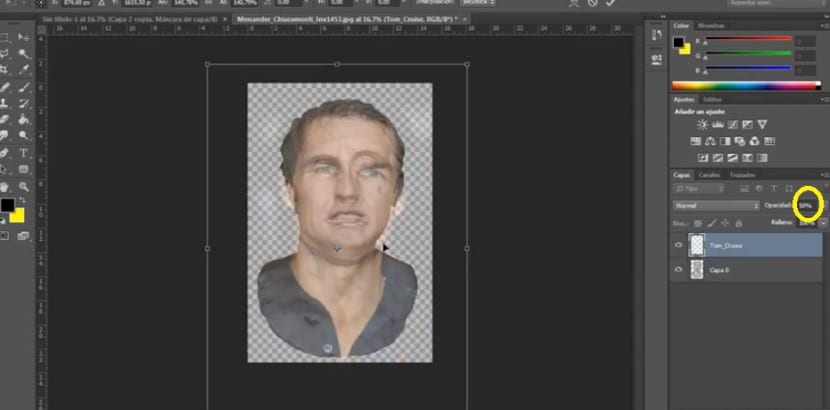
Once this is done, we will import Tom Cruise's photograph, rasterize layer and we will lower its opacity by 50%. What interests us is to be able to see both layers to be able to take the strategic points of Menander's face as a reference. Once the opacity has been modified we will begin to transform Tom's image, (Ctrl / Cmd + T + Shift) and we will ensure that both characters are on a similar scale, taking as a reference the eyes, the nose, the mouth and the ears. We can see that the disposition of the eyes is reversed in both characters. Next we will flip the image horizontally (Edit> Transform> Flip Horizontal) so that their features are coupled and features are unified. It is important that the two images we use are very similar for this very reason. Otherwise, we would deform the features of our character and lose realism.
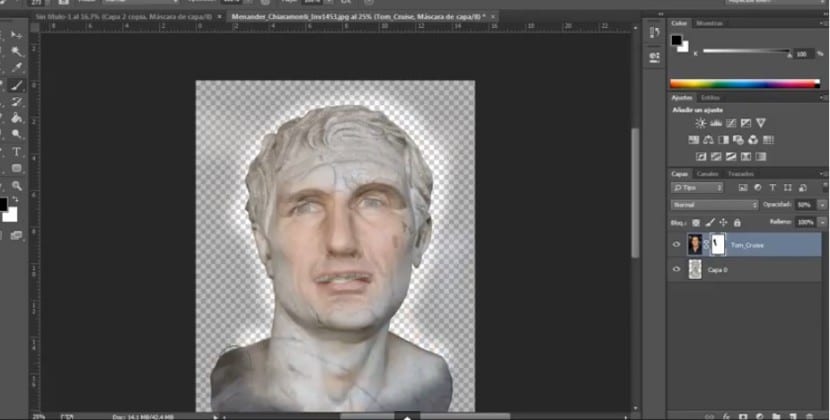
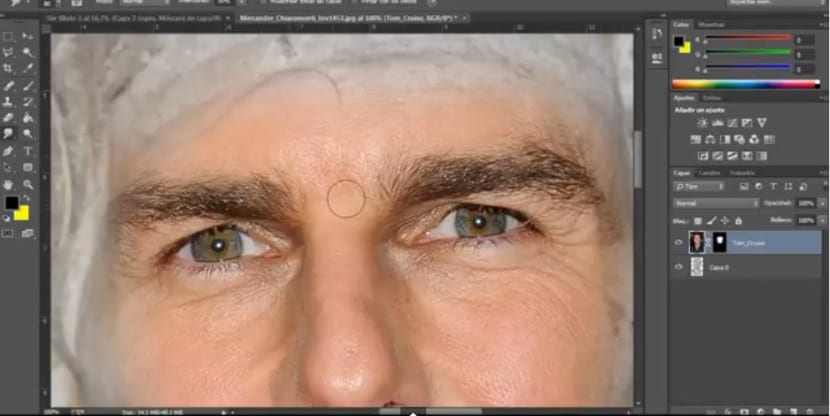
We will create a layer mask in Tom's photograph and with a black front color brush and quite blurred we will begin to discover the sculpture. The only thing we want to keep from Tom is his face. Eyes, nose, mouth, cheeks and maybe the chin.
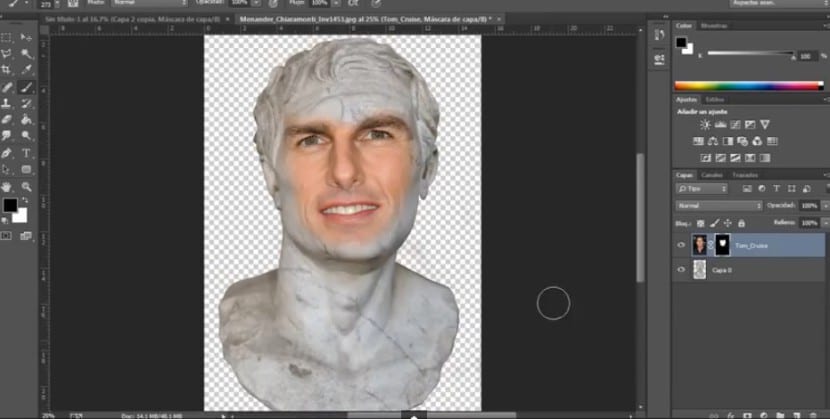
Once this is done, we can return the 100% opacity to Tom's face and thus check the result. At any time we can edit the size and position of the face and the layer mask, so if it is not perfect now, don't worry.
Now we will start working on the skin. As you know, the level of sharpness that a high resolution photograph offers us has no point of comparison with the degree of detail that a sculpture can provide us. What we have to do now is to dissolve or soften all those details, create a more uniform set that integrates perfectly with the stone texture. We will have to work the pores, wrinkles, especially the eyebrows, eyelashes, the facial hair that may be and the teeth, for this we will select the tool Finger and with a 30% intensity.
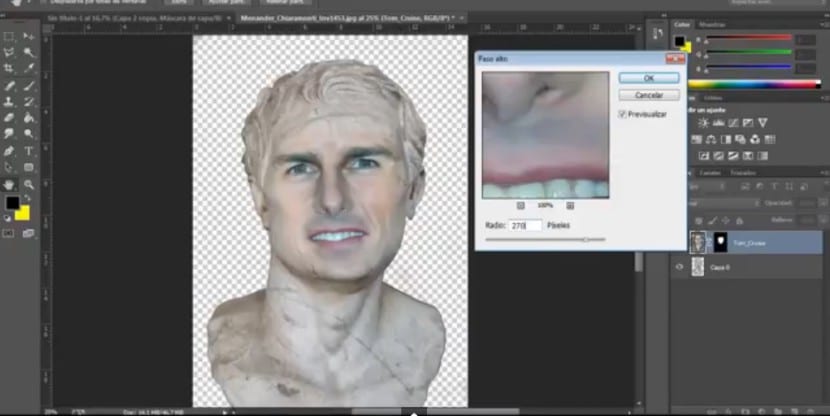
To begin to integrate both elements in chromatic terms, we must make use of the High Pass effect on Tom's layer. We will click on Filter> Other> High Pass. We will give you an adjustment of 270 pixels, although you should bear in mind that this value will depend on the photograph that we are working on and its characteristics. The result is a somewhat grayer and attenuated appearance. We can begin to perceive now, how this union effect is taking place little by little. After this, we should go to Image> Adjustments> Brightness and Contrast and apply it on the same layer. The values that we will use in this case will be -24 in brightness and 100 in contrast. With this, the contrasts and shadows will be marked enough and the texture of the eyebrows will highlight for example, something that we will have to perfect later.
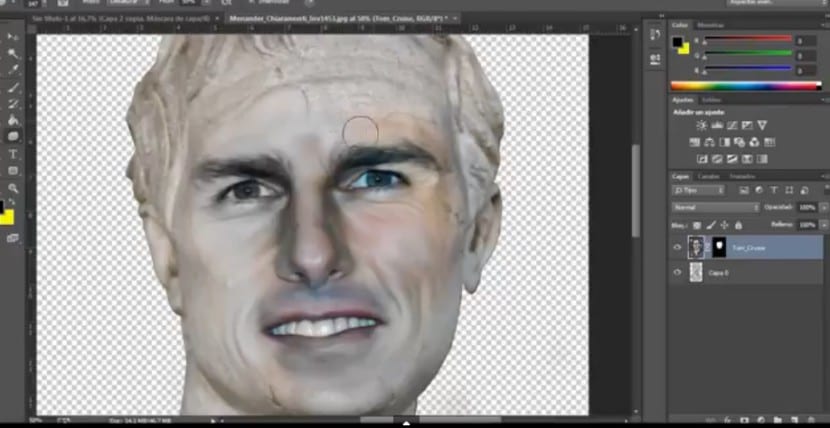
The next thing we are going to do is go to the tool Sponge and press the option Desaturate. As we can see, there have been areas with color, with this tool what we will do is desaturate those recesses to enhance the mixture and union. We will have to affect the entire face with enough attention, remember, the sculptures are gray.
As you can see the area of the eyelashes and eyebrows has not yet been credible, in the second part we will refine these areas and create a realistic appearance.