
The world of graphic design understands endless techniques and these techniques will allow the designer or design enthusiast to modify their projects, responding to the demand of their clients or perhaps satisfying their own criteria when making a model. Thus, the techniques that the user masters will allow you to address a number of situations within which he will be able to measure his possibilities within this area of knowledge, that is, the skills that he masters will give him opportunities over other users, expanding his Work field and allowing you to develop what you have learned during the practice itself.
This article will introduce you to one of these techniques used in the software Adobe Photoshop called Frequency Separation, used to clean human skin in images to edit. This technique can be considered complex and tedious to perform, however, in the text we will present some guidelines to consider, in such a way that the user can afford to perform a diagram on the use of this technique, with the expectation that he will reconsider the difficulty of this technique.
Frequency Separation with Photoshop
First, it is necessary to delimit two kinds of layers, the texture layer, and the colors layer of an image.
The idea of frequency separation consists of be able to work with each of these layers separately, in such a way that the modifications of one do not affect the other. Thus, the frequency separation allows the user modify the layers of an image, in such a way that the image can be clean as regards the skin of the person in the photograph.
Thus, and to perform the separation of frequencies, we must create two layers, both, being part of a single set, in such a way that the modifications carried out fall on the original layer of the image. From these separate layers, we can determine if the original image layer is well doneTherefore, we must be clear about the possibility of both layers within an image as determining factors, and it is that perhaps some images do not have the best color layer or, failing that, a texture layer. However, the latter does not have to be limiting and is that low quality images, which also have these layers, can be modified without major problem, considering of course that the result will not be the most optimal.
To perform the frequency separation, we must follow the steps presented below:
In principle, we must develop the photo to an Adobe Camera RAW type background, the module to develop Lightroom preferably, if not, any optimal program for our files.
Thus, we must duplicate the original layer 2 times with the command (Ctrl + J), generating 3 layers in our panel. The top one can be the texture one, while the second one can be the color one, leaving the last one as the original layer.
Followed by this, we must activate the COLOR layer, at the same time, we deactivate the view of the TEXTURE layer. We go to Filter> Blur> Gaussian Blur. For this first layer we want to keep the color itself and the filter that we have just activated will blur the entire image. Then we raise the radius to the point where the shapes no longer have any detail, although we must bear in mind that this is perhaps the most delicate point. We must raise the radius just a little before the shapes are completely uniform. This will also be compromised depending on the quality and sharpness of the image.
Now, we look for the texture layer in order to keep only the details. We look for the High Pass filter, which highlights the textures, but it may not work because the new layers that we have generated DO NOT generate the original layer as a result. We must then apply the image, an option that allows us to make a combination between channels, with the layers of an image with itself. In this sense, the idea is to configure it to extract all the detail that we are looking for. For this:
Let's go to Image> Apply Image and modify as follows depending on whether we are working with a 16 or 8-bit image.
Then we change the diffusion mode of layer texture to light Linear. For practical purposes, we select the two layers (Ctrl + Click) and go to Layer> New> Group from layers, this being the separation and frequencies.
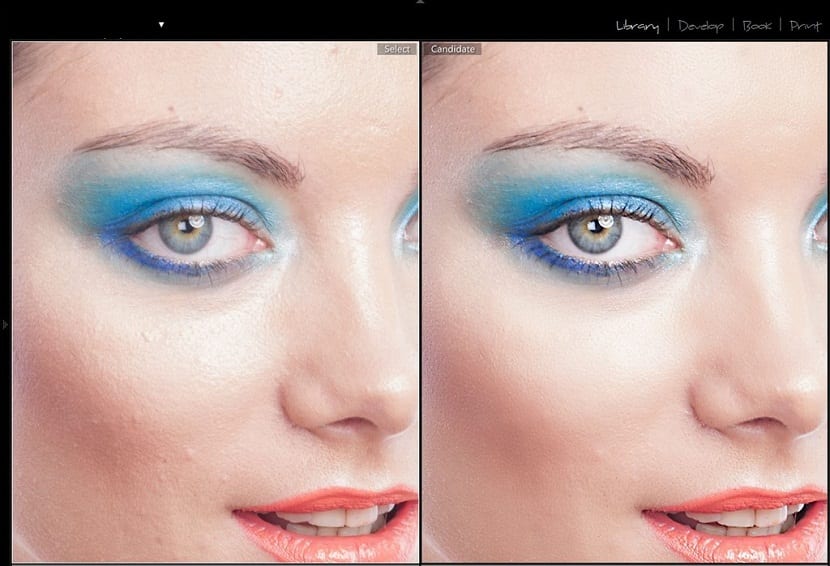
If, once this is done, we see that the layer group looks exactly the same as the original image, it is because we have done it successfully.
this is how i do it
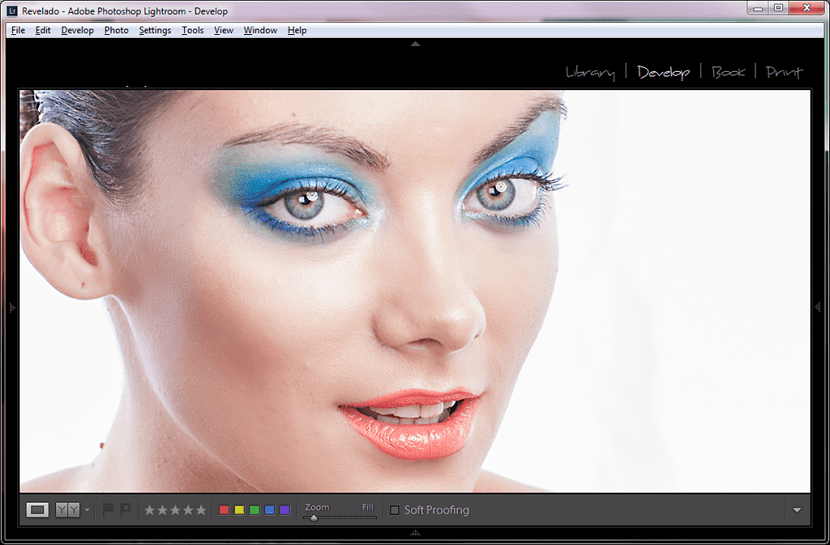
It is very comforting to be able to see how an image with a somewhat disproportionate brightness on a girl's face can remain after the editing work, like a refined professional photograph. Now there are many applications that can be downloaded and used on our portable phone.
Elisa Aboy look… ..