When we see perfect photographs or portraits in magazines, models with smooth, smooth skin and with superbly regulated brightness, those images often carry a treatment. Skin imperfections, wrinkles, scars, acne ... is something that sometimes worries us. Adobe Photoshop offers some tools so that we can reduce or eliminate those marks. In this tutorial I am going to tell you how to smooth skin in Photoshop without falling into too artificial results Are you interested? Well, keep reading the post!
Open the photo and locate the correction tools in Photoshop
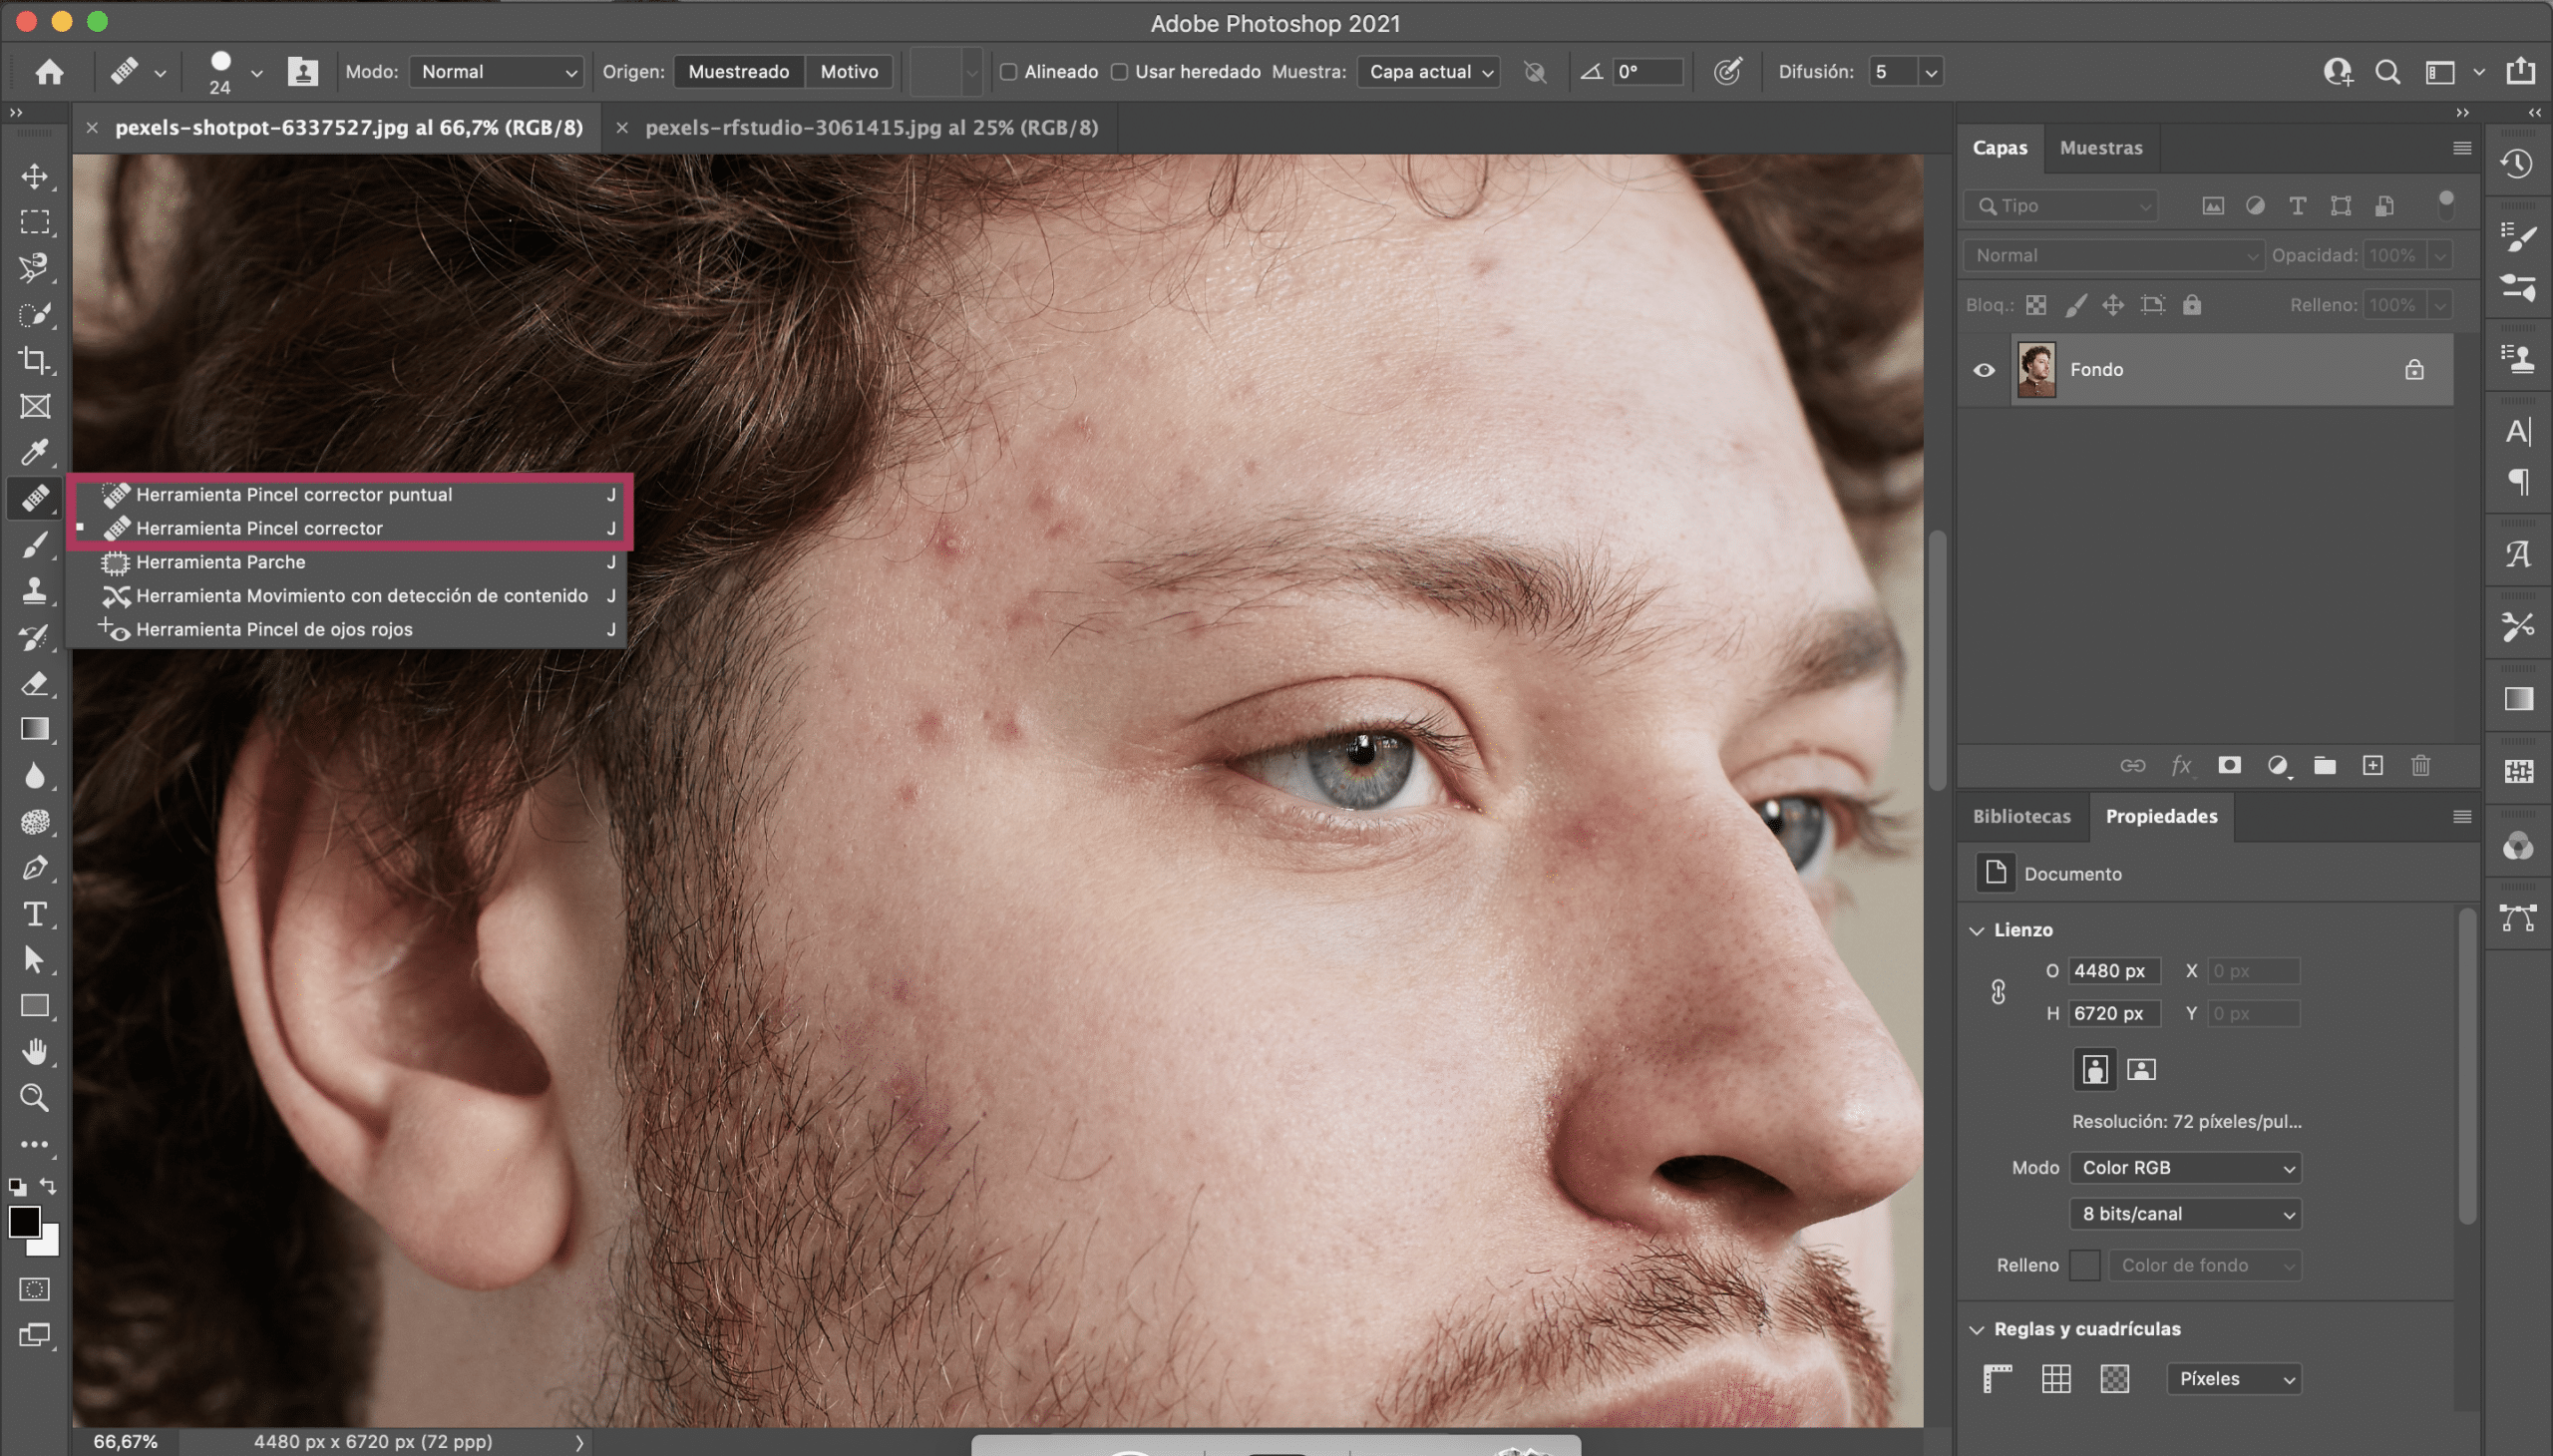
Let's start by opening the photograph. I have chosen two, one of them has almost no retouching so we can see the process well. First of all we are going to locate the two tools that Photoshop offers to correct or delete imperfections:
- The tool Spot correction brush
- The tool concealer brush
You both have them in the toolbar. We are going to use them to clean the most visible imperfections in the image.
Spot correction brush

La Spot Healing Brush tool automatically samples in photo and what it does is when we click on the "imperfection" or in the area that we want to correct, replace some pixels with others that have been obtained in that sample.
In the tool menu we can modify its characteristics, we can change the size and shape of the brush, but also the type of sampling, We can ask you to fill in according to the content or to adjust the area in which we apply it to the environment.
In photographs like this one, in which there is a certain texture, the “adjust to environment” option usually works better, basically because it respects it more and the retouch with which we have eliminated the scar here is cleaner.
Concealer brush

Although the Spot Healing Brush tool is the easiest to use and the fastest because it is automatic, it does not always give the best results. For example, in the case of the image of the chicho there is a small granite that is very close to the hair. By using the spot concealer brush, you clone some of that hair and the result is not very good. Luckily, we have a tool in Photoshop with which we can tell the computer what we want it to be based on for sampling: the correction brush.
Pressing the option key (if you are with Mac) or alt (if you are with Windows) you can indicate where you want the sampling to be done with one click. I recommend that you base your sampling on an area of the skin where there are not many imperfections, then Photoshop will automatically adjust the brightness, the tone ... When you select the zone we release alt and that's it we just have to paint over those imperfections that we wish would disappear. This tool works great, even when you apply it on large surfaces, like here, in this third photo that I have used to eliminate this area of freckles.
An alternative way
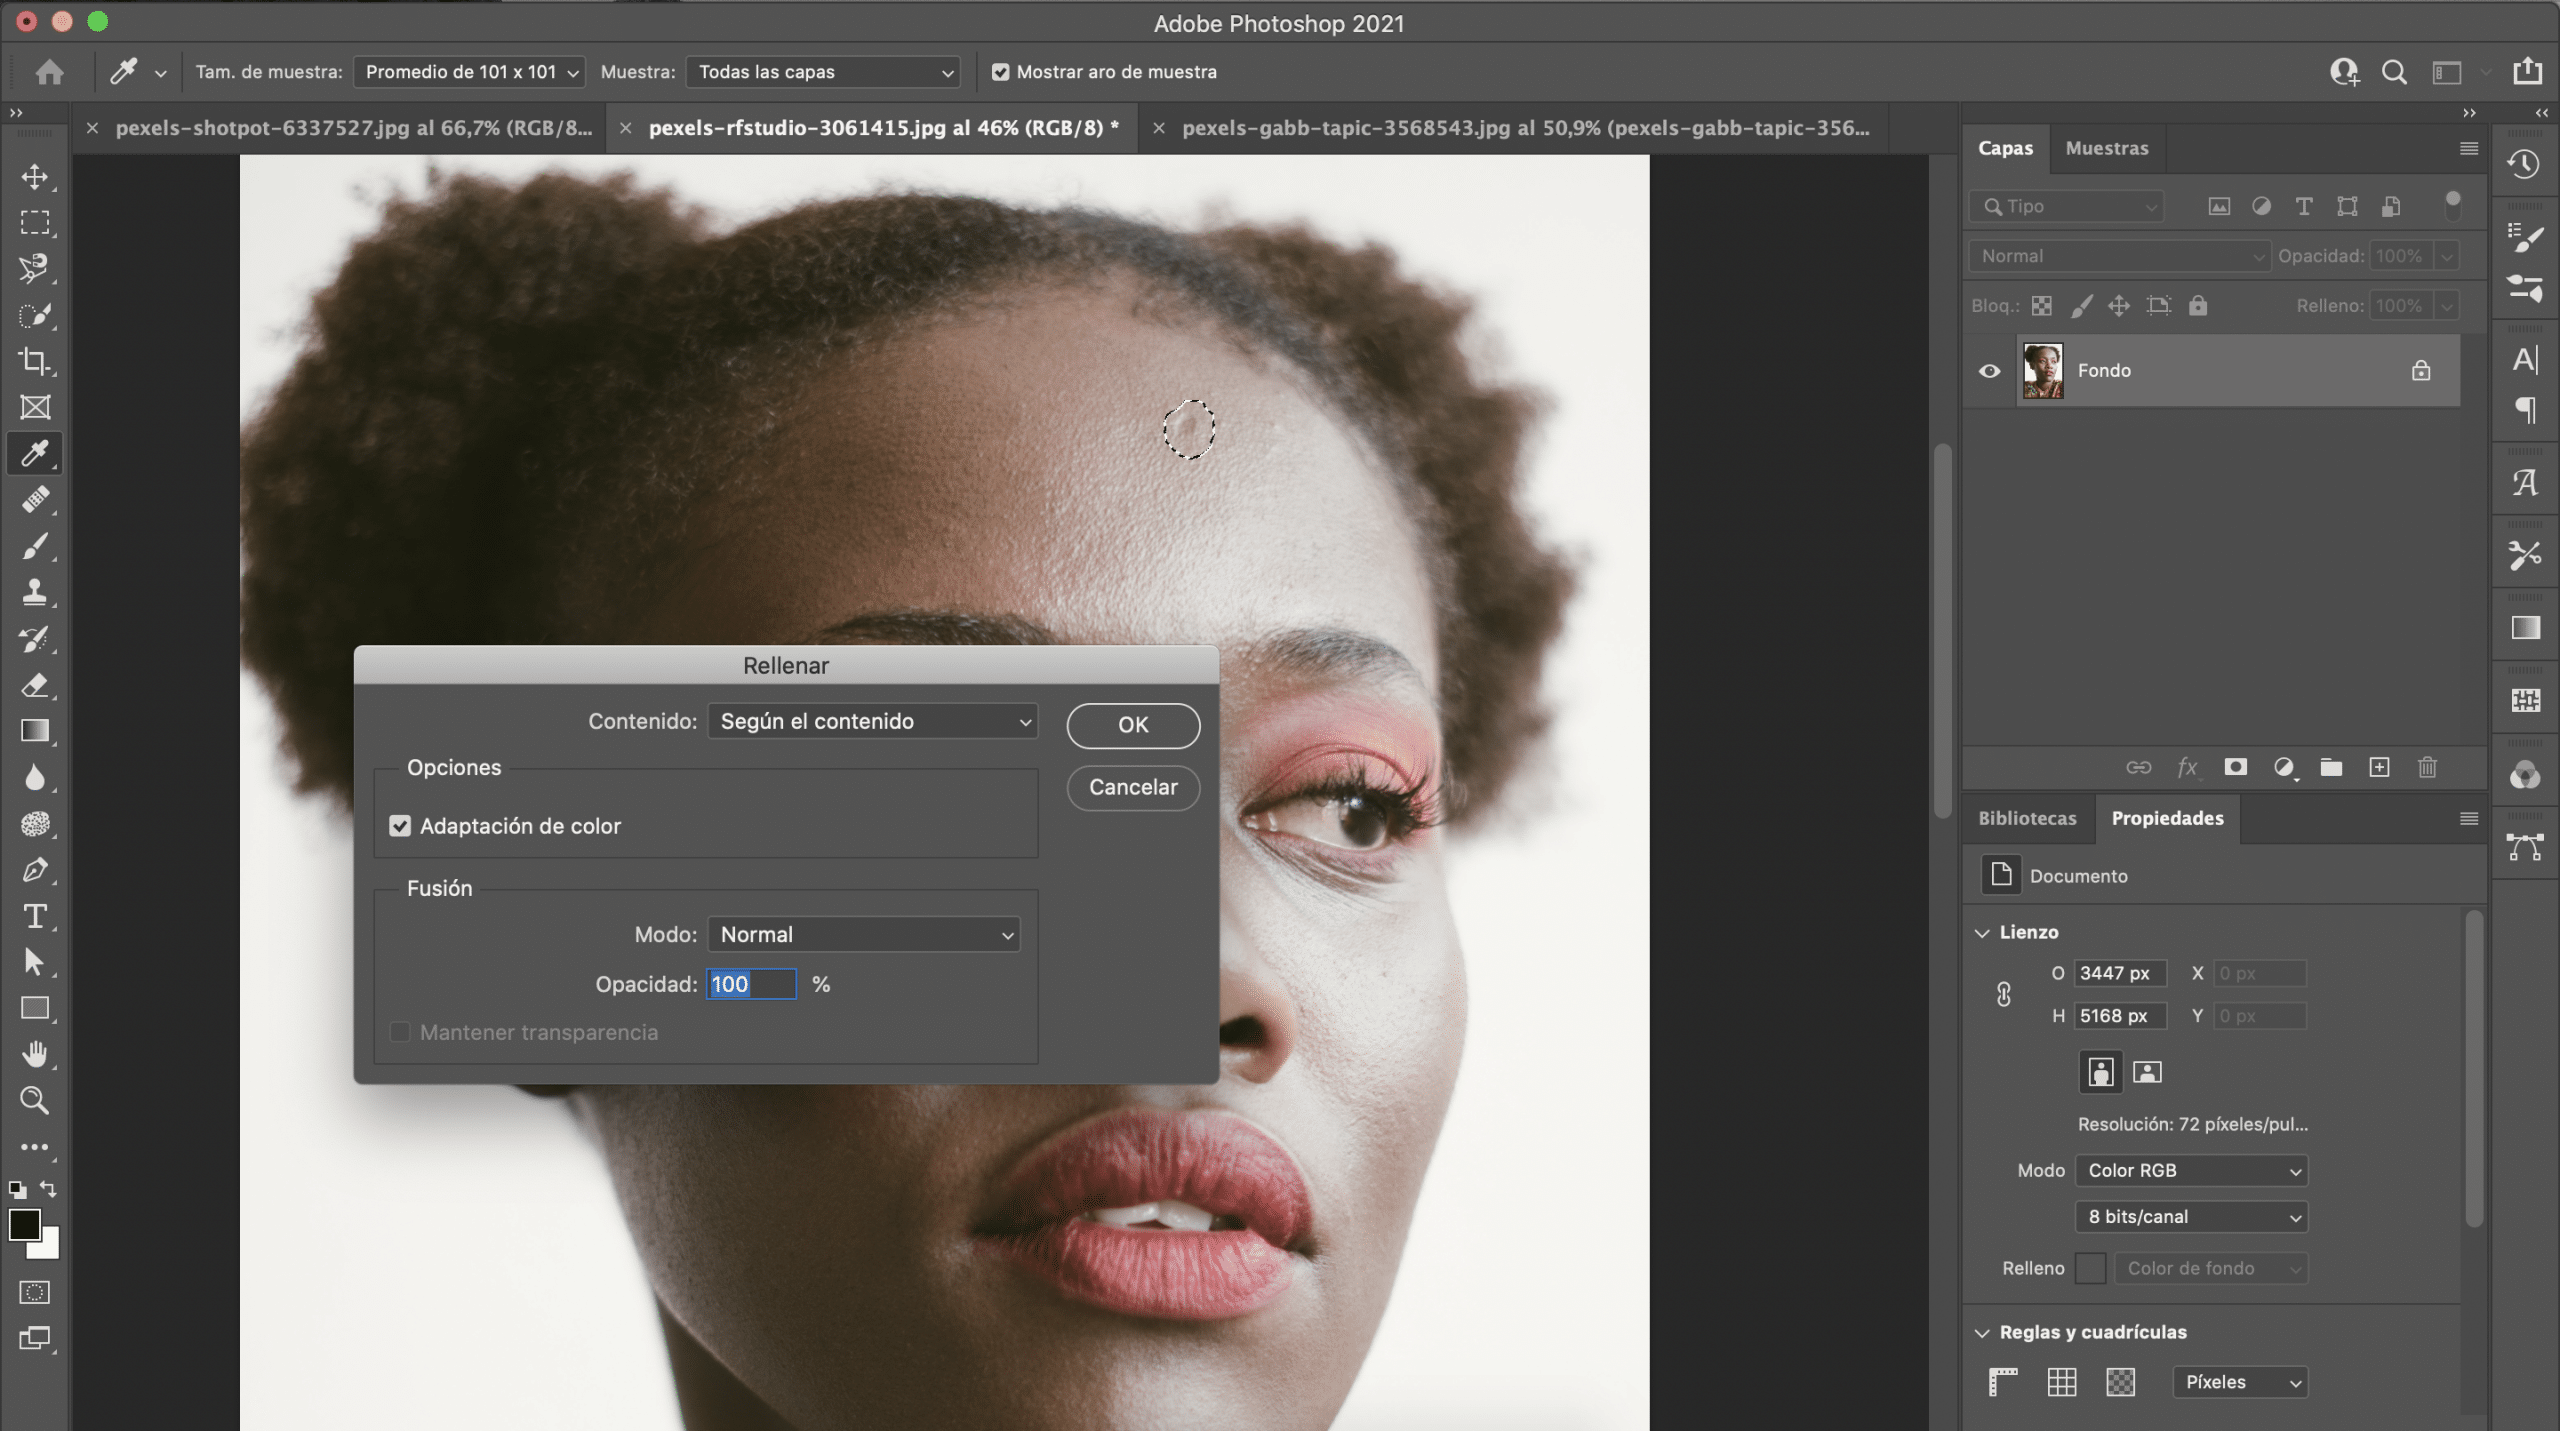
Another more rudimentary way to do this is selecting the zone with the quick selection tool, and in the tab edition we will click on fill> according to the content. It can give good results, although if the surface is very large ... I would not rely much on this method.
Soften the skin even more in Photoshop
Once we have corrected the most visible imperfections, let's see how to soften the skin even more in Photoshop. For this, what we will do is apply different filters and adjust them for the most natural results possible.
Duplicate layer and apply powder and scratch
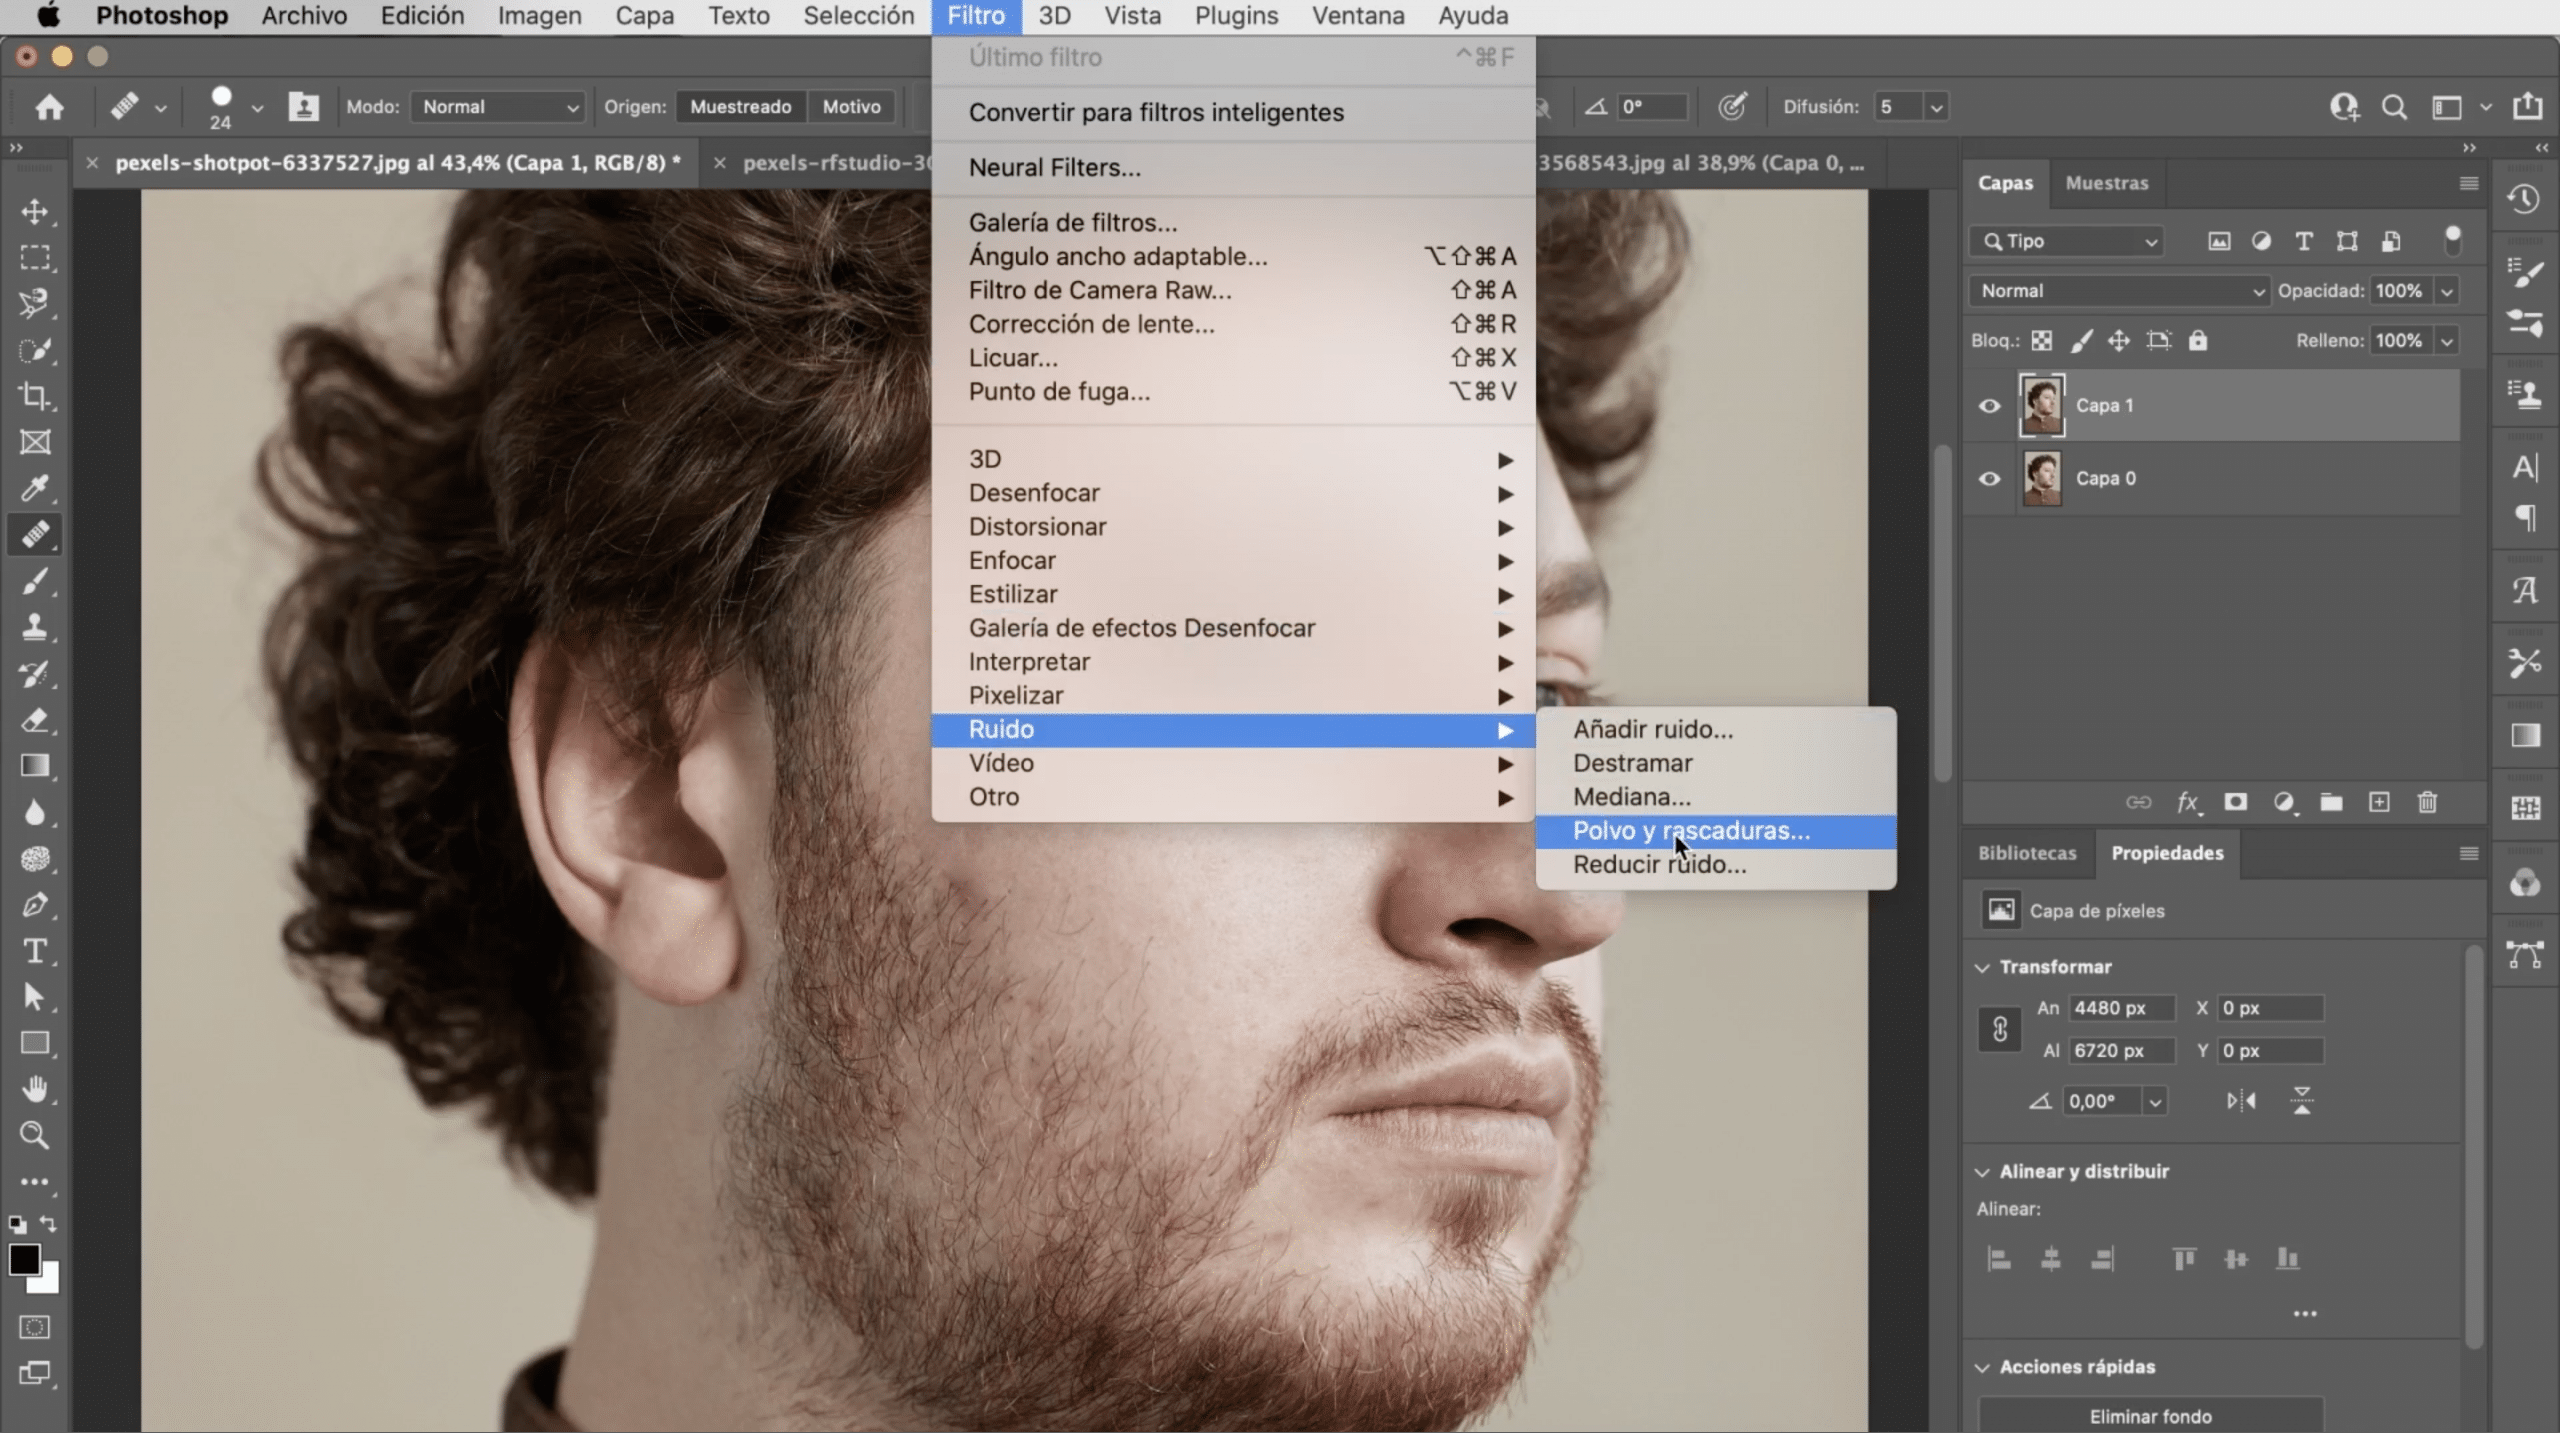
The first thing we have to do is duplicate photo layer, to duplicate layers you already know that you can do it by pressing and giving duplicate layer, or in the main menu, layer> duplicate layer. And if you unlock it, you can also copy and paste with the keyboard shortcut command + c, then command + v.
Once we have duplicated the layer, we are going to apply a filter to it. We are going to go to the main menu and we are going to select filter, noise, dust and scratches. The parameters that we give here will depend on the size of the image, you give it to preview and you go testing, I will leave it at 4 and 0. Keep in mind that if you pass the result it is very artificial and it is not what we seek.
By applying this filter, there will be details of the photograph that are lost, do not worry about that now because we will solve it later.
Apply Gaussian Blur
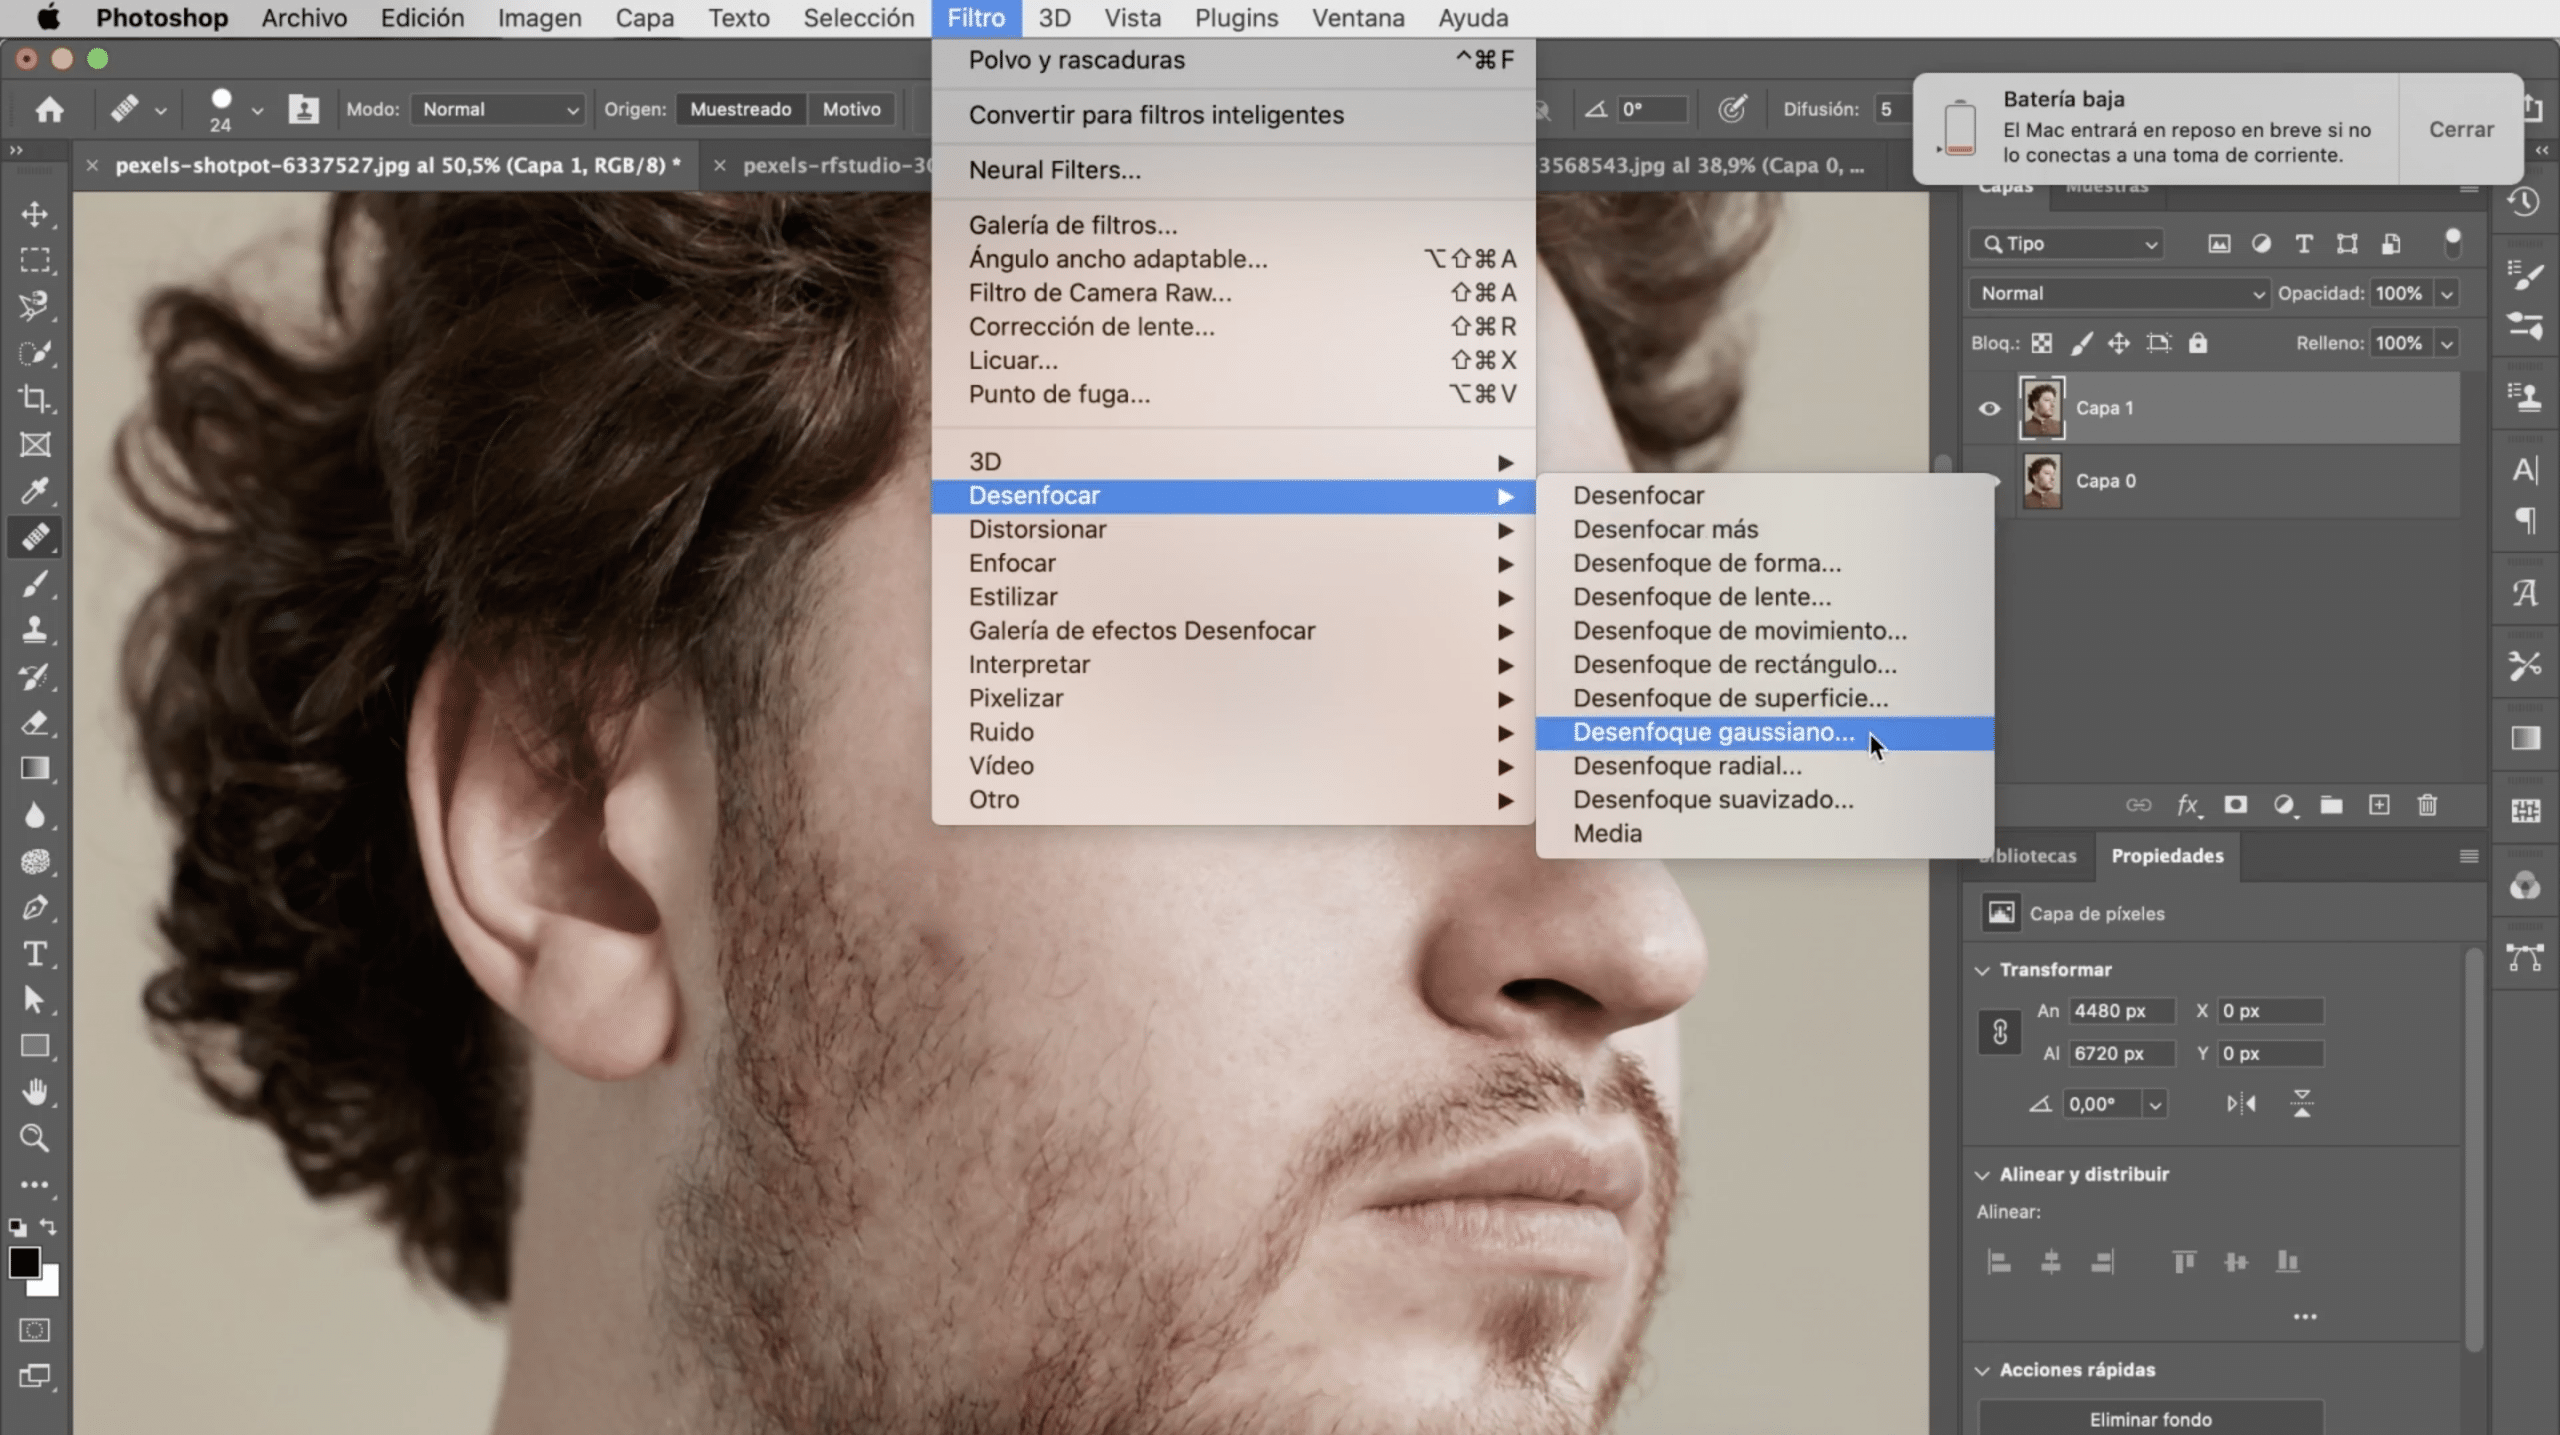
On this same layer, we are going to apply a second filter, let's go to filter> gaussian blur. Once again the values here are indicative, I am going to give it a radius of 2, but you try and stay with the values that most convince you. We have to ensure that the skin has that soft effect.
Noise
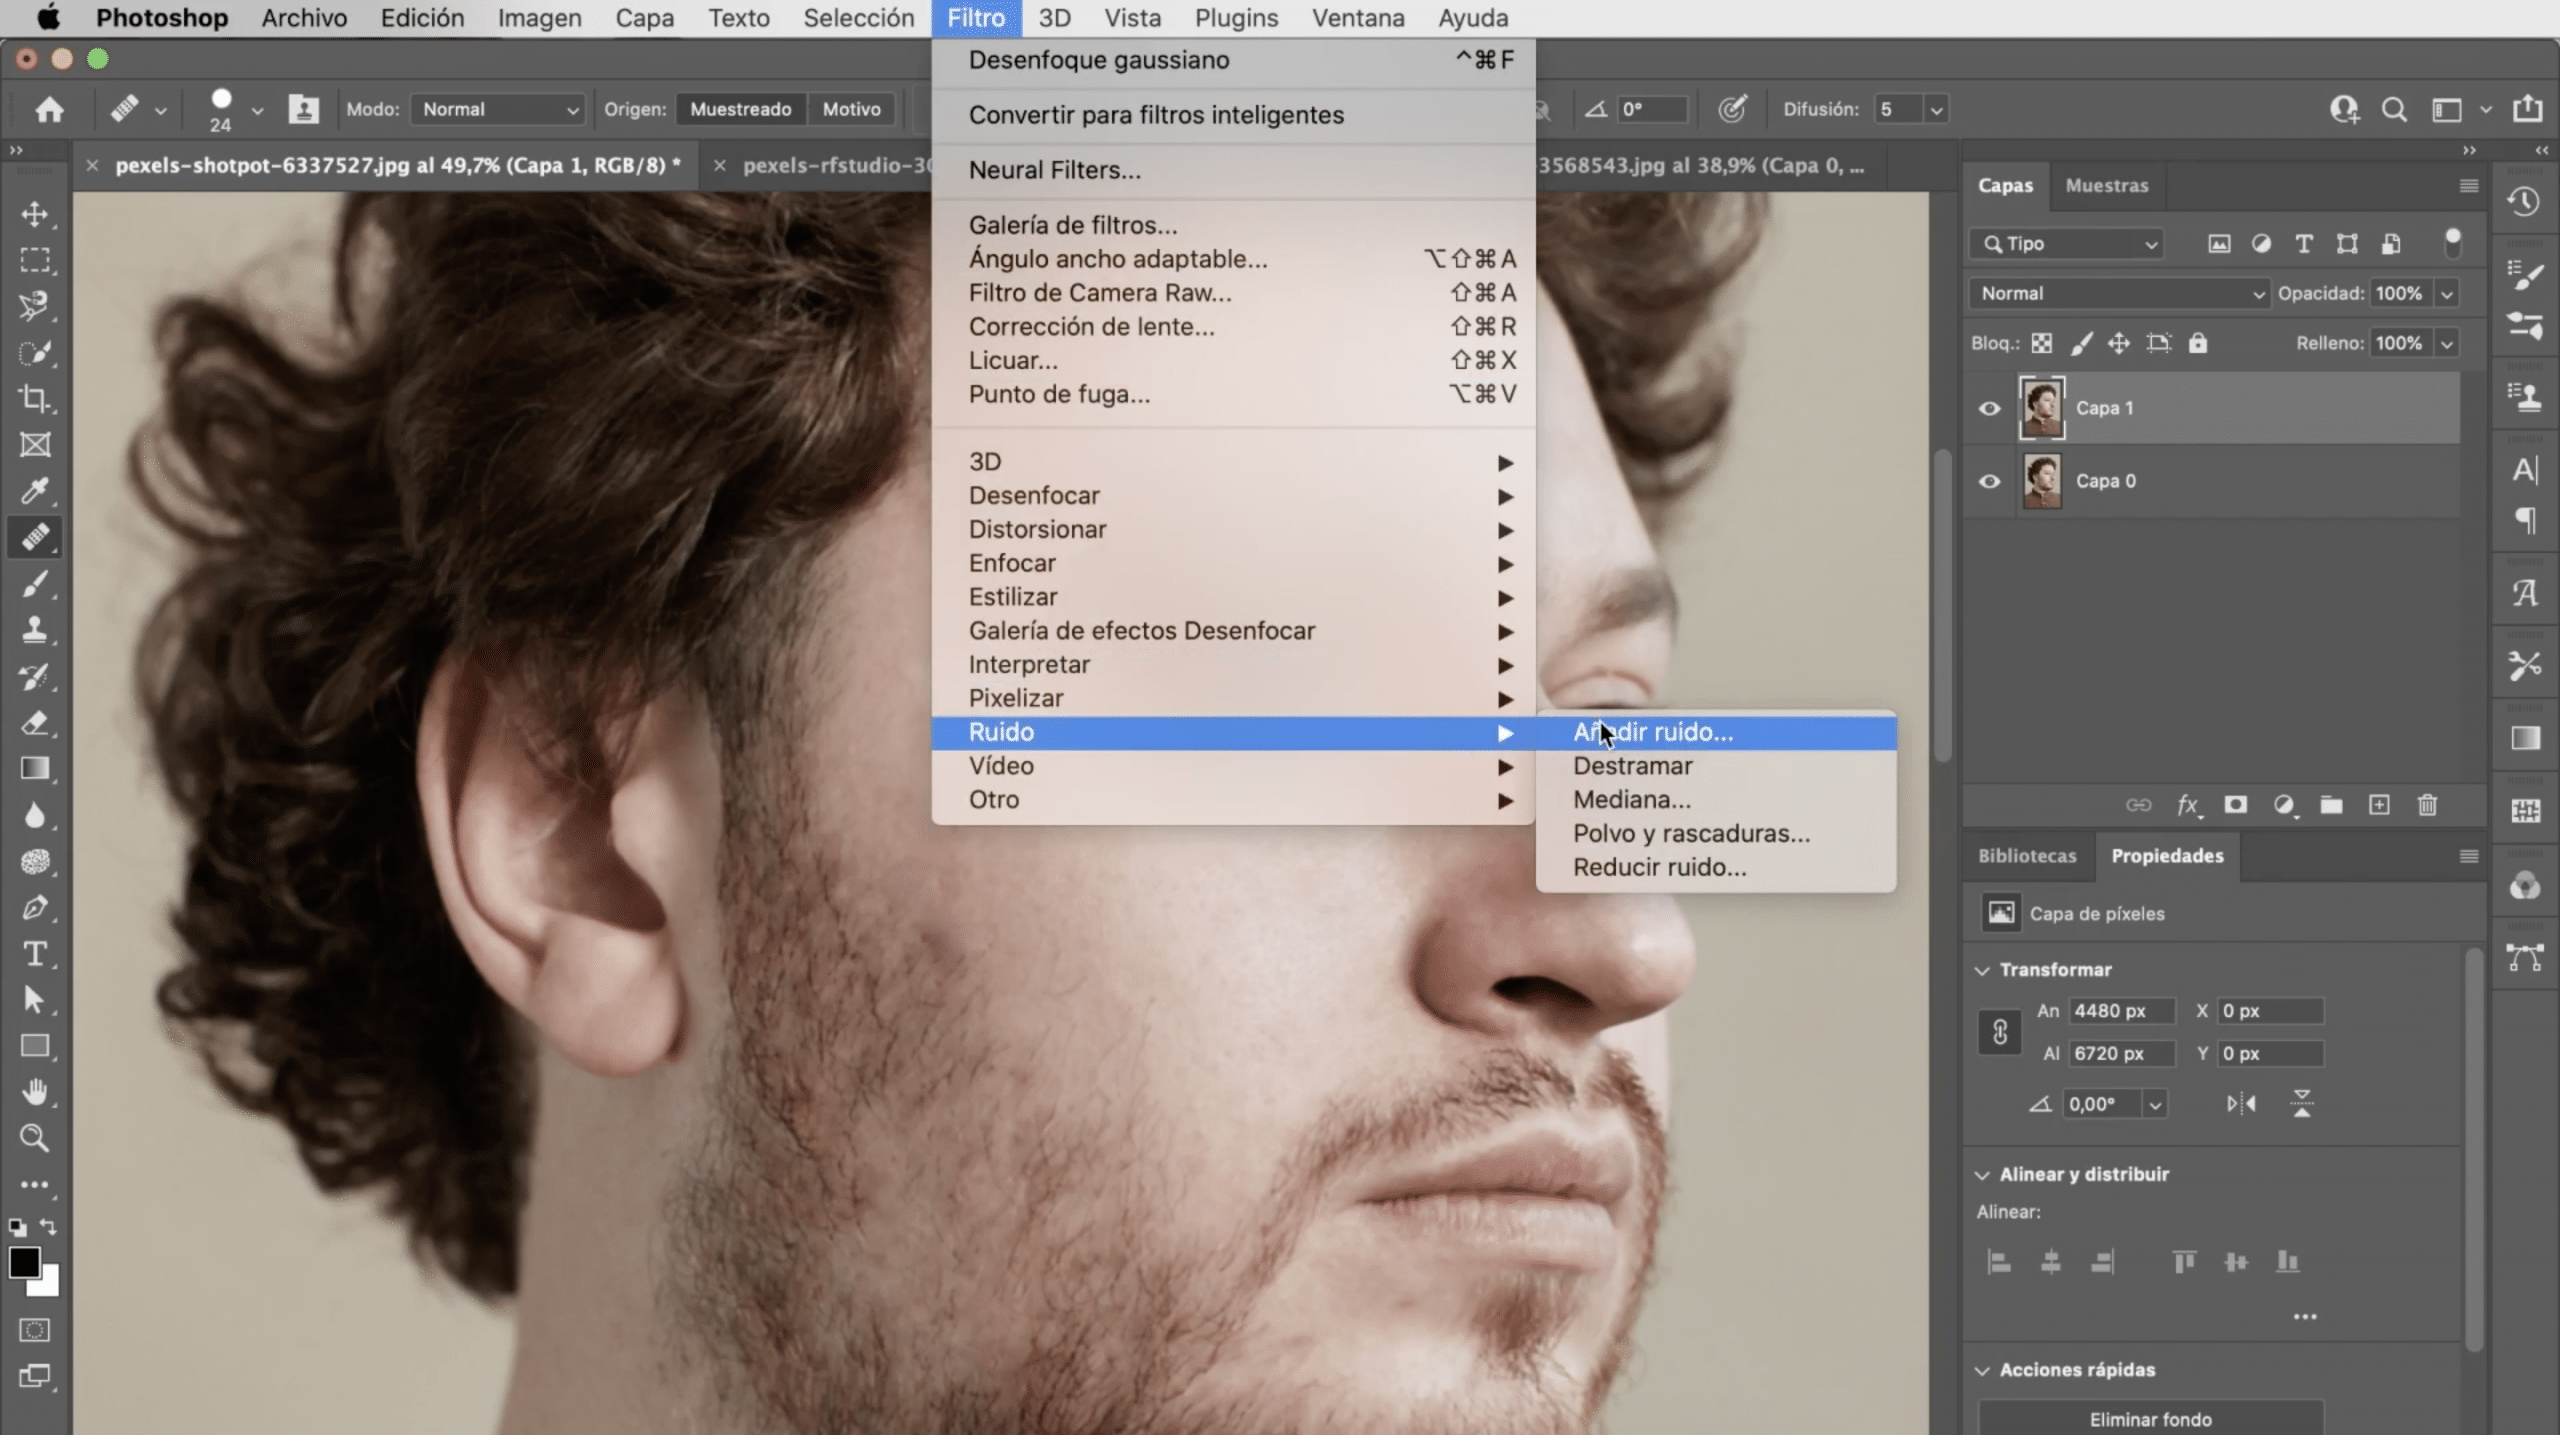
This last step totally optional. I don't like retouching them to look too artificial, the skin is textured and that texture when putting in the filters is lost, that's why me in the end I like to put a little noise in it, I'm going to put 0,7 in it.
Recover lost details

I have already mentioned before that as we apply the filters to soften the skin in Photoshop, there are details that are lost. For example, in the image of the boy, in the area of the beard and hair How can we retrieve those details? Well, what we really need is that the filters are applied only to the skin and not to the entire layer and that we are going to achieve it by creating a layer mask.
To create a layer mask we just have to: select the layer and click on the symbol that appears surrounded in the photo. As you can see, the mask will appear first in white, which means that it includes everything that is on the layer. Clicking on our computer command + I, let's invert it for the mask to exclude everything, when pressing the keyboard shortcut the mask will be colored black.
With the brush and selecting the white color, we are going to draw what we want to include, that is, the areas where we want those filters to be applied, if you make a mistake, don't worry, with the black brush you can exclude from that selection. If you look closely, you will see that you can recover those details, although in reality what you are doing is leaving the background layer visible (the one with the original version of the image) which is the one that really preserves them.
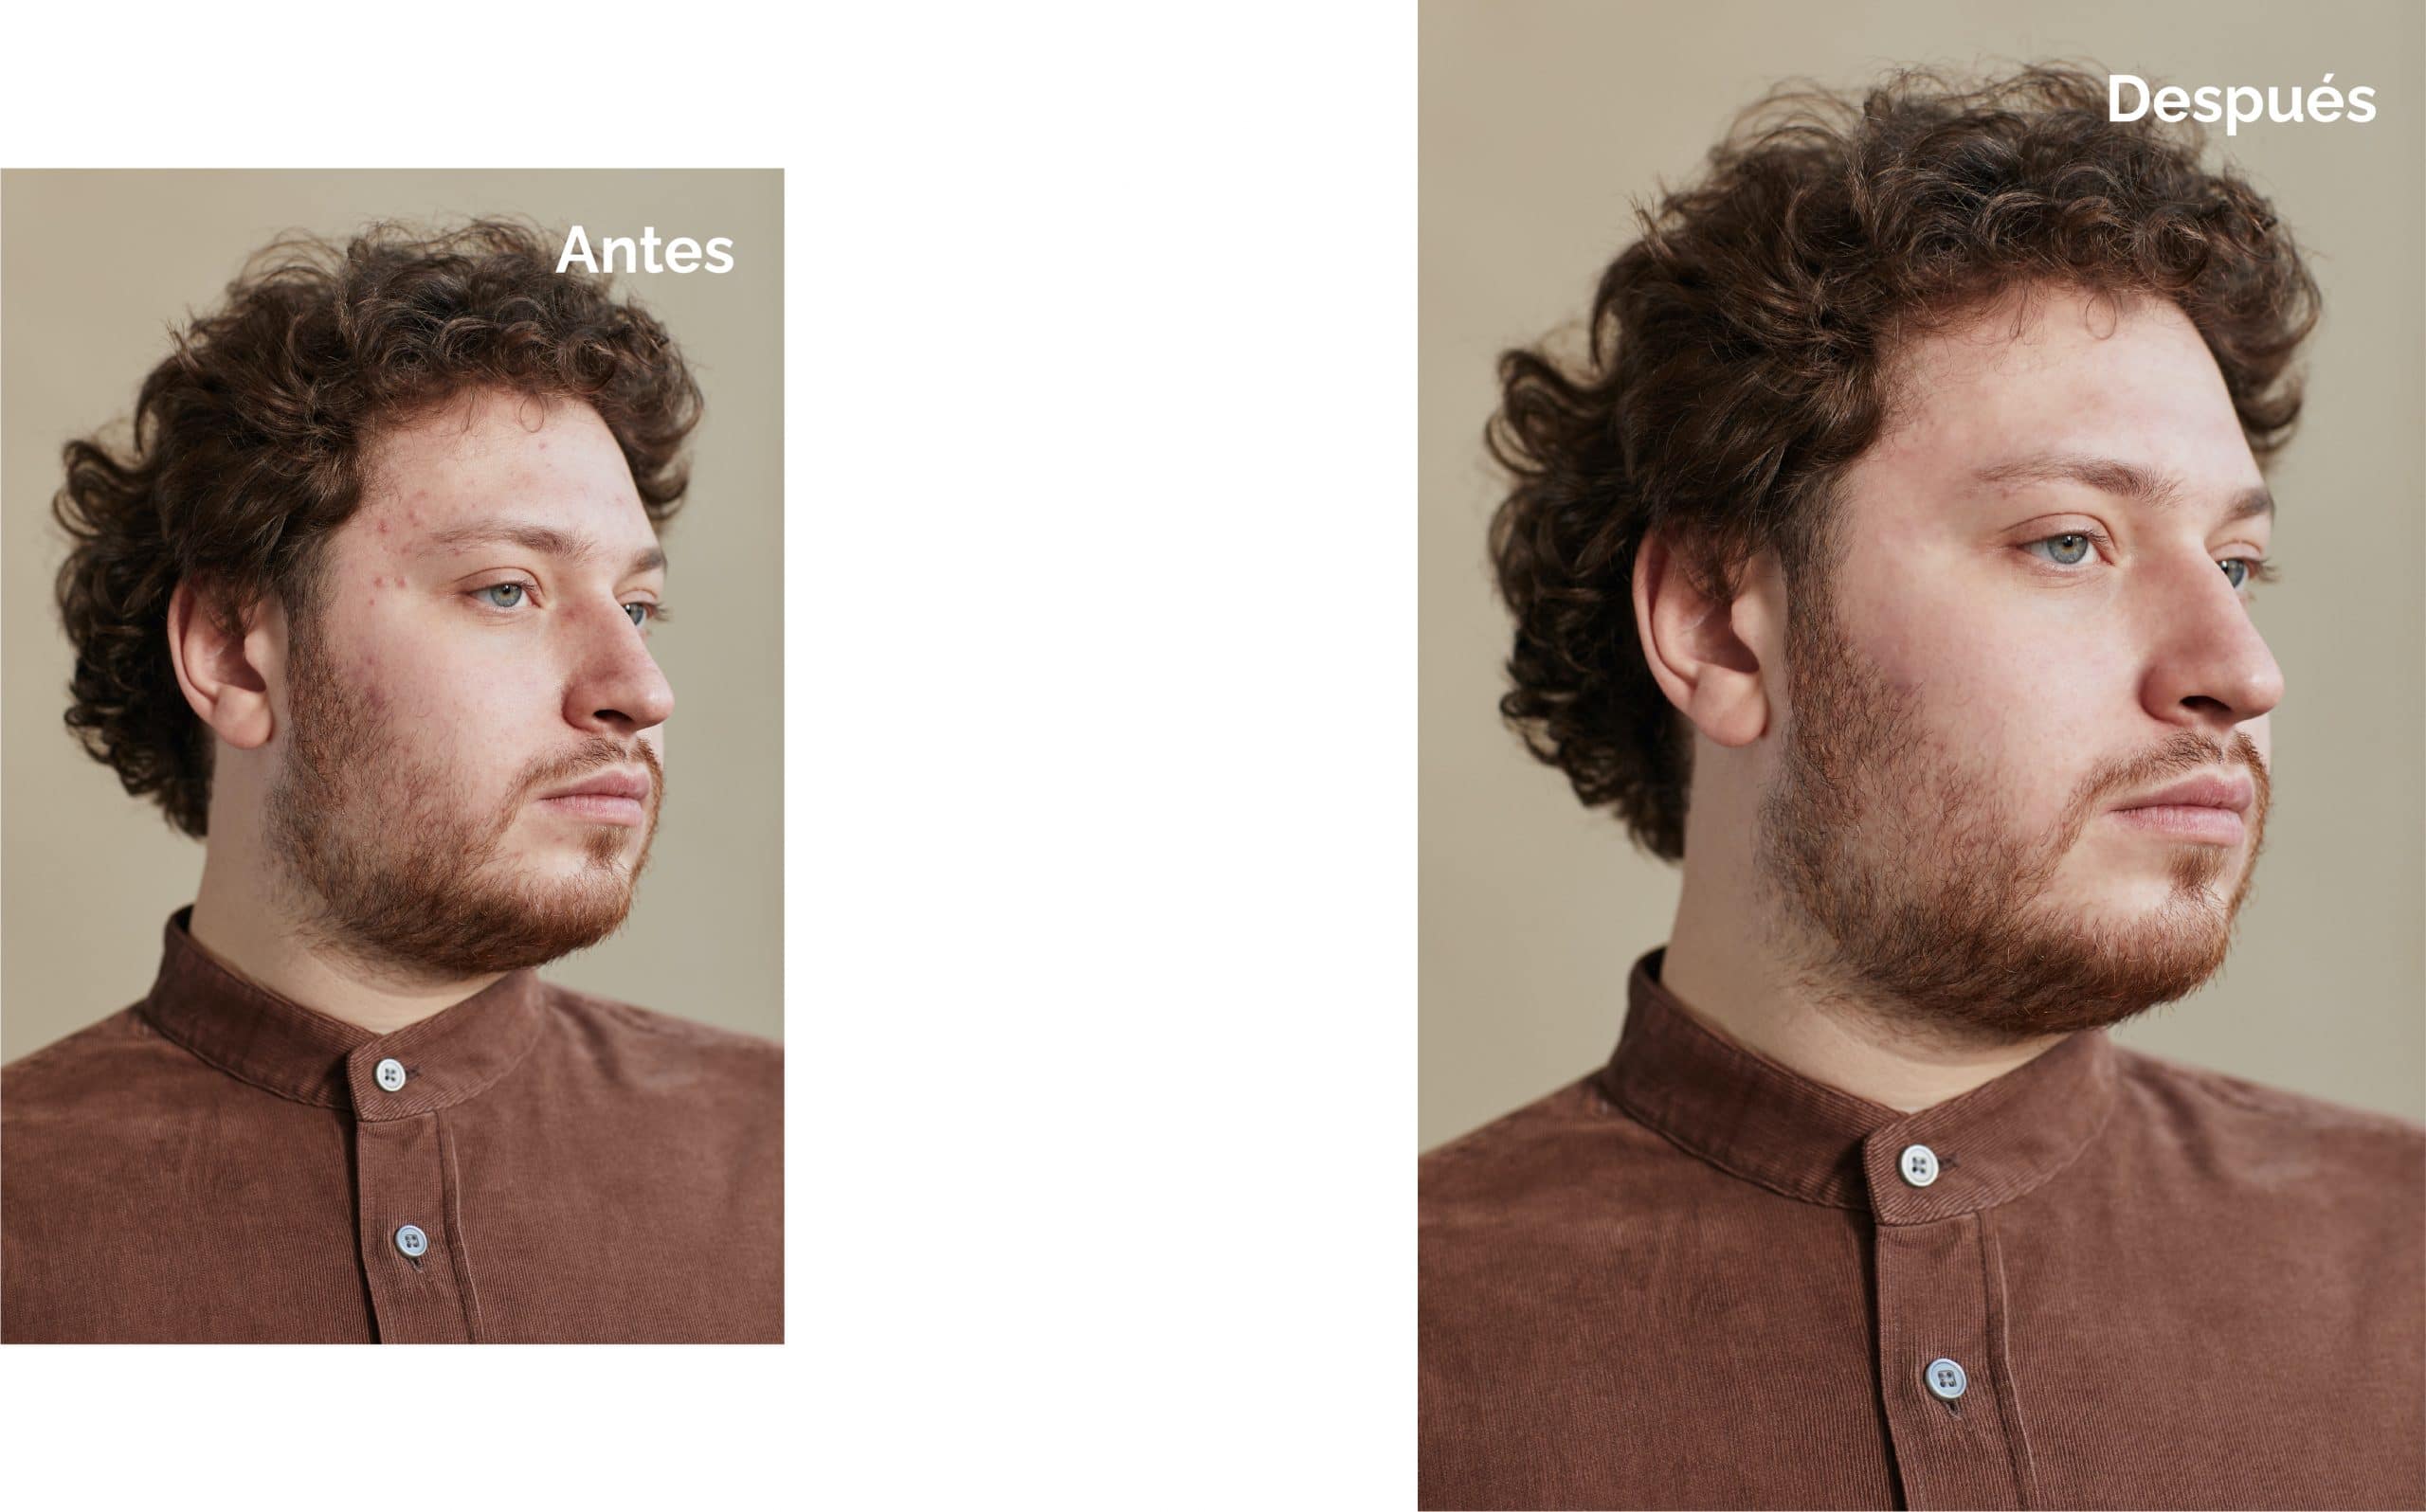
This would be the final result, what do you think?