
On many occasions we need use different tools and applications to combine graphics and thus obtain certain results. To work on a composite image with elements from different applications and in different formats, it will be necessary for us to know the characteristics of each document in order to optimize our composition and provide the highest possible visual quality. To introduce all this, we will build a very simple composition working with a logo previously created in Adobe Illustrator and a photograph. We will work from Adobe Photoshop, although of course later we will be able to return to the Illustrator application and continue with our work.
To start working on this work, we must be clear about the difference between bitmap and vector graphics formats.
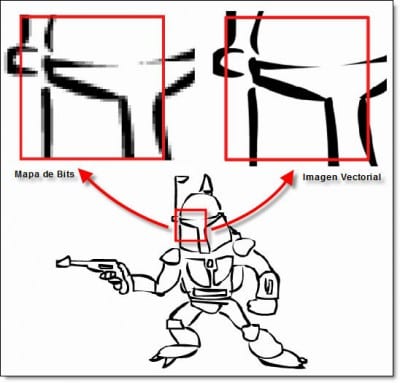
In Adobe Photoshop raster images (bitmap images) are used, which are based on a grid or set of pixels. When working with bitmap images, groups of pixels are edited. This format is suitable for working with continuous tone images such as photographs. The main problem with this option is the loss of definition and the phenomenon of pixelation when its scale is increased.
![]()
On the other hand, vector graphics (graphics used in applications such as Illustrator), are generally called drawing graphics. These are made up of shapes based on mathematical expressions. Their appearance provides greater precision, they consist of clear and smooth lines that retain their sharpness when we modify their scale. This makes it perfect for all types of illustrations, texts and graphics such as logos that will require to be used in different sizes and arrangements.
The steps to combine graphics are as follows and are explained with the highest level of detail possible, because I am aware that you may be taking your first steps with these programs.
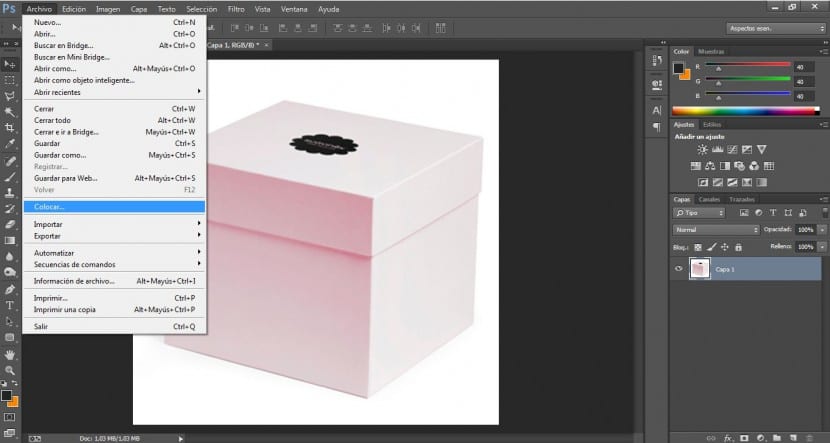
- First we will restart Adobe Photoshop. We will import the photograph or we will open our file in .psd format if we have it in the File> Open menu.
- We can open the Adobe Illustrator file as a new file in Adobe Photohoshop or we can also use the Place or Paste commands to add it. When we do this Photoshop will rasterize (analyze your raster) to convert it to a bitmap image. Photoshop's Place command offers the advantage of allowing the image to be scaled while it is still a vector figure, so changing the scale will not lower the image quality. However, if we cut or paste a graphic from Illustrator in Photoshop, subsequent scale changes will degrade the quality of the image.

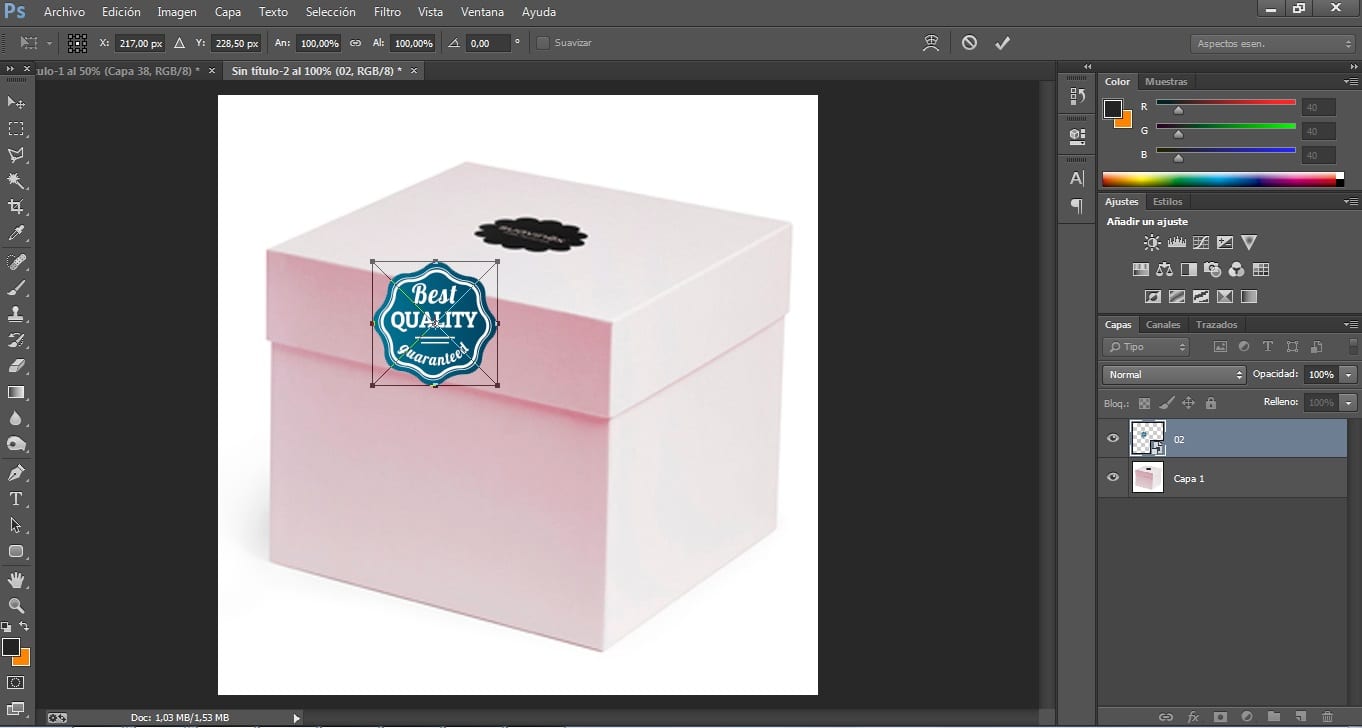
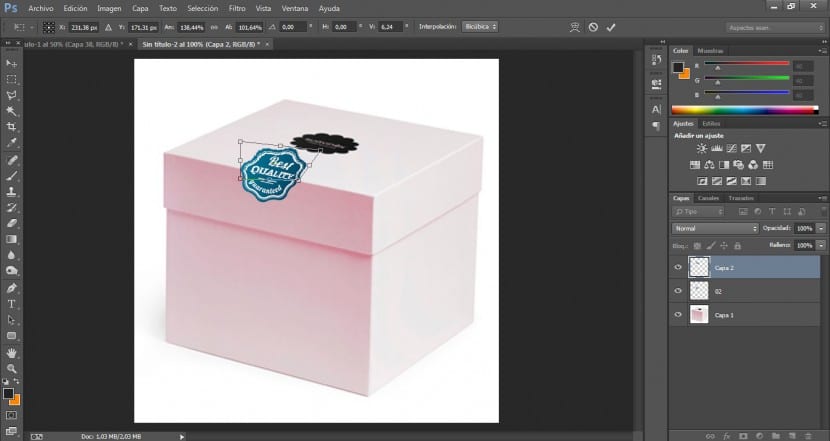
- Once our vector is imported, we will hold down the Shift key. We will drag the vertex of the photograph and modify its size to adapt it to the appropriate dimensions and proportionally. Next we will drag by placing the cursor in the central area to place the image in the appropriate position. We will need to rotate the image subtly in Edit> Transform> Rotate.


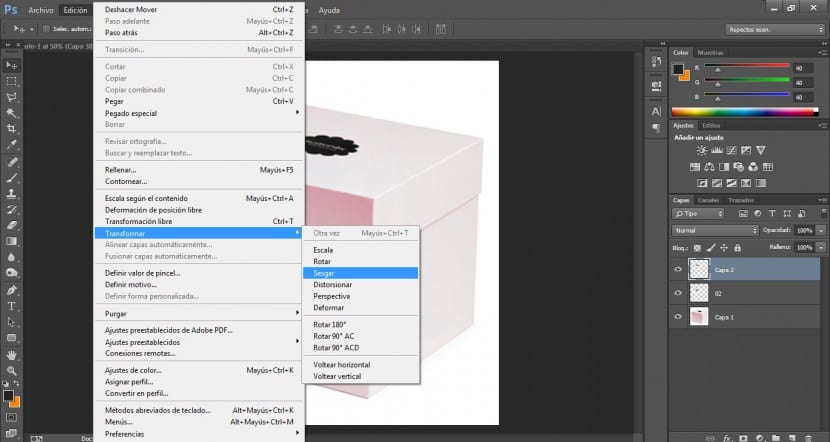
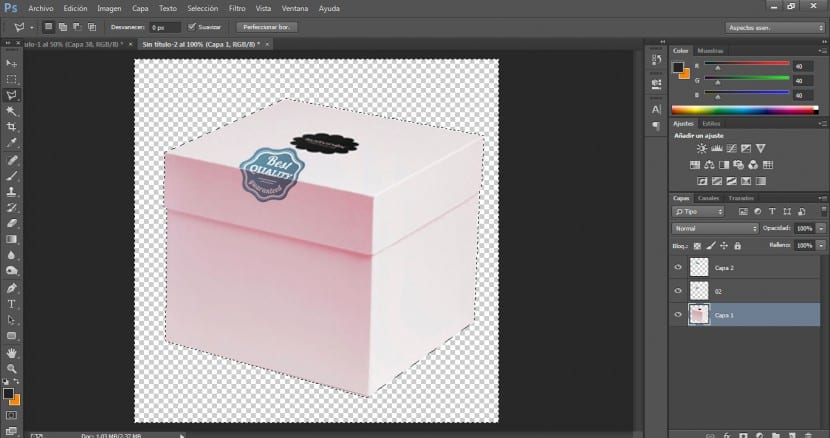
- We will distort the file to fit the shape of the box. First we will cut half. On the logo layer we will select the polygonal lasso tool and click on the front right corner of the upper part of the box. We will drag to the next corner and continue around its upper area.

- With a Ctrl + X we will cut this area. We will create a new layer and click on paste or Ctrl + V.
- On this new layer we will click on the Edit> Transform> Skew menu.
- By dragging the bounding box handles, we will distort the logo to fit the perspective of the box.
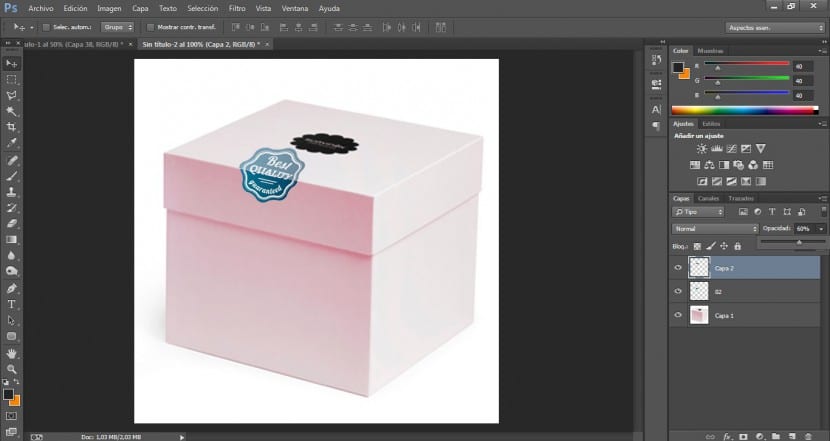
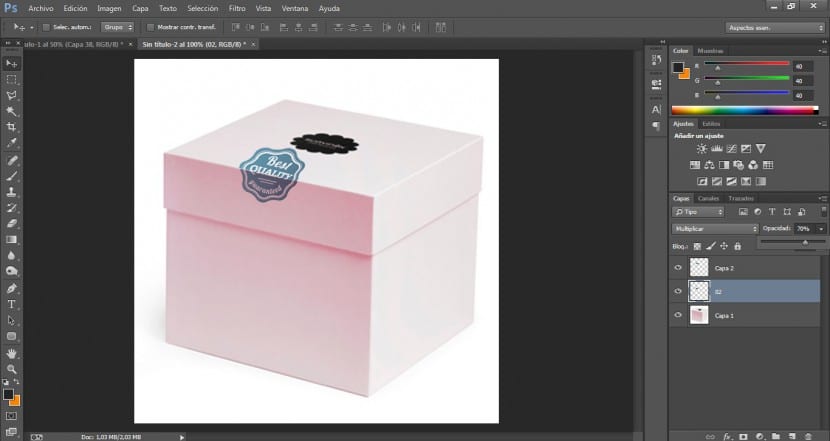
- To achieve a realistic integration effect we can make use of different blending modes. With Layer 1 active in our layer palette, we'll change its opacity to around 60%. Next, we will darken that lower area of the logo so that it meets the front shadow of the box. We will do this by changing the opacity of that area by 70% and selecting Multiply from the blending modes menu.
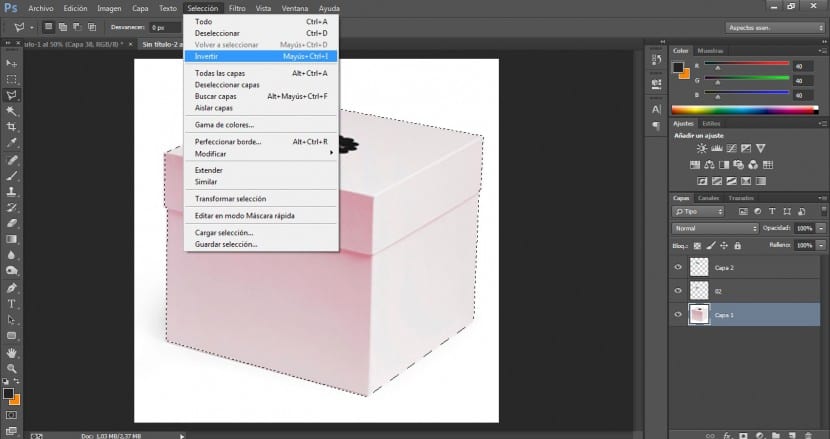
- We will need to create a transparent background since the only thing that will interest us is the box. To do this we will use a selection tool and with it we will border the limits of the box.
- We will press Selection> Invert and then on delete or the Delete key.


- If we want to finish our composition in Illustrator we can use the .psd files. Illustrator supports most Photoshop data, including multi-layer comps, editable text, and paths.


Anyway, in later posts we will delve into the options for transferring files between applications and the compatibility settings between different programs to obtain the optimal results in an agile and professional way. Keep in mind that in many cases the compositions must be treated with different tools.
.