In this tutorial we will see in a very simple way how to personify an apple taking into account the essential aspects to create a realistic integration and professional. For this we will use different documents: The image of our apple, images for the different easy features, a photograph with the leaf that crowns the character and on the other hand we will use a photograph of a worm.
The most important tools to carry out compositions of this style are: LSelection tools, blending modes, levels, curves, eraser and finger If necessary. We start!
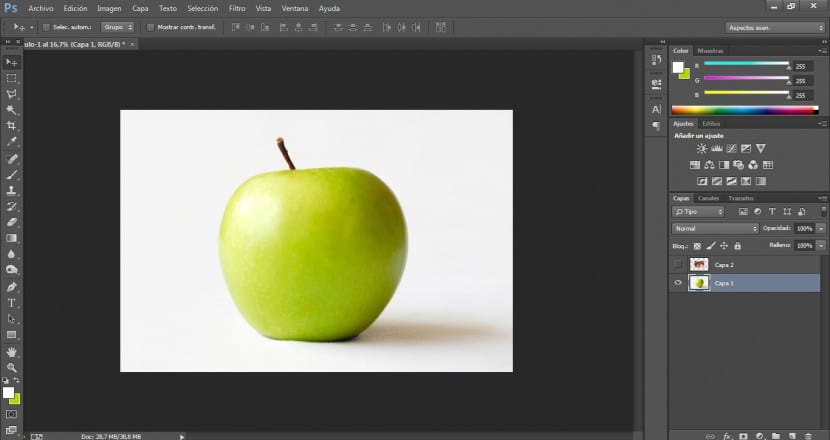
First we will import the base photograph on which we are going to work, in this case our apple, although obviously you can use the element you want to personify it, the method would be very similar.
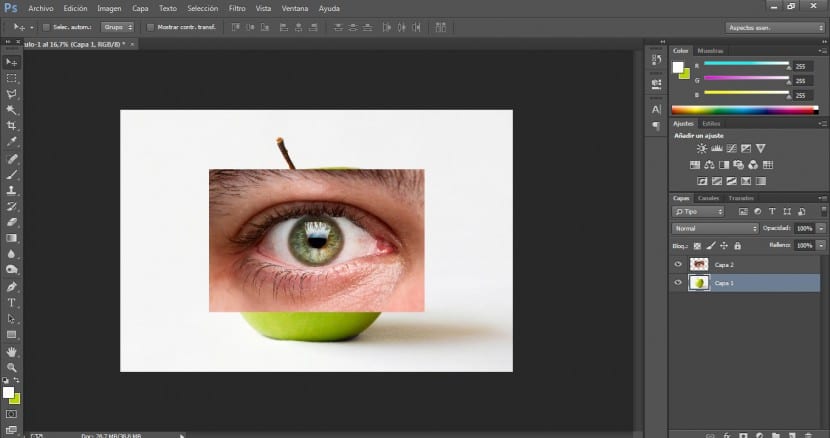
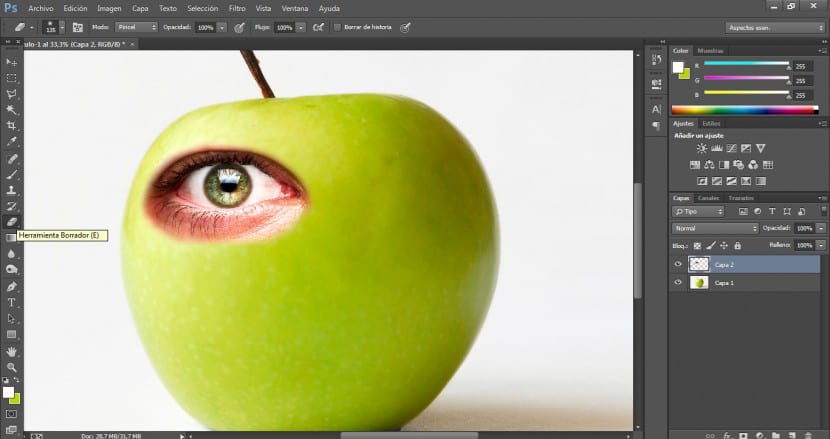
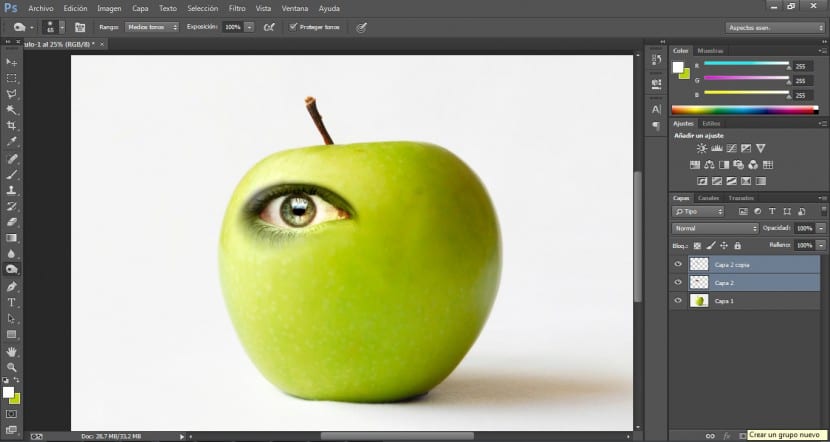
Then we will import the eye with which we are going to work. We will ensure that it has a great resolution. To apply the eyes, mouth and nose I will use different photographs.
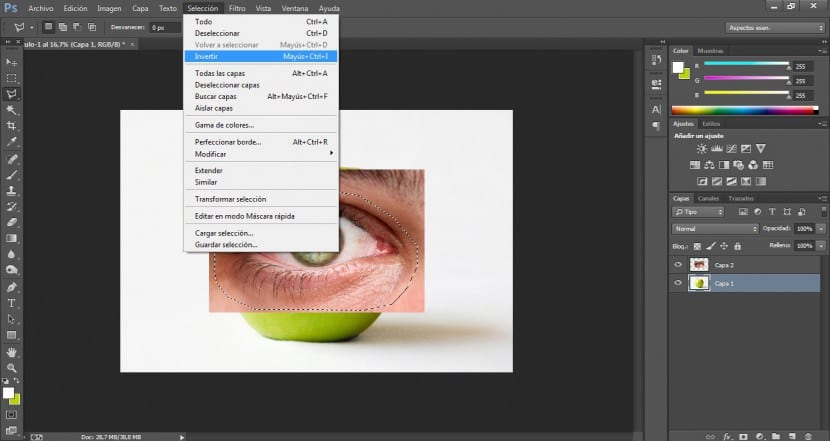
We will go to a selection tool in the tools menu and choose the one that best suits us. In this case we will use the polygonal selection tool. Once we have selected the limits of our eye (including the lines of expression), we will go to the menu Selection> Invert and we will press the Delete key to delete the area that does not interest us.
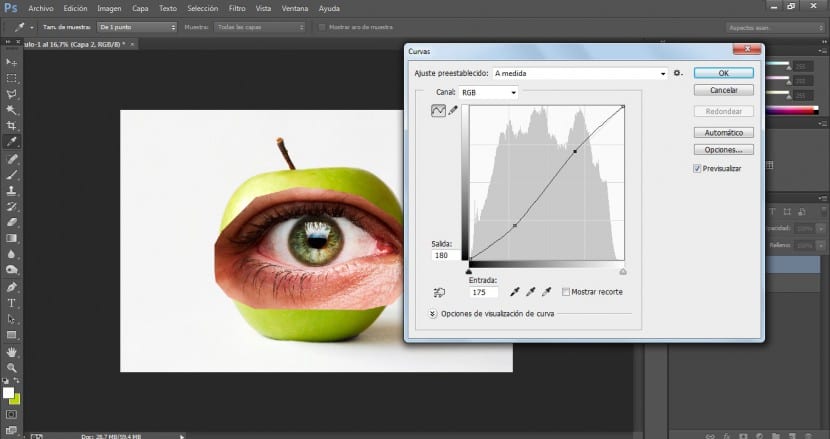
Now we will work on the highlights and contrast for our eye. We will go to the menu Image> Adjustments> Curves.
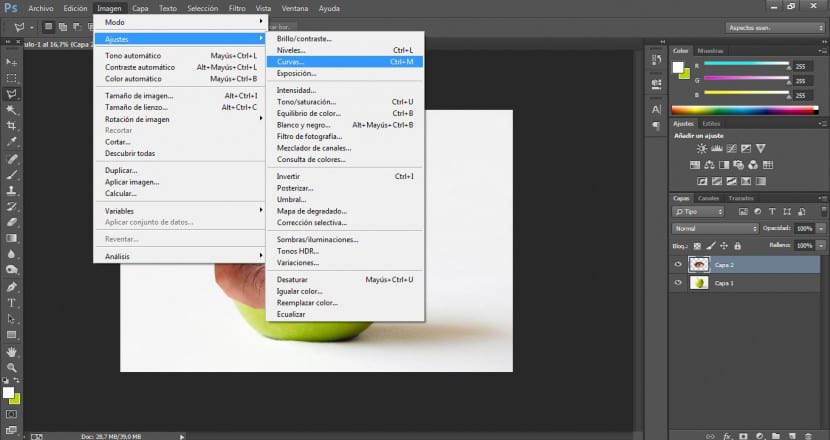
We will look for the most appropriate option, we intend to highlight the contrast areas to be able to integrate our image more easily on the block. In this case we have given some values of 180 out and 175 in, although this depends on your project.
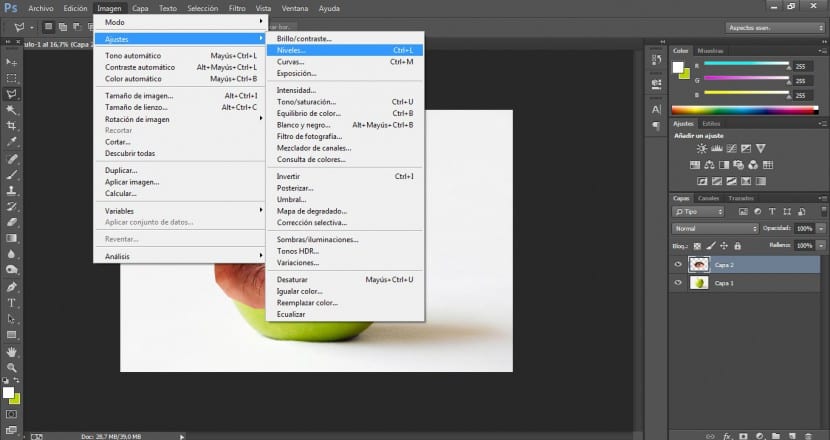
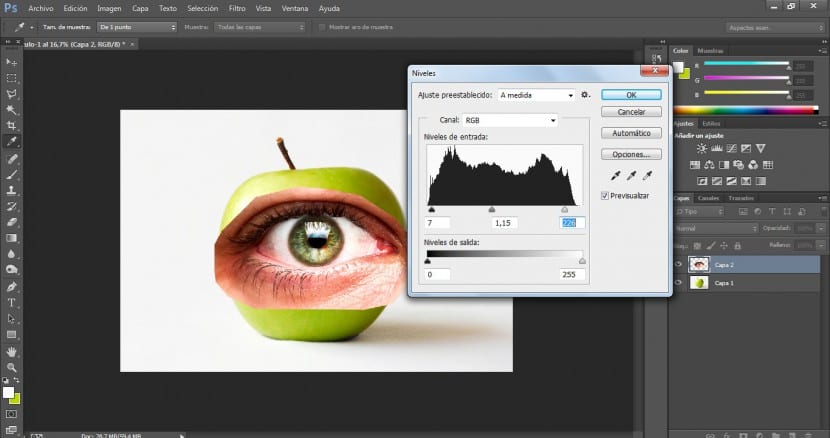
We will go to the menu Image> Adjustments> Levels. We will look for the most successful solution to highlight the lightest and darkest areas but taking great care not to burn the image. In this case we have modified the input values in 7 / 1,15 / 226.
With the Transform tool (in the menu Edit> Transform or with Ctrl + T) we will modify the size and arrangement of our eye until we are satisfied.

Once we have done that, we will go to the eraser tool (E) and we will choose a very diffuse brush, we will also modify the size to be able to work at the most appropriate scale. What we will do is review the limits of that eye in order to soften them and make them blend in a smoother way with the surface of the apple.
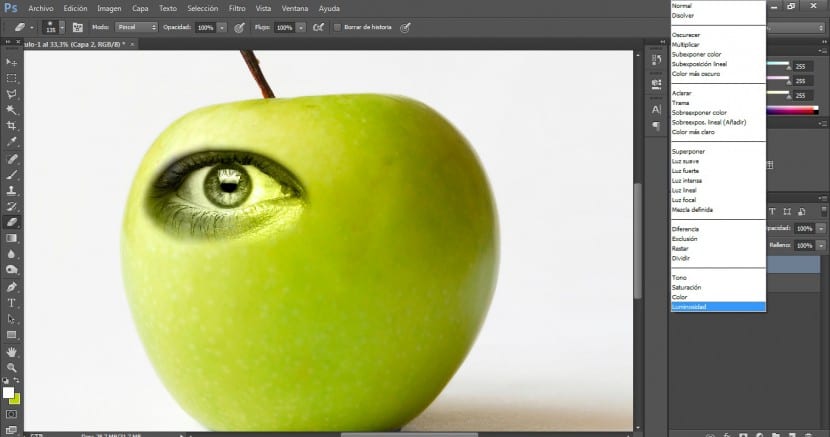
Next, in the layers menu (and having the eye selected) we will modify the blending mode by choosing the Brightness mode.
Once this is done, we will use the eraser tool and from a shorter distance we will perfect the cut.

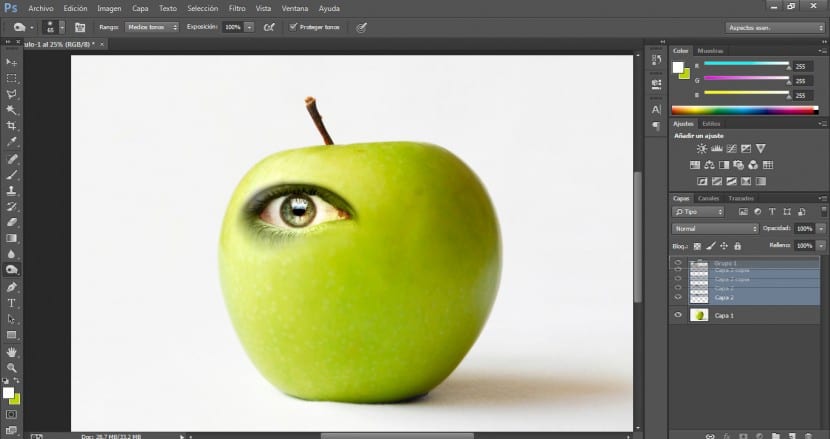
As we intend to preserve the colors of the interior of the eye socket without influencing the external area, what we will do is duplicate our layer of the eye to work on it and integrate it with the original.
We will apply a blend mode to this layer in Normal.

We will go to a selection tool (in this case the Magnetic loop) and select the desired part.
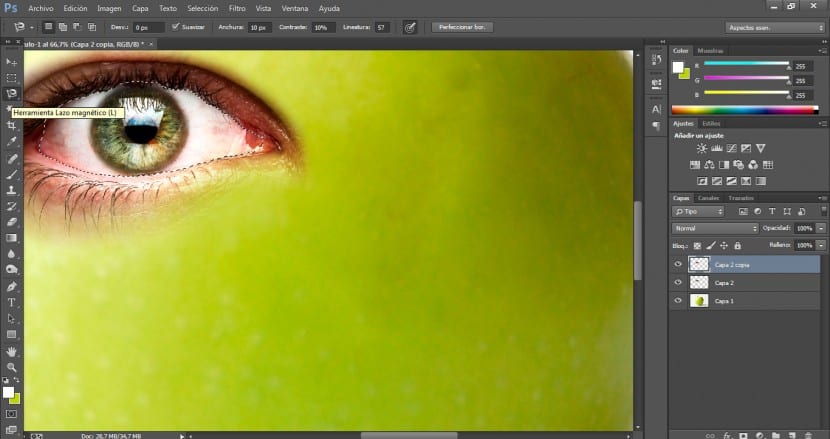
We will refine this selection with the polygonal lasso if necessary adding selected area or subtracting (to add we will click on Shift at the same time that we select and to reduce we will click on Alt at the same time we select).
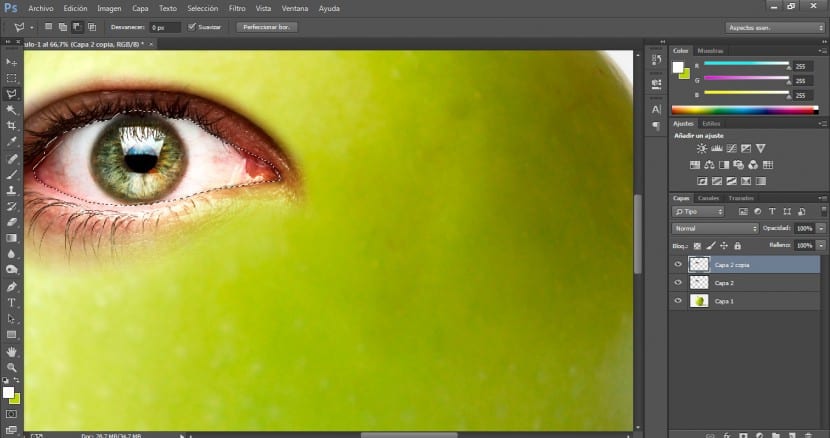
Then click on the menu Selection> Invert and we will delete the external area that we are not interested in in the Delete button.
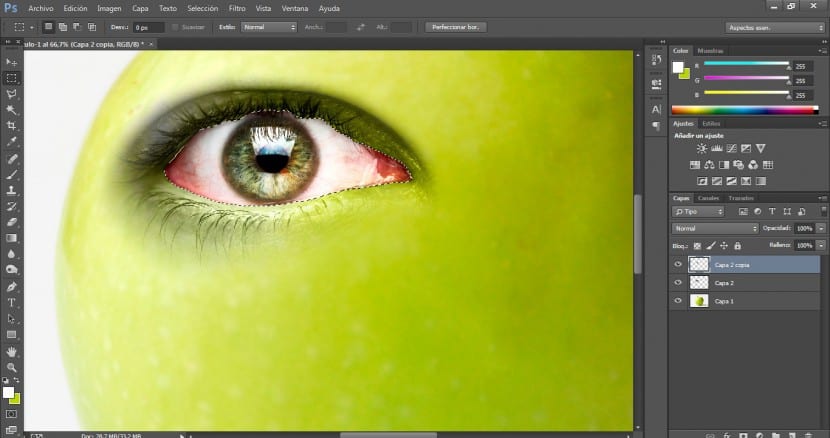
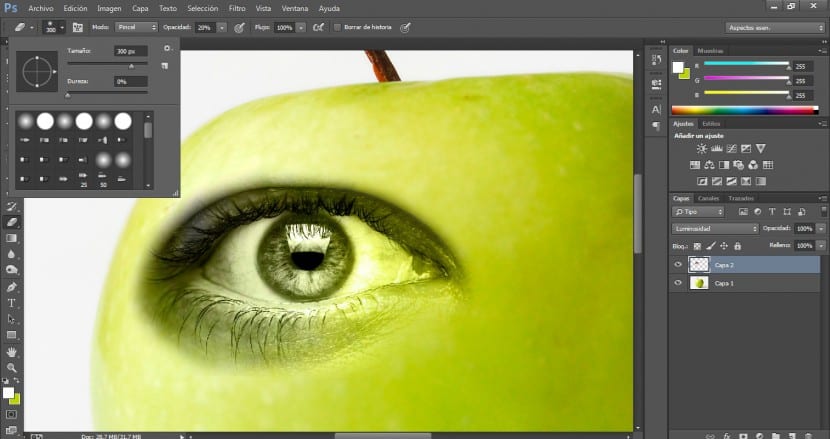
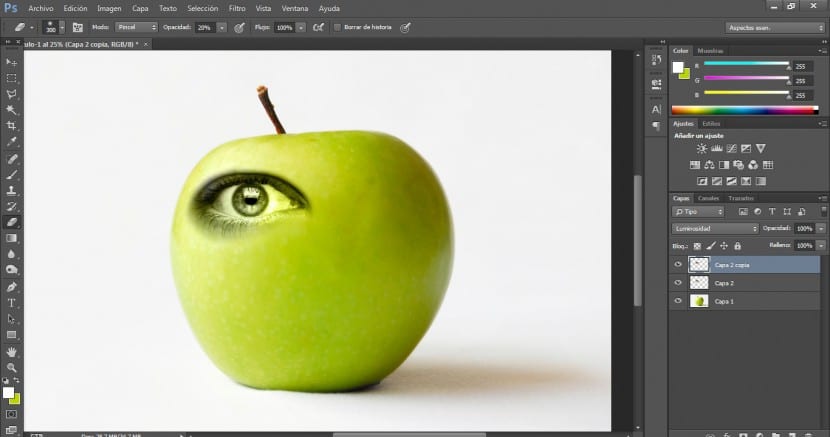
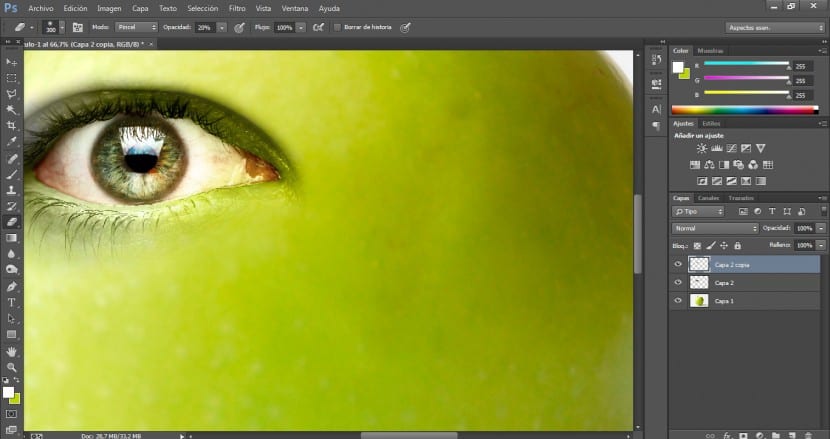
We will perfect this integration between the two layers the eye working with the eraser on the upper layer a size 300 and a 20% opacity.
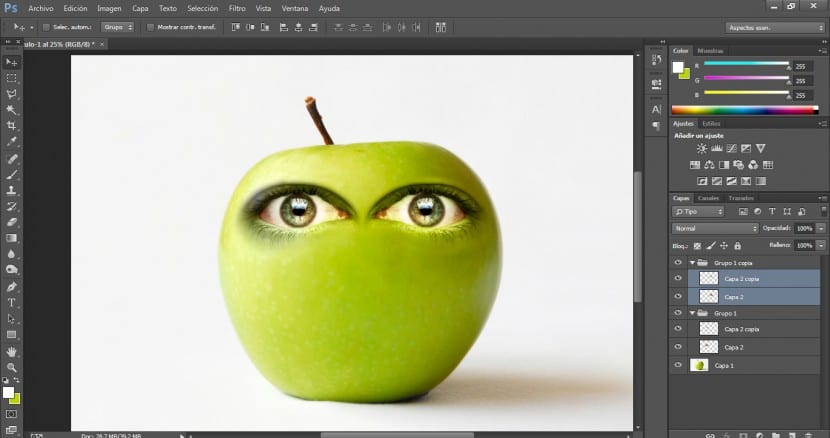
We will select both layers and in the layers panel we will click on the button create new group.
A group will be created for us and we will only have to drag our two layers onto the new group folder and they will immediately be included within it.
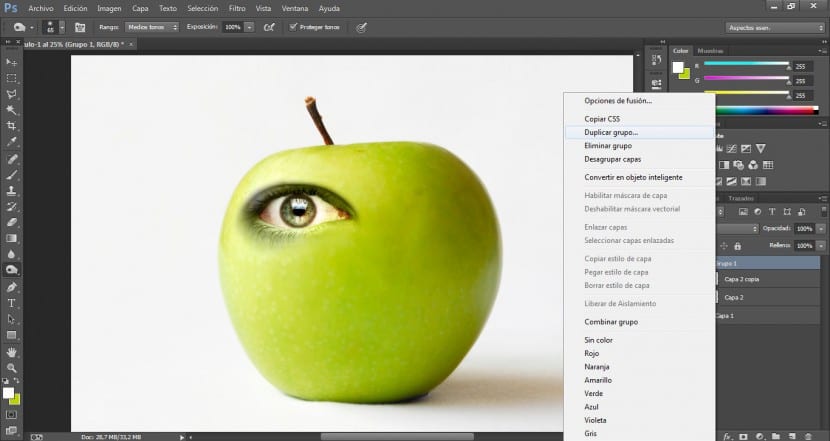
Now, we will duplicate the group to have our right eye.
Having selected both layers of that new group, we will go to the menu Edit> Transform> Flip Horizontal.
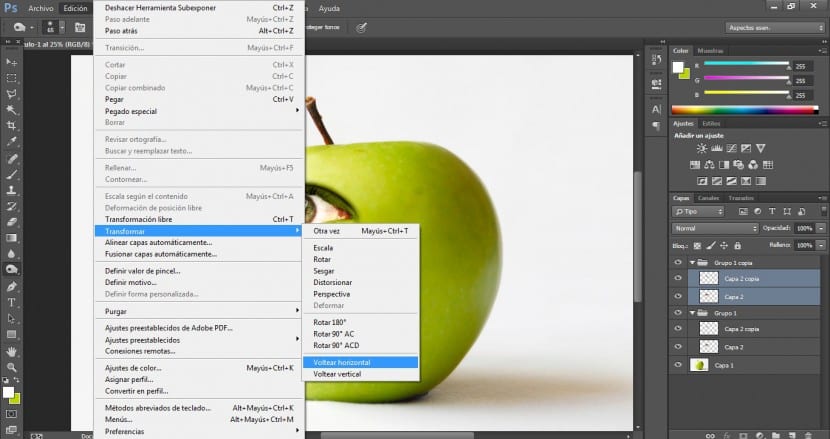
With the drag button we will position it in the most suitable area.
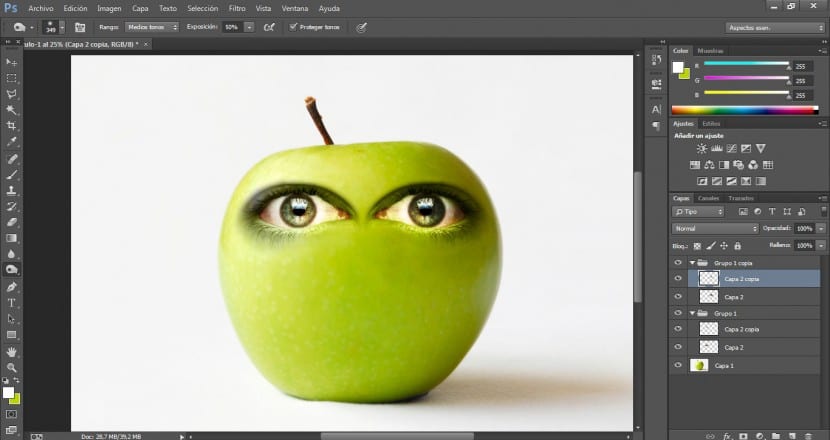
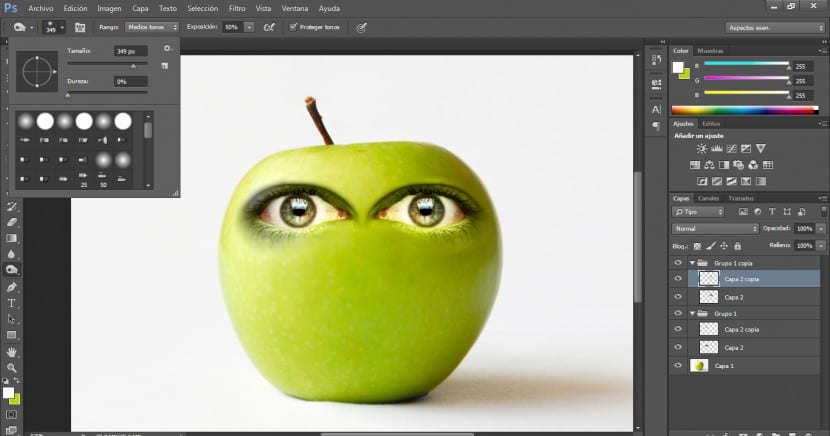
To make it much more natural, we will have to pay attention to the shadow and highlight areas. As you can see on the right side of the block there is a darker, shaded area. To match and integrate the surface of the right eye, we will go to the tool of Underexpose And 50% opacity, 350 brush size and very diffuse brush We will begin to review that area.
The result should be something like this. Keep in mind that the most important factors for a credible integration of this type are the lighting, password, and color matches between all items.